


Processing
Likes
Comments
Share



Likes
7
Share


Likes
156
Share


@Anna-J
Follow
Week 8!
I've seen some challenges leading up to this point so far, with Plant #2 showing the results of what insanely high EC levels can do and how important it can be to know what's going in to the soil and what's coming out.
Luckily, things seem to be straightening out and both plants are putting on bud weight.
Day 50:
- did some very light defoliation, removing a few fan leaves that were blocking bud sites on both plants.
- the smell is starting to get much stronger than it was last week.
Day 51:
- watered with a 310ppm nutrient solution, using 3ml of Remo's Bloom nutrients + GH's CaliMagic per gallon of dechlorinated (by aeration) tap water.
Day 52:
- nothing to report
Day 53:
- tent temperatures reached a bit higher than normal due to warmer outside temperatures. 80F instead of 78F, for approximately 8hrs.
Day 54:
- Plant #2 has an extremely sweet smell, sort of like grape.
- Plant #1 is smells similar but not quite as sweet and not quite as much grape.
Day 55:
- Probably should have watered today but we're leaving it one more day.
Day 56:
- watered with plain, dechlorinated (by aeration) tap water.
- used small amount of bloom nutrients to adjust pH from 7.1 to 6.4, resulting in a weak 55ppm nutrient solution.
- watered to runoff (maybe 10%).
- Plant #2 runoff testing at 6.3 pH and 1850ppm, which is higher than we expected.
- did some light foliage trimming, mostly on plant #2, to remove dead and mostly-dead leaves.

Likes
12
Share


@Noeynoe
Follow
Good week she looks like she’s doing well, I will be topping this week and starting a mainline.


Likes
16
Share


@ZackTaylor
Follow
Changed the setup completely. Moved them into their new home, a 2x2 tent. For weeks 1-4 they will remain under a 150 Watt Mars Hydro LED.
Created an automatic dripper system. Goes off twice, once an hr after lights on and another 5 hrs later, each watering lasts 1 minute.

Likes
3
Share


@erpiccione69
Follow
very good week, after a slow start this lsd from barneys seeds its exploding! by getting bigger day after day, next week i will probably top the plant and start the training!

Likes
8
Share


@JohnnyBarrel
Follow
Week 14 - August 13
Back from holidays. One week without carrying plants.
All is Ok ✅ the Blumat irrigation system worked perfectly, Aphids are totally eradicated: the Garlic mixture is a miracle.
🐛I found 5 caterpillars on 2 plants: it makes lot of damage on a Bubble Gum I didn’t mention in the diary, but the other are safely. caterpillars are the Enemy N°1 at this point: must check everyday.
I found 5 caterpillars on 2 plants: it makes lot of damage on a Bubble Gum I didn’t mention in the diary, but the other are safely. caterpillars are the Enemy N°1 at this point: must check everyday.
Presence of leafminer flies but nothing important.
-Royal Moby, seriously injured by sunburn and aphids aggression: recovering good, amazing stretch (sativa dominant) 140cm high , new branches are healthy. Flowering stage not engaged.
-GMOxZombie Kush, was pretty shocked by aphids and sunburn too but problems are resolved: the plant is not too bad, starting a pre flowering period. 115cm
-Flash Back #2 start flowering. Perfectly healthy, no pests, diseases or deficiency. Gook stretch last weeks, lot of ramifications and booming sites.130cm
-Brake Pad Breath is the most advanced with a flowering stage engaged since 2 weeks. Super heathy, efficient bushy structure with lot of branches: my Favorite!
🌞Daylight 14h15 - 7h05 / 21h11
Around 26 to 32°C this week, hot night, sunny day, little bit of humidity.
💦Watering 1,5L / 3 days
💪Nutrients: Master Grower Floraison by Hydropassion


Likes
7
Share


@RBG
Follow
Smallest plant out all of them, unfortunately had to pull this one a bit early due to continuous bad weather, unfortunately, still excellent smoke for how much was pulled

Likes
15
Share


@Kurow
Follow
Had a bad humidity (spots on leave are wet spots that got handled ASAP) scare last week so got a dehumidifier up in there comfortably. Still smooth sailing.

Likes
8
Share


@Shellshocked
Follow
1st week of flowering done not much to say she is not stretching like I thought she would maybe overfeeding decided not to flush as I just flushed her to get her ready for flowering and I'm afraid she will be over watered. I'm still wondering if I should flush her again anyone with input would be much appreciated. Going to look into some sort of co2 for the tent hopefully will have something for next week.


Likes
33
Share

@GermanGrower416
Follow
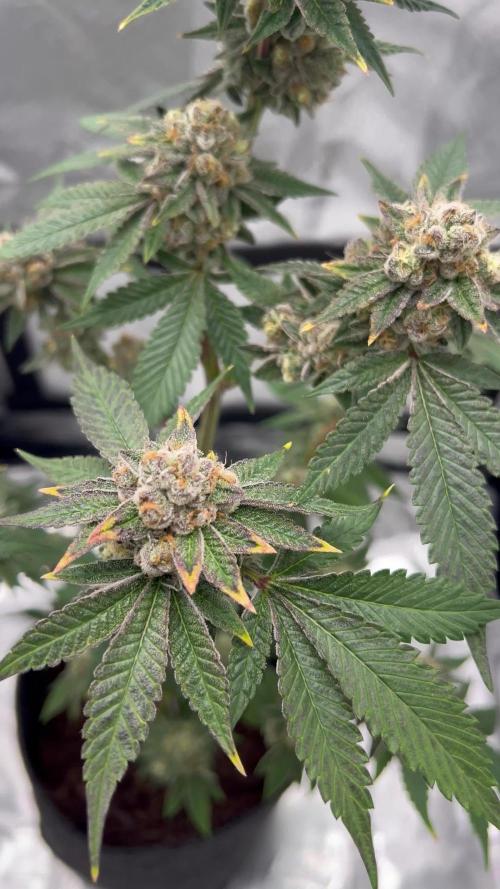
Rückblickend betrachtet hätte ich sie auch noch ein paar Tage länger stehen lassen können. Aber da ich kein Sea of Green habe werden nie alle Buds gleich reif sein.
Likes
7
Share


@CanadianFillmore
Follow
Harvest time is here for Grandaddy Bruce, dense sticky frosty buds. Very happy with the results so far, for the first time growing this strain. Will update in 7 days with dry weight and smoke report.
48 grams dry, smooth smoke.

Likes
17
Share


@BioGrowKing
Follow
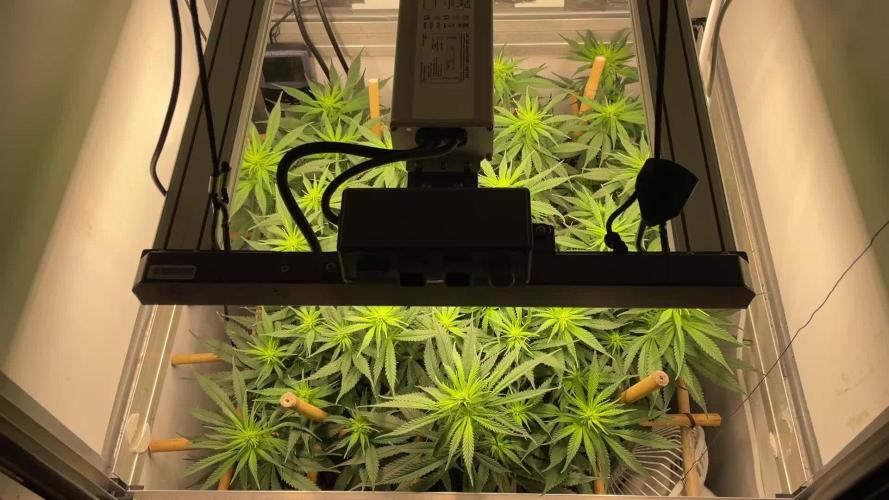
Meine Woche ist an sich gut verlaufen, wie man auf den Bildern sehen kann habe ich sie nun oben heruntergebogen sowie auch an den Seiten Arm da sie sonst zu nah an die Lampe wächst.
Ich habe auch eine neue Lampe und zwar von Mars Hydro die T600
Ich denke sie müssen sich erst ein wenig an die neue Lampe gewöhnen denn die hat um einiges mehr power als die letzte die ich selber gebaut habe ich glaube deswegen hängen die Blätter ein wenig.
Ich habe zwei Blätter da ist eine komische Farbe drauf die man auf den Bildern ersehen kann einmal ein wenig bräunlich und einmal ein wenig braun hat jemand eine Idee was das sein kann.
Nächste Woche werde ich die Uhr umstellen und sie in die Blüte schicken.


Processing
Likes
34
Share


@ElLocoDeLaHabitacion420
Follow
some colas have been growing taller than the others I really dont want to keep adjusting them to the same high! I think im going to leave her be! and see what happens. started feeding her bc bloom to estimulate flowers I really dont know what to expect from her! I just hope im doing it right

Likes
1
Share


@teabee
Follow
pretty happy with it, nice yield, one plant was perfectly fine and one was a little rough near the end, one plants nugs were very dense the other plants was a bit on the fluffier side. Nice strain but a great rosin producer..
Likes
15
Share


@TheCannaProphet
Follow
~ FASTBUDS TESTER #2201 ~
Well friends, here we go on another 'canna-venture' together!
The grow room has had a complete remodel and some upgrades done to it including brand spanking new 4x8 and 4x4 tents and a Trolmaster Hydro X controller along with a new Control Panel.
This tester strain is one of six tester strains that FastBuds has graciously provided me with and I'm looking forward to seeing what this girl has to offer when she's grown to her full potential!
One drawback of 'testers' is I have little to no information on it other than its number and that it's an autoflower... 🤪 But, it's ALWAYS a blast growing them for me because not knowing a lot allows me to just concentrate on the essentials: Light, Environment, Water, Nutrients and possibly a bit of LST... not complicated, just basics like keeping a constant temperature and RH in the tent at a level that gives a good VPD, watering when almost dry and maintaining proper light levels according to their stage of growth.
____________________________________________________________________________________________________________________________________________________________________________________________________________________________________________________________________________________________________________________________________________________________________________________________________________________________________________________
~THE SETUP~
~Initially seeds were lightly scuffed, then soaked for 3 hours in 78℉ distilled water after which they were transferred to moist paper towels laid out in a Jiffy Pellet plastic starter tray with lid. Underneath the tray was placed a Mars Hydro Heat Mat with Controller that was set to 78℉ where they stayed until their tap roots emerged.
~Planted into Jiffy Peat Pellets that were hydrated with distilled water warmed to 78℉ with a 7.0 ph.
~Once roots emerge from the Jiffy Pellet they're transferred to their fabric pots.
~Grown 100% organic in a 4g Gronest fabric pot and a 3g fabric pot by Wraxly filled with Mother Earth 70/30 Coco/Perlite medium and initially amended with Dr. Earth 4-4-4 / Earthworm Castings / Dr. Earth Flower Girl 3-9-4 and Coast of Maine Stonington Blend Organic Plant Food 5-2-4.
~19/5 light cycle for the entire run with supplemental UVA added during flower. Lights are controlled by a Trolmaster Hydro X controller set for a 15min Sunrise/Sunset simulation.
~Top dressing every 3-4 weeks with slow release dry amendments and Earthworm castings.
~Straight water ph'd @ 6.2-6.8 when needed and bi-weekly Compost Tea's.
____________________________________________________________________________________________________________________________________________________________________________________________________________________________________________________________________________________________________________________________________________________________________________________________________________________________________________________
Weekly Updates:
12/1- I soaked both seeds for 3 hours in 78℉ distilled water after which they were transferred to moist paper towels laid out in a Jiffy Pellet plastic starter tray with lid. Underneath the tray was placed a Vivosun Heat Mat with Controller that was set to 78℉ where they stayed until their tap roots emerged roughly 24 hours later.
12/3- Today the tap root on one of the seeds was about 1/4 to 3/8" so at 11 am I transferred it into a Jiffy Peat Pellet that was hydrated with distilled water warmed to 78℉ with a 7.0 ph using a tine off of a plastic fork as a 'mini trowel' to make a hole in the pellet and to gently cover the tap root, leaving only the seed head slightly exposed. This method accomplishes most of the initial work the seed has to do by eliminating having to orientate itself, push it's root down and head up. By 10pm the #1 seed had her cotyledon leaves opened ...calling the #2 a 'fail to germinate' and I'm not going to soak another... We'll let it ride with just one of this tester. 😉👍
12/5- Well this is Day ONE for the #1 FBT #2201! I'll keep her in the covered/heated Jiffy tray until I see her roots beginning to emerge from the peat pellet, then I'll transfer her gently into her 4g Gronest fabric pot from FastBuds.
12/7- Yesterday I checked her, she had roots starting to emerge from her pellet so tomorrow I'll transfer her into her 4g Gronest pot.
😎💚 Thank you for checking out my passion in life! Please visit as often as you wish and I hope you enjoy this journey as much as I know I will! Grow Strong! 💪😎🤙
Likes
6
Share
@HavelGrower
Follow
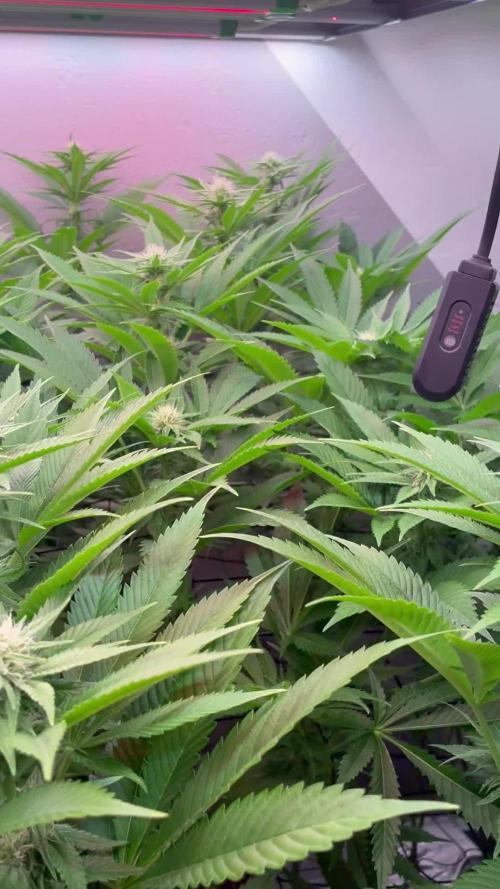
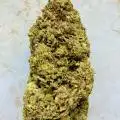
3rd week of flower completed. They got a lollipop cut and a bit defoliation. Besides that I increased the light a bit to 950-1000 umol/m2/s, that’s a DLI of 41-43 mol/day. Nutrients got adjusted a bit.
This week was overall a bit more chill because they stopped stretching so hard. I expect still a stretch but it shouldn’t be that much any more. Flowers start to build up more and more and there are already quite a lot of trichomes. At the moment I will push the plant regarding to light and the overall environment. But later on I will go for terp and trichome preservation and will lower the temps. Starting warm and getting colder to the end. Right now I aim for a VPD of 1.5-1.55 kpa.
Let’s see how week 4 turns out.
Conditions of the Grow:
💡 PPFD: 1000 umol/m2/s
☀️ DLI: 43 mol/day
🌓 Lightcycle: 12/12 h
💨 Humidity: 47-52 %
🌡️ 🌞Daytime Temp.: 23-24 *C
🌡️ 🌙Nighttime Temp.: 19-20 *C
🌡️🌱Leaf Temperature: 21 *C
🌡️💧Water Temperature: 19-20 *C
Water TDS: 1100ppm | EC: 2200us/cm
🚰Watersource: Rainwater (TDS: 15ppm | EC: 0.03 us/cm
Vegetation Equipment:
🔦 Lamp: Mars Hydro FC-E6500
📤Container: 3x DIY 63L Euro-Box with lid
Pot: Netpot 2 inch
💦Pump: M.R.S. Ultimate Whisper Powerpump 22 bar
🚿Nozzles: 12x 0.3mm
🫧Waterfilter: 150 microns
🌬️Fan: 3x Clipfan
🌪️Duct-Fan: AC Infinity 200 mm with Controller and Carbon Filter
🍶Nutrient Brand: Terra Aquatica
🔬Sensors: Waterstation (EC, TDS, Temp, PH, Salt), CO2, Air Temp. & Humidity (VPD), Temperature-Sensor Root Container