
Likes
Comments
Share


@dalemac
Follow
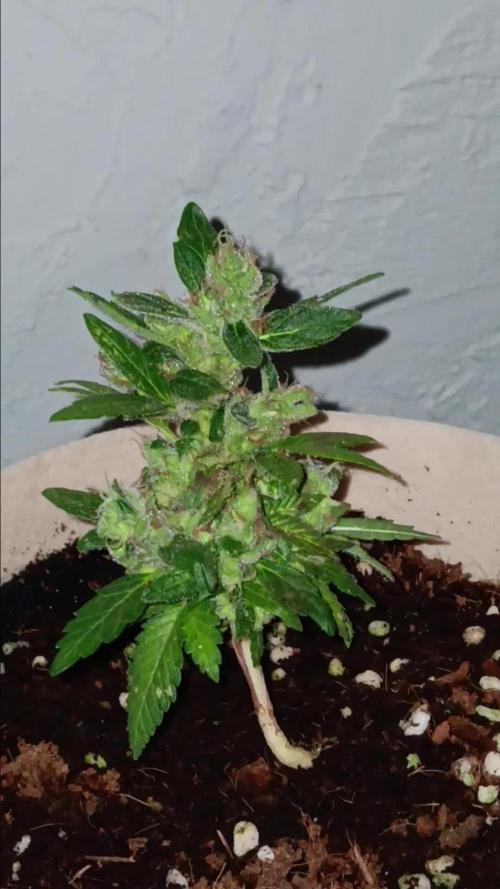
Well I decided I had to pull the plug on this girl with all the weird weather we've been having. I've been pulling yellowing fan leaves off her for a couple weeks now and with our 2nd heat wave and all the smoke & ash thrown in for bad measure... it's been truly weird. Yesterday was a day for the record books around here - it was so dark I could tell my pets were spooked. Even they knew it wasn't supposed to be this dark in daytime. Probably how animals react to things like a solar eclipse. If they haven't got somebody nearby to reassure them of some sense of normal - the alarm bells start going off.
I hadn't really gotten the impression this girl was all that fragrant during the flowering process UNTIL I was washing all that ash off her this morning - then I was like - WOW this stiff is pretty intense in the nose. One thing I'm pretty sure of is that the sun ain't coming out for a couple more days the ways the smoke be flowing around here. We'll see. Two more plants on the patio but they aren't far behind.
September 13 >> Debudded the Widow late this afternoon to make space in my shed to harvest Jack Herer in the morning. She was still a little moist as I harvested her 3 days ago - but it hasn't been that hot. The smoke is still hiding the sun and the atmosphere is labeled "unhealthy". Hung her up in my front bedroom to finish the drying process.
I should note the passing of reggae giant (many say inventor) Toots Hibbert, of Toots and the Maytals last Friday. I went looking for some pics of the last show I saw him at and coincidentally it turned out to be one year ago today, September 13, 2019 at the Independant in San Francisco. I was lucky to have seem him a few times. So I uploaded about 30 seconds worth of Pressure Drop from that show. RIP Buddy. 😪
======================================================
September 21 >> Finished hand trimming the Widow yesterday while mostly listening to the last round of the US Open. In September... while they're playing Stanley Cup playoffs too. Very weird time.... both these things normally happen in June every year.
The buds weighed in at basically 8 ounces (227 grams). The trim came in at 325 grams - and in this case I use the Trimbag - although I don't think she was really dry enough to get proper function outa the bag. I still spent over 6 hours hand trimming the remainder AFTER the Trimbag in this case. It wasn't really a problem because I had like 10 hours of US Open coverage for 4 days to burn thru.
In the process of turning all that trim into hash at the moment... because I'm all configured to go at the moment after making Wonder Pie hash last week. I'll stick it in the garage to dry for a few days and add the weights later.
One thing I've noticed that's probably pandemic-related is 90% isopropyl alcohol has become very hard to find (haven't had to look for like 6 months because I had a couple bottles that lasted). I've used it to clean my glass bong/dab rigs for years. 70% is there - but even that now it's like you have to ask for it. Times change.
======================================================
September 26 >> Weighed out the hash collected from the trim... 12.94 grams
120+160 micron = 1.47 g
73 micron = 5.50 g
25 micron= 5.97 g

Likes
5
Share

@JVKdopegrow
Follow
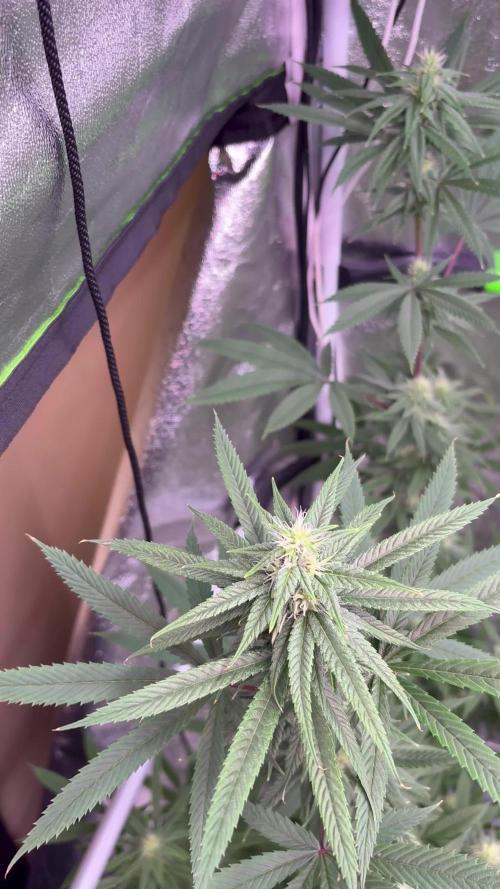
For a couple of runts I think I'll end up with a couple of blunts! Tight little buds. Lots of resin and great scent. I kind if wish I could just keep them going but they are nearing the end.

Likes
Comments
Share


@Santaclaus
Follow
Bueno empiezo la 3 semanas día 15, con un unos LEDs rojos que me regalaron marshydro al comprar el fc800 evo , creo que se llama así 😝 es una auténtica bestia, ya no me imagino que pueden hacer los leds rojos, en teoría la luz roja aparte de hacer madurar los frutos, engordar y dar sabor, también ayuda a hacer crecer a los nuevos tallos que están más abajo y reciben menos luz, la luz roja profunda les da energía a esos brotes para que crezcan y busquen la luz blanca... Total.. quiero ver si crecen las ramas que están escondidas... También he añadido CO2 , cada segundo dos burbujas.. no quiero pasarme, porque tanto echar magnesio, me a dado un poco de exceso, lo he corregido echando más agua al depósito, y con la ayuda de CO2 hará que coman más las plantas, y corregiré antes el exceso de magnesio, en teoría jejeejje😅😅 todo en teoría

Likes
4
Share


Processing
Likes
16
Share


@Andres
Follow
waiting to see if it has any trait of a seed of sweet seed ... just wait...


Likes
5
Share


@Bluethum94
Follow
Some plants are showing sex always an exciting time right also did a topping and started some lst gonna keep them in 1 gallon pots awhile longer then final pots after I know how many females I’m working with
Likes
6
Share


@XanHalen
Follow
Feb 8
Today marks the 13th week of these girls, it’s been an amazing 1st grow, would highly recommend this strain for first time growers, even the one that had some issues ended up surprising me late flower with new growth, and somehow basically caught up with the strong girl in size, but not density.
I learned a lot about how these plants like to be treated, and I will definitely implement new methods to improve my cultivation!
See you on harvest day!


Likes
12
Share


@Ieiogrow94
Follow
Eccoci qui...
Questa varietà mi lascia a bocca aperta è gigante!!! Sono rimasto molto colpito da come pur avendola messa giù da seme sia avanti in fioritura come i cloni con 53 giorni alle spalle!!!!!
Sono curioso di questa bellezza, e come in tutti i diari SI INIZIA CON I VIDEO.
Grazie a @KhalifaGenetics per la collab e a tutti per il supporto🔥🌲❤️

Likes
2
Share

@Ninjabuds
Follow
This plant is a beast I finally got the nutrients down and got rid of the light color growth it was having the plant would have been great to have a clone it is definitely something worth growing again

Likes
13
Share


@HIAZ_urbanbudfarmer
Follow
Time for flower. Cleaned my flowering tent & equipment & transferred the girls from veg tent.
Developed really nice structure on these plants.
Use the promo code GROWEED for a 15% discount on any Fast Buds purchase!

Likes
10
Share


@Minuteman_Organics
Follow
Beginning of week 2!
Flowering is progressing nicely. All plants have been sexed. Ended up being 11:11 female:male. Can't complain Already got some stud males picked out from the hash plants and the Zed blacks.
Rainbow belts f3 had one male and 2 female. The females appear to have two smells but identical looking growth. Tall and thin leaves. Little stretch. The male is short and stocky. No stretch at all.
I have stopped feeding since I saw slight nitrogen toxicity in several plants. I've marked that they are more sensitive which is something I view positively in a no till living soil situation as long as the flowers can back them up.
To control my water pH I am using 12% humic acid and highly fermented kombucha that is practically vinegar. Not great for the overall microbe population in the kombucha but good for lowering a 9+pH solution that comes out of my tap. I am pitching recharge in about .5tsp/gal as well.
Plants are looking good. I have noticed that the Zed black is growing better under lower humidities. I have my lights off during the day in order to reduce the humidity load on my plants. At night when humidity spikes I'll rely on the LED light to burn off a lot of the humid air. However if I had watered recently, which is becoming every other day at this point, the humidity with remain high for awhile. I have now added a dehumidifier. It's been helping a lot and ZB is doing better.
Update 1.5 week
Flowers are stacking. Mostly in the males lol. But the female bracts are starting to swell. Now onto the stem rubs
HP: WOW. ABSOLUTELY DISGUSTING. I cannot tell if I hate this with a deep passion or I'm just wanting to grow it out for morbid curiosity. Smells like nail polish remover plus sulfur. I would feel bad giving this to someone because it smells so bad. Had a few that smell more like a freshly opened can of tennis balls that I dig.
ZB: very strong pinene smells. Earthy and spicy. Little bit of citrus. Nothing out of the ordinary. Grown many hash plants and this a quintessential example
Rainbow belts 3.0: I got a zkittles pheno with classic flavor. Fruit. But with a slight rotten citrus undertone that gives it a little character. Another one is pure pine sol. 100% pine sol. I do honestly love this flavor. Will be using both for seed making. The male is lemon lime candy. Will be pollen source.


Likes
14
Share


@Tazard
Follow
She is bursting with terpenes! I pressed a 6.6g puck and I got a 1.74g return at 220F (26%) my mold is made to hold about 15g so I suspect I lost some recovery to the filter bag. Just learning on the press but I’m getting wonderful results and returns around 25%.

Processing
Likes
6
Share


@Moss420
Follow
END OF WEEK 4 FLOWER
Seems to be going well, nice to be able to sit back and watch these girls grow :D
Had some bleaching on a few of the nugs, so I dimmed the light slightly and managed to raise it an extra 5cm. I also bent a few of the taller stems out from directly underneath.
Big Mumma is killing it, some real nice and dense little nugs on her.

Likes
12
Share


@Northernlights
Follow
Hey,
sie wächst wirklich gut und schnell, doch der Winter rückt immer näher und ich habe Angst das sie es nicht rechtzeitig schafft... Was denkt ihr wie viele Wochen sie noch braucht? Am 23. Juli habe ich den gemeinten Samen eingepflanzt.
Likes
16
Share


@Sadhus
Follow
Bon, la végétation est suffisante pour moi alors let's go 12/12 d'ici deux ou trois jours !!

Likes
4
Share


@Fatbudz
Follow
in the first days of the little one
I only used fishmix from biobizz
to help in the development of life in the soil
which already has nuts itself. biobizz light mix 🌱🌱