


Processing
Likes
23
Share


@GreenISR
Follow
Day 43 - added water 0.5L
Day 44 - added water with filtlizer 0.5L .
Day 45 - added water 0.5L .
I have stop use humidifyer .
Day 46 - added water with filtlizer 0.5L .
Day 47 -added water 0.5L .
Day 48 - added 1 L water + 1 liter water with filtlizer .
Having some mite issuie ,I went to the store and got some neem oil lets see how it went .
Sprayed on each plant 1 L water . NeemBe (biobee) 10 Mg.
Day 49 - added 0.5 L water and tie up the big plant becuse of the hight .

Likes
22
Share


@Theknifeman
Follow
Man, it is getting close, on a couple! Just a few cloudy trichomes showing. Going to hit them with Bud Candy this week then start flushing.
2 are at least 2 weeks behind but starting to fill out more.
The midget...lol...she's still at least 4 wks and a mystery.
If you're looking for a strain that doesn't overpower with smell, this is it. Hardly noticeable at all.

Likes
24
Share


@Nicoweed10
Follow
Germinadas al 100% 8/8.
Trabajaré con la línea quemanta, aplicamos red roots aportando micorrizas al sustrato y directamente a la radicula de las semillas.
#2 dark de Royal life
#2 sweet mango de Royal life
#2 gelatos
#2 zkittlez.
Les dejo los primeros 7 días.
*Buenos humos
Likes
4
Share


@RosQuare
Follow
Day 15:
Switched lights to 20/4
I overwatered them last week when I did the feeding, the fabric pots dry fast but this soil holds water well and I’m not used to planting into final sized pots like this either. It’s taking so long to dry out but I’m letting it. I’ve stopped misting obviously. Watching humidity and temps between lights on/off. Looking good. I will do the same light feeding as last week once the pots are dry enough but will make sure to only water the root area this time. I possibly stunted them a little but they are alive and learning is fun 😅
Halfway through the week update. They finally dried out and are now getting 25ml water per day, with feed. I added an oscillating fan. Temp and humidity seems to have stabilized now. Started to grow again but leaves stacked tightly. I’m playing with the lights, they are a bit strong for this stage I think. I turned off the extra 100w light leaving just the 270w on and they seem to have responded well overnight. Will turn it back on once they start taking off. I think I need to reconsider switching lights to 18/6 if I can figure out how to stabilize temps during lights out.

Likes
13
Share


@HIAZ_urbanbudfarmer
Follow
Hi Gromie's Welcome to my Experimental & tent filler grow. 2 Orange sherbet FF FASTBUD CLONES that were left over when transplanting my current other FF FASTBUD clones into final 15 ltr pots. Originally had 4 left over however due to my mistreatment & lazyness at the time, only feeding/watering every 3 to 4 days, which caused slowed growth, the other 2 died & these 2 were brought back from the brink of death! Picture of them in white container next to current flower run. Transplanted from small pots into net pots, plant#1 had 1 small root protruding from pot, #2 had 1 little main root not even growing out of pot! Put them into 15 ltr Dwc pots running 2 airlines & stones per plant to give plenty of oxygen & help combat any root issues & quick growth. Hot temps as it's summer rising the same temps as environment inside tent. Have been placing frozen water bottles into pots to reduce temps. Add 2 frozen bottles per pot, reduced temps right down to around 17°c. Change bottles out twice a day. Temps slowly rise over extended period until ice melts. Experimenting with different training methods, lst ,hst
Mainly super croping. Have been Hst bending, pinching stems & roughing them up.which causes the stems to grow stronger, repairing themselves along the way as well as the hst bending, I also go around & pinch/ squash the stems every few inches which really strengthens the stems & branches! In fact I've done no tying down! I've managed to create a flat table top canopy with out tying down to hold shape. Super crop them over, they grow strong stems & hold that shape, as they grow out they always start to grow back up towards the light & I continue the process of bending, pinching & damaging stems so they grow strong & hold shape by them selves. Going well & it doesn't seem to slow them down much at all, given I grow perpetually using separate veg & Flower tents makes it impossible to train through scrog net in veg! Trying to train an established plant through a scrog can be difficult & easy to damage or break branches . However I like the benefits off scrogging so looked at a way to make it easier to scrog already veged plants. This is the training methods I've come up with, taking & incorporating established training methods of various soughts to create plants with flat table top canopy. That way when moved to flower tent I can just lower scrog net over the top of plants to hold them in that shape & train through the net as they go through flowering stretch, making it a lot easier! I've come up with a name for it & I'm calling it the pre scrog ! Method of training. In fact it seems to be going so good that the plan is to see if I can scrog them without a scrog net as they are holding that table top canopy shape & have super strong stems that are solid as a rock, can't squeeze or pinch repaired stems, they are super strong, holding shape & should be able to support the weight of the buds, lower growth already lolliepoped as I don't see the point growing that lower growth out just to lolliepop it & remove it once in flower. It's similar to why I grow relatively short plants when scrogging. I see some growers growing 2 to 4 foot plants which take longer to veg only to lolliepop & remove bottom half to 3/4 of the growth, so you end up with 2 foot of bare lolliepoped stems & branches under canopy? Each to their own/I guess. I grow mine around a foot before putting into flower so there's between 20 to 30 cm of lolliepoped stems under the canopy & a foot or 2 trained through scrog net & above .
Likes
9
Share


@Miguels_Fuego
Follow
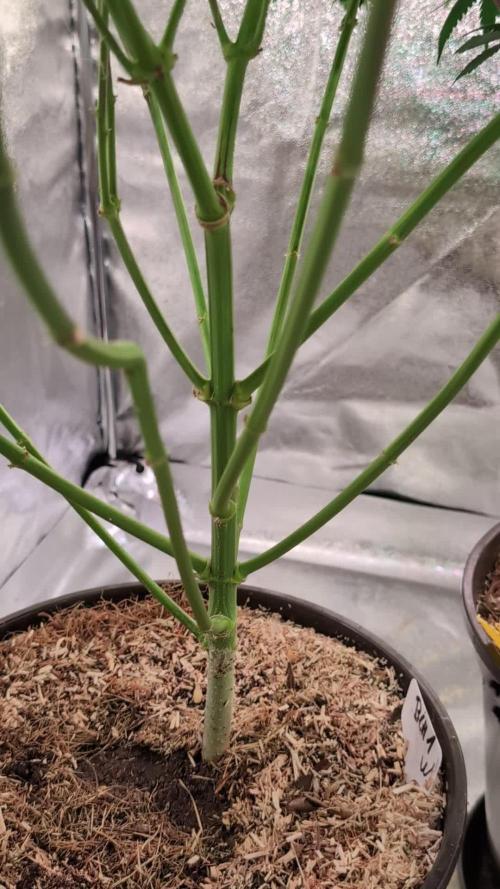
Both started to flower faster than I wanted. I would have preferred another week of veg. Blooming nutes were transitioned during this week. Mimosa is smaller then her counterpart, but is smelling stronger.

Likes
Comments
Share

@GoodTimesOrganics
Follow
Allmählich entwickeln sich die Blütenstände aus und es ist schön zu erkennen, das die Interniodenabstände sich während des SCROG nicht groß weiter auseinander gestreckt haben.
Daraus vermute ich dass nun eine Dichte und Breite Budstruktur zum Vorschein kommen wird.
Jetzt geht es darum zu schauen wie sich daß Aroma und eben die Blütenbildung weiterentwickelt.
Heute befindet sich die Blue Cream Haze bei Blütetag 18.
Likes
Comments
Share


@Samsemilla
Follow
Die Blüten schwellen weiter an und so langsam kommt auch etwas Farbe ins Spiel.
In dieser Woche hat sich einiges getan.
Leider wird das Wetter "relativ" nass/kalt.
Es bleibt spannend...


Likes
2
Share

@JVKdopegrow
Follow
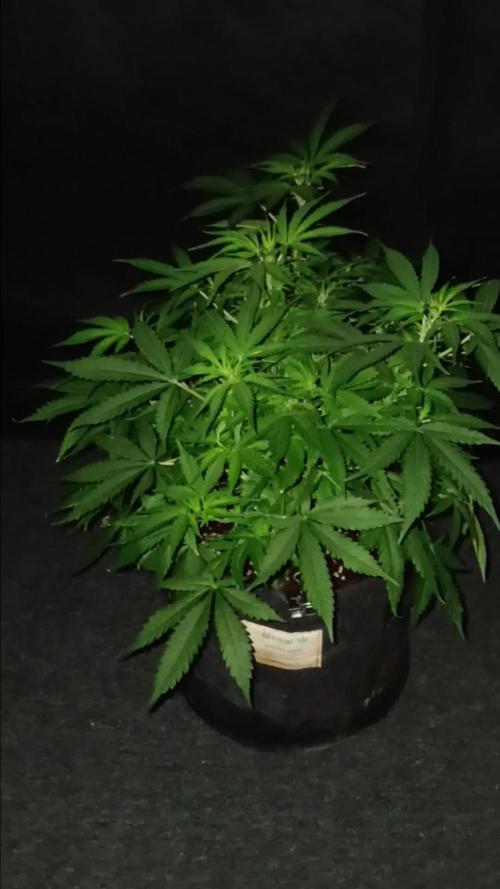
She is showing her flowery self. Still very symetrical and very bushy. I am doing a light defoilation every few days to get the buds sites exposed. She really has potential to yield great flower.

Likes
3
Share


@Canadian
Follow
Day 57 the plans continues to grow healthy and fine very slow but it's starting to look good .
I know that most of the growers in this platform and elsewhere do defoliate and trim down all the lower branches of the plant so that the plant can concentrate all its energy into the higher bigger and better buds .and I do not do this because I drive the plants very hard with nutrients and those lower branches with small buds always give me the first sign of anything going wrong with her and that's why I leave them as a buffer zone to protect the bigger buds and that allows me to push very hard the plant.
thank you for reading and will continue to update have happy grow

Likes
111
Share


@Salokin
Follow
Hi Growmies,
I removed the starter leaves and slightly started bending the highest set of leaves to give the lower shoots more exposure. She looks a lot like a pure indica already, very pretty :) Her root system is developing amazingly as well!
Here is the code that’ll give you 20% in Zamnesia‘s online store, just input ZAMMIGD2023 at checkout.
Thanks for stepping by and until next week!

Likes
9
Share


@Krissci
Follow
Day 1 - LST train both plants... Mostly SB1 to have a wider canopy let the smaller nodes catch up.
SB2.. Nice structure, really upset to break 1/2 of it... But loads of energy and recovered /train well.
Nodes larger than SB1, but SB1 has mode nodes

Likes
30
Share


@XperencdGmanXG
Follow
more liquid seaweed foliar spray and Silica. Pre flower has not started on this plant yet, prob due to the fact it was put out 2 week later than the rest which are in full pre flower. plant has grown a whopping 18" this week. Amazing!
Likes
Comments
Share


@Growfather1
Follow
Hello everyone.
Welcome back to the update for week 5 of the Mac 1 F1 hybrid clones part 2.
Above the soil, it looks like a ghost town right now—absolutely nothing is happening on the upper side! I guess the ladies decided to take an unannounced vacation, or maybe they are just practicing their best statue impressions.
But jokes aside, they must be incredibly busy beneath the surface right now. All their energy is clearly focused on making a massive root network, building the ultimate foundation hidden down in the coco.
Because they are focusing purely on roots, I am keeping the menu very simple at this point. They are getting their basic nutrients with Canna Coco A and B at 2 ml per liter of water, with absolutely no extra additives this time around.
The environment is dialed in perfectly. The temperature is sitting comfortably between 21°C and 25°C. Humidity is staying above 60%, thanks to the humidifier working hard in the background to keep the air dialed in.
There is an interesting experiment running this week between the two clones. I decided to give one clone a fresh defoliation and a topping, while the other one was left in peace to do its own thing for now. Next week, she will likely need some defoliation as well.
I am highly expecting a massive burst in growth next week once these roots are fully established! Let's see how they react and what they look like next week.
Thank you for stopping by and have a nice day.
Best regards,
Growfather

Likes
10
Share


@HanfHueter
Follow
Blüten werden inzwischen sehr Harzig und der Duft nimmt zu.
Dem Giesswasser wird täglich 1:10 Jauche zugegen. Zu dem jedes zweite Gießen Pro Sugar von Grow Pro ein Kohlenhydrat Blütedünger(von der Mary Jane ein Tester). Zu dem gibt es ein bis zweimal in der Woche Seafeed Xtra von envii.
Die ersten Blätter haben sich unten entfernt daher gebe ich gerade wieder Stickstoff zu den Pflanzen. Auch wenn es nur noch diese Woche war danach nur noch Blütedünger.
Zu dem habe ich Basilikum gepflanzt, Dill, Ringelblume und Koriander gesäat am Anfang der Woche und zum Ende noch Lupine und Rot Klee.
Likes
39
Share


@J_diaz420
Follow
El día 27 de floración se vuelve a podar brotes bajos y se colocan tutores de varas 👍🍀
Likes
51
Share


@nonick123
Follow
Día 36 (25/11) Aplico ligero LST a LSD-25 Auto
Parece que OG Kush Auto se ha ralentizado un poco tras el Lollipopping y la defoliación
Día 37 (26/11) CBD Auto 20:1 #2 & LSD-25 Auto han parado el stretch y se dedican a engordar los cogollos
LSD-25 Auto sigue generando unos colores preciosos con todas las hojas inundandose de color morado / purpura
OG Kush Auto está empezando la floración en todos los nodos
CBD Auto 20:1 #1 es un monstruo que no para de crecer! Le hago un ligera defoliación (3-4 hojas) y Lollipopping en un par de nudos inferiores
Día 38 (27/11) CBD Auto 20:1 #1 sigue imparable hacia el cielo! Empieza a formar timidamente los nodos...
CBD Auto 20:1 #2 muestra pistilos rosas en el ápice! 😍
Día 39 (28/11) CBD Auto 20:1 #1 non stop! 🚀 Elimina algunas hojas que tapan a los brotes inferiores
LSD-25 Auto empieza a generar tricomas! 😍 Elimino un par de hojas que tapan los cogollos de la zona media
Día 40 (29/11) Solo riego. NO tiempo a más!
Día 41 (30/11) Día sin riego. Todas las plantas presentan el sustrato humedo
CBD Auto 20:1 #2 empieza a engordar muchos los cogollos y a mostrar pistilos entre morado y rosa 😍💥
Día 42 (01/12) CBD Auto 20:1 #1 non stop! 🚀 Elimino algunas hojas que tapan a los brotes inferiores
LSD-25 Auto tiene unos colores precisosos. Im in love
OG Kush Auto la floración está a tope! Elimino algunas hojas que tapan a los brotes inferiores
💦Nutrients by Bio Tabs - www.biotabs.nl/en/
🌱Substrate PRO-MIX HP BACILLUS + MYCORRHIZAE - www.pthorticulture.com/en-us/products/pro-mix-hp-biofungicide-plus-mycorrhizae
"GDBT420" 15% DISCOUNT code for the BIOTABS Webshop https://biotabs.nl/en/shop/