Processing
Likes
Comments
Share
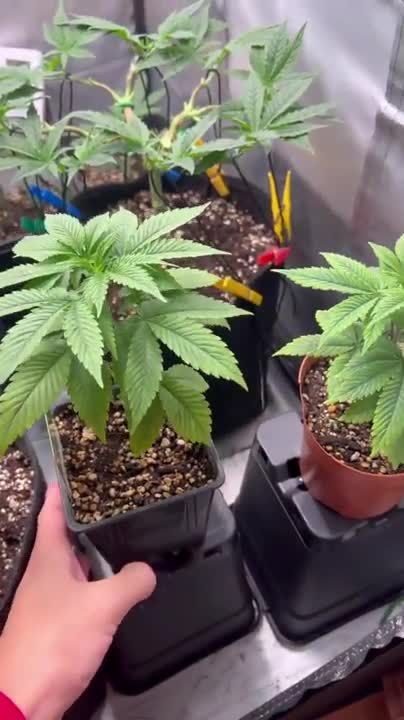
Day 41 up-potting not real crazy over root health, seems like I did a little better first run though I really fucked that one up, thinking about trying Dyna-Zyme & RAW Microbes Grow maybe. Run offs read: LSD #1 pH 5.6 PPM 1120 LSD #2 pH 5.7 PPM 1110 LSD #3 pH 5.6 PPM 1190 LSD #4 pH 5.6 PPM 1050 Gelato #1 pH 5.6 PPM 1090 Gelato #2 pH 5.6 PPM 1080 Watered straight with 10ml of KLN per gal solution pH about 6.8-7 Hoping the pH will normalize over time & these will be back on track. Seemed to perk back a bit today.
Likes
3
Share
Looks like buds r going slow super cheese is on track nice rop colas
Likes
7
Share
I will b running the SHERBCAKE again to dial her in properly took a lot clones of her so I can’t wait to run her again terps of her is dessert and fuely 🍰⛽️ seeds made by k1 kreationz
Likes
19
Share
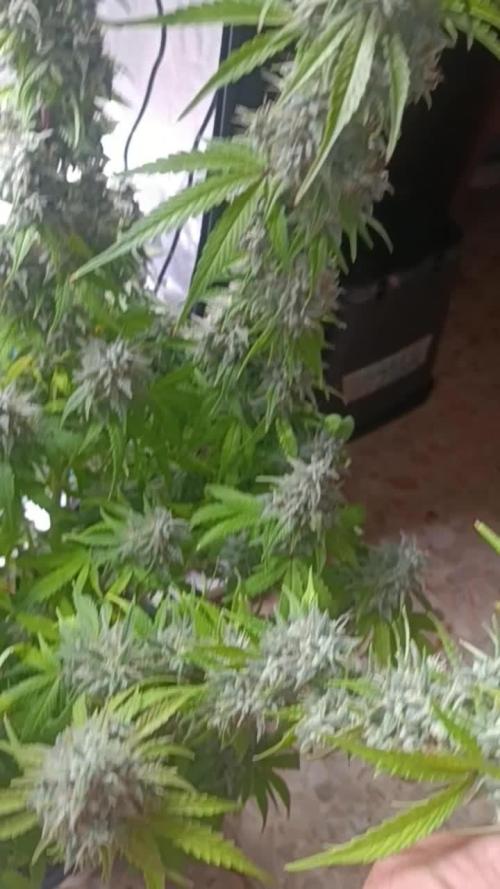
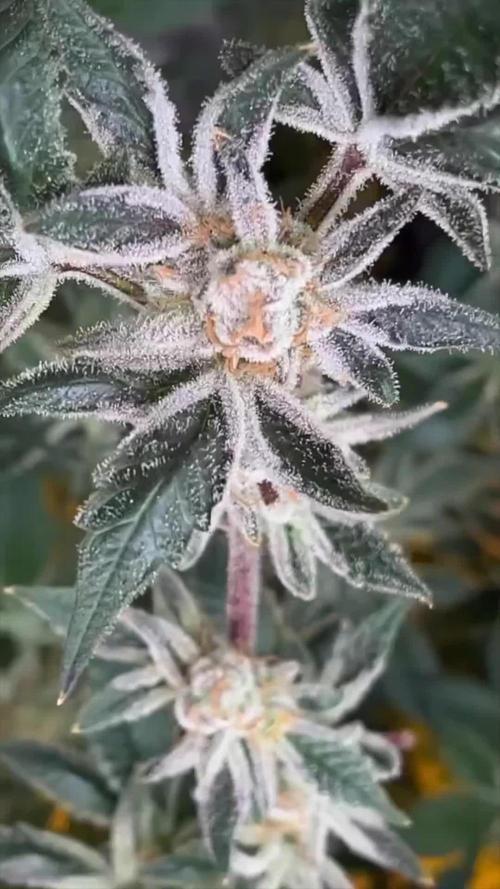
This was a pretty good week. The buds of FBT2203 are looking great and are taking on some nice colors. It seems a little early for the fade so I made sure that this week I gave a little more nitrogen and Bloom nutes to help push these plants through another 3 or 4 weeks. Pictures are day 63 from seed and ending near the end of week 5.
Processing
Likes
24
Share
WOW that was a much needed week of plumping up. What a wonderful difference 1 week made in the tent. The ladies are really looking healthy and beautiful. Absolutely caked in crystals. My guess/hope is another 4-7 days of plumping up, then a week to mature and ripen up before harvest. Hoping to see some color soon but the smell is wonderful. Smells creamy. 😍😍 Hopefully what I've learned and changed from the previous grows is paying off, they are nice and short, fairly level. Most of the flowers are in direct light. Was pretty worried and thankfully for no reason. Cheers to another week of plumping up 🙏🙏🙏
Likes
16
Share
🍼Greenhouse Feeding BioGrow & Bio Enhancer ⛺️MARSHYDRO The ⛺️ has a small door 🚪 on the sides which is useful for mid section groom room work. 🤩 ☀️ MARSHYDRO FC 3000 LED 300W ☀️Also special thanks to VIPERSPECTRA P2000 (200W) & XS2000(240w) LED growlights 🌱 DUTCH HEADSHOP SEEDS: www.dutch-headshop.eu www.dutch-headshop.nl ONE STOP SHOP . 100% germination success on first try! with HUGE seed selection! . Very friendly customer service . Best bio-seed packaging . Sells other products @ best prices: . Nutrients . Vaporizers . Smoking accessories (grinders, cones) . CBD Tinctures . Resin Extracts . Boveda humidity packs . Ziplock bags . Other health supplements such as: . Lion’s Mane Organic Capsules . Hemp Seed coffee
Likes
2
Share
Flowering started on day 28. I applied a topdressing once with Green House Feeding BioBloom at 1.5 grams per liter Soil. I’ll repeat that in the third week to reach the full dose of 3 grams per liter. I also discovered some thrips, so I reacted immediately by using small nematode sachetsboth on the plant and in the watering solution.
Likes
5
Share
@AustinRon
Follow
TH 1Q2025 - Week 5 - Bolt 2 
(ON Haze X Original Haze) X Northern Lights #2 “Todd’s Haze” Objective - 8 Female Plants, Topped ONCE @ Flip, 12” when topped - Modified Sea of Green Seeds Wet: 1139PM, 28.2.2025 Germinated: 2.3.2025 Flip: 21.3.2025 Harvest: 77 Days, DATE: 6.6.2025 Weeks Summary - Continuing slow increase of EC & PPFD - Achieved EC: 1.8 - Allowing natural PPFD Increase (STRETCH), and providing modicum of intensity increase. _________________________________________ __ Fri Apr 4, 2025 TH 1Q25 15:B:2:1 Light Intensity: [ 400, µMol/m2/s] EC: [ 1.1, mS/cm] Foliar: # 1 pt Spray Bottle @ Lights ON - [x] CalMag Fuel: [ 2.5, ml] - [x] Lush Green: [ 0.67, ml] - [x] Kelpak (Auxins): [ 1, ml] - [x] Photosynthesis Plus: [ 1.5, ml] - [x] Quillaja 60 Powder: [scant] - [x] Fertigation: 5:2:2:2:2:2:0 __ Sat Apr 5, 2025 TH 1Q25 16:B:2:2 EC: 1.3 - [x] EC: 1.3 - [x] Fertigation: [5.8:5.8:2.3:2.3:2.3:2.3:2.3] # [Primer A:Primer B:CalMag Fuel:Silica Skin:Lush Green:Root Anchor:Peak Bloom] __ Sun Apr 6, 2025 TH 1Q25 17:B:2:3 - [x] EC: 1.4 Foliar: # 1 pt Spray Bottle @ Lights ON - [x] CalMag Fuel: [ 2.5, ml] - [x] Lush Green: [ 0.67, ml] - [x] Kelpak (Auxins): [ 1, ml] - [x] Photosynthesis Plus: [ 1.5, ml] - [x] Quillaja 60 Powder: [scant] - [x] Fertigation: [6.3:6.3:2.5:2.5:2.5:2.5:2.5] # [Primer A:Primer B:CalMag Fuel:Silica Skin:Lush Green:Root Anchor:Peak Bloom]  __ Mon Apr 7, 2025 TH 1Q25 18:B:2:4 EC: 1.5 Raised Dimmer to 77% LightIntensity: [ 517, µMol/m2/s] - [x] Fertigation: [6.3:6.3:2.5:2.5:2.5:2.5:2.5] # [Primer A:Primer B:CalMag Fuel:Silica Skin:Lush Green:Root Anchor:Peak Bloom] __ Tue Apr 8, 2025 TH 1Q25 19:B:2:5 EC: 1.6 LightIntensity: [ 517, µMol/m2/s] Foliar: # 1 pt Spray Bottle @ Lights ON - [x] CalMag Fuel: [ 2.5, ml] - [x] Lush Green: [ 0.67, ml] - [x] Silica Skin: [ 2, ml] - [x] Fertigation: [7.1:7.1:3.5:3.5:2.8:2.8:2.8] # [Primer A:Primer B:CalMag Fuel:Silica Skin:Lush Green:Root Anchor:Peak Bloom] - [x] Terps Plus: [ 0.2, ml] - [x] Photosynthesis Plus: [ 6, ml] __ Wed Apr 9, 2025 TH 1Q25 20:B:2:6 Looking Relaxed, Happy, Lifted, Supple. EC: 1.7 - [x] Fertigation: [7.1:7.1:3.5:3.5:2.8:2.8:2.8] # [Primer A:Primer B:CalMag Fuel:Silica Skin:Lush Green:Root Anchor:Peak Bloom] - [x] Kelpak: [ 4, ml] - [x] Photosynthesis Plus: [ 6, ml] - [x] Terps Plus: [ 0.2, ml] - [x] Quillaja 60 Powder: [scant] __ Thu Apr 10, 2025 TH 1Q25 21:B:2:7 Light Distance: [ 23, in] HOME Depot Run - [x] Tube Insulation (Re-Fresh Chiller Insulation) EC: 1.8 # MAX EC for GROW Foliar: # 1 pt Spray Bottle @ Lights ON - [x] CAL106 (Micronized Calcium Carbonate): [ 0.125, g] - [x] Lush Green: [ 0.67, ml] - [x] Kelpak (Auxins): [ 1, ml] - [x] Photosynthesis Plus: [ 1.5, ml] - [x] Quillaja 60 Powder: [scant] - [x] Fertigation: [8:8:4.8:4.8:3.2:3.2:0.0:0.0:3.2] # [Primer A:Primer B:CalMag Fuel:Silica Skin:Lush Green:Root Anchor:Peak Bloom] - [x] PCAL 1660: [ 0.5, gm] # Once or Twice/Week - [x] Kelpak: [ 4, ml] - [x] Photosynthesis Plus: [ 6, ml] - [x] Terps Plus: [ 0.2, ml] - [x] Quillaja 60 Powder: [scant]
Likes
3
Share
@ohcibi
Follow
Update June 28th Grow growing steady. Temperatures and humidity are absolutely terrible. I’m not sure if the grow will be successful this way but I’ll just hope for the best. Apart from that things are going great. Trichomes and pistils appeared right on time. I think I’m done lollipopping as well. There’s no hidden mini branches left.
Processing
Likes
25
Share
@EelGrows
Follow
Week 8: Day 50-53: Things are looking ok here, could be better. Still assuming my soil is too acidic certain nutrients to lock out. I now believe what I thought was a calmg deficiency on 4AM#1 was actually a phosphorous lockout in combination with the aforementioned calmg. Day 50 I watered with PH 6.5 and got runoff around 5.5 PH. 4AM#3 was visibly worse off, and no real improvements to the other 2 either(both had signs of calmg deficiency in combination with various other small deficiencies it seemed like). Day 54-56: Seeing no real improvements in any of the 3 plants I decided I would flush them on with 6.5 PH'd water only with regulator until runoff read atleast 6PH. After about 4-5L the runoff was 6+PH, seemed to me like there was a slight build up in the bottom so the first 3L cleared that up quite nicely(runoff was around 5.7). I then fed them 2-2.5L feeding of calmg and regulator with some Biocanna Boost PD'd to 6.5 immediately after flushing. Runoff was pretty much 6.3-6.5 on all plants at this point. I think I am happy with the results of the small flush, this IS my first time indoors(last summer first time was outdoor and I never really dealt with deficiences), so not sure if what I did was correct, I just went with my gut feeling here. Anyway on day 56 now and they haven't gotten any worse, and the leaves feel healthier to the touch. Also seem to be liking the addition of the 150W COB, also decided to lower the lights and see if they could take it(they could). End of Week 8: I don't think I will get more much bulk on 4AM#1 but daaamn is she frosty as hell. 4AM#2 on the other hand is bulking up real nice, those are going to be some fat buds! And 4AM#3 seems to be a slower finishing pheno and seems like she will bulk up loads more, going to be a beast I reckon if the deficiencies didn't stunt her from the last 2 weeks(leaves felt dry and showed yellowing and spots, but are doing better and feel better after the flush).
Likes
51
Share
@urbi09
Follow
DIARY Plant was given nutrient solution every day when the sun went down in the concentration down bellow -    FloraSeries Gro-->1.8 mL/L -    FloraSeries Micro-->1.2 mL/L -    Flore Series Bloom-->0.6 mL/L When I mixed all the nutrients in the water the ppm was 840. That is quite high so I diluted the solution with tap water to 590 ppm Day 50 It was time to bend two new mains, they were long enough to be trained. Firstly I drilled two holes (parallel with mains) into the side of plastic pot. Then I bended one main at the right angle and secured it with electrical wire to a drilled hole. The same was done with the second main, but I was more careful while doing it because the main stem was already under tension and I was afraid it would split. Bend down mains that now resembled letter T were also topped, so I was left with four new terminal shoots. Day 52 Plant recovered very quickly. Two mains turned upward just after two days. Day 55 Four new shoots are growing were quickly and are already about 3.5 cm long. OVERALL PLANT CONDITION Plant recovered very quickly after topping and bending, it also didn't show any sign of stress. Before bending it was 16 cm tall after bending it measured 12 cm. Overall plant is healthy and it doesn't look like it suffers from any deficiencies. Day is about 15 hours long and plant is receiving about 8 hours of direct sun light. REPORT ON CLONES Clones are doing OK and look healthy. I watered them every other day with tap water WEATHER REPORT Day 50-51 Weather was sunny. Average daily temperature was 30 °C. Day 52-56 Weather followed similar pattern every day. It was sunny at morning and afternoon, and it was raining in the evening. Temperatures were around 26 °C during day and 19 °C during night. I also captured some clouds (mammatus clouds) with interesting shapes at day 52, they look liked child drew them.
Likes
4
Share
Começaram a cria os primeiros brotos, com um bom desenvolvimento, sem algum tipo de stress… vamos seguir com o sistema😉🤫
Likes
7
Share
Late flowering smels is awesome like sweet and spiecy both on melane aroma tricome heads are coloured and ready to harvest
Likes
2
Share
@fabialien
Follow
Semana del 8 de Diciembre al 14 de diciembre 2025.
Likes
4
Share
Beautiful plant. Just moving her around a bit my fingers smell like lemon lime and gas flavor still devolving! Fire!! Looking forward to this one!!
Likes
7
Share
@NG420
Follow
Hi there! I decided to cut the other plant like I said. I wanted to try the FIM method and I actually missed and did it in two times cut! 😢 From now on plant #1 will be mentioned as FIM and plant #2 will be the TOP. Lst is a very interesting method and seem to work but I'm not totally sure if I do it right.
Likes
78
Share
Inhale for 13s, Exhale for 13s, Inhale for 8s, Exhale for 8s, Inhale for 5s, Exhale for 5s, Inhale for 3s, Exhale for 3s, Inhale for 1s, Exhale for 1s, Alignment. 1.618 More energy, more blueprint. A plant with both standard cellular respiration (occurring throughout the plant, including leaves and stems) and adequate root respiration will have a significantly higher ATP throughput than one restricted to only general cellular respiration in a limited way. Cellular respiration is the fundamental metabolic process that occurs in all living plant cells (roots, stems, leaves, flowers, seeds) to convert glucose into usable energy (ATP). It requires oxygen and produces carbon dioxide and water as byproducts. Root respiration is not a separate type of respiration, but rather a specific instance of cellular respiration occurring in the roots. Roots absorb oxygen from the air spaces in the soil to fuel their energy needs. Roots require a substantial amount of ATP for essential functions like nutrient and water absorption, as well as growth and maintenance of their tissues. The primary form of respiration in healthy plant roots is aerobic respiration, which is highly efficient, yielding up to 30-38 ATP molecules per glucose molecule. Anaerobic Respiration (Inefficient): If roots are deprived of oxygen (e.g., in waterlogged soil), they switch to anaerobic respiration, which is far less efficient, producing only 2 ATP molecules per glucose molecule and also generating alcohol, which can be toxic and kill the plant. Therefore, a plant with healthy, oxygenated roots performing efficient aerobic respiration in addition to the rest of the plant's cellular respiration has a much greater overall ATP production and energy capacity. A soil without organic matter will generally have a low Cation Exchange Capacity (CEC). Biochar is often prized for its potential to increase soil cation exchange capacity (CEC), but this effect is highly dependent on the specific properties of the biochar (feedstock and pyrolysis temperature) and the soil type to which it is applied. High-ash biochars, especially those produced at lower temperatures and applied to acidic or sandy soils, can significantly boost CEC by providing abundant binding sites for cations like calcium (Ca²⁺), magnesium (Mg²⁺), and potassium (K⁺). Biochar is more sustainable than typical organic matter for long-term soil improvement primarily due to its high stability and resistance to microbial decomposition, allowing it to persist in the soil for hundreds to thousands of years. This longevity provides a lasting positive effect on soil properties, particularly by increasing the cation exchange capacity (CEC) over time, while regular organic matter breaks down much faster. Biochar generally offers a much higher CEC than coco coir, though specific values vary greatly; while coco coir might sit around 40-60 cmol/kg, biochar can range from tens to over 200 cmol/kg, with sources like Acacia wood biochar or even coconut shell biochar often surpassing coco's capacity due to its porous structure, creating significantly more cation-binding sites for nutrients, making it superior for nutrient retention. Needs to be charged similar to coco but at a much higger rate. But shhhh.. It's a secret. Ancient biochar-rich soils in the Amazon basin (known as Terra Preta) provide evidence of carbon stability lasting over 500 to 2,000+ years. Recommend a balanced ratio of key cations, particularly calcium (Ca), magnesium (Mg), and potassium (K). A widely accepted general "ideal soil" cation saturation ratio is approximately 65-85% Ca, 6-12% Mg, and 2-5% K. That's roughly what I give mine. Can even add N in its NH4+ form
Likes
35
Share
@farahweed
Follow
I flushed the pots once this week. And use once with enhancer and a very small dose of shrot flowering fertilizer. And I tried very hard to lower the humidity and make the daytime temperature not more than 25 degrees 💐🛸👽💥1
Likes
4
Share
@Ensign420
Follow
|»» LOG DISCLAIMER: Not intended as a grow guide. Grow log entries are usually posted 3 weeks later and are for my learning reference. ««| Introduction - Week 16 Summary - Ensign's log, stardate 17547.8, Wow what a great week in the garden! By the end of the week, the main tent has pretty much doubled in size! Upgraded the scrog frame and now have a second layer of netting about 14in above the original netting which is already filling in and looking incredible! The tent’s floor slightly flooded, but fixed it. Also trying Stash Blend for the first time! As for the veg tent. To preserve the genetics, started the mother plant cycling process and took more clone cuttings (which were rooting in Coco Coins by the end of the week). To make more room, also bonsaied all mother plants. The stretch is starting to slowing down and next week begins the first week of bloom! Ca-Caw! Let’s go! Onwards Ensign! [START OF WEEK 16] ========================================================== ---------- [ 4x4 MAIN TENT ] ---------- Heady OG BX1 #1 [Round4 ~Wk9] - WEEK 16 - Pre-Bloom [Stretch Wk2] TKO [Round2 ~Wk14] - WEEK 16 - Pre-Bloom [Stretch Wk2] ----------- [ 3x3 VEG TENT ] ------------ Garlic Budder OG#1 - WEEK 09 - Full Veg Garlic Budder OG#2 - WEEK 09 - Full Veg Gorilla Goat #1 - WEEK 09 - Full Veg Gorilla Goat #2 - WEEK 09 - Full Veg 08/04/25 → 08/10/25 This Week's Estimated Goals ---------------------------------------------------------------------------------------------- DLI: ~13 mol/m²/d PPFD: ~300 μmol/m²/s VPD: ~1.0 kPa This Week's Meter Readings & Averages ---------------------------------------------------------------------------------------------- Light On/Off: 19:00 - 07:00 | Wattage: ~326.5W [LV04] Distance From Canopy: ~31”, 27” DLI: ~15.60 mol/m²/d PPFD: ~361 μmol/m²/s VPD: ~0.69 kPa Soil %: [40.7, 47.0, 38.1, 56.6, 41.9, 42.7, 42.9, 43.9] ========================================================== Day 01 - Monday - 08/04/25 - Total Days: 113 ----------------------------------- Daily Averages ~[+01:00] - Temps: 83.6°F [28.7°C] - Humidity: 83.6% - VPD: 0.66 kPa - Soil %: [49, 37, 45, 60, 44, 43, 43, 45] ----------------------------------- - [+00:14]: Night check on the 4x4 tent. --- Holy Cannoli! Wow! These girls are in full stretch! --- Both cultivars have grown beyond the netting and have stretched beyond the (green) Vivosun’s CFM bars! Heady is a bit low on the left, but the canopy is pretty even and perky! --- Ca-Caw! Let’s go cuddies! --- Heady OG (BX1 #1) is starting off shorter than TKO, but am pretty confident that she’ll catch up. --- TKO is looking incredibly healthy! She’s the larger plant, but also in the smaller 20-gallon pot. Well she is 5 weeks older than Heady OG so makes sense. Regardless of the growth difference, absolutely stoked for this grow cycle!! - [+12:19]: Checked the Ecowitt soil moisture sensor data: ------------------ [ 4x4 MAIN TENT ] --------------- ------ 46% - [CH01 FT » G30 - Heady OG BX1 #1] ------ 37% - [CH02 FB » G30 - Heady OG BX1 #1] ------ 48% - [CH03 BT » G20 - TKO] ------ 62% - [CH04 BB » G20 - TKO] ------------------ [ 3x3 VEG TENT ] ---------------- ------ 41% - [CH05 BL » GR7 - Garlic Budder OG#1] ------ 44% - [CH06 BR » GR7 - Garlic Budder OG#2] ------ 40% - [CH07 FL » GR7 - Gorilla Goat #1] ------ 50% - [CH08 FR » GR7 - Gorilla Goat #2] --------- Veg: 38% - 45% | Flower: 45% - 55% --------- General: 30% [Dry] «| 45 - 60% [Moist] |» 70% [Wet] - [+00:14]: Checked the 3x3 veg tent. --- Ooo yea! The veg garden is looking incredible! --- All mamma plants are looking bushed out and beautiful! - [+00:37]: Super-cropped and bend the canopy down a bit. --- Lowered the canopy down a few inches. Really need to defoliate soon. The top growth is bushing out and getting really thick! --- Clones are also looking incredible and both are rotting along beautifully! Heady is going to make it and she is looking great! - [+00:38]: The cuttings are looking good for the most part. One is looking pretty droopy (damnit Ensign). --- Misted the cups with RO water. --- Think the RH may not be consistent enough and the cups might be drying out too quickly. - [+00:41]: Checked the humidifiers. --- Tanks are still full and no leaks found. --- Another day done! --- Okay! Since growth is raging upwards, decided to upgrade the scrog frame and plan to add a second layer tomorrow. --- Ahh yea! This grow is turning out to be an epic one! Day 02 - Tuesday - 08/05/25 - Total Days: 114 ----------------------------------- Daily Averages ~[+01:00] - Temps: 83.3°F [28.5°C] - Humidity: 83.3% - VPD: 0.67 kPa - Soil %: [49, 38, 47, 62, 41, 43, 43, 45] ----------------------------------- - [16:25]: Evening check on the 3x3 veg tent. --- Ooo yea! The clones are looking incredible! --- The cuttings still seem to be struggling. --- Hmm. - [16:27]: Misted the cups with RO water. --- Made a slight modification and wrapped the top of both cups with plastic wrap. --- Cut a slit from the middle to the edge. Misted the cup through the slit with RO water (2-3 sprays each). --- Then gently slipped the cups over each cutting. --- Also slightly misted each Coco Coin with RO water. --- Great! This should hopefully make a better seal and will keep the RH higher. I think. --- Anyways! --- The mother garden is vegging along beautifully! --- Growth is getting really bushy and need to do a heavy defoliation soon. - [16:56]: Checked the Ecowitt soil moisture sensor data: ------------------ [ 4x4 MAIN TENT ] --------------- ------ 48% - [CH01 FT » G30 - Heady OG BX1 #1] ------ 36% - [CH02 FB » G30 - Heady OG BX1 #1] ------ 47% - [CH03 BT » G20 - TKO] ------ 61% - [CH04 BB » G20 - TKO] ------------------ [ 3x3 VEG TENT ] ---------------- ------ 41% - [CH05 BL » GR7 - Garlic Budder OG#1] ------ 43% - [CH06 BR » GR7 - Garlic Budder OG#2] ------ 41% - [CH07 FL » GR7 - Gorilla Goat #1] ------ 49% - [CH08 FR » GR7 - Gorilla Goat #2] --------- Veg: 38% - 45% | Flower: 45% - 55% --------- General: 30% [Dry] «| 45 - 60% [Moist] |» 70% [Wet] - [19:03]: Night check on the 4x4 tent. --- Ooo yea! Wow these girls are stretching! --- Growth has clearly grown since the last checkup and getting taller! --- Ca-Caw! Let’s go ladies! - [19:14]: Wait. Uh-Oh! --- The tent seemed to have flooded slightly.. DAMNIT ENSIGN! ------ [» A FEW HOURS LATER.. «] --- Okay! Think I figured out why the tent flooded and how to fix it. --- The main reason was the new soil sensor which was probably not in proper contact with the soil. --- Fixed this by re-seating the unit. Also adjusted the drip ring a bit. --- Also poured about a cup of water straight onto new sensor. This should make the surrounding soil wetter and will hopefully fix the dry pocket. I think. --- For added redundancy, added additional trigger conditions to both Ecowitt WittFlows (TKO and Heady OG). - [23:45]: Adjusted the watering triggers for the auto-watering system for TKO. --- Changed the ON trigger from: --------- When CH3 soil moisture is under 45% ------------ Updated to: --------------- When CH3 soil moisture is UNDER 45% --------------- AND When CH4 soil moisture is UNDER 50% --- Changed the OFF trigger from: --------- When CH3 soil moisture is OVER 50% ------------ Updated to: --------------- When CH3 soil moisture is OVER 50% --------------- OR When CH3 soil moisture is OVER 50% --- Applied similar watering triggers for Heady OG. --- Changed the ON trigger from: --------- When CH1 soil moisture is under 45% ------------ Updated to: --------------- When CH1 soil moisture is UNDER 45% --------------- AND When CH2 soil moisture is UNDER 50% --- Changed the OFF trigger from: --------- When CH1 soil moisture is OVER 50% ------------ Updated to: --------------- When CH1 soil moisture is OVER 50% --------------- OR When CH2 soil moisture is OVER 50% --- Will check back daily to make sure the flooding has completely stopped. --- Well that pushed everything back a bit. --- Okay! Anyways, - [23:57]: Time to both build and install the second frame and netting. Let’s go! --- Got four 1in PVC corner fittings (local Lowes) along with four 1in PVC pipes (10ft long each). Also got more self-tapping screws. --- For the netting, using mason string. Usually use the braided nylon, but the twisted variant is a lot cheaper. --- To build the frame, I cut the 1in PVC pipes down to two different lengths: ------ [» x2 @ 42.5in «] – Front / Back ------ [» x2 @ 44in «] – Left / Right --- This makes the frame slightly thinner from left to right. --- Saving the extra piping for future projects. - [+04:04]: Okay! The new frame is built and looking sturdy! --- Did not use any glue and simply dry fitted each component. --- For easier fitting, smoothed the ends of each pipe with sand paper. --- Also marked each pipe to indicate the front, back, left, and right sides. --- For the fittings, used corner fittings and have open slot facing downwards. This way I can add the legs. --- After the frame was built, marked and drilled screws about 3in apart (self-tapping). Made sure to mirror the screw spacing on the opposite side. --- Time to weave the netting! - [+04:06]: Using some mason string, --- Started at one corner and strung all the horizontal lines. --- Double-wrapped each screw. --- After the horizontal lines were strung, continued and wrapped the vertical lines. - [+04:44]: Now that the frame is built and the netting fully weaved, time to install the frame! --- First the support poles. Cut and sanded more 1in PVC piping. ------ [» x4 @ 14in «] – Vertical Support - [17:56]: Installed the back support poles before the front ones. --- Temporarily removed the front CFM bar and had to raise the fan up a bit (was not easy, but got it done). --- Once the support poles were installed, gently set the new frame on top. - [+06:07]: Done and wow she’s a beauty! --- Well that took a bit longer than anticipated (also the flooding did not help), but glad the frame fit perfectly and the netting looks great! - [+06:12]: Checked the humidifiers. --- Tanks are still full and no leaks found. --- Ooo yea! What a day! Day 03 - Wednesday - 08/06/25 - Total Days: 115 ----------------------------------- Daily Averages ~[+01:00] - Temps: 83.9°F [28.8°C] - Humidity: 83.1% - VPD: 0.69 kPa - Soil %: [42, 54, 43, 60, 42, 43, 43, 45] ----------------------------------- - [+00:17]: Night check on the 4x4 tent. --- Ca-Caw!! Let’s go cuddies! Growth is looking beautiful and green! --- The second layer of scrog netting was not the easiest to install, but wow the garden is looking incredible! --- Both Heady OG and TKO are still stretching upwards with new nodes branching out everywhere! --- The canopy hasn’t reached the top net yet but hoping a few will make it. --- Regardless, absolutely hyped for this flower cycle! - [+00:23]: Checked the 3x3 veg tent. --- Looking beautiful in the veg garden! --- Wow the mothers have bushed out and have reached the grow light! - [+00:32]: Super-cropped and lowered the canopy --- The canopy is getting really thick! Plan to do a pretty heavy defoliation tomorrow. --- Clones look great and stoked that both Heady OG and TKO seem to be rooting along in the cups. Need to check the weights. Let’s go! - [+00:37]: Here are the starting initial watering ranges: ------ Heady OG BX1 » 261.4g → 301.2g ------ TKO » 240.9g → 301.4g --------- General Solo Range: [Dry] «| [Initial Cup Weight] + ~55-100g |» [Wet] --- All cups were last watered 5 days ago. - [+00:37]: Took the starting weight of both clones before watering, ------ Heady OG BX1 weighed 250.4g ------ TKO weighed 240.9g --- Oops! Probably should have watered earlier, sorry ladies! --- Stoked that Heady OG is clearly going to make it! Also good to know the soil dryback can be at least 10g from the initial pre-saturated weight. --- Anyways! --- While on a scale, --- Gently misted the straw mulch of both cups with RO water. --- Focused on the straw and sprayed as evenly as possible. --- Misted 10-20 sprays. Waited a moment, then misted again. --- Made sure to reference the watering weights. --- Repeated this process for both cups. --- There was no runoff. - [+01:08]: Took the saturated weight of both clones after watering, ------ Heady OG BX1 » 335.5g ------ TKO » 345.1g --- Marked the final wet weight on the back of each cup. Also marked the watering date on the front. --- Placed both phenos back into the tent. --- Cuttings are looking better! --- Glad that the slight modification to the cups helped to keep the moisture in (covered both with plastic wrap). --- Gently removed both cups and re-misted each with RO water (~2 mists). --- Carefully placed the cups back onto the cuttings. - [+01:21]: Checked the Ecowitt soil moisture sensor data: ------------------ [ 4x4 MAIN TENT ] --------------- ------ 34% - [CH01 FT » G30 - Heady OG BX1 #1] ------ 52% - [CH02 FB » G30 - Heady OG BX1 #1] ------ 39% - [CH03 BT » G20 - TKO] ------ 58% - [CH04 BB » G20 - TKO] ------------------ [ 3x3 VEG TENT ] ---------------- ------ 44% - [CH05 BL » GR7 - Garlic Budder OG#1] ------ 47% - [CH06 BR » GR7 - Garlic Budder OG#2] ------ 41% - [CH07 FL » GR7 - Gorilla Goat #1] ------ 46% - [CH08 FR » GR7 - Gorilla Goat #2] --------- Veg: 38% - 45% | Flower: 45% - 55% --------- General: 30% [Dry] «| 45 - 60% [Moist] |» 70% [Wet] - [+01:23]: Checked the humidifiers. --- Tanks are still full and no leaks found. Day 04 - Thursday - 08/07/25 - Total Days: 116 ----------------------------------- Daily Averages ~[+01:00] - Temps: 84.9°F [29.4°C] - Humidity: 82.0% - VPD: 0.75 kPa - Soil %: [32, 51, 37, 57, 42, 43, 43, 45] ----------------------------------- - [09:42]: Quickly checked on the propagation dome (in the 3x3 veg tent). --- Nice! Clones are both looking great! --- Heady OG is clearly recovering and looking better! --- Wow! TKO is looking incredibly healthy! Top growth has perky leaves with a few nodal growth sites starting to stretch. As far as cloning, she has been healthiest with no issues the entire way! --- Both Heady OG cuttings are looking beautiful and should be rooting. Plan to check for roots in a few days. --- Plan to do a pretty heave defoliation today. --- Also going to start the mother plant cloning process. - [17:12]: Evening check on the 3x3 veg tent. --- Mother garden is looking beautiful and the canopy is bushy with growth! --- Both Heady OG and TKO clones also look green and healthy! --- My main focus for today is the veg garden and the preservation of the genetics . --- Lots of work to do and time to also start the mother cycling process! --- This time, going to do a pretty heavy defoliation! --- Going to pretty much bonsai each mother while taking a few clones to preserve the genetics. --- Let’s go Ensign! - [17:58]: Filled a measuring cup with 1.5 cups of RO water. ------ Added 1/8tsp of Horticultural Aloe --- Mixed the solution and poured it straight into a clear solo cup. --- Repeated this process until 4 cups were filled. - [18:05]: Also marked each cup with the corresponding mother plant name. --- Time to defoliate and take the clone cuttings! - [18:07]: Using a pair of trimmers (AC Infinity), --- Bonsaied each mother plant. Removed over 75% of overall growth leaving several branches and nodes. - [19:44]: Done and wow what a difference! --- Pretty much removed all growth leaving a few nodal growth sites to heal. --- This is my first time going this heavy and am hoping that they recover. --- If this bonsai defoliation heals up with healthy growth, this can also be an alternative to a full plant cycling. --- Anyways! - [19:46]: To preserve the genetics, made sure to cut clone cuttings from each mother plant. --- To ensure successful rooting, took several cuttings. --- Made sure to clean each cutting by trimming most of the branches off leaving the top one or two nodes. --- Did not cut any leaf fingers and made sure to cut the tip of the stalk (about 45°) before placing into the cup of aloe solution. - [19:55]: Placed the fresh cuttings into the 3x3 veg tent. --- Have each cup resting on top of the corresponding mother plant. --- Okay! Let the two-day soak begin! - [20:00]: Mulched the trimmings in a paper bag. --- Since the bottom of the paper bags tend to decompose, have the bag in a used BuildASoil soil bag which should not decompose (these are meant for soil). --- Also added a bit of Kashi Blend and worm castings to the bottom of the bag. --- Back to the Heady OG cuttings! --- Gently removed the cups and misted the inside of each with RO water (~2 mists each). - [20:02]: Carefully placed the new cups onto the cuttings. --- Great! Plan to check for roots soon. - [20:08]: Checked the Ecowitt soil moisture sensor data: ------------------ [ 4x4 MAIN TENT ] --------------- ------ 31% - [CH01 FT » G30 - Heady OG BX1 #1] ------ 51% - [CH02 FB » G30 - Heady OG BX1 #1] ------ 35% - [CH03 BT » G20 - TKO] ------ 56% - [CH04 BB » G20 - TKO] ------------------ [ 3x3 VEG TENT ] ---------------- ------ 41% - [CH05 BL » GR7 - Garlic Budder OG#1] ------ 40% - [CH06 BR » GR7 - Garlic Budder OG#2] ------ 42% - [CH07 FL » GR7 - Gorilla Goat #1] ------ 44% - [CH08 FR » GR7 - Gorilla Goat #2] --------- Veg: 38% - 45% | Flower: 45% - 55% --------- General: 30% [Dry] «| 45 - 60% [Moist] |» 70% [Wet] - [20:12]: Checked the 4x4 tent. --- Ca-Caw! Ah yea! The garden is looking incredible and wow growth is raging! --- The tallest growth is just barely under the netting! --- Not much to do in the main tent now but to wait until the stretch slows down. --- Time to relax and let the grass grow! Let’s go! - [21:34]: Have an extra stainless steel rack and thought of a better way to hold the solo cups in the veg tent. --- The cups are balancing on the edge of the pots am concerned that they may tip over. --- Carefully too each cup out of the tent. - [21:36]: Placed the rack upside-down in the middle of the tent. --- Have the rack positioned on top of all 4 pots just above the center floor fan. - [21:39]: Gently placed each cutting cup onto the rack. --- The floor fan can easily still blow through the grid of the rack. Great! --- This should be way more stable while still allowing decent airflow. - [21:40]: Checked the humidifiers. --- Tanks are still full and no leaks found. Day 05 - Friday - 08/08/25 - Total Days: 117 ----------------------------------- Daily Averages ~[+01:00] - Temps: 84.5°F [29.2°C] - Humidity: 82.5% - VPD: 0.72 kPa - Soil %: [32, 50, 30, 53, 40, 42, 41, 42] ----------------------------------- - [23:02]: Night check on the 4x4 tent. --- Ahh yea! The garden is thriving! --- Both Heady OG and TKO are still stretching upwards and the canopy is getting dense! --- Wow! TKO has reached the top netting! Heady OG is just under the top netting. --- Ca-Caw! Let’s go ladies! - [23:11]: Checked the 3x3 veg tent. --- The veg garden is looking great! --- The bonsaied mother plants are still recovering from the heavy defoliation. But growth is looking a lot better than I would expect from such a large biomass reduction. Nice! --- Cuttings are looking great as well! - [23:13]: Time to swap the aloe water out! --- Replaced each solo cup with a clean one filled with fresh RO water (1.5cups). --- Plan to start using the propagation dome soon! --- Going to let these soak for another day before transplanting into Coco Coins for rooting. - [+02:05]: Quickly checked on the auto-watering system. --- System is still charged and no leaks or kinks found in the tubing. - [+02:08]: Checked the humidifiers. --- Tanks are still full and no leaks found. Day 06 - Saturday - 08/09/25 - Total Days: 118 ----------------------------------- Daily Averages ~[+01:00] - Temps: 83.4°F [28.6°C] - Humidity: 83.3% - VPD: 0.67 kPa - Soil %: [32, 50, 35, 52, 41, 40, 41, 41] ----------------------------------- - [07:55]: Quickly checked on the 3x3 veg tent. --- Looking great in the veg garden! --- Mothers are all recovering nicely from the bonsai defoliation. Great! --- Cuttings also look healthy and ready for transplanting! --- Both Heady OG and TKO clones are looking perky and getting bigger! --- Heady OG cuttings also looking green and rooting! I think. Will check for roots in a few days. - [20:58]: Night check on the 4x4 tent. --- Ca-Caw! This is why we grow! Wow! --- Also hyped that the canopy is getting dense with nodal growth! --- TKO has more tops stretching through the top scrog netting! Heady OG has not reached the net yet. --- Stoked the 14in space in between the netting is filling quite nicely and just going to let everything grow! - [21:01]: Checked the Ecowitt soil moisture sensor data: ------------------ [ 4x4 MAIN TENT ] --------------- ------ 29% - [CH01 FT » G30 - Heady OG BX1 #1] ------ 50% - [CH02 FB » G30 - Heady OG BX1 #1] ------ 34% - [CH03 BT » G20 - TKO] ------ 53% - [CH04 BB » G20 - TKO] ------------------ [ 3x3 VEG TENT ] ---------------- ------ 40% - [CH05 BL » GR7 - Garlic Budder OG#1] ------ 40% - [CH06 BR » GR7 - Garlic Budder OG#2] ------ 40% - [CH07 FL » GR7 - Gorilla Goat #1] ------ 40% - [CH08 FR » GR7 - Gorilla Goat #2] --------- Veg: 38% - 45% | Flower: 45% - 55% --------- General: 30% [Dry] «| 45 - 60% [Moist] |» 70% [Wet] - [21:05]: Checked the 3x3 veg tent. --- Growth is still recovering quite nicely! This may be my solution to maintain mother plants longer between cycles. --- Mother clone cuttings are also looking healthy and ready to be rooted! --- Was originally planning on rooting all of the cuttings, but since the mother plants are recovering better than anticipated, just going to plant one of each pheno. --- Let’s go! - [21:23]: Filled a measuring cup with 1.5 cups of RO water. ------ Added a pinch of Quillaja Saponaria Extract [60] ------ Added 1/64tsp of Horticultural Aloe ------ Added 1/32tsp of Mycrobe Complete --- Mixed the solution thoroughly. - [21:26]: Dropped 4 Coco Coins into the measuring cup. --- The coins immediately started to expand. ------ [» ~10 MINUTES LATER «] --- Placed each fully saturated Coco Coin into half-cut solo cups. - [21:41]: Using a squeeze bottle filled with Clonex, --- Gently filled each pre-made hole with Clonex rooting gel. - [21:43]: Time to plant the cuttings! --- Using a pair of clean trimmers, made a final 45° cut. --- Also stripped and scrapped some of the stem’s outer membrane. --- To help with planting, gave each Coco Coin a squeeze to loosen the coco. --- Made sure to insert each stem straight and snug with the tip about a 1/4 inch from the bottom of the Coco Coin. --- Also secured the stem by pinching and pressing in the top of the Coco Coin. --- Once each cutting was planted, - [22:11]: Placed each pheno into the propagation dome’s tray. --- Made sure to keep each clone properly tagged. --- Added 1/4 cup of RO water to the bottom of the tray. --- Placed the side extensions onto the tray. - [22:15]: Misted the top of the propagation dome before covering the cuttings. --- Vents are fully closed. --- Also lowered the intensity from 5 to 1. --- At the current light intensity (LV1), the PPFD is around 110 μmol/m²/s which gives a DLI of 7.13 mol/m²/d under an 18/6 light cycle --- Will check back daily to cycle the air under the dome. - [22:17]: Placed the extra mother cuttings back on the rack. Will try to keep these cuttings alive until the planted ones root. --- Will need to change the water every day or two. --- Also need to water the Heady OG and TKO clones. --- Ca-Caw! Let’s go! - [11:33]: Here are the starting initial watering ranges: ------ Heady OG BX1 » 261.4g → 301.2g ------ TKO » 240.9g → 301.4g --------- General Solo Range: [Dry] «| [Initial Cup Weight] + ~55-100g |» [Wet] --- All cups were last watered 3 days ago. --- Took the starting weight of both clones before watering, ------ Heady OG BX1 weighed 257.0g ------ TKO weighed 259.7g --- While on a scale, --- Gently misted the straw mulch of both cups with RO water. --- Focused on the straw and sprayed as evenly as possible. --- Misted 10-20 sprays. Waited a moment, then misted again. --- Made sure to reference the watering weights. --- Repeated this process for both cups. --- There was no runoff. --- Also defoliated and removed the lowest growth on both clones. - [23:03]: Took the saturated weight of both clones after watering, ------ Heady OG BX1 » 345.3g ------ TKO » 355.4g --- Marked the final wet weight on the back of each cup. Also marked the watering date on the front. --- Placed both phenos back into the tent. Have them now resting on the rack (on drip trays). - [23:14]: Checked the humidifiers. --- Tanks are still full and no leaks found. Day 07 - Sunday - 08/10/25 - Total Days: 119 ----------------------------------- Daily Averages ~[+01:00] - Temps: 83.9°F [28.8°C] - Humidity: 83.6% - VPD: 0.66 kPa - Soil %: [49, 49, 30, 52, 43, 45, 46, 44] ----------------------------------- - [08:02]: Quickly checked on the 3x3 veg tent. --- Ooo yea! Looking great in the veg garden! --- All mothers are still green and recovering. New growth is starting to develop and growth is looking healthy! --- Quickly checked on the propagation dome. --- All clone cuttings are looking green and healthy! - [19:04]: Night check on the 4x4 tent. --- Ca-Caw! Ah yea! Heady OG has reached the top scrog net! --- TKO has several tops above the netting and she is raging with healthy! --- Canopy is also showing more signs of pistil crowning and vertical growth seems to be slowing down. I think. - [19:07]: Checked the Ecowitt soil moisture sensor data: ------------------ [ 4x4 MAIN TENT ] --------------- ------ 48% - [CH01 FT » G30 - Heady OG BX1 #1] ------ 49% - [CH02 FB » G30 - Heady OG BX1 #1] ------ 36% - [CH03 BT » G20 - TKO] ------ 55% - [CH04 BB » G20 - TKO] ------------------ [ 3x3 VEG TENT ] ---------------- ------ 41% - [CH05 BL » GR7 - Garlic Budder OG#1] ------ 43% - [CH06 BR » GR7 - Garlic Budder OG#2] ------ 43% - [CH07 FL » GR7 - Gorilla Goat #1] ------ 43% - [CH08 FR » GR7 - Gorilla Goat #2] --------- Veg: 38% - 45% | Flower: 45% - 55% --------- General: 30% [Dry] «| 45 - 60% [Moist] |» 70% [Wet] - [19:10]: Checked the 3x3 veg tent. --- The veg garden is recovering beautifully! --- Since the stretch seems to be slowing down in the main tent, going to give these ladies a little extra. - [19:17]: Going to feed some Stash Blend for the first time. --- This blend of beneficial microbes and mycorrhizal fungi also includes a bit of silica which should help during the bloom phase. --- Also shout out to Mr. Grow It, Rob (from CLTV), and Pigeons420! Stay lifted! - [19:19]: Filled a pitcher with 16 cups (1gal) of RO water. ------ Added 1/8tsp of Quillaja Saponaria Extract [60] ------ Added 1tsp of Stash Blend --- Mixed the solution before pouring 6 cups straight into a pump sprayer. --- Gave the sprayer a good shake before spraying the entire solution onto Heady OG’s straw mulch. - [19:52]: Repeated this process again for TKO. --- Depending on how growth develops, may start feeding these ladies weekly. --- From personal experience, the veg phase can easily be grown with straight RO water. --- Flower is probably the most important time to feed because there are more roots and the plants are trying to produce more biomass. I think. --- Anyways! - [20:10]: In the veg tent, repeated the watering process for all mothers (1 cup + 1 cup RO each). --- Focused mainly on the straw (2 cups each). - [20:13]: Checked the humidifiers. --- Tanks are still full and no leaks found. --- Wow what a grow week! --- The difference in growth from Monday until now has been incredible! [END OF WEEK 16]