
Likes
Comments
Share


@ScrogFreak
Follow
I finally broke a pound with a single autoflower! Couldn’t have done it without AGLEX cob led’s, Remo Nutrients, and coco coir. They’ve changed my game completely!
This grow started off as a pretty standard grow. I did absolutely no training until the veg period was winding down, and pre-flower was beginning.
As the SCROG net went in, a little later than planned, numb fingers due to cervical spinal issues, and a poorly time muscle spasm, I snapped the main stalk...disaster right? Apparently not! They’re tough plants! Within a day or so she was perked up and sending up new colas from all the growth nodes now exposed to the 2000w AGLEX cob led’s. These lights have transformed my grow process, and increased my yields by over 300% compared to my old led’s, and only draws 408w from the wall. 1.23g/w is quite satisfactory
I didn’t have much tucking to do this grow after the original SCROG. Due to the fact I was a little late getting the SCROG net in place, she didn’t have too much stretch left in her, she certainly fattened up quite nicely though, almost too much so in places. The front left side of the SCROG net got awfully crowded with huge buds packed tightly together. Lesson learned...keep the branches spaced apart slightly further, and maybe allow slightly more vertical growth of the colas to allow slightly better light, and air flow penetration. My issue is I only have 6 foot ceilings in my tents. The ceiling in my grow room is only a little over 6’2”. I managed, through SCROG techniques, without topping or fimming, to keep the top of my canopy 24” from the floor. This allows plenty of space above for the AGLEX cob, and exhaust fan.
After last feeding I flushed with just Ph’ed water for 5 days, then gave the plant 48 hours of darkness, to rid itself of chlorophyll before harvesting on November 4th and hanging in a drying rack. It’s still curing in jars but after trying a few samples, it’s an awesome strain, and hits hard.
It’s not as hard as it sounds to fill a 4x4 tent with a single autoflower, and still pull 18 ounces (504g) out of that tent. With simple SCROG technique, defoliation, quality grow medium you can achieve the same results. Of course you’ll need an AGLEX 2000w cob, but for an 18 ounce return on a $300CAD light, in 3 months, it’s a no brainer folks! You won’t find a better light under $300 Canadian. You’ll also need a quality nutrient line, and it’s hard to go wrong with the Remo Supercharged Kit. The proof of those 2 products quality are in my harvest.
I hope this has helped improve your own grows somehow :) Head over to YouTube and visit my channel, just search for Scrog Freak, or click the link below. Drop a like and subscribe, more videos and logs to come! Recently entered a Gelato OG Grow Off and will be posting updates and instructional videos there. Check it out! Thanks and good growing!
ScrogFreak
https://www.youtube.com/channel/UCDFY6EjqIMqv2peq1d1eM1Q

Likes
Comments
Share

@DonvitoCultivation
Follow
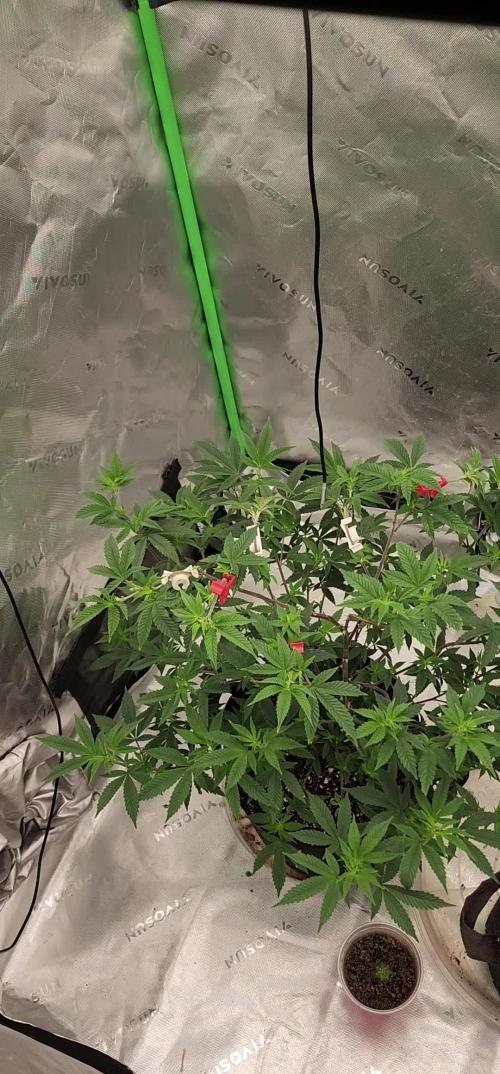
Growing nicely thinking about flipping her soon..what do you guys think
Likes
10
Share


@Ashbash
Follow
Both plants looking slightly different towards the end. #2 is bulkier but less frosty and #1 is the opposite.
#2 could be ready now but #1 definitely needs another week or 2.
Might take a top off to see how it is now. Looking forward to testing!!
Processing
Likes
19
Share


@HisHope
Follow
5/31 Week 6
Finally she is no longer growing vertically. The bulking up is starting as she now has much more space and thus light at all levels of her growth.
She will continue receiving the occasional shot of PK when it looks needed.
Afraid to hope for what it looks like will happen here
6/2
Pics
She is taking over the 4x4
The more room she gets the more she seems to want, she will be alone in there soon enough.
Time of a shot of PK tonight at lights on - 2ml/gal
Nuets prob stay as is for the duration cannot see any way to improve this situation.
6/4
Now Showing : The Beast of CBD Mountain
Will she fill a 4x4 tent?
Villagers are nervous... see it now!
6/5
Light swap HID out Mars TS-2000 in
Reduced cocotek slightly to reduce nitrogen, some tips showing burn.
Water needs reduced a good bit due to new light

Likes
30
Share


@Smokescreen420
Follow
Taken these pics and video today as im gonna start defoliation and lollipopping, such a shame visually as they look really healthy but its yime to start getting ready for those big nugs......hopefully
Likes
18
Share


@CBDAutoGrower
Follow
Colas are starting to come together from the bud sites and put on overall weight, I’m happy with how the plant is doing. Gave it a final feed of 8tbs worm castings and 3tbs 2-8-4 power bloom Gaia Green, will be the final feed and it will just get water from now on.

Likes
11
Share


@GREENPHOENIX6262
Follow
Week 2 Flower 09/04
Bllimburn Apple Fritter - Seedsman Critical +2.0
39 - 40inches - Increased Raw NPK feed ( Phosphorus - Potassium ) 2 teaspoons per gallon on each with Cal Mag, Flower Fuel and Floranova Bloom.
Flowering processing accordingly.
*End of week update 09/09*
Both Apple Fritter and Critical are flowering accordingly.
3-4 Inch height increase
Budsites looking healthy - No signs of deficiencies from nute feeds
Main Colas were aggressively LST's to avoid light burn.


Likes
28
Share

@tantrumrage
Follow
06/04/26 - 12/04/26: I've flipped them to 12/12 4 days ago but will still consider this week as vegetative growth. But stretch should start soon.
Did some minor defoliation and LST prior to flipping them. This time I'll probably be using a SCROG net for the entire length of the tent rather than one for each container. I think I'll get a more even canopy this way :)
Messed up my VPD when changing tents an they've been running at 1.6 for roughly 12hrs. Do-Si-Dos is showing some signs of Mg deficiency which I think was caused by the VPD being to high. She seems happy now but leaves will remain damaged.
Discovered some larvae in the tanks, probably fungus gnats so I've added some BTI to the water. Don't want them to repopulate.
Thanks for dropping by and see you next week 🌱

Likes
2
Share


@Earthsower
Follow
At the end of week 11 the blue dream has done extremely well. She is fully recovered with pale lateral branches and the leaves are soft smooth with 7 fingers with no burnt tips. Her canopy is complete and her stem is stalk like. She has been defoliated the substrate has been loosened and sgrown 5cm this week standing at 73cm tall The blue dream is ready for bloom with no special attention required.
Likes
40
Share


@Corks_Crew
Follow
Really like the outcome of the ladies. Some nutrient deficiencies and maybe cold temperature let her show some purple hints, but really nice result!


Processing
Likes
1
Share


@nausicaahime
Follow
everything changed on week 4
grow tent and cob led came to show how a good light is important.
from now til last 2 weeks, only indoor growing
goodbye CFL's, you worked well.
+ LST and ferts (2ml + 0.25)
Defoliation started
Removed branches from 1st node


Likes
31
Share


@Bud_Spencer
Follow
Hi Grower!!
Day 99 Complete
( 69 Days Flower)
This week i load up that clip! Very frosty and nice Strain!! 🔥🔥🔥
Grown under Viparspectra P4000
CHECK YOUR DISCOUNT WITH THIS LINK
‐----------------------COPY&PASTE--‐-‐----------------
https://viparspectra.eu/?ref=budspencer
Or with my Coupon Code:
Budspencer420


Likes
3
Share


@Zaraki0710
Follow
In the ninth week i keep applying 4ml of Sensi Bloom A and Sensi Bloom B and 2ml of Bud Candy, Overdrive and B-52 from Andvanced Nutrients per 1l of water.
I keep the LST training. I also did a little defoliation in the middle again.
I am watering 2L or 3L of water every 2 days.
I'm struggling to reduce the humidity inside the grow, I turned on a dehumidifier to help control the environment.
Likes
8
Share


@Kirsten
Follow
18.5.25:
I watered with 3ltrs of dechlorinated water PH'd to 6.4.
I added Per 6.5 litres;
♡ 1Tsp Sea K(elp)
♡ 1/2 Tsp Bud Explosion PK booster
♡ 7ml Trace
PH: 6.4
PPM: 780
I added the PK booster this feeding, just to provide some phosphorus without risking an excess. Next time, I won't use it.
23.5.25:
FastBuds Mystery seed #1 is looking super frosty! The buds are still smaller than I'd like to see at this stage.
I'm sure it's going to be fire 🔥 smoke. There just won't be much of it, unfortunately.
She is getting close to being finished, so I have begun checking trichomes.
At least another week to 10 days is my estimation.
She was thirsty, and the pot was dry. I decided to add in a PK booster again.
I watered with 3.5 ltrs of dechlorinated water PH'd to 6.4.
I added Per 6.5 litres;
♡ 1/2 Tsp Sea K(elp)
♡ 1/2 Tsp Bud Explosion PK booster
♡ 7ml Trace
PH: 6.4
PPM: 785
SOLUTION TEMP: 30°C
SOIL PH: 7
SOIL TEMP: 21°C
AMBIENT TEMPERATURE: 23-26°C
RELATIVE HUMIDITY: 55%
24.5.25:
I watered with Ecothrive Biosys 3ltrs each.
The plants are still drinking at least 2 litres per day. They are increasingly thirsty, and it's important that I don't let them dry out.
The soil is mostly coco and perlite, so it can dry out quicker. There are plenty of worm castings, too, so that definitely helps.
The buds are developing and progressing very nicely, keeping up with the flowering nutrients and alternating between Ecothrive Biosys, Trace, and Greenleaf Nutrients.
25.5.25:
I watered with 2.5 ltrs of dechlorinated water PH'd to 6.3
I added Per 6.5 litres;
♡ 1Tsp Sea K(elp)
♡ 1/2 Tsp Bud Explosion
♡ 7ml Trace
PH: 6.3
PPM: 840
SOLUTION TEMP: 30°C
SOIL PH: 7
SOIL TEMP: 21°C
AMBIENT TEMPERATURE: 23-26°C
RELATIVE HUMIDITY: 58%.
☆ Xpert Nutrients PH down, up to 1ml.
☆ Ecothrive Neutralise 1 drop per litre from the 1ml pipette, which is attached.
This is my dechlorinator.
Thanks for stopping by 🍃✌️💚🤞🌱😊
Likes
4
Share

@kdifiori_
Follow
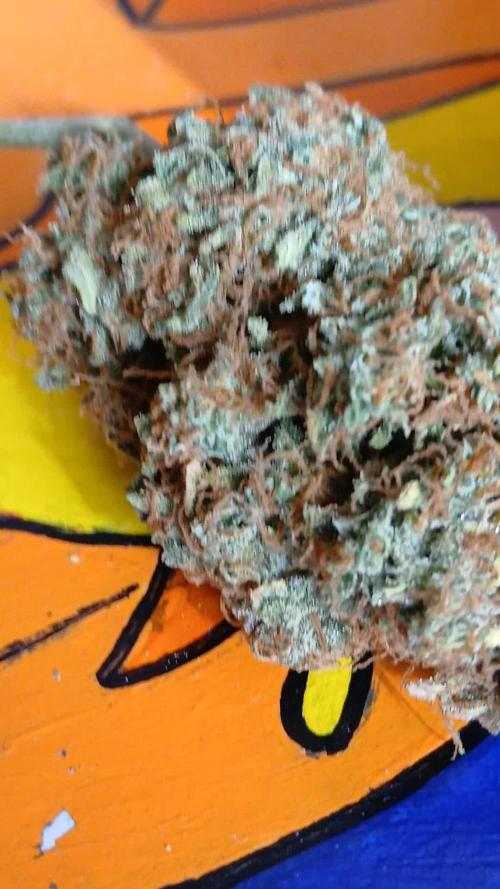
This adventure is over too. This little girl took longer than all the others, she had her problems growing up, but in the end, with a little patience, she gave excellent results! The flowers smell strongly of diesel, which immediately hits the nose, and there are hints of lemon. Not too dense, but I'm happy nonetheless. The adventure is over, and we're already ready for the next one!
Likes
4
Share


@Gram_Solo
Follow
FastBuds - Gelato Auto x 1
Dry Weight - 2 ounce and 20.73 gram
I can definitely see an increase in weight and yield from doing the mainlining technique I would normally get around 1.7 oz of an auto If I hadn't done any training and not lollypopped and defoilated the plant.
Highly recommend this method to avoid clutter , little popcorn nugs and messy plants.
I thought I lost a plant to herm but I could have been wrong as I seen a diary on here that looked very similar to the one I Isolated and it turned out OK.
Smoked that one already and didn't hear any popping or cracking of seeds so she could have gone longer but I didn't wanna risk other plants turning.
Nugs are rock solid!
Gassy lemony smell!
Tried one last night as a tester and it was niiiiiice! Will try and let the cure begin before I raid the jars lol
Buzzing with results!
This was also a sample from FastBuds so good! 🙌🍦🍦🍦🔥🔥🔥
👊
Likes
16
Share


@GrowerGaz
Follow
This week are repotted the plants and will move the four in BAC lava soil up to my Dr120 this week. I have just cleaned it and like to leave it empty for a week , move the food source for any bugs. They have just had water this week and are bouncing back from being topped.
The two in dwc are staying in this tent.


Likes
91
Share


@Greenwolvesfarmer
Follow
Me encantó la cepa y su facilidad de cultivo ! Aun que tuve muchos problemas ambientales y climáticos . Me atrasé unas 3 a 5 semanas con estas nenas , pero nos recuperamos bien ! Usamos malla scrog chilena #kanovicultivo , lo mejor que he usado en malla scrog , no se le comparan , su espacio preciso! .
Las 4 comenzaron en pequeños vasos , luego de 1 a 2 semanas , trasplanté a macetero de 5.8lts , finalizaron 3 en maceteros textil 19lts y 1 en macetero de 20lts AirPot !
Comencé a brindarle 20hrs de luz / 4 hrs oscuridad , a la 3era semana 19hrs de luz y a la 5ta semana bajé hasta el 18 / 6 .
Usé un panel QB de 480w regulables , chips marca Samsung de 3500k , chips epistar UV 660nm iR , el mix completo gracias a mi bro MKleds chile ! Se pasó ! De todas maneras recomiendo una potencia mínima de 600w ( QB LED ) para espacio de 120x ..
Usé un bio estimulante chileno , que a mi parecer fue uno de los mejores que he visto y usado ! El grande #trichomemania , te cuento que este producto activa un mecanismo de defensa en la planta (SAR) , haciendo que reaccione y se trate de defender con mayor producción de resina , terpenos y tricomas ! Es increíble ! A los 24hrs tienes resultados , un saludo grande a los hermanos ! El mejor producto 10000000%....
Grande eva seed , buenisima esta cepa , me dí cuenta que si se deja madurar un poco más , su sabor es más frutal candy , exquisita cepa !....
Estamos probando con un papel de blunt organico 100% libre de tabaco marca *jamaican buzz*...al fumarla su efecto es notorio , enseguida viene el efecto psicoactivo y cerebral , se viene a la vista un tanto distorsionado el entorno ...la vision un poco más brillante , y a la vez relajado ..
Hoy 18 de agosto estamos probando con un papel de celulosa organico marca lion rolling circus ( foto al final del album ) , quema bastante bien , al parecer ya está casi en su totalidad secado , combustión lenta , buen sabor afrutado citrico con toques candy diesel ...uuff efecto despues de 3 quemadas ya por los cielos , totalmente cerebral y estimulante , un gusto charlar con amigos !
Al manipular su fruto , la planta expele un olor afrutado con limon maduro y skunk , con finales de candy terra , una delicia , muy buena cepa , ahora mientras escribo me siento un tanto "mareado" con esa mitad de blunt ! Buenisinaaa!...
____
La verdad cuando comencé a cortar cada planta era como llenar "infinitamente" el armario donde dejaría secandola , se llenó casi la mitad y un poco más sólo con 1 planta cortada ! Increíble producción , yo estimo unos 90g por planta aprox , ya he consumido un buen peso además ...veremos en estos días que esté por completo su secado ! Esta riquísima , sus efectos fuertísimos ...100% ...
___
Una cosecha buenísima, muy parecido como obtengo resultados en comparación con el sodio , todo bien me gustó la experiencia !....
Además tuve la oportunidad de hacer extracción en seco de su materia vegetal . Obtuvimos entre un 18 a 20% de retorno ! Para mi primera vez , geniaaaal ! Su utilizó prensa de 12 toneladas , de apretó a 80°C por 4 minutos .
.
.
Usen lemon king ! Una delicia .
