
Likes
Comments
Share


@SuperGlue
Follow
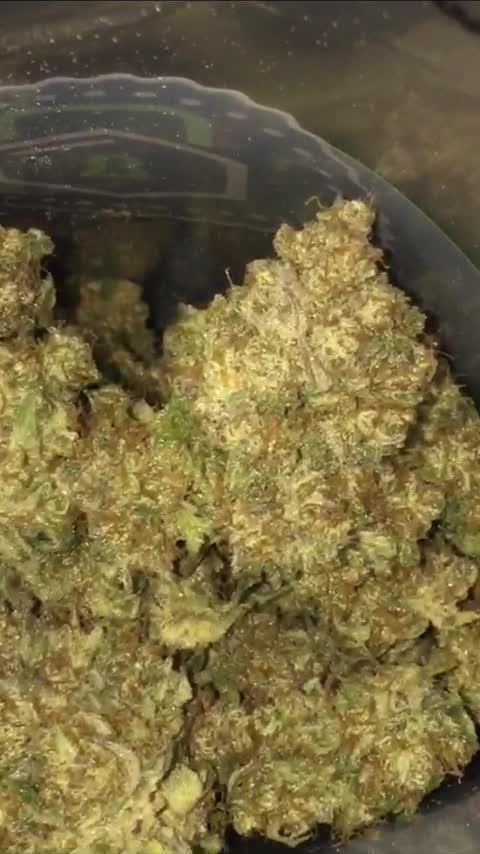
Отличный рост , ну а дальше все сами увидите на фото и видео .
Радует душу , глаз и вскоре будет радовать тело :)

Likes
179
Share


@StarLorr
Follow
Welcome to my Øpium diary.
In this diary:
Seeds: sponsored by Ðivine Șeeds
Media: Promix HP
Nutrients: Advanced Nutrients, Diablo Nutrients.
Light and Weather: Şun☀️and Mother Earth.🌎
___________________________
Feeding:
Wed 29May: 4L nutrients pH'd 6.5
Fri 31May: 2L water not pH'd in bottom saucer only.
Sat 01Jun: 2L water not pH'd in bottom saucer only.
Sun 02Jun: 4L nutrients pH'd 6.5
___________________________
Smooth sailing, she's the tallest to date by an inch😄
___________________________
Thanks for stopping by, likes and comments are appreciated!👊🏻😎
Keep on growin!
Keep on tokin!!!
😙💨💨💨💨💨

Likes
4
Share


@mr_smooke
Follow
I harvest these shiny buds 2 days ago. She ended in 109 days of life of that 59 in flowering. she grew with dark green leaves and tighten buds, I am pretty happy with the result. the smell is full of fruit and incense
will update harvest again when buds gonna be dry

Likes
45
Share


@PotCasso
Follow
Allowing the girls a week more veg under the scrog to fill up the net. Watered I. At 600ml top dressed 1tbs grow 3tbs bloom, 2tbs insect frass, 2tbs worm castings, 1tbs myco.
A Recharge only day and a Silica only day.
Yucca as a surfactant.


Likes
Comments
Share


@Papapeyote
Follow
Entre la semana pasada y esta pasaron muchas cosas..
Tuve un problema con acaros que me termino costando algunas plantas jovenes, a las cuales sustitui por unos clones

Likes
14
Share


@ThatoneAKguy
Follow
She was widely hidden from me behind the neighboring plant and I was surprised when I put the microscope to her and saw that it was ready after a mere 6 weeks of flower. I took a small middle flower to double check and all sides were cloudy with Amber trichomes. I’d really like to try this strain again and complete the tent with it. Because of its great density and trichomes she’ll be a great one to try out in the press.
The rotate and text type box are still NOT working on iOS.

Likes
3
Share


@Jessi576
Follow
👉 Week 9 Bloom👈
👉01.05.2026 - 07.05.2026👈
👉 Days bloom: 57-63👈
The end is near !
This is my most beautiful grow for me, until now. Very beautiful nuggets and very few leaves.


Likes
5
Share


@cookingwithninja
Follow
Plants are currently drying
2+ months later. And next project au79

Likes
4
Share


@BrandonsBudz
Follow
Honestly, the difference from the end of week one to now being in the middle of week two is actually insane. I wasn’t even sure if this plant was going to make it or not because my other one did not.
The 🌱 has definitely blown up and is responding well to basically everything. I did have one issue with watering her and leaving the lights on.. DUH 🙄
Otherwise she’s looking healthy at least to me. Correct me if I’m wrong. Haha. Big learning experience for me!

Likes
120
Share


@Themythicalchristine
Follow
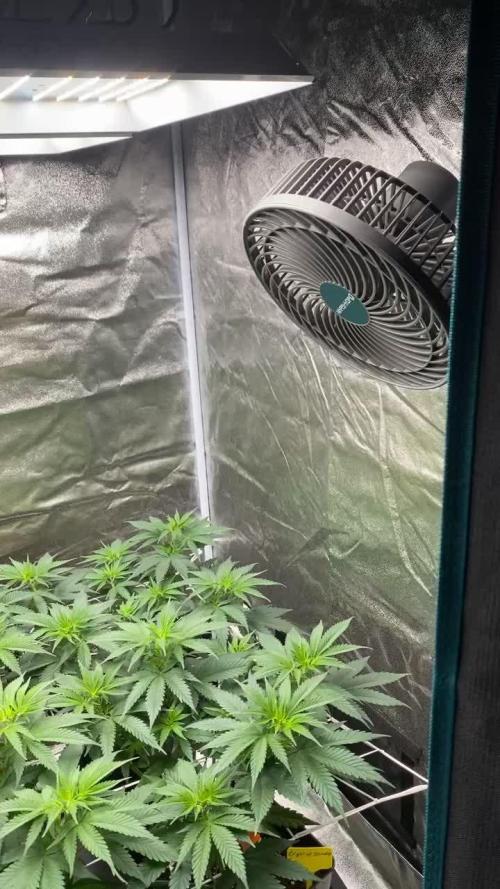
This week I saw a pretty large gain in vegetation.
At the moment I am unable to train the branches outward because I am out of space indoors, we are just under a month out from putting them outside for good; they have grown about 8.5 inches in height.
I top dressed the medium with a 70/30 mix of Gaia greens all purpose 4-4-4 and power bloom 2-8-4 and continue to water with ancient earth every watering.
It doesn’t seem to be in need of any cal mag so I have left it out of the watering schedule this week.
I will continue time the light down every ten days by half hour to match the 16 hour day it will be when I bring them outside.
So far I am very impressed by these ladies

Likes
14
Share


@MG2009
Follow
04/23/2022
I think lemon OG is done
Give her a few days more, Biscotti Skunk, grape skunk about 2 -3 weeks out, the Biscotti Skunk has very strong camphor mothballs smell. Not quite sure what to think of her hope buds fill out well. Grape Skunk is doing a bit better but lemon og has performed best in my specific micro climate, others have more flowering to.
If I'm going 63 days in flower it might as well be a Sativa variety.


Processing
Likes
105
Share


@Green_Friends_Inc
Follow
Commencing week 4: Day 22 on November 14th
Day 22-ph'd back to 5.8x range from 5.5 to 6.1
It
Day 23- added 5ml Clonex to each buck and ph'd. Ppm around 600-650
Day 24- added a little fertilizer salts for N mostly and then ph'd again. Ppm 750-850. Also turned on a few more lights as well as turned timer off to increase temps in lieu of pending storm. Also adding passive humidifier to at least help with the coming dip in humidity from snow outside.
Day 25- pass few days are going well. Aside from a heavy dip in the temp and humidity last night (we have a bit of snow come already). Plants seem to be picking up the pace a little finally. Not much but A little bit which is great because it feels like I've been watching paint dry lol
Day 26- plants are doing great. Seem to be happy 😄 despite or maybe because of the changes over pass two days. And..,.we have roots in water!!!!!! So far gorilla zkittlez2 and gorilla zkittlez3 both have a few roots in the nutrient solution. Now I expect growth rate and work to pick up soon. Hopefully the rest get their feet wet soon 💧
Day 28 last day of week 4 Nov 19
Some plants went from seedlings to "hardened off" this week nearly tripling and doubling in size as well as starting with the secondary growth. Some still a little behind. I've noticed all the Gorilla Zkittlez are simply growing much faster then the rest so far. And that out of the three GZ s one seems to be leaving more hybrid or possibly sativa (see pics) .
Also one or two of the plants seems to have some funny traits like the Boss Hogg1 very purple and covered in baby hairs.
Overall I am amped to see the growth in the coming two weeks and expect big changes 👍👍
Thank you all! who view, like, comment, follow, and support me. I swear it will be much more exciting grow soon!😎

Likes
40
Share


@GYOweed
Follow
Looking kinda poopy. I fimmed it, maybe doesnt like the small pot. Maybe overfed. Will feed ro for now and foliar if needed.


Likes
10
Share


@TeesTrees
Follow
Day 29 - Still change.
Day 30 - same thing still iv nearly finished setting up the room for the grow.
Day 31 - Iv finished the room and now can monitor and manage more about environment.
Day 32 - There is more leaves and plant looks healthier. Lets hope its shoots up!
Day 33 - still growing
Day 34 - everyone keeps telling me to cut it down and start again.
Day 35 - im gonna flush the plant out and give it fresh nutrients.
Likes
1
Share

@Organic_bud21
Follow
Diese Woche kam das Automatische Bewässerungssystem von Mars Hydro mit einem 50L Tank. Ich brauchte alle 8 dripper weil ich im anderen Zelt auch noch die F1er hatte, deshalb hat mich das genaue einstellen 3-4 Stunden Zeit gekostet. Am Ende lief alles gleichmäßig bei 1 min 20 Sek 500ml aus jedem Dripper. Daraus konnte ich mir auf die Sekunde das Benötigte Gießvolumen ausrechnen. Der Tank roch übrigens nicht mal annähernd so schlimm wie ein Pool oder sonstige Hydro Schläuche, was oft in den Kommentaren negativ bewertet wird. Die Pflanzen habe ich weiter ins Netz eingearbeitet und ein letztes Mal mit B-52 und Break Thru Foliar behandelt. Sonst stand nur weiterhin Erholung auf dem Plan, damit die Blüte bald starten kann.

Likes
168
Share


@Still_Smoq
Follow
📆 Week 2, 13-19 May 2024
13-19 May - Observed and watched the seedling grow.
📑 Plant is strong and healthy. I see no problems in early development or the speed of growth.
🍶 13 May initial nutrient solution not changed, 1st change is week 3
🍽️ 13 May initial feeding schedule unchanged
💧 Using reverse osmosis water with EC/TDS at 0
🐉 Nutrient solution EC 1.0 at 72 degrees F
🔆 Light power at 50%, DLI 12-15 canopy coverage at 18hrs
😤 Using PYPABL, Air Pump, 400GPH
That is it for this week. Thanks for the look, read and stopping by.
Processing
Likes
2
Share


@Munchiesfrommars
Follow
Hi there
This review starts from 1st week of flowering
Auto Brooklyn sunrise
Looks very small
At the end it was a real surprise
Hope you will enjoy next weeks
Likes
3
Share


@Weedzoks
Follow
Welcome everyone
Here is the diaries of a friend, this is his first culture.
He chose for this session five Hulkberry from Royal Queen Seeds, a BubbleGum offered by Zamnesia, as well as a Big Bang Auto from GreenHouseSeeds.
All these ladies are under HPS 600W, 150cm square area.
Here we go!


Likes
15
Share


@Messypies
Follow
Auto cinderella jack - Amazing week of growth. There are new nodes exploding from everywhere and its not showing signs of slowing down. They are currently loving the organic nutes and have started showing signs of flowering.
Auto critical cheese - this plant has shot up recently. It was planted a week later that the ACJ but is growing some seriously fat fan leaves. Should be a nice yeilder.
Peanut butter cookies - this girl is looking pretty sorry for herself. I am intentionally trying to keep her as small as possible so that I can get the autos out before flipping into flower but she is gonna be a beast. Will transplant into a final pot in the next day or so.


