Likes
Comments
Share
@Growador
Follow
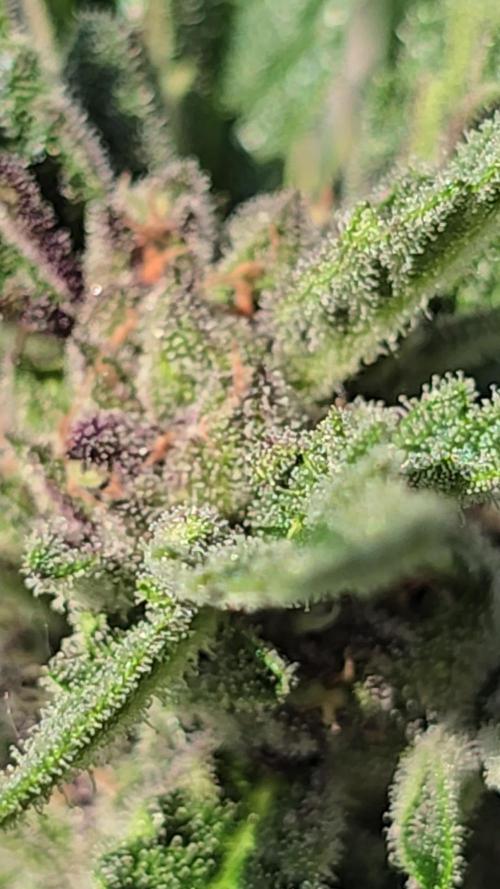
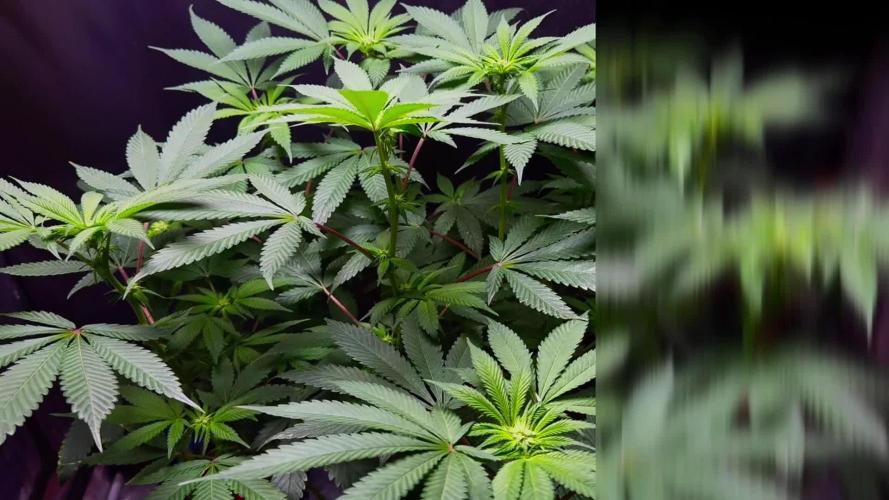
Shoot!!!! They’re beginning to thickening up, i’ve done some lst for 5 days and now they’re pretty good. I’m letting them grow and will begin to tie the other branches when they will be big enough!
Likes
5
Share
@Ensign420
Follow
Greetings fellow growers 🖖 and welcome to my first grow ever. This adventure actually started several months ago when I decided to stop buying flower from dispensaries and just grow my own bud. How hard can it be!? This is actually my second seed of this strain. The first bean sadly died due to over watering (sorry girl, RIP). I was literally watering the cube to the point where water was dripping from the bottom, then heavily sprayed the humidity dome and tray with the vents completely closed. Everyday. Multiple times. I never let the dome or try dry out. So after about 8 days of not sprouting, there was a funky smell of rot. So that was that. Later I learned that rockwool retains a lot of water and can easily drown seeds. So a wet/dry cycle is best for rockwool germination. So even after hours of researching and digging through forums and tutorial videos, I was still under prepared for this journey. Did not consider how delicate the germination phase is. Oh well. Lesson learned. Reset and try again! I hope everyone is safe and stoned during this corona crisis. Just like everyone else in the world, I want this pandemic to be over with. But in the meantime, let's grow some weed! 🖖 [START OF WEEK 01] Day 01 - Monday - 08/03/20 - Total Days: 001 ----------------------------------- - [0830]: Light Schedule: 24Hrs/0 --- Soaked cube in 5.5 PH water for 10 min. Did not shake water out. --- NO NUTES! Only PH'd down to control the PH levels. --- Did not use the default hole (way too deep). --- Flipped cube upside down and made a shallow hole for the seed (less than 0.25" deep). --- Placed seed in and pinched hole close. No additional water added. --- Sprayed the tray and dome with straight water (5.5 PH). --- Vents are cracked opened a for ventilation (about 1/4 opened each). --- Distance between the light and tray was 53" --- AC was set to 80 °F --- Exhaust fan was set to 86 °F --- Room average temp was at 85 °F --- Dome humidity was at 85-99% when sprayed. --- Allowing to completely dry before respraying. - [2200]: Dome and tray were completely dry! Sprayed only tray and dome with more water. Day 02 - Tuesday - 08/04/20 - Total Days: 002 ----------------------------------- - [0845]: Sprayed dome and tray in the morning. Everything was dry. --- Hoping for the best! - [2130]: Everything was dry again, so sprayed dome and tray at night along with a light spray on the cube. Day 03 - Wednesday - 08/05/20 - Total Days: 003 ----------------------------------- - [0830]: Everything was dry again. Resprayed dome and tray. Slightly sprayed cube. - [2125]: Hooo damn!! She popped! Am little stub is visible! Resprayed dome and tray again. --- Still going 24/0 for lights. - [+0033]: Just checked up on her and I swear she grew a bit taller! Getting excited! Day 04 - Thursday - 08/06/20 - Total Days: 004 ----------------------------------- - [0845]: Wow! Went from a little stub to fully sprouted overnight! Everything was pretty dry again so resprayed dome and tray. - [2200]: Tap root is visible! Over 1" long too! Just resprayed dome and tray again. -- Going to prep for hydroton transplant tomorrow! Day 05 - Friday - 08/07/20 - Total Days: 005 ----------------------------------- - [0930]: She keeps growing! -- Added a bit of CalMag to the spray bottle (8 drops to 650ml of distilled water). Resprayed dome and tray. Water was at a 5.4 PH with 141 PPM. - [1045]: Prepped the bubble bucket with 4.5gal of water. Water is high enough to reach about 0.25" above the bottom of the net pot. --- Added 3 drops of Superthrive --- Added 3.5ml of CaliMagic --- Added 2ml Hydroguard --- Then PH'd down to 5.6 --- Solution Strengh: 120 PPM --- Water chiller is set to 20 °C - [1100]: Transplant time! --- Filled the net basket 1/3 with hydroton. When placed in the bucket, air bubbles are not visible, but are slightly below the surface (slight digging will reveal the water/bubbles below). --- Removed plastic on rockwool cube and placed in basket, then filled around and covered with hydroton. Making sure to block any light from passing through the net pot and into the nutrient solution. --- Covered with a half-bottle dome sprayed with the CalMag water from earlier. --- Hoping for the best! - [1300]: Raised Bucket 5" higher. Now light distance is 48" to top of bucket. - [1820]: Lowered tent exhaust temp to 76 °F --- Lowered AC to 75 °F --- Raised bucket even higher so light distance is 30" to top of bucket. - [2300]: Looking good! --- Sprayed dome and surrounding hydroton with more CalMag water. --- Attached timer to light! So new 18 Hrs On/6 Hrs Off light schedule. --- Lights On: [1600] (4pm) --- Lights Off: [+1000] (10am the next day) --- Decided to go with lights on during the evening/night and off during the later mornings/afternoon (the hottest part of the day) to see if temps can be controlled better. --- Please survive girl! Day 06 - Saturday - 08/08/20 - Total Days: 006 ----------------------------------- - [0800]: Everything was dry. Resprayed hydroton and dome. - [2000]: Here first night cycle seemed to go well! Get'n taller! --- Dry again. Removed the dome. --- PH went up to 6.5 so PH'd down to 5.7 --- Ran the top feed drip ring for a bout a minute to wet the hydroton and rockwool with the nutient solution. ---Too scared to leave the top feed on 24hrs (I don't want over water her and cause dampening-off). Will let dry before re-watering. - [2100]: After closer inspection, I think she's looking a bit yellow. --- Decided to add a bit of grow nutes to the bubbler solution. --- Added 2ml of Sensi Grow A --- Added 2ml of Sensi Grow B --- Solution strength after adding more nutes: 176 PPM --- PH went up to 6 --- I hope that the extra chelating properties of the 'PH Perfect' solution is enough of a buffer for proper nutrient uptake. Day 07 - Sunday - 08/09/20 - Total Days: 007 ----------------------------------- - [0800]: Water dropped a bit (mostly due to evaporation) so solution strength was at 190. --- Checked PH again. Was still at 6, so PH'd down to 5.4 --- Ran the top feed for a minute to wet the hydroton a bit. - [0915]: Since she's looking perky but still a bit yellow. So decided to up the nutrient concentration even more before lights out. --- Added 2ml more of Sensi Grow A --- Added 2ml more of Sensi Grow B --- Solution strength after adding more nutes: 199 PPM --- PH went up to 5.8 - [1700]: Checked nutrients. --- PH: 5.9 --- Solution strength: 202 PPM --- Added 4ml of Voodoo Juice --- Added 4ml of B-52 --- PH after adding more nutes: 5.9 --- Solution strength after adding more nutes: 238 PPM - [2130]: Decided to make a new foliar spray to address the continued yellowing. --- Started with 500ml of distilled water. --- Added 3 drops of CaliMagic --- Added 3 drops of Sensi Grow A --- Added 3 drops of Sensi Grow B --- Added 3 drops of B-52 --- Added 1 drop of Superthrive --- Solution strength: 164 PPM --- PH was at 5.9 and did not adjust. --- Gave her one spray. --- Also sprayed the surrounding hydroton. [END OF WEEK 01]
Likes
2
Share
Lst week , tying down any of the larger branches, & defoliating. I added ac infinity self-watering bases connected to 2 reservoirs from autopots.
Likes
79
Share
И это всё FastBuds! 😜В этот цикл у моих автоцветов случился полный рассинхрон. Вы только посмотрите👆 - лимонад вымахал выше метра(что еще раз доказывает, что в ограниченном пространстве нужно применять техники по сдерживанию роста), и уже сформировал красивые одуваны, также цветет 20:1. У cbd crack пока нет даже намека на цветение. Самое позднее время зацветания автоцвета в моей практике - на 53день, посмотрим, будет ли побит рекорд. Хоть и не хочется, но видимо придется перейти на раздельное питание. А пока сделал перестановку, и теперь смог согнуть лимонад, надеюсь его рост прекратился. Т.к. в дальнейшем лазить в бокс будет уж проблематично, таки подсоединил фильтр(еще цикл без замены угля😱). Включил боковой досвет. Ах да, в начале недели лимонад проявил фиолетовый фено, вот так резко, прямо на глазах в течении дня. Спасибо, что заглянули, и будьте здоровы! 🙏 Продолжение следует...😶
Likes
35
Share
I'm going to need to transplant this gal! Already roots poking out the bottom so I'm prepared to get her in a bigger pot soon! Probably this week.-- update, she's loving Life in a larger pot! Smells incredible already 👍
Likes
8
Share
@Kronen
Follow
Auto Flower AK Triple Haze by Super Sativa Seed Club: 35 Days from Seed, 10 Days Flower. All are green, healthy, & growing. Comparison of Living soil+Teas vs Coco/Perlite+Fertilizer is a huge difference. Plants in Coco are twice the biomass. Weekly Environment: 78F, 54% RH, 975ppm CO2, & 650-850 PPFD 18hr Lighting. Unfortunately, I didn't get any pictures or Videos this week was very busy. So uploaded last week's video.
Likes
11
Share
Kind of given up on this one. I had an issue catchung runoff which led to me not watering plants enough Not watering plants to runoff will result in higher substrate Ec(Generative cue and also could burn plants) Also its about 20• outside which does not work for the plantsr dark period. December and january are tough months. I recently learned that i should
Likes
8
Share
Likes
5
Share
Day 15 - Gave the girls 500ml of plain RO at 6.3(ish) PH. Watered in a ring around 'em to encourage the roots to spread out. Day 16 - Didn't do anything today just monitoring grow environment Temp, RH, Leaf Temp, VPD etc. Day 17 - Waterred 'em down again, 500ml plain RO at ~ 5.9 PH. Days 18 &19 - Nothing done, just monitoring the grow environment Temp, RH, Leaf Temp, VPD, etc. Day 20 - Waterred 'em down with around 700ml plain RO at ~ 6.1 PH. Day 21 - Didn't do anything today just monitoring grow environment Temp, RH, Leaf Temp, VPD etc. Notes: I'm starting an Arduino project that automatically waters the plants based on the soil moisture and will calculate weekly water consumption. I already have one setup that does all of that and has a water level indicator that alerts me when the water level is low. Automatic Watering Kit: https://www.adafruit.com/product/4746 Soil Moisture Kit: https://www.adafruit.com/product/4241
Likes
4
Share
@Ninjabuds
Follow
Trasplant day! Nothing special going on. Im excited to see how these turn out. Not to much visul difference between the LCR and the Papa at this point.
Likes
109
Share
@PapaNugs
Follow
These girls are doing well still. Responded well to their training and recovered from their topping. All is well and have watered twice in the last week.
Likes
3
Share
@PalmaGrow
Follow
7 - 13 sep Inicia 3ro semana de floracion se realiza defoliación.
Likes
17
Share
Welcome to week 6 of flower! Things are starting to shape up quite nicely and some of the plants are starting to get colourful! Its hard to capture on the current camera I'm using but my new one that's on its way should be much much better! Overall really excited to see what this week will bring! I will be checking some of the ladies trichomes to see how far along we are either this week or next week to give me an approximate harvest window! Huge shout outs to @MarsHydroLED for all their outstanding work on lighting and grow spaces that make it fun and easy to grow! Huge shout outs go to @Seedsman , @PyramidSeeds and @GreenHouseSeedCo for all their outstanding work developing genetics that give us that fine medicine! HUGE HUGE shout outs to all my followers and to the people who stop into the diary alike! Keep inspiring to grow! -The Projexx Day#36F Pictures N/A. Ladies are starting to fade but they're still putting on mass daily! Day#37F Pictures N/A. The terpenes an nose coming off the plants its INSANE we got lots of nice and unique smells going hard here! Day#38F Removed some of the leaves blocking nodes, cleaned up the bottoms abit more. Day#39F The ladies continue to put on mass and some of the leaves are really starting to turn purple! Day#40F The ladies continue to cruise along. Fuel D.og#2 is starting to come back to a nice green Day#41F Kings Juice#1 is really starting to show her fade now! Ladies continue to put mass on. Day#42F Water increased to 5L each at 550PPM. Stalks are getting massive! Recap: Things went really well this week, the ladies continue to put on mass on their rock solid flowers! With some of the plants starting to show signs of an open window for harvest Im going to break out the microscope next week to see exactly how far along we are! Over all really really pump about the plants , looking like its going to be a great harvest!
Likes
2
Share
@Fleetwood
Follow
I am busy all weekend, so I wanted to make sure I got something out of the grow (just in case). I might use a good portion of this harvest for rosin and for when friends ask :) That is if the second plant lasts until next week. I cant ask my wife to keep an eye on water, roots, or bud.
Processing
Likes
7
Share
Going to extend 1, possibly 2 more weeks of veg; want to manifold and fill out the table more before flipping to flower. Defoliation, tucking, LST
Likes
37
Share
I still have a few leafs I have to remove. But this girl has bounced back. This strain seems to do better on a lower dose of nutrients. I raised up the light a few inch’s. I will be flipping her in a week or two, I would love loke to allow a little more growth. This strain is definitely a beginner statin. This plant has been through so much do to my errors. Still not much smell. I am hoping she will flower nicely after everything. All we can do is watch.
Likes
54
Share
Likes
34
Share
Our Rainbow Sherbet has started to flower, the main lining here worked really well. Unlike the other plants I cut at the second internode to create the mainfold. This is a smart choice because autoflowering plants flower more or less at the 5th / 6th internode, if you have to do topping it is better to start as soon as possible to delay flowering as much as possible. Another reason for topping / mainfold at the second internode is that the plant is lower and you can work the mini brunches much better. In fact here we managed to create a T-minlining. In the sense that the mini brunches form a perfect 90 degree T with the main stem which is not easy at all. To do this you have to use the arches with the wire it is much more complicated and the cut at the second internode helps a lot. So topping at the second internode, mainfold and then continue for another three internodes and topping again. You can decide to cut something along the way I left perhaps too much stuff here. However, for better or worse, everything that can see a fair amount of light enough to flower well is left. The plant is a specimen with a medium internodal distance and I managed to work it reasonably well. We are still using soil, feeding and all the recommended additives from Plagron 100% organic. We have moved on to the flowering start card that maintains the same Power Roots additives - Sugar Royal, Pure Zym and adds the flowering stimulant dear in my house for obvious reasons of Biscotti. Of course the basic fertilizer now is Alga Bloom. The Green Sensation when the flowers are already a little swollen, do not start immediately. The Power Buds must immediately stimulate the initiation and development of the buds. ---- Decide on the right soil and calculate your fertilizer schedule based on the soil on the official website. -- www.plagron.com Try a seed of this variety that drives us crazy.. ---- https://www.zamnesia.io/en/11230-zamnesia-seeds-rainbow-sherbet-automatic.html Zamnesia Description //A cross between Pink Guava, Sunset Sherbet and a hint of ruderalis, Rainbow Sherbet Auto offers a wide range of flavors, effects and more. This 70% indica-dominant strain reaches considerable THC levels (24%) and is suitable for both experienced growers and those taking their first steps in the world of cannabis cultivation. All the best that mother nature has to offer is on ---- www.zamnesia.com
Likes
2
Share
This was the last of them to come up.