The Grow Awards 2026 🏆 


Likes
Comments
Share
@eldruida_lamota
Follow
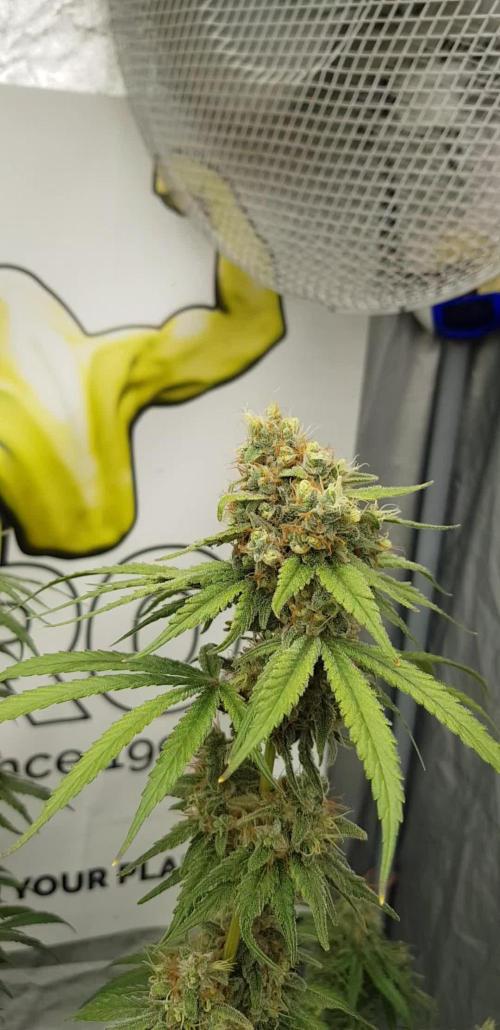
Bueno resumiendo cookies gelato es una variedad híbrida muy fácil de cultivar pero ojo, cuidado con los últimos riegos si no queréis perder cosecha por moho. Lo demás de 10 pegada heavy sabor increíble, cogollos duros como rocas y bañados de una gran capa de polen.
El ambiente del secado se mantuvo en 23 grados de media y la humedad estuvo por debajo de los 45% en todo momento.
Poco más la verdad estuve encantado de poder cultivar una genética tan potente .
Un saludazo que paséis un final de año increíble y por supuesto buenos humazooos💨💨💨.

Likes
18
Share
@eLBowAutoGrows
Follow
Day 50. Still a lot larger than I anticipated. But the good news is she still fits in the 3x3 and is showing signs of slowing down the stretch. Iv heard people burning up their plants using canna PH13/14. So I’m going to mess around with a couple dosages and see how she handles it.
So far this method has done almost exactly what I wanted. Stayed about a foot shorter with a much more even canopy. In about 10 days she will be getting another heavy defoliation.
Update day 54. Heavy defoliation under way to expose bud sites. In about 6 days I’m going for mt first schwazzing. Should be a good time
Update: As week 8 comes to an end I and very happy with the progress. I’ve bumped the ec up to 2.8. Will continue on that for a little bit longer. Day 60 about I will do my first “schwazzing” pretty excited about that.

Likes
10
Share
@Turbo420
Follow
This week I did a single topping at the 5th node. Along with this I applied low stress training and tucking to expose the new growth.


Likes
9
Share
@GERGrowDesigns
Follow
Welcome to Flower week 9 of Zamnesia Kalini Asia
I'm excited to share my grow journey with you from my
Zamnesia Project . It's going to be an incredible ride, full of learning, growing, and connecting with fellow growers from all around the world!
For this Project , I’ve chosen the Feminized Photo Strain Kalini Asia :
Here’s what I’m working with:
• 🌱 Tent: 120x60x80
• 🧑🌾 Breeder Company: Zamnesia
• 💧 Humidity Range: 35
• ⏳ Flowering Time: 7-8weeks
• Strain Info: 22%THC
• 🌡️ Temperature: 26
• 🍵 Pot Size: 16
• Nutrient Brand: Narcos
• ⚡ Lights : 600W x 2
I would truly appreciate every bit of feedback, help, questions, or discussions – and of course, your likes and interactions mean the world to me as I try to stand out in this exciting competition!
Let’s grow together – and don’t forget to stop by again to see the latest updates!
Happy growing!
Stay lifted and stay curious!
Peace & Buds!

Likes
82
Share
@BigBadLion
Follow
Hey guys!
Sorry for the big delay since my previous grow! Right now I'm growing some babies from Royal Queen Seeds! Kali Dog! 😃
The first week was calm! The babies broke out from their shells rather fast and two babies grew out of their jiffy pods rather fast! Also, since the strain is Kali Dog I decided to name each of the plants with a different dog name! I'm still unsure about the names but the first two are called Roko and Max!
For the first time I also noticed the first buds looked... different? You'll be able to see them in the photos tho... and once again two of my babies are suffering from helmet head 😰 But eh, I'm used to it. Gladly it's an easy error to fix.
I'll try to make a longer timelapse (these were bad!) but I didn't know my camera battery wasn't enough for long sessions 😝
Anyway, thanks for reading! See you all next week! 👋
Likes
6
Share
@Ninjabuds
Follow
Permant marker the one seedling I could not be more happy with. It has a distinct different look to it than any other plant in the tent with strong growth going on. I'm sad about the other seedling thou the 1st set of leaves were kinda deformed and it has like a spiral thing going on where new growth comes from. Hopefully it comes back around, I always like seeing atleast 2 phenos of a strain I feel it gives you a better idea of what a strain is.
It's looking like a good start to a week the plants are strong they are getting to the point I can let the dried dry out completely. I'm thinking by the end of this week the plants will be starting to be sold.
Last week I put all the plants into my bigger 2x4 tent with my medicgrow mini sun 2 the 500w version. Only a few of the plants were ready for that light. Seems like the only plants that really have good resistance and have a strong start are the weedseedsexpress.com seeds. Shout out to weedseedsexpress.com for the strong plants.
I ended up putting all the plants back into my 2x2 tent with the 55w amazon light it has alot more blue light in its spectrum. It's kinda weird b4 I switched the plants to the 2x4 tent they were getting 220umol under my amazon 55w led then when I put them under the 500w light 25% strength about 50in from plants and they were getting only about 195umol in that tent but it was stressing most the plants. I assume a larger light has more side lighting hitting the plants. I think when useing larger lights it's good to measure umols from the top but also coming from the sides. I think durring seedling stage they only need about 50% the umols coming from the side the plants as the top is receiving.
When I put the plants back in the small tent about the same umols as they were getting b4 the switch and they were still a little stressed. So for a few days I put the small light at the top the tent giving them 100umols for a few hrs then 130umols the rest the day.

Processing
Likes
20
Share
@LockDownGrow
Follow
This girl is set on hold back on flowering
This girl is going too be a beast
Likes
61
Share
@Papa_T
Follow
Welcome back!! It’s the beginning of week four. I now consider the seedling stage over and now we’re going strong into veg. Vamos!!
FRIDAY - Day 22
11 October 24
- Topped both bottom branches.
- Added a few LST staples to begin shaping her.
- Just an other day under the lights.
- Going to start thinking about up potting her in the near future.
SATURDAY - Day 23
12 October 24
Watering day, 1 litres of dechlorinated tap water.
- Base water 1 litre - 61.1 PPM
Final - 1 litre at 6.45 PH at 62.8 PPM
Runoff - N/A
- Thinking of removing her giant fan leaves soon, they’re becoming cumbersome.
- Did my final planned topping of the two top branches.
- Now just have to give her time and continue shaping her.
SUNDAY - Day 24
13 October 24
- Just a day under the lights.
- She doesn’t seem too bothered by yesterday’s training.
- She’s got a few days now to recover.
- All is moving along according to plan.
MONDAY - Day 25
14 October 24
- Just a day under the lights.
- Also a good recovery day.
TUESDAY - Day 26
15 October 24
Transplant day into a 5 gallon pot and her final home.
60% Gaia Green soil
20% Worm castings
20% Perlite
8 Tbsp Gaia Green All Purpose
4 Tbsp Gaia Green Power Bloom
5 Tbsp Diatomaceous Earth
1/2 Tbsp Dynomyco
Amended it all and transplanted.
Watering day, 5 litres of dechlorinated tap water.
- Base water 5 litres - 61.2 PPM
- Add 2.5 ml Cal-Max - 167 PPM
- Add 5 ml Supermax - 200 PPM
- Add 15 ml Miicrobial Mass - 300 PPM
Final - 5 litres at 6.48 PH at 301 PPM
Runoff - N/A
- Removed the lowest fan leaves.
- Removed LST staples to let her acclimate to her new home.
- Will resume LST in a few days.
WEDNESDAY - Day 27
16 October 24
- Just a day under the lights recovering from a big day yesterday, extended light hours and a transplant.
- She’s looking perked up and pretty happy so everything is looking good.
- Probably resume LST staples tomorrow.
- I’m done with my planned toppings so from here on out it should just be LST until we flip to flower.
THURSDAY - Day 28
17 October 24
- Ahhhhhh I tweaked a branch manipulating it with my gorilla hands.
- It not completely broke off so hopefully she can repair it and recover.
- Going to give her a bit more time to recover before restarting LST.
- Just a day under the lights today.
Well this is the end of week four. It was a busy week with the transplant, all planned toppings are completed and now it should just be some LST from here on out. Join me tomorrow for the beginning of week five. Vamos bendejos!!
Likes
10
Share
@LAShugars
Follow
My tent is so packed! I had no idea it was going to be such a beast. The smell is becoming super strong.
Processing
Likes
13
Share
@Xelxz
Follow
ºDay 44 (21Dez) - Did some "plant work", moved upper bigger leaves under the colas that were developing below so they get more light.
ºDay 45 (22Dez) - LSTing the rest of the colas, 13th watering (1st vegNute);
ºDay 47 (24Dez) - LST on other colas, 1st and 2nd videos;
ºDay 48 (25Dez) - 14th watering (2nd vegNute), broke one of the colas on accident...
ºDay 49 (26Dez) - End of week 7;

Likes
13
Share
@J_diaz420
Follow
Genética muy estable, floración rápida, hermoso color y bastante generosa 💚❤️

Likes
30
Share
@SolitudeCorners
Follow
Last week of flowering (72days from the light switch) Gonna cut soon when the dirt is dry. A quite late harvest. Many buds denser more, and stem can’t longer resist.
This season so satisfy. Thank for all mentor and comment. You all are my inspiration for grows.
Feeding
23/1 Water 13.5L+Flawless 20ml ppm80 ph6.2
MDR 3L 2Lx5
Runoff
MDR 1400 /1155
Zkittle 1600/1300/1150
Pineapp 900/600
Purp 1300 /1200
Sapp 2000/1100
Dozdos 1100/1000
25/1 10.42 6L ppm9 ph6 1L per pot
3L+Flawless6ml ppm116 ph5.9 1.5/1.5 Purp, Zkittle
4.5L+ Flawless7ml ppm119 ph6 1.5/3 Sapp,MDR
Runoff
Purp 1300
Zkittle 1500/1200
Dozdos 1400
Sapp1300
Pineapp850
MDR950
27/1 runoff
Pineapp 500
Purp 900
MDR 600
Zkittle 400
Sapp 300
Dozdos 400

Likes
80
Share
@Qlimax
Follow
Day 30-had some electricity problems for 12hours so put them front of the window so they had some little daylight without sun :( guess this will not be so big problem since is autoflower. I hope...
Day 31- i freaking love how they explode... they grow like 3+cm every day :) and biggest plant is lke 6cm every day lol... i belive they are now full in flowering stage cus alot pistals comming out ! Oney like 40 more days till harvest jeeeej :p
Day 32- saw some brown spots on leafs i foud out is calcium deficiency,so i made calcium from egg shells..i boiled for 20min then baked for 10min and mixed in fine powder (1g/350mg) calcium and add 0.1g/l into wather ...also did some extra LST...
Day 33- Some flowers hight info ... biggest plant is now 62cm then 52cm,39cm,37cm,35cm......they are in diffrent size of pot so i expected something like that.... well 50cm plant is in smallest pot,alot higher but 2main colas and alot less side stems then others plants(also made pic week 5)
Day 34- I was looking and thinking and i noticated if plants keep growing like this i will have to make tent bigger so i going to make width and length of tent bigger for 20cm, from 100=120...biggest plant is alredy 65cm so i start bend her down slowly so doesn go to close to light....also i raised small plants so they are all olmost the same height.
Owerall all is good did tons of LST little bit deformatiation and had little bit of calcium/deficienty also alredy made tent bigger so looks all good now :)
!!!till next week!! Goodbye :)

Processing
Likes
15
Share
@eldruida_lamota
Follow
Que hay familia, yo deseando finalizar estas cookies que han fascinado me tienen, tienen un buen porte y unos buenos satélites, un ejemplar creció demasiado pero not bad.
Ph controlado y humedad / temperatura relativamente dentro de los parámetros correctos.
Nuestras crazy cookies de zambezaseeds visualmente están espléndidas, tienen un verde sano que me gusta, y principalmente no es difícil de cultivar tampoco, hay que tener algo de cuidado con la altura y pasarlas pronto a floración.
Por lo general tienen un buen comportamiento en indoor , así que veremos estas semanas el crecimiento y la formación de las flores.


Likes
3
Share
@HappyHarvests
Follow
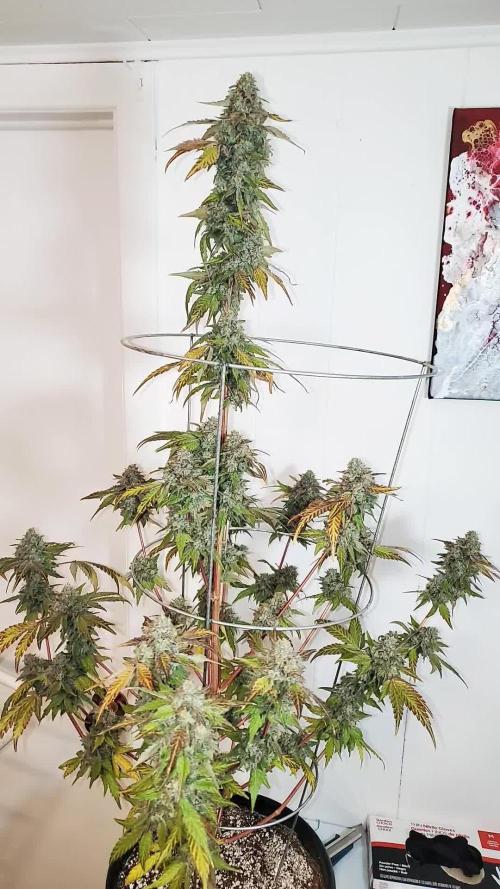
The buds are big, dense, and impressive, showing off just how strong this plant really is.
Likes
8
Share
@Shalma_kush_420
Follow
Muy buenas mi gentee
Por aquí otra semana más con estas increíbles plantas #sherbetz de @artgenetix que vienen con una forma muy top.
Color y aroma muy marcado.
Ya hemos empezado con los azúcares e hidratos de carbono para ayudar la floración.
Riegos con fertis solo una vez por semana, el resto de riegos con solo agua regulada.
Veremos cómo siguen la semana que viene.


Likes
35
Share
@eldruida_lamota
Follow
Venga familia que ya viene la cosecha de estas Cereal Milk de RoyalQueenSeeds, que ganas que tenia ya de darles machetazo.
No veas que pinta que tienen estas plantas.
Las flores aparte de prietas se ven bien resinosas, con 70 dias de floración.
a sido una genética con la que disfruté mucho cultivarla, es resistente , y no es para nada complicado cultivarla por lo menos en interior.
Agrobeta:
https://www.agrobeta.com/agrobetatiendaonline/36-abonos-canamo
Mars hydro:
Code discount: EL420
https://www.mars-hydro.com/
Hasta aquí es todo , espero que lo disfrutéis, buenos humos 💨💨.

