
Likes
Comments
Share


@French__flair
Follow
First Week of flowering
Week without too much hassle. A small excess of fertilizer but nothing serious. Uniform color. High water consumption (10L every 2 days), you can feel that they are in good shape.
Semaine sans trop d'encombre. Un petit excès de fertilisant mais rien de grave. Couleur uniforme. Grosse consommation en eau (10L tous les 2 jours), on sent qu'elles sont en forme.
Una semana sin demasiados problemas. Un poco de exceso de fertilizante pero nada serio. Color uniforme. El alto consumo de agua (10L cada 2 días), se puede sentir que están en buena forma.

Likes
75
Share


@WhiteEdge
Follow
Flowering W5 D1
No Co2 in tank, last night Co2 levels drop to 250ppm
Outside temperatures freeze my window from extraction fan. Big problem. No Co2 , no ventilation😒
Light intensity HLG Diablo - 800-1000 PPFD , Light distance - 50/55cm, DLI - 42, Light Interval 12/12,
SCL @ 45% - DeepRed @ 100%, FarRed @ 30%, UCL-50%
Midea 25c5% day/night, TM 65/55%RH, AC Infinity AUTO - 4/3
Day RH - 65/70%, Night RH - 55/59%,
Day Temperature - 26/28c, Night Temperature - 21c/23c
Leaf temperature 25/26,
VPD Day - 1.1/1.2 , VPD Night 1.0/1.2
CO2 - less than 400ppm
Nutrient Tank - 2.20EC, PH-6.00, Temperature - 17/18c, ORP-600/800mV
Day Misting - 20sON/10minOFF + 1 x (8min) shot
Night Misting - 40sON/45min OFF
Runoff - 10.00h-r2400ec/6.02ph, 19.30h-2300ec
Flowering W5 D2
Light intensity HLG Diablo - 800-1000 PPFD , Light distance - 45/50cm, DLI - 42, Light Interval 12/12,
SCL @ 40% - DeepRed @ 100%, FarRed @ 30%, UCL-40%
Midea 25c5% day/night, TM 64/55%RH, AC Infinity AUTO - 4/3
Day RH - 65/70%, Night RH - 55/59%,
Day Temperature - 26/28c, Night Temperature - 20c/22c
Leaf temperature 25/26,
VPD Day - 1.1/1.2 , VPD Night 1.0/1.2
CO2 - 300-400ppm
Nutrient Tank - 2.20EC, PH-6.00, Temperature - 17/18c, ORP-600/800mV
Day Misting - 20sON/10minOFF + 1 x (8min) shot
Night Misting - 40sON/45min OFF
Runoff - 10.00h-r2410ec/6.12ph, 19.30h-2300ec
Flowering W5 D3
Light intensity HLG Diablo - 800-1000 PPFD , Light distance - 45/50cm, DLI - 42, Light Interval 12/12,
SCL @ 40% - DeepRed @ 100%, FarRed @ 30%, UCL-40%
Midea 25c5% day/night, TM 63/55%RH, AC Infinity AUTO - 4/3
Day RH - 65/70%, Night RH - 55/59%,
Day Temperature - 26/28c, Night Temperature - 21c/22c
Leaf temperature 25/26,
VPD Day - 1.1/1.2 , VPD Night 1.0/1.2
CO2 - 400+PPM
Nutrient Tank - 2.20EC, PH-6.00, Temperature - 17/18c, ORP-600/800mV
Day Misting - 25sON/15minOFF + 2 x (8min) shot
Night Misting - 40sON/45min OFF
Runoff - 10.00h-r2410ec/6.12ph,
Flowering W5 D5
PH calibration, 7.44,- 0.44 off, tank was at 5.56ph
Light intensity HLG Diablo - 800-1000 PPFD , Light distance - 45/50cm, DLI - 42, Light Interval 12/12,
SCL @ 40% - DeepRed @ 100%, FarRed @ 30%, UCL-40%
Midea 25c5% day/night, TM 63/55%RH, AC Infinity AUTO - 4/3
Day RH - 65/70%, Night RH - 55/59%,
Day Temperature - 26/28c, Night Temperature - 21c/22c
Leaf temperature 25/26,
VPD Day - 1.1/1.2 , VPD Night 1.0/1.2
CO2 - 400+PPM
Nutrient Tank - 2.20EC, PH-6.00, Temperature - 17/18c, ORP-600/800mV
Day Misting - 20sON/10minOFF + 1 x (8min) shot
Night Misting - 40sON/45min OFF
Runoff - 10.00h-r2430ec,
Flowering W5 D6
Again no irrigation for last 3 hour in day time and firs 3 hour in night times
Dilute tank to 1800ec, PH at 6.05 running for rest off the day with this solution
Light intensity HLG Diablo - 800-1000 PPFD , Light distance - 45/50cm, DLI - 42, Light Interval 12/12,
Smanjo diabla, bilo je i do 1380ppfd! Sada je na kanopji oko 950ppfd u vecem delu
SCL @ 40% - DeepRed @ 100%, FarRed @ 30%, UCL-40%
Midea 25c5% day/night, TM 60/53%RH, AC Infinity AUTO - 4/3
Day RH - 65/70%, Night RH - 55/59%,
Day Temperature - 26/28c, Night Temperature - 21c/22c
Leaf temperature 25/26,
VPD Day - 1.1/1.2 , VPD Night 1.0/1.2
CO2 - 400+PPM
Nutrient Tank - 2.20EC, PH-6.00, Temperature - 17/18c, ORP-600/800mV
Day Misting - 20sON/10minOFF + 2 x (6min) shot
Night Misting - 40sON/45min OFF


Likes
2
Share


@Ninjabuds
Follow
Those three Bubble OG plants are something else. They're stretching up so much, it's like they're on steroids or something. Seriously, in the past week they've shot up a ton. I can't believe how much they've grown.
Well, it's Christmas again. This year feels a little different, though. Maybe it's the snow blanketing everything, or the way the tree lights up the whole living room. Either way, it's cozy and warm, even when it's freezing outside. I'm really looking forward to seeing what Santa brings. I hope I get that new video game I've been wanting. But most of all, I can't wait to spend time with my family. We always have so much fun
This past week was a good one for the plants. They started the first week of their stretch, and they've already grown a decent amount. I can really see them filling out. It's cool to watch them grow so fast. I can't wait to see how big they get by the end
I always get a little worried at this stage, like they're not gonna get as big as I want them to. But then I remember how they always end up surprising me. By the end, they're always perfect.
Likes
10
Share


@TiRobotProds
Follow
Bonjours à tous, nous entamons les deux dernières semaines de rinçage pour ces dames. La gorilla sherbet 1 a été récolter.

Likes
10
Share


@MrJones
Follow
White Chrystal Meth Auto
🔸🔸🔸🔸🔸🔸🔸🔸🔸🔸
~~~~04.20.23~~~~
“DAY 72 Above Ground”
📝Sunday 07.02.23 - This lady has lagged behind the others who started at the same time, they are in their projected harvest window, but feel they need another few weeks.
📝Wednesday 06.28.23 - The buds continue to pack on weight and ripen, the smell in the tent is amazing, fed with a Mayan tea from Humbolt Nutrients, loved the way it looked, they have great products.
~~~~~~~~~~~~~~~~~~
🔸🔸🔸🔸🔸🔸🔸🔸🔸🔸
🌱White Chrystal Meth Auto
👨🌾🏽Grown By: MrJones
🔆@medicgrow420
@originalsensibleseeds

Likes
13
Share


@Lazuli
Follow
March 4: start flowering
The plant looks wet because i have to put her under the sink for 12h darkness lol the humidity rises in the closet but thats ok for the first 2 weeks of flower as this will boost the root growth. The flower room is at 55% humidity and 22celcius. Im waiting for spring temperatures so i can turn off that dehumidifier.
Final 2 pictures are day 5
Thanks for stoppin by


Likes
82
Share


@UnorthadoxDude
Follow
Hello growmies!
Welcome to week seven of An Epsilon Adventure! Massive thanks to both Shogun and Royal Queen Seeds for sponsoring this grow!
I have just completed the final defoliation for the three least advanced (and largest) girls. I have also rearranged the tent again to try to maximize the space available and light usage.
I have not fertigated for 5 days after the last fertigation was a flush without coco base. I am struggling with humidity at the moment so I have been trying to let the plants go more dry than usual.
Daily Updates
###
Week 7 Day 2 02:30 7/8
Heavily defoliated plants 1, 5 & 6 and removed some of the lower branches. Rearranged tent then photographed & measured:
Plant 1 is now almost unbelievably 2nd tallest at "only" 141cm in height! Her stretch has just about ended.
Plant 2 has stopped stretching at 111cm and is 2nd most advanced into flower.
Plant 3 has stopped stretching at 95cm and is most advanced into flower.
Plant 4 has stopped stretching at 100cm and is 3rd most advanced into flower.
Plant 5 has gained 6cm this week and may add few more but she is pretty close to done stretching at 119cm.
Plant 6 has gained 22cm this week and isn't quite finished. She is now the tallest plant in the series at 142cm.
###
Week 7 Day 2 07:00 7/8
Fertigated 1.6l each
###
Week 7 Day 4 02:00 9/8
Fertigated 1.6l each reduced coco a/b to 2m/l each.
Spent a bit more time photographing and videoing to try and capture the changes and the developmental differences. These 140cm+ plants are going to STACK. I am bracing myself for a lot of trimming and a monster harvest. 🙏
The current order of maturity and likely order of harvest is 3 2 4 1 5 6. I think the first and last plants will be at least a week apart in harvest, perhaps 2 or 3.
###
Week 7 Day 6 23:00 11/8
Fertigated 1.6l each
The smell in the tent is there now, really not that strong but there are 6 plants motoring through flower here now so it's not insignificant either.
Plant 3 is absolutely stacking now, she's more or less run out of space around her cola and is now growing some foxtail like structures, exciting!
Plant 6 the least mature is 2-3 weeks behind plant 3, but her stretch has finally stopped at 144cm.
Took wide angle in tent photos today.
All of the girls are drinking a lot now, but especially plant 1 who is really thirsty.
---
Thanks for reading growmies! 👊
==========
Tent: 120cm x 120cm x 180cm
Light: 600w HID Elite Dual Spectrum HPS + Angel Wing Reflector
Air: 5" duct fan system with carbon filter ~300 m3/hour + RAM 9" floor fan + 4" intake fan
Pots: Air Pruner Fabric Pots 30l - UGro XL Coco + horticultural grade perlite (~20%)
Seeds supplied by Royal Queen Seeds https://www.royalqueenseeds.com
Nutrients supplied by Shogun Fertilisers https://www.shogunfertilisers.com/en
==========

Likes
5
Share


@Cukito
Follow
Some yellow leafs because of the potassium deficency, but definetly psicodelicia is making really great dense buds with citrus / cheesy aromas!

Likes
35
Share


@Compassionate_Gardener
Follow
All 18 CANNALOPE HAZE plants from DNA-GENETICS are developping FANTASTICALLY! They love the BIOTABS-nutrients and start to show first signs of fading, now that we are coming closer to the end of flowering. The main COLAS are HUGE and glisten with trichomes, the plants are SUPER STICKY now, I love it. The smell is a earthy and mildly sweet aroma, which is getting stronger by the day, its MOUTHWATERING! As you can see in the overview-video above, the plants on the right side under the LUMATEK ZEUS 600W PRO are less uniform than the plants on the left under the SANlight Q6W-Gen.2 LED-lamps. Some are taller and some are shorter there, which is bad under a spider-system, since I cannot adjust the height for the smaller plants. The smaller plants will get too little light and produce less buds. The trichome production seems on par between the two sides, but the buds on the SANlight-side seem to be compacter than on the Lumatek side. I am VERY CURIOUS how the end result on the scales will be...


Likes
7
Share


@BIYEI
Follow
Al empezar a cortar se noto un aroma muy penetrante, se ve que el sabor estara estupendo, aun no la eh probado pero supongo estara de 10.


Likes
104
Share


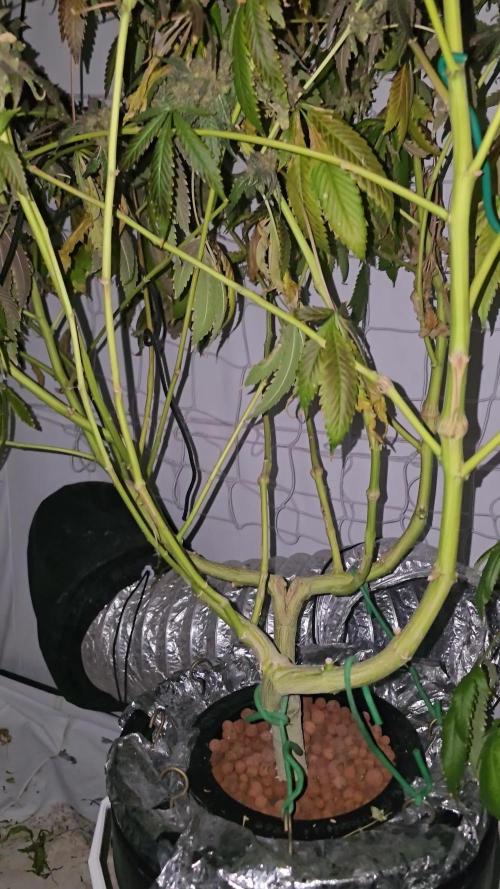
@Lordshiva83
Follow
Olá amigos! A minha árvore está com 1 mês de floração, o que acham??deixem o vosso comentário 🙏 esta semana fiz pulverização com óleo de neem, para combater possíveis pragas, tenho feito a rega com os nutrientes que a planta necessita, ainda continua um calor abrasador, espero que ela consiga suportar tanto calor até ao fim, sem a danificar 🙏 até agora está com um bom desenvolvimento! ✌️ Até para a semana que vem, obrigado!

Likes
2
Share

@Ninjabuds
Follow
I have got a whole crew of four Bubble OG plants, and they're all doing really well. These plants are like quadruplets – they all look super similar, with the same strong smell that's kinda like a putrid skunk. They're all uniform in height and have the same spacing between their branches. It's like they're all following the same blueprint.
Happy late turkey day grow diaries world!!!! It's now day 24 from seed for all the seedlings I have going. The past few days the plants have really started to take off. There roots have really started to dig in. Every other water I am still giving 2ml per gal of fox farm grow big. I keep having to tell myself not to add any more nutes other than that. I don't want to fry my plants but I also want they to start jumping. I'm quite excited for the coming week, I think the next 7 days or so is when the plant really starts to transform and look more like a pot plant than just some random little green thing.
A few days ago I decided to move the plants from under my 55w cheep amazon light to under my spider farmer 100w newer version light with the good leds in it. The plants will hopefully be ready to up pot them here soon and get them in the large tent.
Sometimes when growing multiple different strains it can be really hard to balance giving to much or to little light. You don't want the faster growing plants to get to stretched out waiting on the slower plants to catch up
I spend Thanksgiving day morning transplanting the plants into 2gal pots. I am useing spme promix potting soil it's my 1st time tring this soil. It is actually doing really well the roots were all white and nice looking. I think next time I'm going to add some worm casting, kelp, granular mycos, and a little bit extra perlite. I just didn't have the money with christmas coming to splurge for all the extra stuff. I got rid of 2 plants 1 of the bubble og and 1 skunk apple runtz. There is only room for 10 pots in the 2x4 tent. I will peob only bring 8 of them to flower, always good to have back ups. Yesterday I also stuck the plants back under the 500w medicgrow mini sun 2 in my 2x4 tent. They did great under it the 2nd half the day I was happy they didn't get stressed. I had put them under that light a little early about 10 days ago or so. I am expecting in a week these plants will ge going crazy with growth
Likes
19
Share


@MadeInGermany
Follow
Welcome to Garden Of Green Cup 🏆
Flowering day 44
since time change
to 12 / 12 h
Hey guys :-)
The buds are becoming incredibly beautiful and smelling better and better ☺️.
Today there was again the full load of food and will be slowly driven down as soon as it comes to an end :-)
Was watered 3 times a week with 1.2 l each (nutrients see table above)
Otherwise everything was cleaned.
Have fun and stay healthy 💚💚💚
👇🏼👇🏼👇🏼👇🏼👇🏼👇🏼👇🏼👇🏼👇🏼👇🏼👇🏼👇🏼
You can buy this Nutrients at :
https://greenbuzzliquids.com/en/shop/
With the discount code: Made_in_Germany you get a discount of 15% on all products from an order value of 100 euros.
👇🏼👇🏼👇🏼👇🏼👇🏼👇🏼👇🏼👇🏼👇🏼👇🏼👇🏼👇🏼
You can buy this strain at :
https://gardenofgreenseedbank.com/candyland/
Water 💧 💧💧
Osmosis water mixed with normal water (24 hours stale that the chlorine evaporates) to 0.2 EC. Add Cal / Mag to 0.4 Ec Ph with Organic Ph - to 5.8 - 6.5
MadeInGermany

Likes
3
Share

@MadProfessor
Follow
Im Happy that I coule harvest the plant without any Budrott! I am glad that this 8 years old seed germinated that Well and a plant vigorous Like her was thriving since the begining of her life cycle ❤️ a big thank you goes out to Humboldt!

Likes
7
Share


@Strainchaser
Follow
Had a few family issues to contend with so sorry for not updating.. Tbh lost the week am on but she's growing very very well for my first attempt
Likes
43
Share


@PEAKYPLANTERS
Follow
Welcome back, brother farmers! Let's continue to develop a good root system and then repot in a few weeks
Plants with excellent vigor that grow without problems