The Grow Awards 2026 🏆 


Likes
Comments
Share
@GrowBro503
Follow
**I start talking around 1:20 into the video**
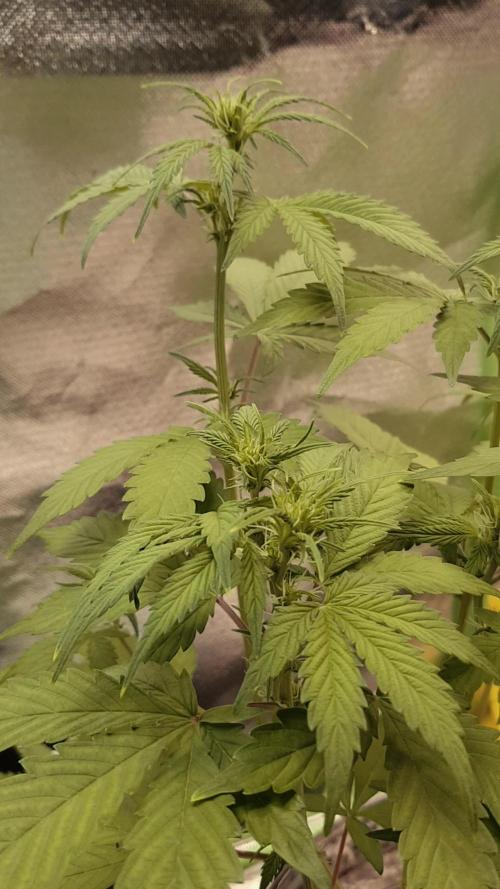
I had to move the lights further away. I stressed the clone out a little, but we're back to good growth. I think it was good that the original setup didn't work because it made me upgrade the set up.
Plant is 19"H x 10"W
This grow is legit just an experiment with these lights.
https://www.amazon.com/GREENSINDOOR-Lights-Spectrum-Growing-Hydroponic/dp/B08JHQQYFN/ref=sr_1_54?crid=11CFSPTAQ548R&dchild=1&keywords=led+panel+grow+light&qid=1608408067&sprefix=led+panel+gr%2Caps%2C255&sr=8-54

Likes
18
Share
@Greenfox89
Follow
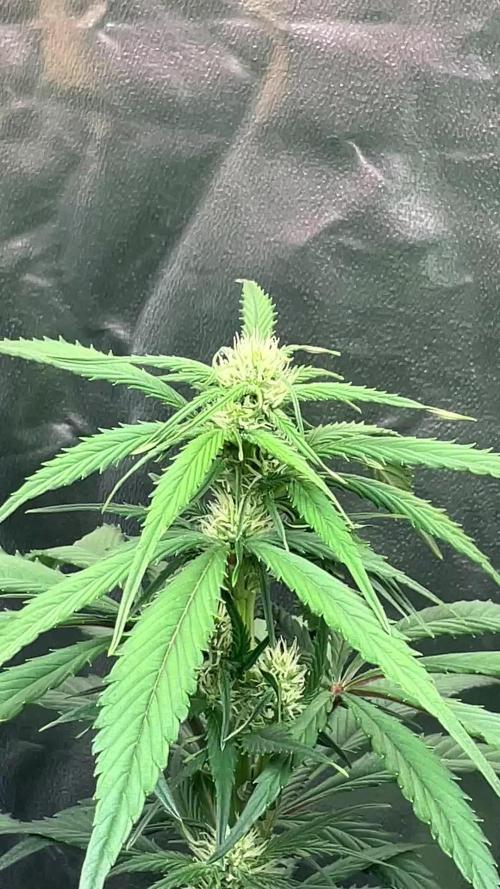
Hallo everyone 🦊 so i got question? Would you defo this plant? Im not sure about it cause i read that cutting leaf of stress they to much and dont have the time to recover? I just put the seed in the soil and let her do the rest.
Maybe helping a little bit her to finish the flower as perfect as possible would not be so bad
🥦🦊
Thanks for all advice.
Grazie
Merci
Danke
Dankje well
Obrigado
Muchas Gracias
✌️

Likes
14
Share
@Wenz004
Follow
F-MILF takes 70 % of my tent now...wtf
Hope all this green gives some good buds at the end.
Deficiency from last week is under control...added some Silicate from TA...no idea if that helped or anything else...of course...there is too much light photons for the above area...but wtf I cannot do the plant smaller...lamp is on 75% now und lower would be bad for lower buds.
NL untopped (F-MILF) getting this week:
(TA nutrients mentioned above are for NL topped from other tent...pictures follow)
Aptus Topbooster 6 drops/l (increased)
Aptus P-boost 12 drops/l (increased)
Aptus regulator 3 drops/l
Aptus All in one 0.6 ml/l
Aptus CaMg 0.6 ml/l
TA Silicate 0.4g/l
4-6 litre each day nutrified (thats a real problem) F-MILF cannot get enough...just makes me poor that fat big milf
Processing
Likes
22
Share
@Ace860524
Follow
Stoped LST about a week ago as it's really bushy now and canopy flat witch is good grow as been good switch to bloom as the stretching has stoped leaves still abit yellow I fear this might be due to night time temps droping to below 15 C was wondering if I could defoliate this auto as it's really bushy now don't know if I should or can any advice ? Ok I have decided to go forward with the defoliation as the RH in tent is very high and it's winter at the moment so my risk for mold and bud root is high so I feel with the defoliation it really opened up the canopy great for air circulation and lower buds are getting much need light now tryed to keep all big fan leaves that are on the out side posted pics and plant seems stressed due to it leaves droped and hanging abit but hopefully she will bounce back the canopy in the centre was a mix of leaves on leave s on leaves like no way air would ever get in there lol funny thing once I opened her up there was nice size buds under there don't know how they got light but they did some how get food from main steam I guess

Likes
Comments
Share
@DaddyPrime2
Follow
6/28/24
she was about 16 inches before I tried some lst. she wasn't as bendy as before so it turned into supercropping which is fine. after transplant, she wasn't happy at all and I couldn't seem to figure out what was going on. I believe her soil is too compacted and I tried using perlite on top of the soil to top dress easier but it just held a ridiculous amount of water underneath. it became like 3 inches of just perlite and I think she was drowning. she's starting to perk up and be happy again.

Processing
Likes
8
Share
@Fizzybuds
Follow
We Have liftoff, They are officially potted! Regular soil and Perlite, going to find the sweet spot with the light, Being me Im trying a little Experiment with the pots, both fabric and 5/6 gal/25l but one taller and thinner than the rest, would be nice to see if there is any difference 😬, i've added the tiniest bit of bit of root juice just to spice things up a lil bit! Also a lil sneak peak of a Sweet seeds Dark Devil late flower 😉 lets doooo this!
Likes
5
Share
@GERGrowDesigns
Follow
GERGrowDesigns Welcome to Veg Week 4 of Divine Seeds Auto AK-47 XL
I'm excited to share my grow journey with you all as part of the Divine Seeds Autoflowering Competition 2025. It's going to be an incredible ride, full of learning, growing, and connecting with fellow growers from all around the world!
For this competition, I’ve chosen the Feminized Automatic strain: Auto AK-47 XL
Here’s what I’m working with:
• 🌱 Tent: 120x60x80
• 🧑🌾 Breeder Company: Divine Seeds
• 💧 Humidity Range: 60
• ⏳ Flowering Time: 59Days
• Strain Info: 21-24%THC
• 🌡️ Temperature: 26
• 🍵 Pot Size: 0.5l
• Nutrient Brand: Narcos
• ⚡ Lights : 200W x 2
A huge thank you to Divine Seeds for allowing me to be a part of this amazing competition and Sponsoring the Strains. Big thanks for supporting the grower community worldwide! Your genetics and passion speak for themselves!
I would truly appreciate every bit of feedback, help, questions, or discussions – and of course, your likes and interactions mean the world to me as I try to stand out in this exciting competition!
Let’s grow together – and don’t forget to stop by again to see the latest updates!
Happy growing!
Stay lifted and stay curious!
Peace & Buds!

Likes
13
Share
@Alpha_Green
Follow
Some of you may have wondered:
Why do I use CO2 at average 950 ppfd μmol/m2/s (moral flow)?
The answer is quite simple. Because of lack of space in some regions of my cultivation area, I simply cannot keep the ideal distance to my Sanlight high-performance lamp, due to some height growth of various strains. And so some of the main colas have ppfd values of 1250 μmol/m2/s and even more...
So this is how I manage to achieve and compensate for such high radiation levels even with a CO 2 balance. And I have to say, my strategy to avoid various light stress symptoms works just fabulously. In combination with CO 2 implementation, my babies are simply unbeatably insensitive to light. Thats it!
Beginning of 3rd week flowering:
Again feeding my babies by 36 hours fermented potions of Bio Tabs Kompost Tea PK-Booster (15 g pro Liter) and added:
5ml Orgatrex/Liter
1 Spoon of Bactrex
1 Spoon of Mycotrex
1 Spoon of Mycco-Vital
1 Spoon of Dynomyco
A little tip for those who are interested in small modifications that have a big difference or influence - on the result - effect - beauty - health - taste! Before adding microorganisms or beneficial bacteria or Mycorrizae and Trichodermas, please use oxygen-saturated water. On the one hand, unwanted chlorine gases evaporate and the small world of the microbiome becomes even faster and more rewarding in compost tea to sprout.
Last but not least for this week, I would like to introduce my reasons, why I prefer growing biologically and sustainably.
First of all, it’s something which suits very well in these times/days we are living now. Sustainability is a big need and task for our planet. 🌎 Nature means life. Our home, the air we breathe and everything that surrounds us. Not just today. Hopefully tomorrow as well.
Maybe I'm starting to protect our environment on a small scale, but maybe I can also make a big difference at all.
If you change the way you look at things, the things you look at change...
I thought about what’s the difference, between Mineral Feeding and Super Soil Feeding.
It’s very easy. Biologically Growing is a similar process than the natural soil activities out there in the lap of nature’s. So plants has to work and interact with the microorganisms and microbiomic communities in the soil. So the plants will never get lazy like the lazy ones of mineral feeding growers.
If you grow biologically, you will feed the soil first and the microorganisms will support every parameter next to your plant conditions. And that will generate an unbelievable spectrum of Terpenes and Trichomes you will never forget.
It’s the same comparison, when you daily visit McDonalds and you eat only fast food. How does your body and mind react on this shit for money?!?!
May I invite you to think about it…
See you next week dear Growmies! Have a nice Weekend and take care…
Peace out!
Addendum for Day 53:
At the moment we unfortunately have another winter onset here in Germany. This means that I am forced to take additional heating measures due to structural facts in order to be able to keep the temperatures constant. After all, just tonight the thermometer climbs again to -1 degree Celsius.
In addition, my exhaust air system runs out of my bedroom terrace and I therefore grow winter and summer with the patio door open. Well, sometimes I experience real weather-related challenges. But all in all, no problem...
"Where there's a will, there's a way."
Addendum to pouring out the fermented PK tea: I always administer half a liter of lukewarm aerated water with 3.5 ml of cannazyme per liter to each plant. This means that the "root machine" is not supplied with supplies unprepared and the nutrient solution can thus also be better distributed in the soil. Since I also work with cloth shoes, I spray them evenly moistened everywhere with water that is also warm before pouring them out from the outside. This has the advantage that the moisture stays where it should: in the pot!
... I did the math today ;-) We are still in week 7 until this Friday. And week 8 starts on Friday! OMG... still so much time yeahh!
Today my Fast Buds Sour Jealousy and Sweet Seeds Big Devil and Dark Devil Automatics arrived. I'm looking forward to it.
This time Fast Buds next Time Sweet Seeds. Love them too. Very beautiful genetics.
Today a review video of the beginning of week 3.
At the time of the pictures, I had minor signs of nitrogen excess. (Light peaks first at the crown of the roof and then slightly continuing to the middle section.) I then painstakingly racked my brains as to why this could be. I found that very slight dry spots had formed and therefore the root found small accumulations of nitrogen that caused its problems. But then, when I carefully homogeneously checked the moisture content in the substrate, the problem evaporated again. However, they had not shown any loss of growth rate during this time. Nevertheless, they developed as expected.
They Strawnanas had no problem with that.
In the end, I always have a hard time killing them. But I guess that's the way things go.
We live and die.
We come and go.
But it's not there yet. ;-)
Tomorrow is day 56.
Tomorrow’s updating day!
Can't wait to see their progress.
Have a good time and see you tomorrow… 🏽🕊️
🏽 ☮️🕊️

Likes
70
Share
@Roberts
Follow
Big Fat Wedding Cake is growing good under the Spider Farmer G5000/UVR40 lights, In the Athena blended line nutrition. She is bulking now and has a aroma that is developing. She has a nice layer if frost going as well. Everything is looking good. Thank you Spider Farmer, Athena, and DutchFem Seeds. 🤜🏻🤛🏻🌱🌱🌱
Thank you grow diaries community for the 👇likes👇, follows, comments, and subscriptions on my YouTube channel👇. ❄️🌱🍻
Happy Growing 🌱🌱🌱
https://youtube.com/channel/UCAhN7yRzWLpcaRHhMIQ7X4g
Spider Farmer Official Website Links:
US&Worldwide: https://www.spider-farmer.com
CA: https://spiderfarmer.ca
UK: https://spiderfarmer.co.uk
EU: https://spiderfarmer.eu
AU: https://spiderfarmer.com.au
G5000 Light Amazon Link:
amzn.to/4643esa
UVR 40:
https://www.amazon.com/dp/B0BR7SGTHS
Discount code: saveurcash (Stackable)


Likes
39
Share
@Unkraut
Follow
I'm not happy with the overall harvest...it produced some good tasty smoke due to fine nutes and a wonderfull strain but i fu**ed it up by using a very bad soil...growth was very slow and also lost like 25g due to budrot/mold...again my fault as i set up ventilation the wrong way (RH was good but some buds didn't get enough airflow)
Again i learned alot of things and got 275g of good, great smelling smoke...so not that bad...but could be much better 🙂

Likes
35
Share
@McBubatz
Follow
3. Woche Wachstum startet wieder tip-top, Fatty ist gesund und munter und wächst wie wild 😁.
19. Tag
Wurde bisschen entlaubt, nur unten 4 Fächerblätter. Oben die großen soweit möglich unter die Seitentriebe gebogen.

Processing
Likes
6
Share
@Ferenc
Follow
Hey! Just back well
They are getting better and better soon need to start to flower them. Fertilization happens 3x a week with the mixture of Biobizz family (Biobloom, Topmax, BioGrow, Epsom salt, Gunokalong extract.) They grow as hell. 600W LED, 18 hours on 6 hours off, 200 ml water per plant a day, humidity approx 35 percent.
Day 53: They are bushy keep doing LST on them.
Day 56: I constantly do LST for them and also some lollipopping so I removed the bottom unwanted leaves especially the yellow ones. From tomorrow I provide darkness for 2 days and then Monday the beggining of the 9th week I will switch to 12/12.


Likes
3
Share
@Lovemabud
Follow
Time challenged again so comments a a whole lot of shit talk are in the video.


Likes
2
Share
@Coman
Follow
Flowering phase has officially started.
My Ladies did grow a lot this week. GC is 90cm, SG is 85cm and GA 80cm.
All 3 have a lot of flowering spots, they don’t really need LST or other grow techniques, maybe only little defoliation.


Likes
2
Share
@lleuquino
Follow
Una semana desde que lavé raíces, realicé defoliación en las partes altas. Solo a esperar que maduren los tricomas.


