
Likes
19
Share


@Dunk_Junk
Follow
She grew 9cm this week.
Doing her thing, no input from me other than watering/nutrients.

Likes
3
Share


@Chucky324
Follow
Hello. This is the end of week 12 and the beginning of week 13 of veg.
I watered with some lower ph nutrient and that seem to stop the yellowing of the leaves.
So she likes the lower ph food or maybe she just likes food. 😏
Really hot in here this week.... 32*c when these pics were taken.
2 days between watering's when it's hot like this.
They say, rain, and cooler weather for next week though.
Yeah... more water in the rain barrels.
Ok. Be Cool.
Chuck.
Likes
42
Share


@cheetah844
Follow
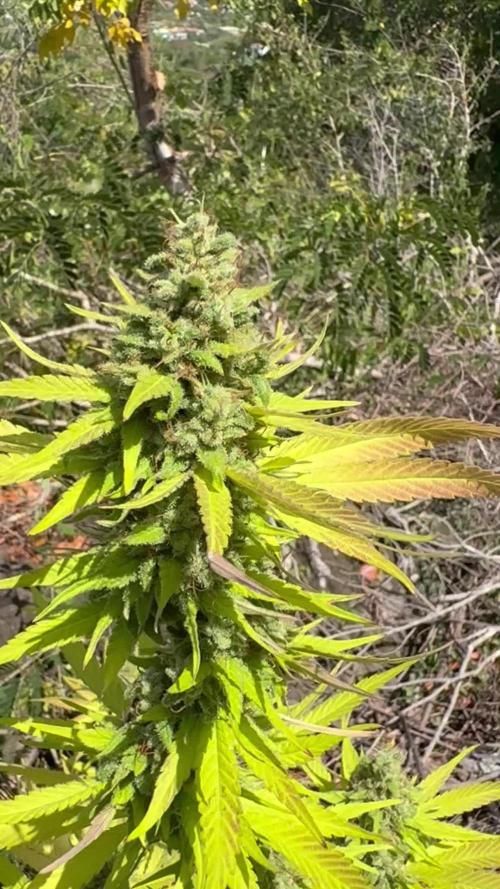
It's doing it's normal tall Jack Herer growing. Definitely have to start training soon, she'll be going outside but I want to keep her shorter almost bush like. We'll see how that goes with a tall girl?!

Likes
32
Share


@SkunkyDog420
Follow
Hallo zusammen 🙋♂️. Die Knospen werden jeden Tag dicker und der Geruch ist einfach Hammer. Sonst gibt's nix zu berichten Sie wächst ohne Probleme 😀.
55 Blüte Tag: Habe sie heute das letzte mal gedüngt , ab Mitte nächster Woche werde ich anfangen mit Spülen

Likes
Comments
Share


@jeremyb616
Follow
so i just have a short video, camera isnt working so well, good growth same as last week, should have a better camera as it comes to harvest to show off the ladies better
UPDATE
so like the genius i am i did some math and realized that today is literally the end/start of week 9 so im adding the pics i took last night thinking that it was week 9 pics lol


Likes
2
Share


@AllenUpNorth
Follow
We have topped her this week. We also forgot to post that we transplanted a week ago. All of the girls seem to have bounced back from the over watering. We have attempted our first compost tea to boost the microbiology in the soil.
7.5ml fish shit
1/2 tablespoon recharge
1 teaspoon stonington plant food
1 1/2 handful work casting
1 1/2 coast of Maine
Brewed sightly less than 24hs but not much, ph to 6.3😎
Likes
7
Share


@PCGrows
Follow
First week of full flower, clear budsites and she’s stretch good! LST is really keeping all budsites relatively same size and all getting super purple/black


Likes
6
Share


@Thckaos
Follow
10-08-20 Se comprueba los parámetros y la solución se mantiene bien. No se cambia.
Se realiza a la 2 poda apical y a todas LST
12-08-20 PH: 5.5 y Conduc: 1.7 ms.
Se realiza poda de las ramas más bajas a todas las plantas y de nuevo LST a las que no tiene poda pical.
14-08-20 PH: 5.6 y Conduc: 1.78 ms
16-08-20 PH: 5.5 y Conduc: 1.9 ms
19-08-20 PH: 5.4 y Conduc: 2.25 ms. Se cambia de solución y semana ya que ha llegado a sobrepasar 2.2us

Processing
Likes
8
Share


@Stick
Follow
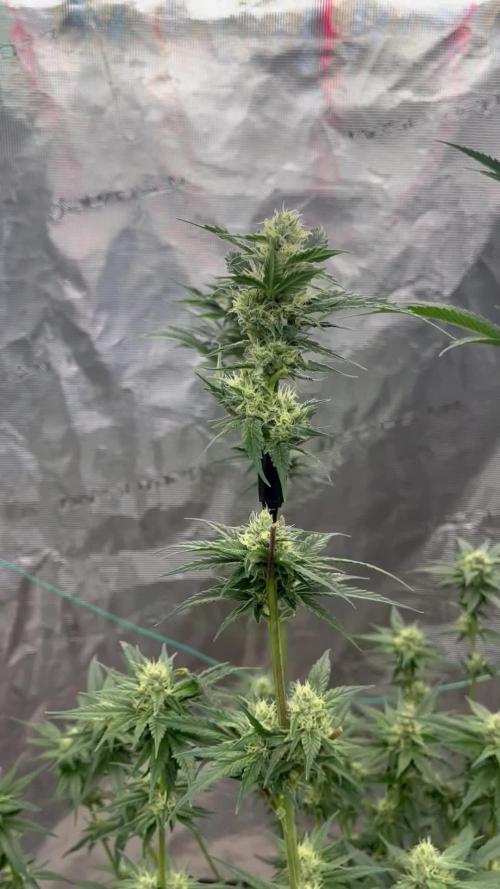
She has a delicious candy/sweet perfume! Bud structure is really nice, tight nodes and dense buds, I love this {unknown} strain! 😍


Likes
31
Share

@Rangaku
Follow
RS11 is showing off now , she’s got mad sticky this week and starting to fill out very nicely, keeping up with the defol weekly and tying her down she’s stopped stretching for sure and wants to bulk up . Same same next week . Solid strain this , she loves feeding and does all the good stuff automatically. Gonna be a great month at chez Rangaku

Processing
Likes
14
Share


@Smile_gan
Follow
Due to last week BCN leaf change to lighter color, brown and some leaf tip got the burn. So i decision to feed organic Bat guano juice instead of Flower Fuel and Myco+
For Pineapple still small and slow growing rate, And look like just only Bud is growing only. This plant i change to feed Bat guano only same as BCN also.
Due to yellow leaf issue, I check soil PH by cheap soil PH meter and found soil PH around 5.5 Looking seem to be problem of ph locked. Before end of this week i decision to fill dolomite around 3 tbs per pot. Hope it will help my plant from nutrient lock and help my plant better on the late of flowering stage. Need see result in near future.


Likes
6
Share


@GoldenWeedGrower
Follow
Legend
Timestamp: 📅
EC - pH: ⚗️
Temp - Hum: 🌡️
Water: 🌊
Food: 🍗
pH Correction: 💧
Actions: 💼
Thoughts: 🧠
Events: 🚀
Media: 🎬
D: DAY, G: GERMINATION, V: VEGETATIVE, B: BLOOMING, R: RIPENING, D: DRYING, C: CURING
______________
📅 D36/V32 - 21/05/24
⚗️ EC: 1.0 pH: 6.0
🌡️ T: 20°C H: 70%
🌊
🍗
💧
💼 LST
🧠
🚀
🎬 1 TL in her new home and one TL of LST job
______________
📅 D37/V33 - 22/05/24
⚗️ EC: 1.0 pH: 5.4
🌡️ T: 20°C H: 70%
🌊
🍗
💧
💼 LST
🧠
🚀
🎬 1 TL video and one TL of LST job
______________
📅 D38/B01 - 23/05/24
⚗️ EC: 1.0 pH: 5.3
🌡️ T: 20°C H: 70%
🌊 2L
🍗
💧
💼
🧠 As I saw clear signs of blooming, I need to pass to bloom phase so I put B01, in the header.
🚀 Clearly she's starting flowering
🎬 1 TL video and 1 LST video
______________
📅 D39/B02 - 24/05/24
⚗️ EC: 1.1 pH: 5.3
🌡️ T: 20°C H: 70%
🌊
🍗
💧
💼
🧠
🚀
🎬 1 TL video and 1 LST video
______________
📅 D40/B03 - 25/05/24
⚗️ EC: 0.2 pH: 5.3
🌡️ T: 20°C H: 70%
🌊 15L
🍗
💧
💼 Flush for two days and then flowering nutes
🧠 I think no more LST, she's now full blooming
🚀
🎬 1 TL video
______________
📅 D41/B04 - 26/05/24
⚗️ EC: 0.2 pH: 5.3
🌡️ T: 20°C H: 70%
🌊
🍗
💧
💼 Flush for two days and then flowering nutes
🧠 I think no more LST, she's now full blooming
🚀
🎬 1 TL video
______________
📅 D42/B05- 27/05/24
⚗️ EC: 1.1 pH: 6
🌡️ T: 20°C H: 60%
🌊 15L
🍗 Calmag - Bloom A-B - Bud Candy - B52 - Big Bud - Seaweed
💧
💼 👉👉👉 Changed res and added nutes
🧠 I think no more LST, she's now full blooming
🚀
🎬 1 TL video

Likes
24
Share


@Homestickycannabis
Follow
Well it's dry and cureing in jars. I ended up with 78 grams of dry sticky buds. Growing this cultivar was a breeze! I mailined her for 8 main kola's and I would say that it was a success. I did however end up with more larf than I would have liked, but I'll be using that for fresh flower rosin in my Rosineer press. This particular pheno did not like her nutrients above a mild strength at all !!! I did flush her 3 times during her life and with good results. The first was to clean and build up of veg nutrients , primarily nitrogen. And the other two times were during flower. I wanted a good transition into flower. I've had a bad habit of thinking that a super dark green plant is what I want in flower. All in all she was a delight to grow. Not to finicky and a forgiving strain imo.
Likes
Comments
Share

@GothBotanical
Follow
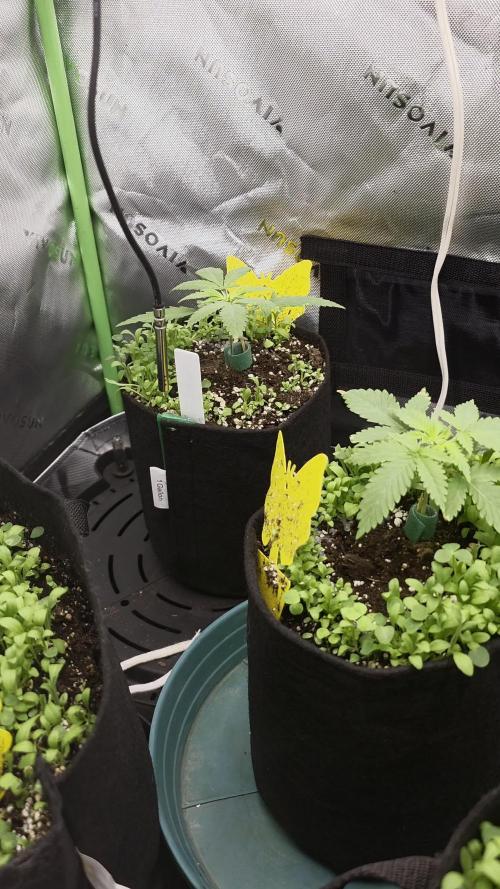
The autos continued their steady vegetative push this week, with larger 5–7 finger leaves developing and noticeable daily growth. Canopies began to fill out, giving the plants a stronger, bushier appearance compared to the previous week.
On Aug 26, the pots were watered thoroughly, and beneficial nematodes were applied as a preventative step against soil pests. This was the first pest management measure of the grow.
The environment stayed stable overall. Temperatures stayed warm but within a healthy range, and humidity hovered in the target veg zone.
By the end of the week, the plants looked vigorous and healthy, with no signs of stress or deficiency. They are well-prepared for topping and early training in the coming weeks.
Processing
Likes
24
Share


@Canaryweed_tf
Follow
Ya tenemos esta segunda semana de la Purple Kush Feminizada del banco de KannabiaSeeds y la verdad es que va super bien, esta creciendo de lujo y espero que siga asi 💪😍

Likes
12
Share


@cookingwithninja
Follow
day 30 video day 30 note crossed bridal party x pink paradise
day 31 crossed blackberry oreo bigstuff x pink paradise
day34 videos of each, a lot of photos. Rh% high I keep my terps non-volatile. Bridal rubbing sugar leafs smells like some sort of candy watermelon, blackberry neat skunky AF sugar leaf rub, pink is nice mellow I will have to check tomorrow. Dr. Thunder very oily with sugar leaf rub I swear you could deepfry with it. It also smells mellow skunky but will check again tomorrow it may have been terps overload on my fingers regarding thunder and pink paradise aromas. Pink caylaxes have shriveled and accepted pollen locations. I just don't think the seeds will be ready when harvesting in a few weeks. Start week 5 tomorrow and I don't think crosses will be ready so I will figure it out. Pink crosses would be fun next round but I have so many more selections to choose from to grow my next 4.Thunder smells like a citrus cleaner, almost pineapple front notes then a full citrus.
day35 defoliated like madd. no lie so sticky: 2 fingers lifted a ceramic cup like I was spiderman. 1 finger was a struggle.. science

Likes
17
Share


@Fitzwell
Follow
First off I need to thanks crop kings seeds for sending me such great seeds.
I'm so close I can taste it. The Buds are getting nice and fat, and really stinky. Doing my flush tomorrow and running 15 gallons of RO water through it.
I'm done feeding it and water only the next week then CHOP CHOP

Likes
1
Share


@Deebow
Follow
Have grown 3 gorilla cookies autos out to harvest and all three have been noticeably different in growth and characteristics