Likes
Comments
Share
This Diary contains one of Katsu Bluebird's Most Exciting breeding Projects; Grape Ape Cake ! Lineage; Hotcakes (Katsu Bubba X Burnt Toast from Raw Genetics) X Grape Ape Welcome to Week Seven, our last Veg Entry These Girls loved the topping last week.. & didn't really miss a beat as far as growth is concerned, a minor delay but still cracked an inch worth of height gained this week. As most seam to have a very tight growth pattern I honestly think they're going to be monsterous tower's in the coming weeks. with that in mind I gave everyone a good leg shave to increase those chances. Also The Frist trellis is up ! after talking with Katsu about how much he thinks this particular strain may stretch.. i've decided to hang 2 lines of support across these girls. this first being right as we move into FLOWER ! teh second line will go up one the stretch stops..(week3-4 maybe we will see) With that being said, after a slight flush @6.6ph Water, & 24 Hours of darkness happening as I type this entry.. They will receive their first Flower Feeding in the Morning! & the next entry will be our first week of flower ! It is always a blast working from a pack of Reg Seed, let alone an Exciting project like these Katsu beans ! and as we move into flower next week I've taken cuts that I'm hopeful will ensure I have the BEST of the Best Flowers from this run to keep for another run at least.. and maybe even outdoor 2021. Thanks for Reading This far 🙌 If you have a question or a comment leave it down below otherwise, I Hope You Check in Next Week, Stay Safe out there & Happy Gardening Cariboo
Likes
9
Share
@russrahl
Follow
Had a bad week 4 as my PH pen decided to go wonky. Once I got it all straitened out plants took a few days to bounce back and took some lower leaf damage but nothing to bad and it will mostly be trimmed off soon anyway. Still waiting to start LST on 3 of these girls until they get a few days of normalcy after the ph shock. Will probably be end of week five we tie the other 3 down and get the screens in place to prep for Scrog.
Likes
36
Share
23/25 seedlings came out Pretty fast. now on day 5 everything is doing great.
Likes
9
Share
@n1mbu5
Follow
Please like and follow my diary and check out my others!! Would appreciate the support🙏 Ok guys week 4 starting now and these girls have gotten all bushy and lushy!! I am just now setting up and starting to play around with time lapses lol here are my 2 tester videos to start. Any pointers and tips would be greatly appreciated👏 Soo the girls are doing great done a little lst and neem oil applied last night for pest prevention I wanted to bend down their main stems and do a little hst but unfortunately their main stemsare waaaay to thick for it, I'll add some pics later Ok and as for feeding we are following the advanced nutrients feeding schedule I have measured EC and PPM this time but i need to go find my notes will add it into this weeks diary Ok that's it for now I've got another time lapse running so I'll add that one later today too!
Likes
3
Share
Likes
12
Share
@KalooNie
Follow
These gals are doing fantastic! Smell is really starting to come out now, smells like a very strong citrus pine 👌🙌 Switched them to full strength flowering nutes and they're doing pretty well. I probably should have transitioned them a little earlier but a little stress doesn't hurt, they're growing just fine! Heat is also an issue but they'll manage 😅 8-4-18 :: Largest plant's bucket got empty on accident; Filled a 15gallon reservoir of full strength nutes and pumped the solution into the bucket as always. Next day my largest plant is dying and the other two are fine, looks like lockout. Flushed for a day and then added nutes, no improvement.. Orange pistils are appearing pretty fast on it too as if it's trying to ripen but not grow. My heart is broken😰 UPDATE: Realized I was an idiot and didn't plug up the holes I drilled into the top of the buckets (I stick a hose in there to fill them up) and the roots were exposed to light.
Likes
32
Share
And this is it! The last week! 😲 And an early update as well! 😁 This is the last video and last photos of my girls before they were chopped and I'm quite happy right now! Almost everything went how I planned it, which is great 💪 I lowered the lights (5cm) and I did a good chunk of defoliation to allow more light penetration which I believe totally helped! Some of the branches got a lot of weight and could barely hold themselves (good thing they didn't break!) I also think that I should've chopped my girls last week because I got way more amber trichomes than what I originally wanted 😝 but eh, I got more weight in exchange! 😆 Oh, I also gave my girls some ice cold water! Hoping to get some extra purple! There are a lot of stuff this week, so please let me know what you all think about them! :D See you all in the next and final update! 👋
Processing
Likes
24
Share
Hi everyone 🤗. Since she started to flower last week, she got Canna Flores and Canna Boost for the first time :-). It develops very nicely, gets an even level and has a nice extension 👍. Otherwise there is nothing to report this week :-). I wish you all a nice weekend, stay healthy 🙏🏻 and let it grow 🌱 You can buy this Strain at : www.Zamnesia.com Type: Runtz ☝️🏼 Genetics: Zkittlez x Gelato 👍 Vega lamp: 2 x Todogrow Led Quantum Board 100 W 💡 Bloom Lamp : 2 x Todogrow Led Cxb 3590 COB 3500 K 205 W 💡💡☝️🏼 Soil : Canna Bio ☝️🏼 Nutrients : Canna Bio ☝️🏼🌱 Water: Osmosis water mixed with normal water (24 hours stale that the chlorine evaporates) to 0.2 EC. Add Cal / Mag to 0.4 Ec Ph with Organic Ph - to 6.0 - 6.3
Likes
2
Share
Likes
24
Share
@BUDMAN73
Follow
start of week 4 and shes showing signs of preflower😀 she has grown quite well considering the 12/12 for my photos (now in flower). when i put in the 2nd light i didnt realise how much more light intensity there was and did not raise my light rig up enough so burnt a few leaves 😢.
Likes
10
Share
Welcome to Veg Week 5 of Kannabia Clementine Slush BioBoost Edition Need a Fail-Safe Germination and Express Flowering?Kannabia Makes It Easy with BioBoost, Sproutly and Its Fast Genetics . More informations to find at The Kannabia Blog on GrowDiaries. Check out Kannabia Seeds with my link [https://www.kannabia.com/de?ref=61966] and grab the germination device or the strains I used . Trust me – it’s worth it for sure ! Get another 20% Discount at all products using the code [GGD] at the checkout For this Project , I’ve chosen the Feminized Photo Strain Clementine Slush BioBoost : Here’s what I’m working with: • 🌱 Tent: 120x60x80 • 🧑‍🌾 Breeder Company: Kannabia Seeds • 💧 Humidity Range: 60 • ⏳ Flowering Time: 65 Days • Strain Info: 21%THC • 🌡️ Temperature: 26 • 🍵 Pot Size: 20 • Nutrient Brand: Hy-Pro • ⚡ Lights : 600W x 2 A huge thank you to Kannabia Seeds for allowing me to try my Best with this amazing collection from Photo Strains they managed to Sponsore . Big thanks for supporting the grower community worldwide! Your genetics and passion speak for themselves! Let’s grow together – and don’t forget to stop by again to see the latest updates! Happy growing! Stay lifted and stay curious! Peace & Buds!
Likes
17
Share
@volcanic
Follow
07/01/2024 - They are starting to get some colors, size not yet but they look amazing and there is a smell of citrus!! Days in flower: 42 11/01/2024 - Last photo in the next 13 days, I'm going again on vacations and will be going all in on my Autopots. I hope they do the trick like they always have ❤️‍🔥
Likes
11
Share
This strain is LEGENDARY... and continues to amaze me every week! 😍 Never have I, in 15 years of growing in/outdoor both autos/photo periods, seen a bud "squirting" droplets of resin... have you? 😳 Sorry for the shitty mobile pics but... Gnar Gnar! 😈 Feel like they are almost ready... will start flushing and the daily trichome check until harvest day! 😋
Likes
44
Share
For LIQUIDS & NUTES ******GREEN BUZZ NUTRIENTS***** organic. Also i’m using their LIVING SOIL CULTURE in powder form! MARSHYDRO ⛺️ has large openings on the sides which is useful for mid section groom room work. 🤩 ☀️ MARSHYDRO FC 3000 LED 300W 💨MARSHYDRO 6” in-line EXTRACTOR with speed-variation knob, comes complete with ducting and carbon filter.
Likes
107
Share
@Afterglow
Follow
Начинаю растить новый сорт моим собственным методом. Я его называю корона, хотя больше подходит название Multiple Symmetric Lollipopping. Это что-то среднее между Main Lining, Low Stress Training и SoG. Суть заключается в том, что мы делаем Topping выше 4-го этажа и затем все 8 основных веток разводим по сторонам. Четыре нижние ветки по диагонали, четыре верхние крест-накрест. В итоге получается эдакий равномерный круг веток, растущих на одной высоте, так как мы легко можем контролировать высоту каждой ветки. Принципиально можно и 10 и 12 веток делать, но мне хватает 8. Желательно иметь широкий горшок, чтобы было куда разводить ветки. Надеюсь когда-нибудь появится новый метод MSL с моим авторством. Итак, взял две семечки, а победитель по росту переедет в большой горшок. Гроубокс у меня самодельный. Две лампы HLG 100, но по факту обе работают по 50ватт. Встроено два фильтра и два канальных вентилятора. Один работает постоянно, второй включается автоматически при превышении верхнего порога температуры. Дверки на защелках, проклеены уплотнителем чтобы не пробивался свет и запах. Внутррение габариты от лампы ШДВ - 67х48х68 сантиметров. Помещается два куста, но я предпочитаю растить только 1. Как проращиваю семена? 1. Они всегда хранятся в холодильнике. При попадании в теплую и влажную среду семена получают сигнал к росту и быстрее всего прорастают, буквально за 14-16 часов. 2. Берем нужные семена и кладем в теплую воду (18-22 градуса Цельсия) на 3-4 часа. Это нужно, чтобы скорлупа размягчилась, а семечко согрелось и получила достаточно влаги. 3. Слегка маникюрными щипчиками расщепляем скорлупу. Делается специально, чтобы как можно раньше корешок начал получать воздух. Чем быстрее раскрывается скорлупа, тем быстрее начинает прорастать корень и уменьшается риск загнивания. 4. Садим в таблетку или сразу в готовый субстрат. Обычно я сажу сразу в готовый субстрат, но в этот раз решил попробовать в торфяной таблетке, чтобы выбрать победителя по активности роста. Как я готовлю кокосовый субстрат? 1. Я никогда не использую старый субстрат. Во-первых, я применяю микоризу и множество других грибков и бактерий, которые для маленьких ростков будут слишком концентрированными и могут навредить. Во-вторых, в старом кокосе очень много старых корней, которые обязательно будут гнить. С одной стороны это хорошо, но по факту это приводит к загниванию субстрата и образованию плесени. 2. Беру половину брикета, развожу в воде, промываю в проточной воде (попеременно горячей и холодной) пока не вымоется вся морская соль и затем размешиваю с вермикулитом и перлитом. 3. Заливаю полученный субстрат на 15-20 минут удобрением Cal-Mag (1000 PPM), чтобы субстрат набрал катионов кальция и магния, иначе первую неделю полива кокос будет забирать эти вещества из полива, а растение будет голодать. Если измерить PPM воды после внесения Cal-Mag и через 20 минут, то увидите, что PPM упадет до 600-700 единиц. Это кокос вобрал в себя соли. 4. Заливаю удобрением, в случае трех-компонентного Grow-Micro-Bloom в соотношении 3-2-1, PPM 1000. Также оставляю на 15-20 минут. Нужно это затем, чтобы кокос теперь равномерно вобрал в себя другие катионы (железо, цинк, медь, калий, ну и азотистые соединения, как то мочевина и аммоний). То есть мы целенаправленно вымываем излишки кальция и магния. 5. Затем, уже поливаем нашим удобрением с PPM 600-700 чтобы чуток снизить концентрацию. 6. В этот готовый буферизированный субстрат потом и попадет пророщенное семечко. Как я поливаю? В течение первых трех недель я поливаю через день. И не важно, высох субстрат или не высох. Кокосовый субстрат это позволяет. Далее приходится поливать каждый день, потому что развитая корневая система осушивает весь субстрат за сутки под чистую. Никогда не поливаю чистой водой - это только нарушает PH внутри субстрата и приводит к стрессу растения. Если нужно промыть субстрат, то готовится несколько поливов с нужным удобрением. Вспомните про то как после промывки падает PPM. Вот тоже самое происходит и при поливе чистой водой: питательные элементы вымываются с кокоса и когда вы начинаете "кормить" растение, оно голодает, потому что кокос все отбирает, чтобы делиться "потом", когда "насытится". PH на веге всегда около 5.6-5.8, на цветении 5.8-6.1. PPM стараюсь держать на уровне 700. На цветении 1200-1400. Если вы дочитали до этого момента и увидели страшную цифру в 700 PPM, то на самом деле ничего страшного в этом нет. Если вы возьмете обычную землю, разведете водой и померяете PPM, то он там будет куда более высокие показатели. На самом деле растение способно жить даже при PPM в 5000 единиц. Поливать растение с PPM 300 - это слишком бедная смесь. Как правило, все руководства ориентируются на земляной грунт, а производители страхуются и дают заниженные нормы, чтобы покупатели случайно не сожгли свои растения. Но если если у вас есть PH и TDS измерительные приборы, то вы смело можете щедро кормить свое растение, а оно вам ответит буйным ростом и плотными шишками. Всегда руководствуюсь золотым правилом проверки дренажа: PPM растет PH падает: у растения несварение и что-то оно не может усвоить. PPM падает PH растет: растение голодает, либо нарушен ионно-катионный баланс. PPM стоит PH растет: все идет хорошо. В каждом случае нужно понимать что было сделано ранее и корректировать действия. Итак: 19.01.2021, в 12:00 замочил семечки в воде 19.01.2021, в 16:00 расколол аккуратно семечки и посадил в торфяную таблетку 19.01.2021, в 23:00 уже одна семка начала вылезать из торфа, хотя утапливал. И это всего лишь прошло 7 часов. Чувствую кандидат на пересадку уже показал себя. 20.01.2021, в 16:00 эта же семечка уже отрастила корешок и полностью показалась из торфа. 21.01.2021, в 10:00 выскочило из торфа и готова расправить листики. Вторая семечка пока сохраняет молчание. 21.01.2021, в 17:00 росток вот вот начнет разрывать скорлупку чтобы выпустить первые семядоли. Перенес в гроубокс под лампу. 23.01.2021, в 10:00 умер... так и не увидев свет. А вот её младшая сестра неожиданно вылеза из торфа и вытянулась за ночь на 2 сантиметра, пока были отключены лампы. Пришлось ей вручную снимать скорлупу. 23.01.2021, в 15:00 младшая сестра уже показала хвостик корня с другой стороны торфяной таблетки. Завтра надо будет пересаживать уже в нормальный горшок 24.02.2021, в 14:00 девочка переехала в новый дом. Первые листики стали размером с семядолями. Поздравления принимаются, мы проросли.
Likes
16
Share
She is starting to look like one of those sativa I will never forget… she will be flushed in the coming Weeks
Processing
Likes
28
Share
@No_Clout
Follow
27/02/19 - This one is great, I popped the seed 24hrs after the gelato and this one seems to be developing its leaves a lot faster than the rest, so far really happy with DNA and with mills nutrients, it’s a lot easier to mix and I no longer have to use ph down because once all mixed it’s at a 5.8/5.9. 👌🏻 02/03/19 - Just transplanted all into their final pot, just in time I think as it looked like the roots were starting to circle at the bottoms of the pot, sprinkled half a tea spoon of Mykos on each hole prior to the transplant & fed them 2.5 litres each. I was going to saturate the whole pot but I’ll do that next feeding.
Likes
5
Share
@DE_BW
Follow
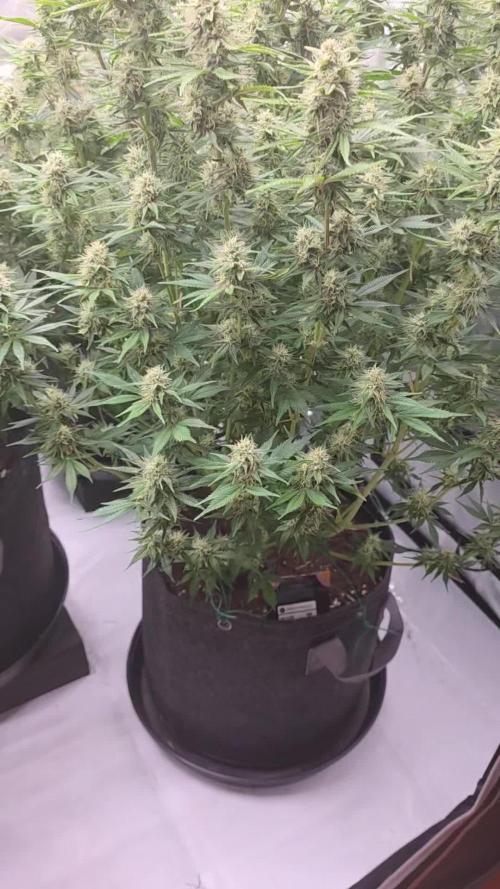
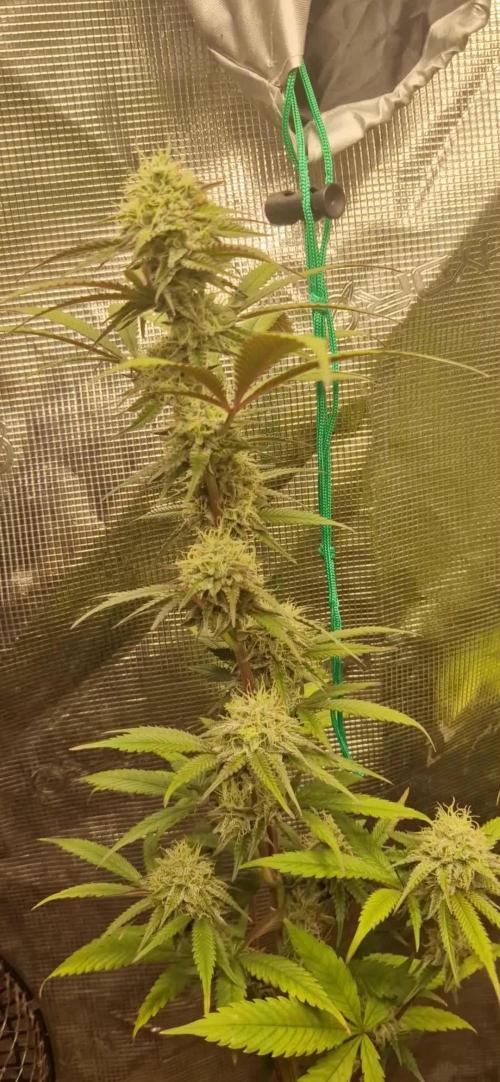
The plant is now in mid to late flower (around day 35–37) and bud structure is fully developed. No new pistils are forming anymore, indicating the transition from bulk to ripening and resin maturation. Buds are very dense, heavily calyx-stacked and already showing strong coloration and frost. Feeding has been stabilized with moderate Bloom and Micro, minimal Grow for pH stability, and the switch to Overdrive has begun. From here on the focus is on ripening, trichome development and maintaining airflow until the final harvest window.
Likes
10
Share
The plants are large enough for low stress training I also decided to add advanced nutrients three-component fertilizer ph perfect As you can see in the main photo, the lower branches are small and underdeveloped due to the lack of light in the greenhouse I therefore decided to bend the plant more than is healthy in order to achieve greater development from the lower branches I noticed that some plants are small and undeveloped, and I saw holes and moles It was clear that something was eating the roots of the plant from below While working on low stress training, a mole ran out of the hole and started burrowing to another plant I really like animals, but I had to quickly decide what to do with the mole I pinned him to the ground with my foot and stuck a stick behind his head :( that I have as a support for low stress training I'm very sorry for the mole, I've never killed such a big animal... May mother earth forgive me... The next day I saw a vole crawling into a hole near a plant, so I decided to buy a mouse trap I put a carrot in the trap and the hunt was successful I am the alpha predator in my garden... At the same time, while digging holes, I saved about 20 caterpillars that fell down and could not climb out It turned out that caterpillars are a very rare butterfly that almost never occurs I really like butterflies, when I take a picture of them on my plants I attach a photo from last season