


Likes
Comments
Share


Processing
Likes
6
Share


@CommanderCannabis
Follow
3-16 part 1. Very robust growth. I had to tuck the fan leaves under the growing lower stems so they could get some light and stretch. Leaf and stem growth has a good color to it and I will up the nutes by half a teaspoon and rotate Martha so she can get light everywhere possible.
3-16 part 2. After I came home from work What did I see but the top of Martha had been sliced off! it seems the metal tie-down stake was too tight against the resistance of growth and she snapped at the top. Its a clean cut and at the right spot. I raised the light to 24" in hopes she will stretch out abit faster.
3-21 VEG GROWTH ACCELERATING UP.

Likes
4
Share


@SuperGluedGrow
Follow
Completely forgot to update like an idiot, but these videos were taken two days ago. Pheno 1&2 are both male, so I'm just hoping this last one is female. I might flower when I get back from vacation to just speed this process up but I guess well see.
Likes
27
Share


@adam_pawloski87
Follow
Let’s go day 43!!!! Week went real well , girls started preflower so sometime this week I will be switching up the nutrients for flowering! We are stable and looking super healthy! Can’t wait to see what these ladies do this week! Hope you all enjoy !

Processing
Likes
11
Share


@ganjaman24
Follow
Sorry guys been lagging on posting because got a lot other stuff going on n I figured this plant would’ve been chopped by now but I must say she’s been filling out quite nicely..I lowered the light hours to try n see if thatll he’ll ripen her a bit faster as I’m looking to replace her with another plant


Likes
16
Share


@TerpTurtle
Follow
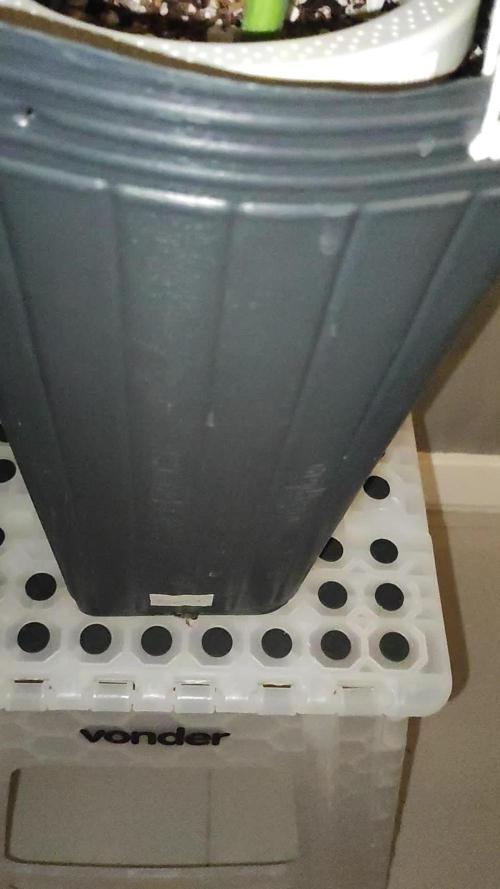
Loving the tight bud structure on this plus size gurl.. she greasy, drinkin like a fish and F U N K Y fuely
ppfd ranging 800-1100

Likes
74
Share


@BigCough
Follow
Hello!
First and foremost.. thanks for stopping by!
After many years and dreams of growing I'm finally giving it a go. I will update this "diary" every Sunday with the previous weeks progress. All feedback is welcome as long as it's done in a constructive manner. Please keep in mind this is my first grow and will be learning and making adjustments as I go. I am growing in tent indoors in the Midwest.
STRAINS:
7 Super Skunk
1 Tahoe OG
Possible HiFi 4g & Slurricane clone
EQUIPMENT:
5x5 Vivosun grow tent
1 ViparSpectra P2000 LED (additional LED will be added in 2 weeks.. next payday 🤪)
AC Infinty 6 inch Carbon Filter
AC infinity cloudline T6 fan
3 gallon smart pots
Two 11 inch honeywell "desktop" fans
Vivosun Seedling heat mat
Seed Sarting station
InkBird humidity Controller
8 socket surge protector with built in timer
Ducting
Metal grating
Rope hangers
Zip ties
Solo Cup
Fine mist spray bottle
SOIL/NUTRIENTS
Fox Farms Light Warrior seedling starter soil
Roots Organic Original Soil
Distilled water (room temp with Avg PH 6.3)
Coconut water 50ml/gallon
Roots Organic dry fertilizer lineup
January 11th - ordered 20 Super Skunk feminized seeds from ILGM.com. the order process and payment was easy and intuitive. Was updated by email every step of the way. I did not pay the extra $25 for the ability to track my package, however ILGM did email me once product was shipped as well as when product was out for delivery.
January 25th- Seeds delivered. Pkg was discreet. I would have like to see some type of pkg that took into account the cold weather, however I was home to pick up pkg so it wouldn't sit out in cold.
January 26th- today is the day I attempt my first germination. I decided to germinate 6 seeds using the direct in soil method. Soil I am using for germination is Fox Farms Light Warrior. Watered with distilled water that was at room temperature with an avg PH of 6.2. Germinating in a seed starter tray using a seed heat mat.
January 27th - Watered as needed
January 28th- First seed sprouted. Germaninated an additional 6 feminized super skunk seeds using same method as above. Watered as needed.
Recieved two tahoe OG seedlings from a friend. They are roughly a week ahead of mine. Both seedlings have a little yellowing on leaves. Both seedlings were transplanted into FF light warrior soil. Watered as needed. Placed in tent under ViparSpectra P2000 LED at 25% power 30 inches above. Tent at 71° F 65% Humidity at 18/6 light cycle.
January 29th- two additional seeds sprouted. One seed from first batch pushed itself out from soil and tap root was exposed. Gently placed back in soil. (No change since) Second seed sprouted was from second batch germinated. Watered as needed using coconut water at 50ml/gallon.
January 30th- Two additional seeds sprouted. Both are from second batch. Watered as needed. Added 10inch fan into grow tent set on low.
January 31st- These two as well as sprout from yesterday were transplanted into Solo cups with FF light Warrior soil and moved into tent with same parameters as above except LED was moved to 40% power. Watered as needed.
Feb 1st - started germanting 3 more SS seeds. Dug up the 4 seeds that had not germinated and trying a second time. No water for other seedlings today.
Feb 2nd- no water
Feb 3rd- 1 seedling emerged from the soil!! Watered with coconut water 💧
End of the week thoughts:
I believe I watered both the seeds and the sprouts way too much. Backing off water until soil is dry.
In the future I would like to try germinating in water and paper towel. I like this idea as I know whether or not the tap root pops... currently I'm left wondering 😔
Questions:
At what point are the plants in VEG? Is it as soon as they sprout?
Any idea why some leaves on the Tahoe OG are yellow?
Some new sprouts are also more like green than others.. thoughts?
18/6 or 24 for veg.. thoughts?



Likes
18
Share


@Canna96
Follow
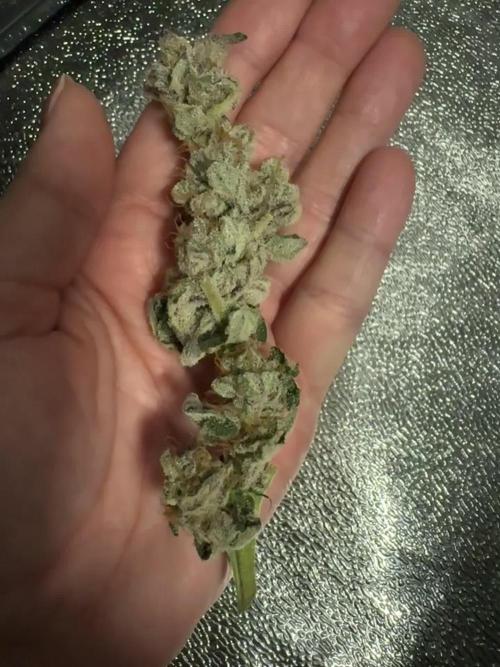
Hey now, hope everyone is having a great weekend and staying safe. Another great week for the ladies, as they are now about 3 weeks into flower, and the stretch has just finished. I am still feeding them silica, cal mag, and flower nutrients maxi bloom by GHE. I did start to add a PK booster this week pushing the EC up to 1.4. I also will be switched the light from V1 to the F1 Spectrum at the beginning of this week, and will be integrating the UV/IR bar into the light cycle later this week. I will run the UV/IR bar for approximately 30 minutes prior to lights off to get started.
The tallest plants are the Sundae Driver and the Durban Nights at 42" and the Red Hot Cookies is the shortest plant at 38" however they all look happy and healthy and capable of easily giving up a half pound each.
The 5X5 is really starting to fill up nicely, I am running two dehumidifiers outside of the tent and I am able to maintain around 50% RH in the tent during lights on, and around 55% RH with lights off. We did get an unexpected heat wave this weekend and it has been a struggle keeping the heat and humidity down but the flowers are just starting so no need to worry about mold or anything like that yet. As soon as this heat wave is over the temps should be good to go the rest of the way this is by far the best time of year to be flowering plants in my region.
I did defoliate twice this week and I may do one or two more rounds before just letting them do their thing. Not much to do from here on out except make sure the reservoir is full and the PH is in the proper range.
I hope everyone has a great weekend, Thanks for stopping by, Stay Safe and Blaze On!!! 💪
Website: https://medicgrow.com/
https://growdiaries.com/grower/medicgrowled

Likes
5
Share


@CityFarmer
Follow
Hello everyone,
Well its getting kinda packed in the greenhouse so all i have for you guys is a little video,
See you guys next week... 🤘🤘🤙🤙


Likes
16
Share


@Symbiosis_420
Follow
Ok, so it's slowly getting thicker and frostier. At week seven my girl could be ready in anywhere from two weeks to four weeks more.
The light was dropped closer to the top of the canopy. I decided to try 15 cm of distance, as well four 50W LEDs are not as powerful as the 600W HID or LED panels that are usually used in grow tents. I will of course keep an eye for signs of light and heat stress, but I suspect that won't be a problem.
Update Day 89.
Today I decided to turn the plant around to see the back colas and their growth. Then I found some mites under the leaves after examining weird spots in a couple of leaves. It seems to me that there was not enough airflow to deter the mites from making home in the back leaves, when compared to the front leaves of my plant. Lesson learnt, rotate plant often, ensure good and even airflow.
I didn't find any webs beside a really small one seen on the video (most affected leaf). So, I think I found them mites early. I only found this kind of damage on very few leaves, and each leave contained less than 8 mites (at least that I could see) and a couple of eggs. So it seems that paying close attention to my leaves saved me from an out of control infestation.
Anyhow... I removed all of the leaves that had even a single mite, or a single mark of discoloration.
Also, I disinfected the grow tent, top of soil and lower part of the branches by spraying them with a 1/4 tbsp of bleach per liter of water.
After that was completely dry, I mixed one part rubbing alcohol with 9 parts water and misted both sides of the leaves and even the buds directly (ethanol evaporates easily, so there shouldn't be residues left after it dries completely).
I got these remedies from https://www.growweedeasy.com/cannabis-plant-problems/how-to-get-rid-of-spider-mites
I will apply them every 3-4 days and keep a good eye on the leaves.
Prevention is key, and some aspects I could've considered before are:
1. not grow any other plant next to my cannabis
2. Don't come into my indoor growtent after tending my outdoor plants.
3. Ensure even and plenty airflow.
So, I attacked back strongly. I cut more leaves than those that showed damage, to increase airflow. I will be on the watch for pests and will rotate my plant often, as well as spraying a few times every week, just to make sure they don't come back.
I also am going to build a kind of metal wire cage to separate the colas further and make it harder for any pest to spread.
Its only my second grow, but from what I've read online about mites, it's way more costly (time and money) to deal with an infestation than to strike them hard early. I guess that specially now that I noticed them before they even made webs.
Look closely at your girls growbros !
Update day 90.
So this morning I. Becker the trichomes and they seem to have gotten more cloudy. I am not an expert at that, but they are starting to be fewer clear and more milky. I will keep an eye on them, but it think harvest might be here very soon, probably closer to the 9 week mark than to the 12 week one (I'm about to finish the 7th week)...
Likes
29
Share


@GermanGrow182
Follow
Orion f1 wächst schnell.sehr schnell. Die ist 60% größer als die bananas gleichen Alters... läuft gut bisher. Die beiden größeren banana wachsen wie die aus dem 1.run, der spätzünder ist halbsogroß aber sie wächst.
Likes
1
Share


@Smokwiri
Follow
Watermelon X Zkittles from clone.
Been in veg for 5-6 weeks.
Now in flowering phase (12/12).
Use code RUFFSELEKTAH at Mars Hydro store checkout
Likes
8
Share


@Smoking_Joe_Frazier
Follow
Week 8: Steady Bloom & Vacation Prep
Update: 10.07.2025 | Day 58
Weather stabilized around 25°C with occasional rain - ideal conditions. Gave another mild dose of dissolved Biotabs + Bokashi juice (1:100). Rain refilled water tanks just in time: Vacation coming up! Midweek my grow buddy takes over (fingers crossed).
Here are the main characters:
Forbidden Runtz
Pure bloom focus now - minimal height gain. Sugar leaves turning frosty daily. Aroma intensifies: Sweet candy meets earthy skunkiness (yes, we're making that a word!). Buds point skyward, thickening noticeably. Pistils showing beautiful color variations - not just white anymore.
Green Crack
Surprise performer! Bud structure defied expectations: Fewer sites but chunky indica-style nugs instead of wispy sativa candles. Already sticky to the touch with impressive frosting. That glorious mango scent is creeping in - imagine it at peak swell! Easily 3+ weeks left.
Bruce Banner
She's still stretching like your yoga teacher!
Not full bloom yet – new shoots exploding everywhere. Bud sites multiplying like rabbits. Light frost/mild smell now… but genetics don’t lie. FastBuds Tangie flashbacks intensify. This will be explosive soon.
Wrap-up:
This grow's the anti-stress champ compared to last year's coco/nutrient math marathon. Just observing, responding, and trusting the plants.
Low-budget (Bokashi juice and only 1 smashed biotab), high-satisfaction. Learned from 2024 but 2025? Pure joy.
I hasn't always to be complicated!
Catch y'all next week growmies
Smoking_Joe_Frazier
Likes
6
Share

@Abendkraut
Follow
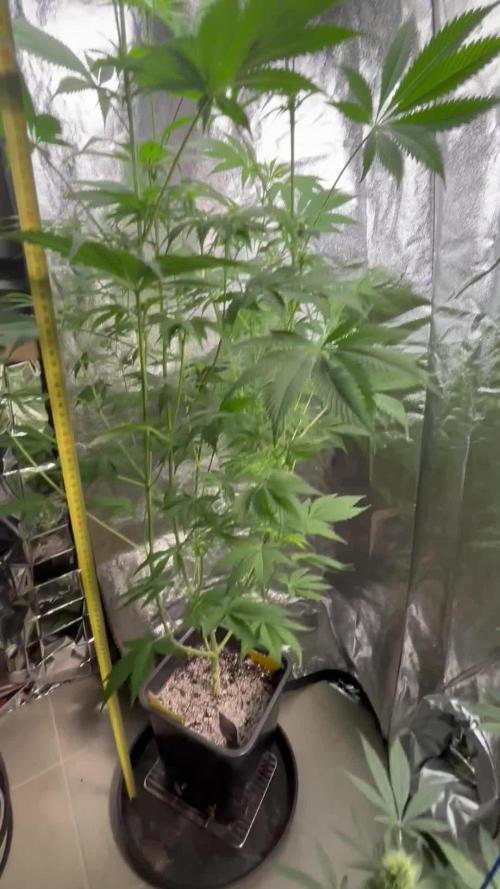
She just can't seem to strop stretching, 140cm (or 120cm if you don't count the pot).
I did everything I could at my original growing area but had to relocate her due to the size. Now she got amble room to not only stretch in height but also more space for branches.
I started adding Green Sensation to my Nutrients mix. 1ml/L as recommended and will be added until the last week.

Likes
10
Share


@Big0zGrower420
Follow
Hey everyone,
Day 14 and things are going ok so far. I put all the plants in a pop up greenhouse so I could add some humidity. Hoping for some good growth this week as weather continues to be nice.
Processing
Likes
25
Share


@rainman
Follow
Start of week 7, everything is going alright. Removed some leaves, done SCROG, increased amount of nutrients. Added Nirvana from AN. No more FloraBlend. 5 litres of water from now on. Also removed some LST points.
Day 43 - 5L with nutrients, removed leaves, done SCROG. Nirvana added.
Day 45 - As you can see on photos, buds are actually purple. I'm fckin happy.
Day 47 - 5L water.
Happy new year to everyone <3
Peace.
Likes
5
Share


@johnwill
Follow
Finally got a grow tent. Still using the shitty lights though, that'll be fixed another pay day !

Likes
8
Share


@BeanCrop
Follow
Lot more to this girl this week her buds are starting to bulk nicely and she is producing more of a smell I'm really pleased with how she is turning out for my first ever grow and a DIY Aero/Hydroponic system. This was the last week of nutrients I will now start to dilute/flush my reservoir by just adding water of PH 6.2 to the solution for the next few weeks and then plan to do a complete reservoir change to just water at a PH of 5.8 - 6.2 for the final flush.
Happy growing 🌱
