
Likes
Comments
Share


@midEastern
Follow
just before flowering 8 weeks ago-I took 2 clones of each strain from my last 4 diaries - 8 clones total and vegged them with CFL then went to LED reflector mars 192 (400w wall).
now,my flowering room has just finished the last crop so i moved all 8 grown ups to veg another week and today i started 1212.
i will be adding 2 X 300w BloomSpect LED panels in a week so total flowering led power is
Mars Reflector 192 plus the 2units bloomspect 300 (660w wall).
This diary records only flowering weeks without the clones vegging.
I am having 8 plants with 660w @ 1.2m by 1.2m room - 10-12 oz dry is expected.
Pictures soon
Cheers


Likes
18
Share


@Hempface86
Follow
Happy Birthday 🎂 🎉 🎈 🎁 🎊!!!! So here we are with what i'm hoping to be an award winning seedling lol ... thank you Zamnesia Seeds and Plagron for putting this contest together!! I am very excited for this one. As you can tell, she got her very own personal home.. With her parents breeders name on the front!! So high hopes for this girl, she is in a Zamnesia 2.9 gallon fabric pot ( I recommend 👌 ) and if all goes, well, she is going to have some sexy stinky nugs for all to see and for me to smoke lol .. hope everyone has a good time with this contest.God bless and happy growing ✌️. P.S i added Plagron to my nutrient list so I could answer the contest, but this plant will not see those nutrients until the fourth week of flower.. Bread and Butters is the man for dropping that knowledge on me.. Y'all should check him out...
https://www.zamnesia.com/us/35-cannabis-seeds/368-zamnesia-seeds

Likes
4
Share


@PabloTheGrower
Follow
Buds are very resinous, but due to the stretch they are very spaced between each other. Also I'm getting trouble to fatten them up. Seem airy and the tips are drying a litle bit.

Likes
Comments
Share

@LeosLivingSoil
Follow
Eine ein Fuß Bud an einer auto ist schon Wild, dadurch das Sie die Anfangszeit aber draußen war hat sie Blattläuse mit reingeschleppt, das war arsch. Semi Outdoor kann ich also nicht 100% weiterempfehlen :D

Likes
4
Share


@Mr_nugs_lover_David
Follow
Super frosty and stinky lady, super good strain,same aroma as her sister, smells super sweet,unfortunately she didn't got a good enough size so she's not gonna be very productive, I hope to grow her again to be able to get a bigger yield of this sweet organic nuggets! 💚🌱🤞

Likes
16
Share


@m0use
Follow
Plants are chilling, added in some bokashi and dry amendments, not expecting much more from this plant, just needs to finish growing and we can be done.

Likes
14
Share


@Mousse
Follow
Lampe bei ca. 75% DLI~40
Der Abstand der Buds gefällt mir mega👍🏽
Würde jetzt schon die Sorte weiter empfehlen.
Die Sorte selber geht aber spät in die Blüte könnte aber auch an topfgröße etc. Liegen.
Vom Stretch merkt man was aufjedenfall.
Sonst machen sich leichte cal mag Probleme sichtbar konnte aber bis jetzt gut gegen steuern.
In dieser Woche aber kein Training mehr jetzt soll sie sich voll und ganz auf die Blüten.
Ende der Woche nochmal Bio Blom gegeben
Likes
59
Share


@Rap_a_cap
Follow
Well, my organic vegetables garden, in anticipation of growing weed has been at rest for twenty months. I started to amends with green manure from legumes and lawn mowing (expecially the last month, for ready availability of N). I've mixed 1 gallon of Vigor Plant Full (perlite, guano, peats) to improve drainage. All the roses around, the apple tree and the hedges were treated with deltamethrin so as to preventively reduce the population of aphids, whiteflies & red spiders.
My vegetables & weed eventually will receive only spraying of nettle macerated. My girls spent the previous week outdoors night and day in their pots savoring the discrete temperature changes in my area.
Now in the evening I will have to pay close attention to broadnose weevils and later to bedbugs. It will be a tough fight against the wind and heat. A whole week of full sun awaits them.
Pineapple Kush shows strong genetics, she has tolerated very well strong wind and full sun (28 C° average temp) asking for watering twice a day.
Maybe it will be the southern sun but she already smells slightly. 🤞


Likes
91
Share


@Greenwolvesfarmer
Follow
Bajando las horas de exposición de luz , pasamos a floración neta ! Al fin ! Largo trayecto con estas preciosas ! Salimos del stress 🙌🏼🔥 #480w #SAMSUNGQUANTUMBOARDS
@leds.mk
@eva_seeds
Leyendo e investigando , pasando a la realidad y al papel ideas y proyección ...
Te amo sol y tierra , nada más! Te agradezco por un día más en este bello paraíso.
.
.
.
.
.
.
.
#seguimientoMKLED #cannabisfamily #420 #420weed
#greenwolvesfarmer #weedchile #weedgrower #cultivoindoor #cultivointerior #indoorgarden #cannabischile #cannabissociety #cultivamedicina #medicinanatural #420family #420time
#chilecultiva #nomaspresosporplantar #growdiaries #growdiary #cannabisgrowers #quantumboard #samsungquantumboards
#480w #quantumboards #seguimientoMKLED #comunidadcannabica #cannabiscomunity

Likes
1
Share


Likes
Comments
Share

@Kushncheeseplz
Follow
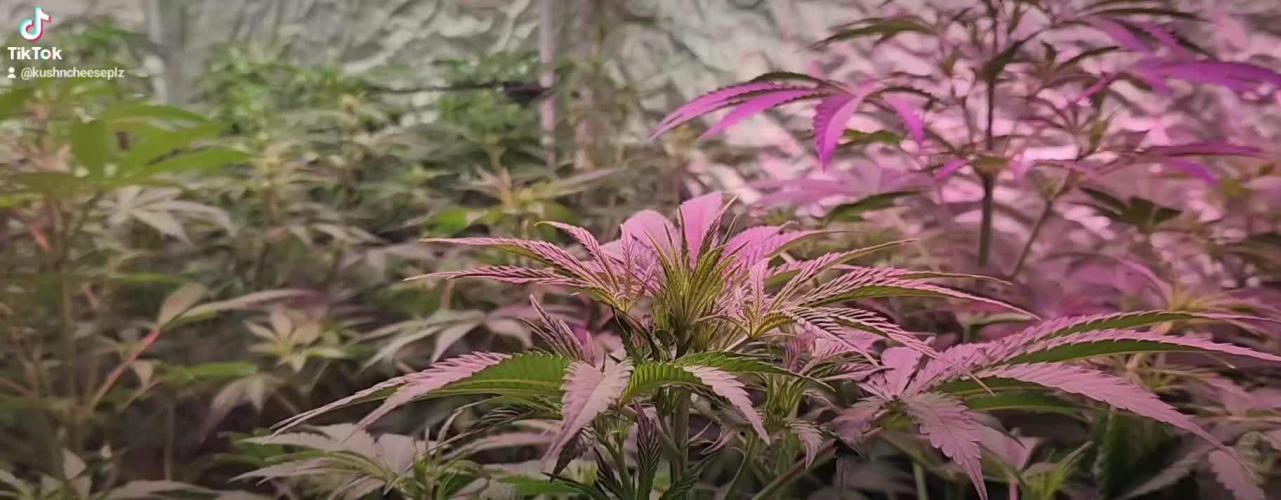
Right now , the challenge is the humidity
To combat against it., open the other tent

Likes
3
Share


@IVXV_IVXV
Follow
Our Country illegal Cannabis ! Military Kills Many People In Myanmar ! Save Freedom. Save Peace. Save Plant.


Likes
15
Share


@Lukeskywalker
Follow
Ufff... Fortunately finish...
😄 Starting a new Breedbros project, see ya soon


Likes
31
Share


@Reaper
Follow
next time i wont Veg under fluorescent lights, needs more power from the start for bigger stem and root system, i cant complain by the end result lol
Likes
49
Share


@masterofsmeagol
Follow
6/1 I'm anxious to get my plants in their final homes. Another 90 degree day today and then it will be cooling off with some showers. I plan to take advantage and utilize that to make the transition. I have some small burns on a couple plants bit considering the weather we've had its nothing. Temperature swings 50 degrees. I hope these girls do OK outside. I was tired and stoned last night and I accidently topped a plant I had already FIMed. Oh well. Transplants soon. Supports screwed in after the heat. Plants have been handling this weather like a champ. Big thick healthy stalks.
UPDATE PUT THE PLANTS IN AROUND 730. Cutting down on light hours I'm poverty close to where we are. It was 95 today. Plants have suprisingly little burning. My fan was taken so they go without that tonight too. In the next few days it's going to cool down and that's when I'll transplant. Only thing left before transplant is sanitizing trellis and supports. Easy peezy. Especially if it's supposed to be in the 50s. And people dent climate change lol. I'm hoping that all this adversity makes my flower a higher quality. I'm glad to have the quantity to pick the best phenos for the BIG POTS. Im trying to stay excited but it's just so dumb hot. Oh well. If the plants can do it so can I. I'm planning to give them some kelp me kelp you next watering and may start some light organic nutes.
6/2 Phone doesn't like uploading my videos. Broke record high temp yesterday 95 and tomorrow we will break the record low 50. Plants withstood the heat well and are doing great. Transplant soon. They were a little light but I held off on the water. Plan on it tomorrow. May transplant tomorrow. I have several videos that haven't uploaded. I thought they did but I was wrong. Oh well.
UPDATE: Forgot to water. Some were light and others could've held off. Did the half a powerade bottle ahain. A litt ke less on the heavier ones. However I'm looking to transplant into final homes tonight and into this weekend. I sanitized a fifty and a forty so my bags and two pots are sanitized. Cage is sanitized and ready and pallets are sanktized and in place. The 40 and 60 fit PERFECT in the small space left from the pallets. Plus the plants always lean the opposite direction so things should go smooth. Only thingvleft is sanitizing stakes, bamboo, plastic garden stakes and all the other plastic training stuff. I'll just soak it while I transplant. Gotta mix the soil first too though.
UPDATE. Heat went higher than expected and hit 90. I figured I'd go back around three and screw in suppirt stakes and begin getting everything ready for transplant (i.e. supports, mix soil, sanitize trellis) before I transplanted tomorrow MORNING was what I had planned. Unfortunately we got a huge thunderstorm with a shot ton of rain and it's gonna continue throughout the night. I think this is God's way of telling me to take a break. I can get up early and get those support stakes screwed in. Then when I get back from the wife's doctor's I can do the transplants. I'm trying to break the labor up into manageable chunks. Looking at my other diaries I can see that my plantscare fine in their three gallon homes. It'd a little disheartening seeing such big clones that I started so much earlier on the other diaries. However I always was fighting SOMETHING (usually more than one thing) and last year was a shit show. At least this year I stay away from anyone else's cannabis any clones and I'm extremely cautious. I've seen my cousin out perform me multiple times with healthy plants like this I'm excited to see how it goes. I really needed the break anyway but tomorrow morning the stakes will be in. Hopefully they'll be outside.
6/3 Broke the record for low days after breaking record for highs. I saw it 94 yesterday and the day before. On the way to my grow at 6am it was 44 degrees and it's not warming up much. Fifties at best. Rainy. I left the door closed. The big door on the otherside got opened as the other end of the garage neededcto he used. If the rain let's up I'm going to set up the grade stakes so I can transplant in the morning and throughout the day. I think I'm going to light dep a couple of them and leave them in the 3's. We'll see.
UPDATE: At 12:30 the temp today was 44. Yesterday it was 94. I can't believe this. Plants are doing great though and are in the garage under lights for the day. The BIG door was open part of the day. Didn't take any pictures (or even enter the grow area) as I sanitized the last 40 gallon pot and a bunch of grade stakes. I drilled the grade stakes to the pallets in the front. The first row is done. Just need to sanitize the plastic trellis itself and finish attaching the other grade stakes. I don't need the fill trellis up by transplant. I just need the bags to not knock over and have SOME support. I'll be back over there either to tonight to put more supports in or tomorrow when I actually plan to start transplanting. I'm getting excited. After dealing witb the stiff that I sanitized I didn't dare go fuck with my plants so I looked through the window. I'll finish sanitizing the net tomorrow. These plants look great. I'm wondering if doing the two diagonal I poles with zipties actually works. It would save me some kone for sure. I'll definitely update in the morning.
6/4 It's warmed up to a balmy 44 degrees. My plantsxare in the garage still. Weather sucks this whole week but after this heavy rain it should be perfect weather to transplant these girls. A little to chilly but it will warm up and I need to get this shit done. I'm trying to do to much at once. I need to just out dirt in bags and get them outside. I'm glad I waited until after this craziness. Breaking temp records for high one day then breaking it for low the next can't be good for the plants. I'll update what gets done today. I may mix soil or I might wait until tomorrow. It will let up some then. Plants still look fabulous 👌
6/5 50 degrees still raining like hell. Rain until Friday. Plants are inside under the onecworking light. Lots of indirect light through the massive windows though. I'm planning on mixing soil today and tomorrow and getting bags and pots half filled. Just trying to break the labor up into manageable pieces. It's probably a good thing I didn't put them in their huge containers before all this rain.
UPDATE: MIXED SOIL 1/3 of each (FOX FARM OCEAN FOREST, HAPPY FROG, AND ROOTS ORGANIC 707). I prepared I believe 11 containers for transplant. I need to sanitize two more containers and I'm good. I got a lot done. Might go back over. Set up extra cams too. I'm excited. Talked to my commercial buddy amd he motivated me. No reason my plants can't handle this shit. I've just had massive personal shit going on. Friday is the next GOOD day but these girls might go out earlier. I'm checking the forecast. I'll sanitize the other containers in the morning and fill them.
6/5 Today is usually my watering day but shit still seems heavy so I'm going to hold off. Despite that i need to transplant. I think they're wet enough. I could do it today. Plants are looking good and weather takes a better turn Friday. It's not raining hard though. It's just sprinkle right now. I may transplant some today depending on how things go. I'll keep the diary updated.
UPDATE: I went back over with the intent to just mix soil and let it acclimate. I decided to try to transplant one. I grabbed a 10th planet and started to go. I had done a bunch of manual labor already so i wasn't thinking. Of course the fucker was dry and didn't wanna come out ofcthe pot and the root ball pretty much decintigrated in my hand so I'm not sure how that will go. Tried again with the Blueberry Cheese Cake. I thought the roots just might not have been rootbound abdcthat could've been the case. After having another rough transplant I recognized I was tired, all the hard stuff is done and it's gonna keep raining until Friday. I wanted to transplant three and put them outside but with the wind and rain and the difficult transplant I let them sit under the light in the garage in indirect light. I had the doors open for a while. Should be open now but i don't want to have to go back over and shut it. Plus I'm not to keen on getting water on my light. Let's hope for a better day tomorrow. This was the only thing I had going good. Phrple punches are still behind. I've decided I'm oing to light dep ttwo of the plants in the 3 gallon pots. The two shittiest or smallest plants (probably purple punch will be light deped.
WENT BACK OVER AT FIVE AND IT APPEARS EVERYTHING IS ALRIGHT. WILL HAVE CHECK IN MORNING. Vid won't upload. Tried multiple times. I'll try again tomm.
6/6 Waiting for a doctor's appointment when I should be transplanting buy whatever. Everything is looking really good. Despite me disint9grating the rootball in my hands the two transplants look great! When I get back I'm planning to get some more work done. It's still lightly raining off and on but the door is up. I'm lettingvthe soil mix acclimate a little bit too. Hard labor is mostly done. Now the intricate part. Wish me luck. Not sure if it will be today bit I'm hoping.
WENT BACK OVER CAUSE IT WASNT RAINING BUT AS SOON AS I WAS CLOSE IT STARTED POURING SO THE PLANTS ARE UNDER THE ONE WORKING 150HPS AND THE AMBIENT LIGHTING FROM THE WINDOWS. TOMORROW IS TRANSPLANT DAY. I WONT HAVE A VEHICKE SO IT WILL BE TRICKY BUT IM GONNA MAKE IT HAPPEN. Opened doors at 530. Video still didn't upload
6/7 Still raining. It's off and on and a nice rain though. It's 53 degrees at noon. I transplanted two 10th planet's into 20 gallon pots. I transplanted these two a little differently. I put the bags in there final spot I side my cage andctransplanted in the misting rain. The first one came out and seemed to be heavier on the bottom and broke off. I tend to "throw" them in the hole before they collapse. With my anxiety I suck at transplanting. Plus these plants haven't filled the 3 gallon pots with roots yet but i want hem in their final homes and its time to go outside. I transplanted the other two plants indoors and let them have days in the garage with the door open and the light on then protection from the elements at night. I've been doing this for awhile. They would all be outside if the weather wasn't so shitty. This rain is supposed to stop. I'm curious as to what will be the fate of the two plantsci transplanted and left outside. I'm praying and hoping for the best. I also put my back tarp up so I have a wind break between rhe buildings. I stopped working because I didn't want to fuck anything up. Anxiety disorders suck. TOOK A BUNCH OF VIDS BUT THEY WONT UPLOAD. GOES FROM 9% TO 65% BUT ALWA7S TURNS RED "FILE FAILED TO LOAD". I'LL KEEP THE DIARY UPDATED. ESPECIALLY IF I GO BACK OVER. WAS ABLE TO LOAD A COUPLE VIDEOS. I GUESS ITS NOT AS BAD AS I THOUGHT. AT LEAST I HOPE. WENT BACK OVER AT 3 AND CHECKED THINGS OUT. THE TWO REXENT TRANSPLANTS I LEFT OUTSIDE SEEMED TO BE IMPROVING. DESPITE THE FACT I DUMPED A SHIT TON OF SOIL ALL OVER ONE OF THEM. IT SNAPPED A LITTLE BRANCH CLOSEST TO THE SURFACE. ITS STUFF I'LL REMOVE ANYWAY BUT STILL. IM REALLY CROSSING MY FINGWRS AND PRAYING THESE GIROS WILL MAKE IT. With everything i have going on tjis is my respite.IM GOING TO TRY TO SEE WHAT I CAN ACCOmplish TOMORROW. SOME OF THE PURPLE PUNCHES ARENT READY FOR TRANSPLANTING THOUGH. I ALSO ADDED TEO TARPS TO THE CAGECTO COVER THE WIND TOWER BETWEEN THE TWO BUILDINGS. THIS IS GOING TO BE A GOOD YEAR! Shut the door at seven. For some reason the two 10th planet's I transplanted (that fell all over the plant and I thought mightve broke it) look awesome lol. Despite the ridiculous pouring rain. It's going to let up soon and we are do fir some good weather. I'm trying to get everything (that isn't getting light depoed) into the cage. Four transplanted. Ten (I mean 8 more) to go.

Likes
32
Share


@Hawkbo
Follow
Daytime smoke, nighttime smoke. Depends when you go to bed.
Photos shot with Nikon D5600 with various lighting and stop settings
Videos shot on Samsung Galaxy S8 and cut with inShot00
Likes
48
Share


@xbrico
Follow
D99/FD73 - Lost a couple of tops to the rampant rot that hit the tent. Got them out quick though. Had one day, after the sulfur burn where even though the fan was switched on, it didn't actually go on so humidity got up to the 70's-90's and a few corner pieces got the cheese. They had breathed 5L of water into the tent so it got a bit wet in there!!! like lying water in the tent!!!
Have moved to the Dragon Force now to try and get these chopped by next week! Too many big buds in there to risk any more issues or failures!!! Been a big learning lesson this run!!!
Nothing else on this week to report.
Happy growing all!!! 💪

Likes
53
Share


@MistaOC
Follow
**************
17.03. Day 50
Flower Day 10
**************
Now I've stretched the scrog net, which has stretched the plants out nicely. They look incredibly healthy. Flowering is starting.
// RO Water // TEMP 20C // PH 6,4 // CalMag 2ml // 0,1ml Regulator // 0,6 ph- //
**************
20.03. Day 53
Flower Day 13
**************
Flowering is in full swing. Today I added 3g/L of biobloom.
// RO Water // TEMP 20C // PH 6,4 // CalMag 2ml // 0,1ml Regulator // 0,6 ph- //
**************
23.03. Day 56
Flower Day 16
**************
// RO Water // TEMP 20C // PH 6,4 // CalMag 2ml // 0,1ml Regulator // 0,6 ph- //