


Likes
Comments
Share


@RanchPringle
Follow
Solid 4th week for the grow. She really bounced back after the stem breaks. Did more LST on day 22... And again on day 26. Feeding about 2000 ml per 24/ 30 hours. Showed signs of pre - flower on day 28.

Likes
4
Share


@Fatbudz
Follow
Week5
the temperatures dropped a bit and I did what I could...❄️❄️
Earlier this week I had to flush this little one because I thought she had nitrogen toxicity. Maybe not...
But From the water that ran out I realized that the soil was full of nuts and after the flush I didn't give it any more water. as I use a 12 liter vase, you can imagine how much water was retained in the root system. for that reason and because the water is good quality and has an amount of micronutrients, I didn't have to worry about giving water this week. let's see next week, wish me luck 🤞☺️🌞

Likes
42
Share


@Prototype0181
Follow
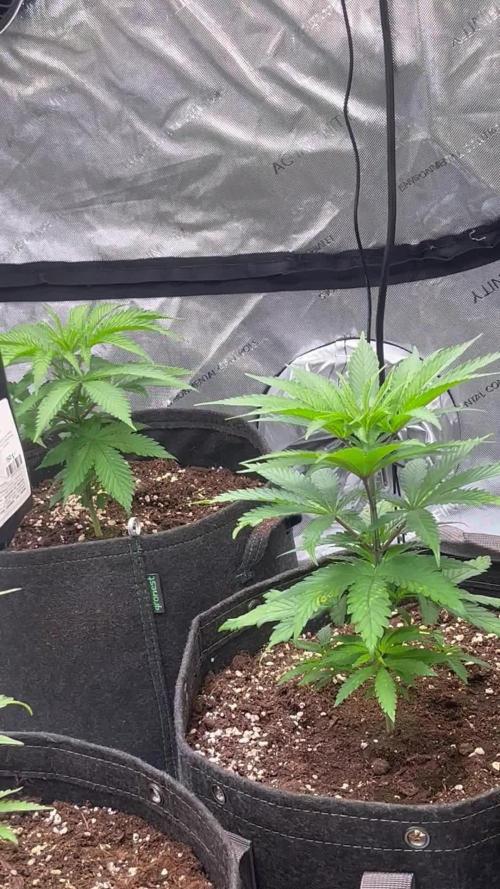
Since the transplant to their 1 gal airpots they took off. Further nothing to report 💪
Stay tuned growmies 🌱

Likes
31
Share


@Mr_Motalovah
Follow
Hello growers and tokers! 👋 👩🌾 🧑🌾.🔥💨
As you can see these ladies are growing nicely.
They're both at the same height 59cm but one is wider than the other.
Quite nice so far. That's 12cm in one week same as the Royal Gorilla.
Evenly spread canopy, the one that had better shape from the start now has longer colas.
Both are stacking nodes nice and tight.
They have a nice green color to them but you can't really appreciate that in the pictures.
I'm still trying to get a hand of this new phone, I might just go back to the camera. 🤔
Starting to get a little shine to them, I think this strain will be the first in forming trichomes.
They give off a nice smell but I can't put my finger on it yet.
Feeding 1,5L each, every other day. Will be increasing as they ask for more.
How do they ask for more?
When feeding if the soil is drier than normal I give a 150-200ml increment of water.
I do that until they stop feeding so much then i just maintain that amount.
I start reducing if it takes longer to dry.
That works good for me. The old finger in the dirt trick. 👍
Nothing like knowing exactly what your ladies need first hand.
**Info and pictures were taken at day 12 of flower.**
Hope you enjoyed this week's update. Stay tuned for next week. 😃
If you like this check out the other diaries of the strains in the tent. 😄
Take care and stay safe!
One love!✌️🏽

Likes
10
Share


@Bud_vista
Follow
We are entering week 6 now!
Since the last heavy defoliation 3 days ago she’s handling any stress like a champ. No highs of slowing down growth. First pistils are showing and looking strong
I feed her with 2liter of ph regulated water from bottom and about 1,5liter from top every 4 days.
The stretch is visible but not that crazy, which is good in regards of the limited space in the vgrow. At the end of week 6 she’s getting a little defoliation to ensure good light conditions in the lower part of the plant.
Processing
Likes
15
Share


@CanadianFillmore
Follow
Start of week 4, the blueberry is using up nutes quicker then the other strain's, but she rebounded quickly after being fed. The OG Kush is very compact and tight node spacing, lots of bud sites.

Likes
5
Share


@Naujas
Follow
I visited her for the last time today, and I'm going on vacation, I'll be back in 3 weeks, I think she'll be ready :) I hope the weather won't rain :) so next time I think it'll be harvest time:).

Likes
26
Share


@SirDillton
Follow
Final week: temp 20 , lights 20 hours, Par 400 slacked them off to increase stress slightly and trichomes development, RH 37%, (recommend crystal poured on once I dropped it) flushed 12 days before harvest. Water ph 6.2 . Ppm 150, sugar daddy carbohydrates was used highly recommend the smell increased tremendously after I fed them a full dose of this stuff. Runoff ppm 250 ph 6.2, water temp was bit colder then usual also.
Harvest , went with a full plant cut this time, for slower dry hopefully and easier lol. I simply rose my scrog and made sure heat and fans aren’t directly on my weed, and gun them upside down after trimming just the big fan leafs off.
Temp is 20 and RH is 50% , lights are off.
Trimmed and put in jars after 5 days and they were reading a humidity level of 72% so I will just burp the jars for couple hours daily until I achieve 60 ish percent.
As for my first over all auto flower grow is was a challenge, I am definitely excited to try them again and hopefully have a little more bud development because I didn’t have the time to train these properly and the lower bud sites are rather light and I want dense this buds. I will really benefit from a PAR meter and co2 meter next grow that’s the last variables I need to perfect.
. I hope y’all enjoyed this diary seeyou in a couple months.
-Sir Dill
Likes
17
Share

@Naujas
Follow
To tell the truth, I am very surprised myself, how amazing she is FastBuds Gorilla cookies, she copes well with a small space:) she drinks 1 liter every day :) everything looks better than expected:) good luck to everyone.
Likes
37
Share


@MrJones
Follow
Cream Mandarine XL-Auto #2 / FOOP Nutrients
======WEEKLY GOALS =======
🌞Environment - 80F and 50%Humidity - using Humidfyer as needed.
💧 Feeding - Feeding with FOOP Canna Organic Nutrient Line
🍃Training / Keeping Stems Stable and Strait
🕷️ IPM - Will be using Green Cleaner" 1 OZ per Gallon, and CannControl from Mammoth alternating between product each month for Integrated Pest Management.
🔅 Vegetation & Flower Kingbrite 240W QB288 v3 LM301H 4000k+ 660nm Red x2 - Maintianing 575 PPFD
========Plant Update===========
🌱 Plant - Week 6 started today, the plants are doing great very healthy, will need to do another IPM treatment in the mornting.
===========================
▶️Monday 03.29.21 / These girls are re well into flower, they are soundly in the 9/10 week glide path, they should start building up this week, may need to remove a few more leaves.
▶️Tuesday 03.30.21 / These look great every day, and have gotten too tall!! Feeding about 30 ounces per day.
▶️Wednesday 03.31.21/ Decided to cut the FOOP to 60%, feeding 30 ounces per day.
▶️Thursday 04.01.21 / Decided to cut the FOOP to 60%, feeding 30 ounces per day.
▶️Friday 04.02.21 / Decided to cut the FOOP to 60%, feeding 30 ounces per day.
▶️Saturday 04.03.21 / Decided to cut the FOOP to 60%, feeding 30 ounces per day.
▶️Sunday 04.04.21 / Decided to cut the FOOP to 60%, feeding 30 ounces per day.

Likes
102
Share


@Aleks555
Follow
Everything has been fine for a week. We trimmed the top of our girl; she is healthy, eating well, and growing in a 3-liter pot. When should we transplant her into a larger pot?

Processing
Likes
1
Share


@Mr_nugs_lover_David
Follow
This wedding cake is looking as healthy as her sister however she's in a bigger pot 25 liters. Let's see if she does as good as her sister,she's enjoying life right I don't think I'll have any type of issue,she's being fed 100% organically,with lactobacillus liquid made by me,liquid bat guano,and she has in her soil florians living organics and more bat guano and seaweed,mycorrizae,humic and fulvic acids,beneficial bacteria and fungus. She's gonna be a wonderful plant at the end I'm sure. Stay tuned guys! 💚🌱✌️

Likes
3
Share


@DRAZ_420
Follow
All of the branches have been tied down for LST she is reacting super well so far. The smell on it is definitely becoming apparent. Love how they are reacting ti the nutrients from green leaf as well very responsive. Everytime i prune leaves of more just grow immediately pretty amazing. Cant wait to smoke this plant :)

Processing
Likes
7
Share


@NorthernFrostCannabis
Follow
Really exploding the first week of flower. I lollypop the bottom before bud.
Likes
12
Share


@cheetah844
Follow
This one is going outside. It's a regular photoperiod seed, I'm hoping it's a female for some long awaited & needed flower.
This was the very first strain I ever ran out of several years ago, I'm ready to have this back in stock 💜. I remember it being very relaxing, dissolving my migraine & putting me in a relaxed but great mood.
Likes
25
Share


@Fatnastyz
Follow
9-9
Biggest of the bunch! Ztrawberriez
Recharge around 750ml
Kosher rockin too though!
9-11
Day 17
Both big and tall, so I bent them!️
I happen to notice a slight, tiny hair on Ztrawberriez. So Ill mark her flower, in around 5-6 days. I'll hold top dress till then as well.
9-12
Big water! Brought eco witt from 20% to 45% after settled. Took around 2-2.5 liters.
Definitely pistols!
9-14
Adjusted LST, prepare for water and top dress tomorrow. May add booster!?
Great growth and end to the week! Both have pistils, z by 1 day! Both start flower tomorrow!
Thanks!
Likes
1
Share

@4hundert20
Follow
Endlich steht alles und die Parameter pendeln sich ein..
Das sieht man den Pflanzen aber auch an.
Ich entferne nach und nach die nekrotischen Blätter und muss mir überlegen, wann und wie ich anfangen werde, die Pflanzen breit zu bekommen.
Ertragen die nochmal ein radikales Topping? Oder lieber behutsam knicken bzw runterbinden?
Processing
Likes
7
Share


@winn420
Follow
so its been a steady week growth has been amazing especially on my OG kush and the auto-colorado Cookies. Unfortunately while doing some lst on the colorado cookies i snapped branch. I was able to duct tape it back and hook it to the main branch as a form of botany sling. ill be taking clones in 2 days (waiting for freaking amazon) i plan to take arond 3-6 from the og kush and 2-5 from the g zkittlez(about 8 total) from there i will begin a perptual 2 week harvest. Once the roots take place i will put them all in soil and after about a week or two i will be placing 2-4 into a flower tent, arriving soon as well. Following 2-3 weeks later place another 2 into the flower tent, and do this while cloning every 5 weeks. This is a rough draft idea. I will need to ensure the essential space is available, the veg tent doesnt get too crowded, and the smell can be contained. But all is looking good as of now!
update 09-04
took clones today. took too many the goal was 6-8 total and i did 8 per plant, 16 total. The OG kush has been such a stronger strain in ways i did know plant could vary. What i am specifically speaking to is when cutting the og kush cuts stayed up right with leaves still in the up/"praying" position and stayed that way until placed in the tent. the G zkittlez IMMEDIATELY started drooping and i could feel how weak the cuts were. Regardless i took 8 from each and am very excited about some of these cuts. I still have high, yes pun intended, hopes for the gorilla zkittlez, some strains in my experience do shit during veg but come alive during flower and vice versa, that being said if the same routine occurs during flower i do not expect to keep this strain in my line up. i have Amherst sour Diesel (humboldt) and Skywalker Kush (emerald triangle) seeds sitting waiting to be used, 3 of each fem.


Likes
25
Share


@Chubbs
Follow
What up fam. This girl has absolutely exploded into a beast. It's probably the one of the biggest Autos I've ever grow and definitely drink more then any I've grown. She's drinking a gallon a day and not showing any signs of slowing down. The flowers are definitely forming and looking phenomenal. Happy Growing
Likes
5
Share


@pzwags420
Follow
WW is putting on weight and trichs I switched to ro water.Im happy with ww so far


Likes
5
Share

