


Likes
15
Share

@pHilosophy420
Follow
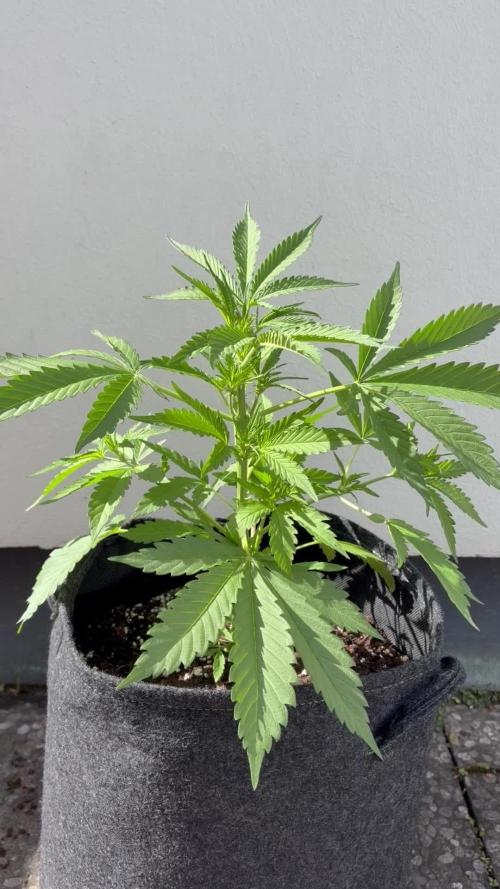
Day 77 , Power at 90% and lamp distance still at 45cm.
She’s getting denser every day, and the buds are looking really nice. I’ve probably got another 2–3 weeks to go, so I’ll be about two weeks late on the content, but that’s fine. The plant is coming along beautifully and should turn into some really good smoke😜👊


Likes
18
Share

@Mrs_Larimar
Follow
2025-09-18
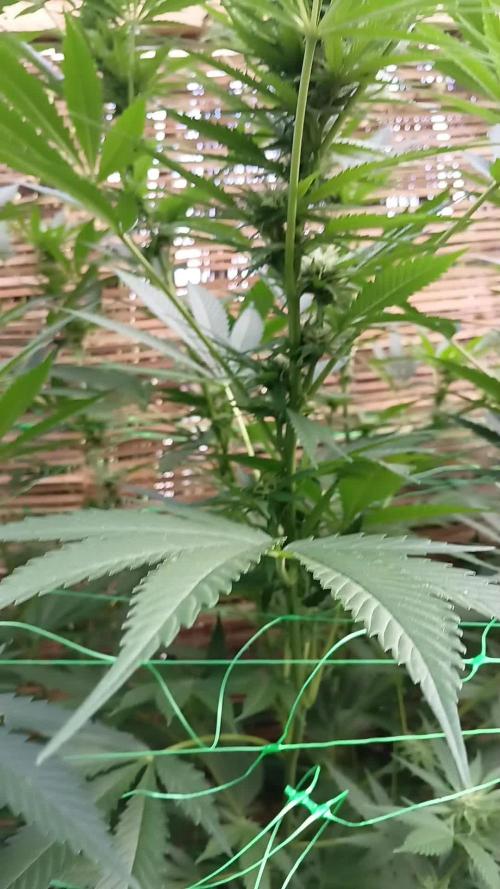
SHAMAN- Lady loves her space.
She sitz in a rich deep bed of loose Soilmix, stabilized in 2 SCROGS, and covered from above
with a wonderful taransparent roof
We had a couple of rough days with heavy Wind and Rain, but she stayed safely
xxxxxxxxxxxxxxxxxxxxxxxxxxxxxxxxxxxxxxxxxxxxxxxxxxxxxxxxxxxxxxxxxxxxxxxxx

Likes
1
Share

@Trichoma
Follow
@ 1.4-1.6 kPa
Feels like she is developing her buds pretty slow for 8 week flower strain likely gonna need 2-3 weeks I would guess in my case.
Likes
3
Share


@CannaBossBizz
Follow
The Moby Dick ist gettin bigger every day. Lovely plant.
Did top her and some LST so every branch's gettin enough light. Stay tuned for more 🤙🏽

Likes
10
Share

@Chubbs
Follow
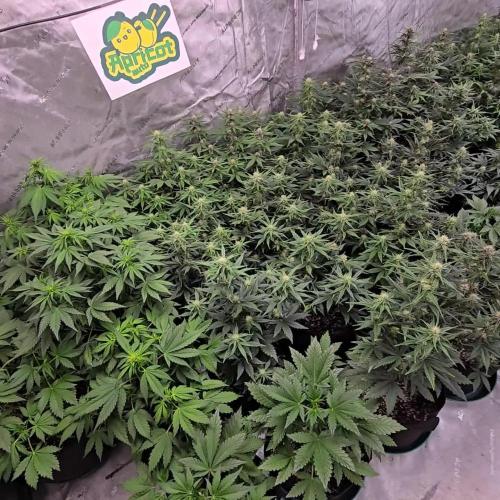
What up Grow Fam. Weekly update on these beauties. They've stopped the stretching part and now started focusing on flower sites. Seeing the flowers swell almost daily is wild to watch. I started to drop the night temps down to low 60's and around 70 with the lights on.
All in all Happy Growing


Likes
15
Share


@MrRaid
Follow
She grows with ease she doesn't need extra attention all she needs is feed and light
Likes
27
Share


@Bristolguyty
Follow
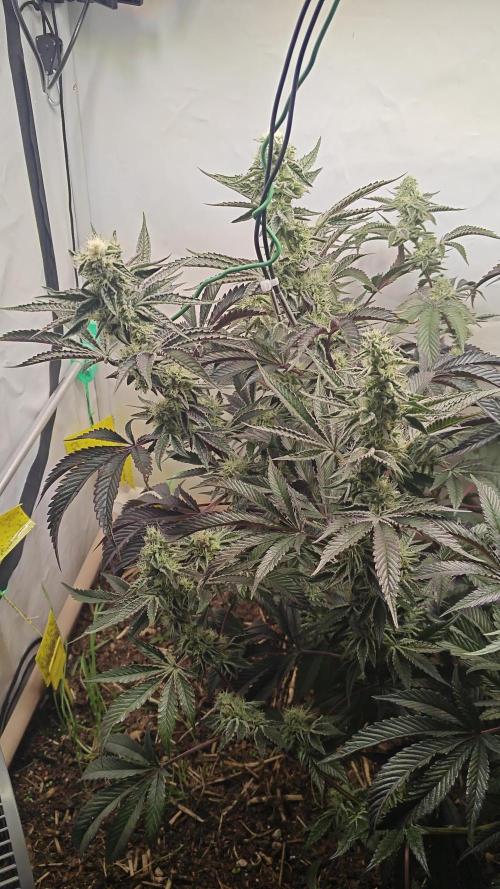
06/01(85) - I've decided to flower for a little longer, i have cut back all the large fan leaves for this final stretch. some of the side buds are getting heavy and almost as big as the main colas.
07/01(86) - I am just dyeing to harvest her but will hold off a little longer, included a video to get a scale. I've been massively impressed by this strain so far. leaves are still a dark green
08/01(87) - This morning at 8am she has been banished to darkness, will check on in 24 hours but expecting to go 48 hours. gave last plain feed yesterday and pot is still heavy so no more water. hoping to harvest on day 89/90 (sorry for mass picture dump)
09/01(88) - Completed 24hr of darkness and checked buds for mold. water has now been used up and pot is light. Noticed the smell is easier to distinguish. going to leave for another day as I am waiting for some sieves/gloves/trimmers before I harvest.
10/01(89) - Checked this morning at 8am and the COCO was bone dry. I have now cut her down at 4pm and weight was 401g but that with stems and leaves straight from cutting (might weigh tomorrow once trimmed). I have began the trimming but have to do it in parts due to time restraints. Quick One (81 days) is now back inside the tent but is still too big. will see if its worth keeping in the next week
How do others check wet weight??
I will be completing a harvest page in a few days once I have fully trimmed and dried to get final yield before curing.

Likes
Comments
Share


@chuggerguy
Follow
I've started using 0.6 "grams" of peter's per gallon of water. Not 0.6 mL. I don't know how to enter that.
Before I started defoliating they were each drinking a full gallon of water per day.
A couple days I misjudged and opened the tent to weeping lower branches.
Now that I've defoliated, they each drink somewhat less.
Pistols are still yellow. I'm assuming they'll turn brown/red before they're ready to harvest?
My eyes are so bad that even with a scope I'm not sure I can spot cloudy trichromes turning amber. I'm not even sure I can tell clear from cloudy. I don't think they're getting close yet though, maybe 3 or 4 more weeks?
I put the undersized screen up only because a few colas started falling over. I don't like that I can no longer rotate them but with the defoliation, I can see the back side.
These were freebies from lucious genetics. Photo periods. I don't know what to expect from them.
Until recently I hadn't smoked since the 80s. I'm sure they'll do the trick. :)
Likes
2
Share
@RooftopFarmer
Follow
Guava Runtz – Week 6 (Fast Buds Outdoor 2026)
The weather remained good. Guava Runtz is getting a lot of sunshine and consistent nutrients.
She has stayed compact and is now around 22 cm tall. The plant has a healthy green color and solid structure.
Steady growth so far.


Processing
Likes
3
Share


@GanjaFarmerGrow
Follow
She is going ok...
dispite the bad quality of the air..
she is takind some heat this week...
really fully flowering..
I have increaed the feed...
hope it all goes good...
fingers crossed 👍


Likes
18
Share


@Pokan187
Follow
All is good so far, the seeds of all the different strains have been quite vigorous. Lost my first sour diesel due to my impatience, but the second time around was a charm .

Likes
Comments
Share


@Liberty420blaz
Follow
Day 42
pistils showing up here and there,
tucked a few leaves away from bud sites
looking healthy, i expect her to enter bloom in a few days.
recieved her nutes today
4L dechlorinated water
12ml bloom A-B
rhinoskin,bud candy 8ML

Likes
40
Share


@BudXs
Follow
These 6 slurricane are set up to be some frosty MFr's. 4 phenos, im hoping at least one of em is the frostiest nug ive ever seen, cuz thats what the marketing told me. A smaller stature plant than some of the others, but one of em is just a fkn mutant. The growth in the coco/perlite hempy's is astounding, right up there with DWC. Many of these girls have outgrown their mother which resides in 5 gallons of soilless. Loving the node structure and red stems on this plant.
F11 and all is good. Environment on point, smell in check, and visiting the garden only 3 times a week. Stay tuned for some monster nuggies!!!

Likes
5
Share


@Bluemels
Follow
Tag 40: Ich gebe zusätzlich Alg a mic in das Gießwasser zur Stressbehandlung.
Tag 46: Ich habe mich entschlossen diesen Grow abzubrechen. Seit kurzem werden die Blätter hell und fühlen sich trocken an. Ich vermute es liegt daran das ich einmal ein großen Schluck zu hartes Wasser genommen habe. Ich hatte einmal zuwenig Gießwasser vorbereitet (PH wert eingestellt 6,3) und es lief unten nicht raus so nahm unvorbereitetes (PH wert 7 etwa) Wasser zum Schluss, zunächst wuchs die Pflanze normal weiter, doch nach 1-2 Wochen stagniert das Wachstum die Blätter sind hell und trocken, auch die neuen Triebe sehen nicht gut aus.