
Likes
Comments
Share


@A1420
Follow
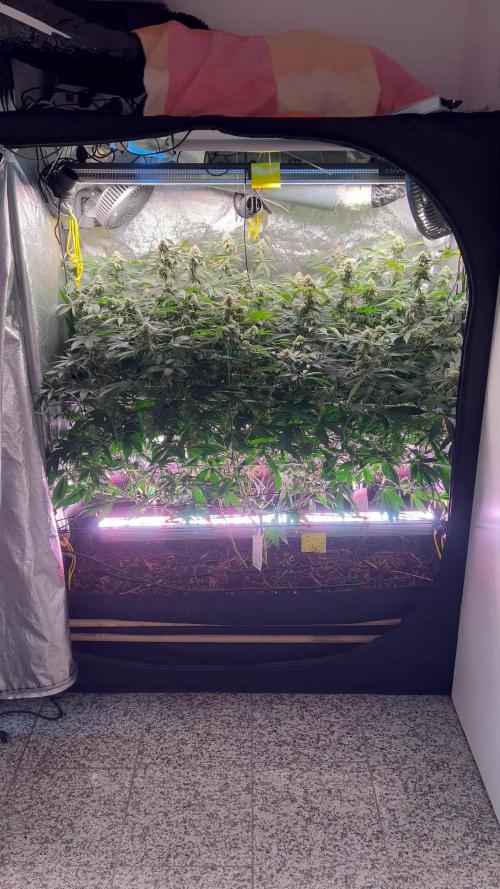
Plant is 8 weeks from seed today, stretching has now stopped and she is starting to fill out now.
It looks like the feed will sit at 2ml A +B to a litre as she hasn't shown signs of wanting anything more although pk 13/14 will be added in roughly 3 weeks time.
She's been drinking a lot more last few days


Likes
189
Share


@Green_Man_420
Follow
Evening fellow growers. Hope all is well and you’re all doing great!
⚠️I’m down to one 😞😞😞😞 the other lady is now chilling in the garden. I was running out of space and no matter what I did I couldn’t get her back.
I will add more pics but it’s just too cold in the garage to have them out.
This has got to be one of the hardest grows i have done. I always knew starting this early in the year was going to be hard and it’s proving that way.
And again a massive shout to James and the team at RQS for supporting me and supplying me with the seeds. 🙌
Here we are week 6 the start of the second week of flower. This lady is moving along alright (I think) although the cold weather is back and has not been to kind over the last couple days. She is still stretching out which is good, some sativa characteristics coming through. Just signs of cold which isn’t the best. The bud sites are forming slowly and the structure of these plants looks good. Let’s see what this week brings. ✌️
Day 37, Watered tonight with 500mil she is doing ok. Added some nutrients in today as she has only been on plain water and looking a little faded. I’ll try get some pics later but it’s too cold to be in the tent any longer than I need to be. ✌️
Day 38, warmer today and this girl is finally starting to love life. Nothing done today just a few photos and a little video. ✌️
Day 39, watered with 500mil and a bit of feed. Took a few leafs off too. ✌️

Likes
12
Share


@2SeedsToParadise
Follow
Some deficiencies or burn in bottom leaves but show goes on.Bout to hit the Jumanji weeks of upward growth
letzgetit


Likes
5
Share


@Jays_Not_Here_Man
Follow
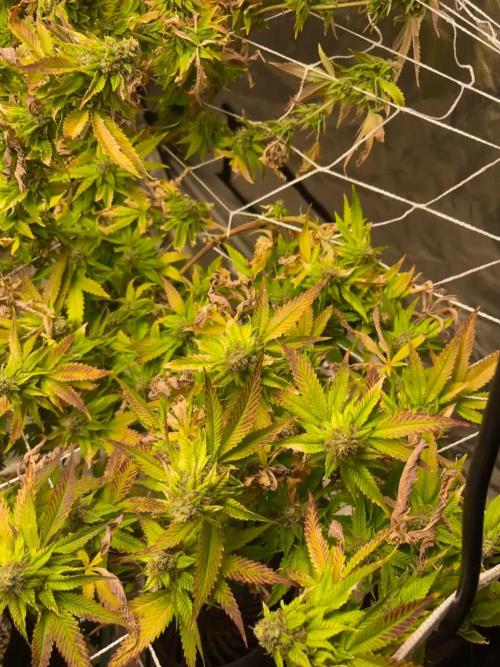
These girls are exploding! Flower came so fast, they are all showing need for more phosphorus and potassium, while at the same time showing nutrient burn at the tips, Jebus, save me! Lol . Overall, no complaints. A few more weeks to go!

Likes
7
Share


@magonheiro
Follow
Thricomes starting to move from transparent to white ones, my idea is to harvest when I find any ocurrences of ambar
Starting from 2.2 EC and lowering to 0.5, then I will flush with tap water (50ppm) in 3 days before harvest.

Likes
2
Share


@Cefek
Follow
31.3 The plant has entered the flowering stage, with the first pistils starting to show. I think both plants are going to be the purple phenotype. You can already see the first hints of purple on the early-stage buds—or at least they seem to have a purple tint. We’ll know for sure in the coming days.
2.4 They’re definitely going to be fully purple. Even at this early stage, they’re already starting to show deep purple hues. I’m really excited to see how they develop.
Likes
11
Share


@BudBeezy
Follow
Welcome to week 12 of my grow diary. There's not much new this week. The plant is growing as it should and is slowly starting to stretch. I have increased the watering quantity to 10 litres as the soil dries out too quickly. Unfortunately, my nettle slurry has now been used up. The stem is now 3cm wide.
See you next week ✌️
Likes
3
Share

@Organic_G
Follow
Einfach wunderbar, noch ne Woche würde ich den Tops geben, dann kommen die wahrscheinlich noch ab, werde wieder stufenweise ernten… oh Mann kein Bock auf Trimm Jail…
Aber wieder ordentliche Beute für 3 Pflanzen

Processing
Likes
23
Share


@Cookie_thefarmer
Follow
Day 122- first signs of the some pistols ambering! Super excited I know to be patient! About 3-4 weeks out I think!
Putting my favorite photos and more on my Instagram! Follow me 📷 @cookie.thefarmer

Likes
2
Share


@PlantGod
Follow
exploded in growth this past week
nutrients to start the week must have been it. Other clone strains didn't respond like this though!
Starting the 3rd week in 3 gal pot tomorrow

Likes
11
Share


@julian100614
Follow
En general la cepa es bastante buena para cultivadores tanto expertos como novatos. Es una planta bastante resistente a los cambios y con gran fuerza en el tronco.
Durante todo su ciclo ella fue perfecta, tanto en tamaño como en producción. Tiene un tamaño medio y es gran creadora de resina 👌 si tuvieramos que poner algun pero sería sus cogollos que no erminaron de ser muy compactos, quedando algo desprensados cada uno de estos. Tambien haybque tener en cuenta que es una variedad automática y no feminizada lo que tambien influye bastante ya que no van a salir de la misma manera.
A rasgos generales puedo decir que la planta me ha gustado bastante y es un gran aliado para fumar de día y pasarlo mas alegre y feliz 👌
Likes
1
Share

@ThaKiloVillain
Follow
Appears to have some nutrient lock out? Not sure? Probably just going to continue her out until harvest at about day 64.
Plant still smells amazing. Buds are smaller than I would like. Still a good plant. Very resilient.

Likes
54
Share


@Ch33cH
Follow
Well these are the final pics of her. Gonna be sad to see her go but glad to get her in the grinder 😂.
This grow has spoken for itself. She has presented no problems and never asked for anything. A plant that was quick of the mark and had almost no reaction to being topped, It really is a healthy strain. In darkness now for next 24h then i'll get her down and hung.

Likes
14
Share


@Ganja_Victoria_Aus
Follow
Almost 4 pound of plant. I got to taste this strain coco and hydro. Bud looks and smells fantastic. Dunk extremely ⛽⛽⛽🌈🌈🌈

Likes
15
Share


@Siriuz
Follow
Yo guys whats up
Check out my videos and lemme know
Im trying my best to keep up
MY girls are doing very good
Im just too busy right now with my son
He is 10 months old now and sometimes I have to leave behind the girls thank God I had built over the past months a great setup and I keep improving every time I have budget so it is very kind of you every like you give and every Comment is a blessings for us as a family you guys help us a lot to continue promoting and growing the best medicine in this world, thanks brothers happy growing and keep enjoying our diaries we will keep posting once we get the time and space for sure stay tuned
Now this
PPM 1000 lowering down to
800/600/400
Until we are done for the remaining weeks
Also we stop adding nutes for like 2 weeks now or so
We only add water every Day
Like 300ml at least to keep them hydrated
But for us is best to add one 1.5 liters then wait for them to drain and leave them like that for like 3-4 days until water in the bottom is full absorb this forces the roots to go and drink water which makes the plant grow bigger...
I know THESE are autos but you would be impress depending on the genetics of what they're capable of
The only thing that really f them up is time
They dont go back just forward so yeah
Got to be quick
Anyways how you doing guys
Happy growing thanks for everything


Likes
Comments
Share


Likes
24
Share


@GreenthumbGreen
Follow
It was a pleasure to grow logendary strain such as Franco's Lemon Cheese.. sticky buds and grat aroma is what i love.. effect is so strong and euphoric.. i reccommend this strain to everyone.

Likes
96
Share


@gottagrowsometime
Follow
Welcome to my MilkyWay F1 Auto Diary, Untopped VS topped. Results are in.
Days 71-82 ripening 0-13 week 11&12
Went well. She did bulk up a tad. But not much. They spent most their lives under a 100w. But, the bud is really dense all over. No larf, at all. Its a really good quality of bud I'm getting from both phenos. As far as ToppedVsUntopped well, that result is in. With a seeds used from the same pack (same parent) making true F1s as they need to be from the same batch. It why we all got different phenos, and those who ran more than 1, from their seeds, the phenos are very close. One of mine had more of a fade and looks more purple. Both smell very lovely & fruity. Nice trichome production with very dense but, rather small buds if I do say so. But the grade itself is very high. (As grade is not rated on size) overall both turned out very similar. Even fade wise, they've both developed a lovely colour finishing under high co2 environment with the SE5000 really has brought out a lot of fade i normally do not get. look at the start. It was only a few days under this light and the past 14 days they've both popped. I will also say. A lot of their life was spent under a 12-12 (3/5s of flowering).
Topped VS Untopped pheno 2 & 1
Are very similar as I've stated this area will be filt in with harvest comments. Bud smell. How the dry went. And after a weeks cure. I'll rate it. So watch this space. These 2 phenos have been on just water for 10 days. I did a quick run off test. Got back 145ppm my tap is 110. So, they're good to go. Trichome wise. 95% cloudy 30-35% amber. (Hard to see, I'll try get pics with my scope) but, as you see. Both are fully ripened. Anymore and its just bud deg. Both plants leaves are showing end of life. Some are dying. (I'VE BEEN WATCHING THESE LEAVES AND SEEN THEY'VE BEEN DEAINED, ITS NOT BR)
Lights
The SE5000 was used for the Ripening phase. With high temps and co2 i pushed my boundaries and got a lovely fade reaction from doing so. How I know its down to this light as I've put my Runtz under it. And as soon as I did. It developed fade. My Frosted G even started getting light purple on its sides. The temp in tent has been pushed to 31-33c (that's not leaf temp as I've fans blowing on my plants, and that lowers surface temps by a few degrees.) They've been on 17hrs of high powered light. At 25-30cm id no choice. My temps are mad high this time of year.
Harvested
Both plants are been pult they're getting their last few hrs. You'll then see the last few pics in a few hrs. I'll get bud shots later, smoke reviews and then to be fair. I'll then mark it by the GD rating system. As I do with all my strains. (So I've 2-3 wk delay in my diaries as they're Harvested, mostly) both plants I'll try push them as far as I can through the drying process whole. But, as I'm dealing with high temps. Lower RH and a fastercl dry is pref to a longer dry in hot conditions might not make sense, but 30+ hot weather harvests, I've got this down. Mind you only this round all my other hot harvests some took a few weeks to rid the hay smell. This avoids it and locks in potency. Most of the drying is done by leaving the plant in the substrate just before the plant goes for itself for fluids. 4-5 day dry as opposed to 5-6 day dry with weed that loses half its stenght. (dry harvesting look it up)
Thanks to James from RQS, although I know everyone and their sister got the offer for these seeds I am defo going to be trying more from RQS, if it's buying. I'll get round to it, and depending on the quality of smoke it might be soon. If its a real nice auto, I'd love to try a fem of theirs for my winter crop in October. But, that'll depend. I've lots I want to buy & try.. and when favs are found. I'll invest.
I would like to thank everybody for the activity this diary has gotten. Its possibly one of my most active diaries I've done without a harvest. And that's in no short means down to all the views and likes from you guys. And for sure I will fully complete it, with results on the smoke Quality from both phenos, if it varies, but, results thus far, structure wise they're shockingly similar. Scary so. Topping has very little affect to the structure. She grew a main cola. But both phenos, turned puples I will say the topped one was a more troublesome plant. Maybe that had a role onin its morphology. And maybe it'll affect the bud also. The topped was more demanding nutrient wise, and drank more. Maybe to support a more even bud load. (I've yet to do a through inspection, but on the VS front, it's kinda in the air about quality, structure wise, it had very little difference. Look for yourself at the heights are 3-4cm dif) lots still to come. And I'll update it soon with more results. Again, thanks so much for the support, likes, comments and how active it is, an unfinished diary moving to my home page. 1st for me. So thank you.
Also to my light sponsors who played a part in this grow. Although both phenos owe their bud quality to 2 x 100 watts SF-1000 (SE5000 was used for ripening lovely fade) and I used a P1000, they shared even light distribution in the end for the most part. So, thanks to Bella for the upgrade. I'm sure when I run an RQS strain again, this time I'll know only have the fade to show, but the bud size too.
Thanks again my Friends. Updates pending as of 6th June.
Edit
June 7th
Both plants are hung whole and drying 24hrs. I don't like how fast they're moving. The buds are already soft. Should still be hard at this stage only 30hrs in. They'll harden up in the cure no doubt. Let's just hope they don't shrink too much. Will give daily updates