
Likes
Comments
Share


@Cariboo_OG
Follow
The Number's;
Started with;
564g Wet on the Scale
Finished with;
263g Dried Flower.
Plus some Pollen for a Personal project..
IMO; Definitely decent yields for a pheno hunt.
Two tents filled with Pheno 3... would be OFF the Chart yields :) That is coming soon !
Big Thanks to EVERYONE who stopped in to support this diary.. your the real MVP's
Until Next Time,
Cariboo.

Likes
7
Share


@Cultivatorcarlos
Follow
everything in the second week of flower went well. she really stretched and the buds quickly started getting fat. also every watering i would notice a very strong odor of weed.
december 22nd 2021: gaver her last half of gallon used in last feeding. also nothing was tested. ph tested at 6.6 last feeding and it usually comes out a little higher after a few days.
january 1st 2022 i noticed the first trichomes.

Likes
18
Share


@Wrongholn519
Follow
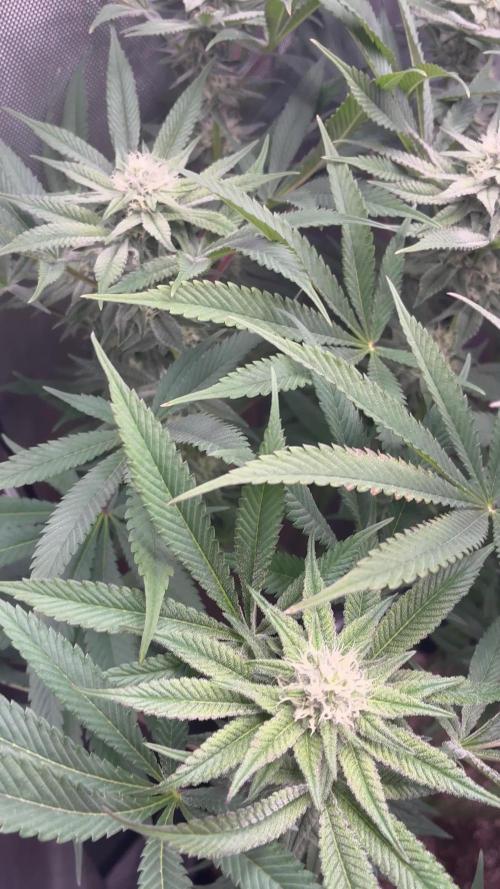
At this point I'm checking the plant for signs telling me it's time to harvest. I think I'm getting pretty close at this point.
She is putting out a strong smell and has a sativa structure with tall and dense flowers.
I fed a really heavy compost extract this week with calmag and Golden Tree.
Process/ Environment changes:
- turned off one Ts1000 yesterday when I cut down the blackberry auto
- humidty set to 45-50 % RH
I'm on auto pilot at this point and I'm looking forward towards the dry and cure phase. I have purchased 1 gallon glass jars to cure the flower in. I have also purchased 2 way humidity pack to help keep my cure on the right track. I will go in to detail about my process when the time has come to dry the flower.


Likes
27
Share


@adam_pawloski87
Follow
Today is day 72 from seed!! This week went real well , 2 of the Forbiddin Runtz have been getting flushed an the rest will also start flush through this next week, I can’t believe the smell of this combo strain,, super fruity smelling an all are super sticky!! Stay tuned for next week yall !


Likes
16
Share


@GreeneScene
Follow
I stressed this lady out early accidentally , she bounced back as best as I permitted room for . She bared with me all the way until the end throughout this entire learning cycle . I’m deeply appreciative for the ease of grow & level of bounce back she had . It was the most impressive grow but it didn’t require rocket science to grow this either

Likes
371
Share


@love_2_grow
Follow
D85.
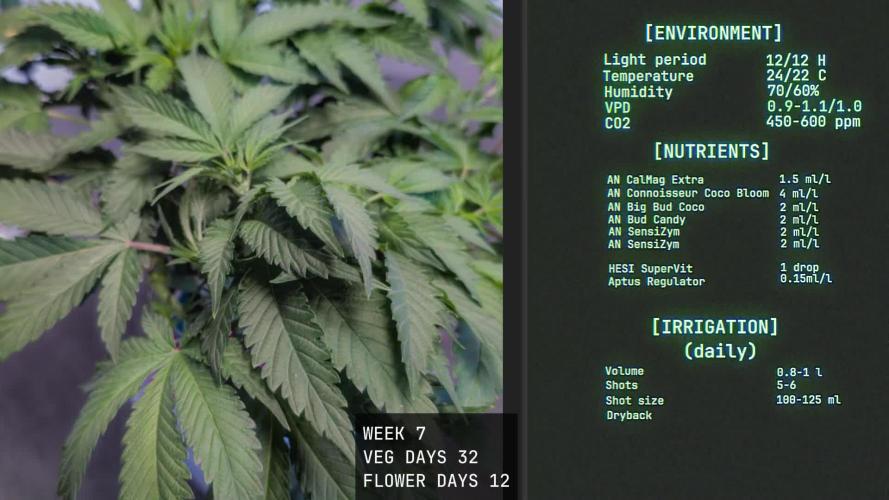
At the start of week seven of flower, the girls are just humming along.
I gave each girl 2.5 liters of water @ pH 6.6.
------------------------------
D87.
I brewed a compost tea with worm castings, kelp meal, neem meal, rock dust, biochar, and molasses and gave each girl 2.5 liters @ pH 6.3.
------------------------------
D89.
Each girl got 2.5 liters of water @ pH 6.3 with Bokashi Juice.
------------------------------
D91.
We're at the end of the seventh week of flower, and things are uneventful in the tent. I still can't find any thrips when I scout, so that's good.
Yesterday, each girl got 1.25 liters of water @ pH 6.6 with fulvic acid and FFJ, and today, they also got 1.25 liters of water @ pH 6.6 but with humic acid.
------------------------------

Likes
10
Share


@Exploding_buds
Follow
Esta semana hemos implementado la iluminacion metiendole junto al fc3000 de marshydro, 3 barras de led kappa solux para explotar este scroog💥🌱


Likes
39
Share


@GrowWiththeBro
Follow
Half gallon nute feed.
Trichomes still a little glassy. Dense budding 👌🏾. 60-65 days for both ladies will open the window.
Flushing soon.


Likes
2
Share

@puff_mcdanks
Follow
Soaked Seed in RO water for a day. Already saw tap root exposed....Nice!
Used my dibber planted 0.5" deep | Domed | Lights off | Heater set to 79°F | Humidifier 70%.
Popped 3 days later.
DLI 19


Likes
1
Share


@ChitownCannaChica
Follow
What can I saw? I did this plant dirty with the multiple plant dwc set up. Beautiful colors
Likes
8
Share


@Growstopher
Follow
6.18.25.
7th week of flower started on 6.16
Plant is still putting on bud so I would say about another 2 weeks left. Just started lowering nutrient strength so she will be nice and flushed by harvest! Wish she wasn’t so stunted from being stressed out. Another 2-3 weeks and harvest!
Thank you for checking out grow! Have a grow day everyday!
Likes
10
Share

@MADMANk
Follow
Super croppin, clips and defoliation, quite aggressive this week as shes getting rather large! 💚✌️

Likes
Comments
Share

@TyRun
Follow
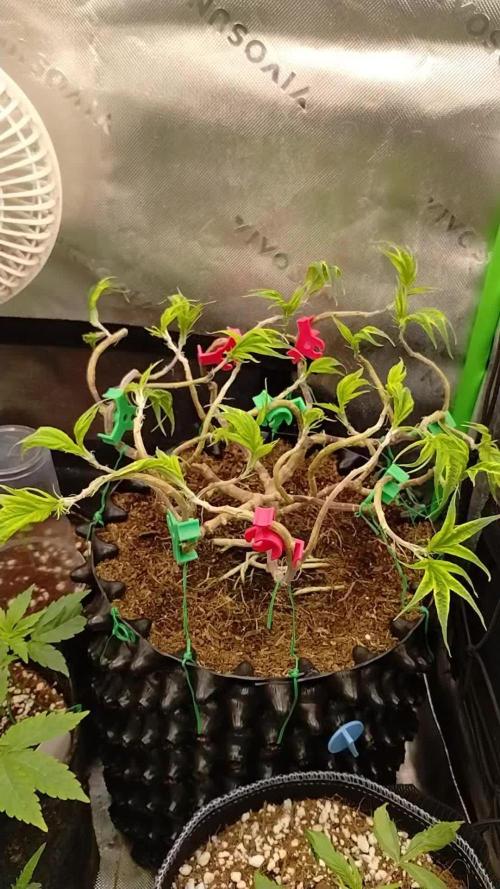
Clones termination. Mom's flowering.
Yep, this is an example of how it should not be done. The clones survived two cases of tip rot and a transplant after cleaning the tips.
They finally developed some roots, but still didn’t make it. I kept only one, but I need two. So… the mom is about to start flowering after stretching, and I cut eight branches again to make a second clone. After some bending and tying, the mom returned to the flower room. If your light has a flower mode, now is the time to turn it on. The fast stretch period is over, so add some red light. It helps with yield.
This time we’re going to do it right, using the experience from the first attempt at cloning.
Check the clones 2–5 times a day. Keep the propagator lid closed at all times, and don’t let water touch the cloning medium. Also, the cubes shouldn’t be soaking wet, just moist. This balance between water content and airflow is crucial for future roots.
Likes
Comments
Share


@609indica60d
Follow
Night & day difference from my first grow, in a GOOD way lol good genetics for sure


Likes
4
Share

@NyBushDr
Follow
Good morning, today is day 22 flower ! Nothing much to be reported as everything is on cruise control and there’s basically nothing for me to do anymore but water ! The permafrost buds are getting frosty, stacking amazingly and chucking up while the jungle cookies smell very strong but aren’t stacking as tightly! I’m super happy with how they look! Just continuing to water a gallon every couple days rotating fish shit and silica as usual! Nothing else to report and I’ll see you all next week