
Likes
Comments
Share


@Mrs_Larimar
Follow
March, 19th
Second Week of Vegetation breaks
Seedlings have established, hardest Part is done
She gets sprayed daily with "Fast Plants Spray", and water with beneficals if she needs it
Smooth running
I was setting up this Tent new and they got a new Light too.
Iam very happy with the Light
Its a bright, good quality Quantumboard
The corpus is built solid, and has cooling fins, so the Board and the Tent stays quite cool
No issues
It runs on 60 Percent
The Light was released on March, 15th.
here are some codes
Amazon US:
XS1000 10% off: it10mlarimar http://yx-8.cn/0y-6
XS1500 5% off: it15mlarimar http://yx-8.cn/0yA
XS2000 5% off: it20mlarimar http://yx-8.cn/0y2Y
XS4000 5% off: it40mlarimar http://yx-8.cn/0y5k
Amazon Canada
XS1000 10% off: it10mlarimar https://amzn.to/38udUVe
XS1500 5% off: it15mlarimar https://amzn.to/3esVUyr
XS2000 5% off: it20mlarimar https://amzn.to/3l5zAfg
XS4000 5% off: it40mlarimar https://amzn.to/3l7k5Uj

Likes
119
Share


@DogDoctorOfficial
Follow
Hello, my green connoisseur! The moment we've all been eagerly awaiting has arrived—the Harvest Report for our botanical queen, Jealousy, in the Power Buds competition. This has been a journey filled with anticipation, and now, we stand on the shores of botanical triumph.
Jealousy, in her final act, bestowed upon us a generous yield of 195 grams of dry bud. It's like a cornucopia of green abundance, a testament to the meticulous care and strategic decisions made throughout this green saga. Each nugget is a jewel, a culmination of weeks of growth, love, and dedication.
But the story doesn't end there. Jealousy, in her love for the trim bin, gifted us a beautiful golden pollen. This precious powder, transformed into ash via the French Cannoli style. Also gave me a Charas/Finger Ash ball. It's like capturing the essence of the plant in a tangible form—a botanical relic that encapsulates the spirit of our green empress.
Now, let's talk about the auditory symphony that accompanied the harvest. The sound, reminiscent of a tree making timber, is like nature's applause for the bountiful harvest. It's the soundtrack to a successful cultivation venture, a melody that resonates through the grow room, echoing the grand finale of this green symphony.
The drying process, carried out over two weeks with a temperature of 17°C and humidity at 58%, is like the slow and methodical crafting of a fine wine. Each day, the buds undergo a transformative journey, evolving from freshly harvested flowers to dried and cured masterpieces.
And now, the pièce de résistance—the preservation of terps with the Grove Bag featuring Terploc technology. It's like locking the aromatic essence of Jealousy in a time capsule, ensuring that every toke carries the full spectrum of flavors and aromas. The anticipation for the smoke report is palpable, as the strawberry candy profile promises an exquisite sensory experience.
Reflecting on this entire journey, from germination to harvest, it's like turning the pages of a botanical epic. The decisions, the challenges, and the moments of sheer joy have shaped the destiny of our green empress. It's a narrative that will be retold, shared, and cherished in the annals of our horticultural adventures.
As we conclude this harvest report, let's extend our heartfelt thanks and shout-outs to Zamnesia, Plagron, Grow Diaries, and the vibrant community. Your support and contributions have been the guiding lights on this extraordinary green expedition.
To my fellow contestants and growers, may your own harvests be as abundant, flavorful, and joyous as this one. Here's to the culmination of our shared green dreams, the thrill of the harvest, and the anticipation of what lies ahead. Stay green, stay inspired, and keep cultivating those dreams!
With true love comes happiness. Always believe in yourself and always do things expecting nothing in return, with an open heart. Be a giver, and the universe will respond in ways you can’t even dream of .
Friendly reminder: all you see here is pure research and for educational purposes only.
Genetics - Jelousy @Zamnesia
Nutrients @Plagron
Light - @viparspectra P2000
Room size - 3x3 - 0,9x0,9


Likes
169
Share


@squalino
Follow
SESSION-AUTO-XXL
PLANTE : Mac 1 – "Spirit" (Plante #2)
BREEDER : Growers Choice
DATE DE DÉBUT / GERMINATION : 11/04/2026
DATE DU CUT : 11/07/2026 (J+91 / Semaine 13)
STADE : Bilan du Séchage & Verdict Final
📋 BILAN DU SÉCHAGE & PESÉE FINALE
Le séchage est désormais terminé et le verdict est tombé. Les chiffres dépassent toutes mes espérances :
Poids sec total : 231 grammes de têtes dures, lourdes et parfaitement maniables. Un ratio de séchage excellent par rapport aux 694g humides du cut !
Branches monstres :
La structure de Spirit était tellement dingue qu'une seule branche pèse à elle seule 40 grammes secs, et deux autres branches secondaires ne sont vraiment pas loin derrière sur la balance.
Contrôle de qualité :
Le séchage s'est déroulé sans encombre grâce au combiné de mon ancien secteur et du test sur le DryRocket. Aucune trace de moisissure malgré la densité extrême des buds.
👃 PROFIL AROMATIQUE & QUALITÉ DES BUDS
Odeur / Terpènes :
C'est une explosion aromatique. Ça sent très fort le citron vif et acidulé, accompagné de ce profil mythique à l'ancienne type Amnesia Haze très reconnaissable.
Aspect & Résine :
Les têtes sont denses, ultra-lourdes, bien compactes et littéralement blindées de trichomes. Sous la loupe, c'est une vraie mer de cristaux.
Graines de sauvegarde :
3 graines ont été trouvées isolées sur la structure (pas directement enfouies dans le cœur des buds, donc la récolte reste impeccable). Elles sont précieusement gardées en réserve pour une prochaine session en espérant retrouver ce phénotype d'alien.
💬 MON MOT DE LA FIN & REMERCIEMENTS
Pour une simple autofloraison, sortir 231 grammes secs sur une seule plante sous tente avec des têtes de cette qualité, c'est une performance complètement hallucinante pour moi. Spirit aura repoussé toutes les limites du début à la fin.
Un grand merci à Growers Choice pour nous avoir pondu cette magnifique génétique Alien, stable, ultra-vigoureuse et monstrueusement généreuse. Merci aussi à toute l'équipe et à la communauté qui ont suivi les 13 semaines de ce journal passionnant !
Le journal de Spirit se termine en beauté, mais l'aventure n'est pas tout à fait finie : rendez-vous très prochainement pour un mini-journal dédié à l'extraction du haschisch réalisé à partir de la montagne de feuilles de manucure gorgées de résine qu'elle m'a laissée ! ❤️❤️

Likes
22
Share


@LSDMan
Follow
(EN) Rainy and cloudy weather continues, but temperatures are rising. On day 30, I spray a solution of nettle manure at 200ml/L of water on the leaves and stems of plants in order to remove and kill potential parasites (red spiders, mealybugs) and also prevent certain diseases such as late blight. I think I repeat this treatment every 2 weeks. Watering with clear water on the same day (approximately 600mL per plant). I prepare the soil to transplant plants into open ground soon, with 20L of universal soil, 20L of surrounding soil and 1L of perlite.
(CAN) Le temps pluvieux et nuageux continue, mais les températures remontent. Le jour 30, je pulvérise une solution de purin d’orties à 200mL/L d’eau sur les feuilles et les tiges des plants afin d’éloigner et de tuer les potentiels parasites (araignées rouges, cochenilles) et également prévenir certaines maladies comme le mildiou. Je pense répéter ce traitement toutes les 2 semaines. Arrosage à l’eau clair ce même jour (environ 600mL par plant). Je prépare le sol pour transplanter prochainement les plants en pleine terre, avec 20L de terreau universel, 20L de terre environnante et 1L de perlite.


Likes
9
Share


@SkunkyDog
Follow
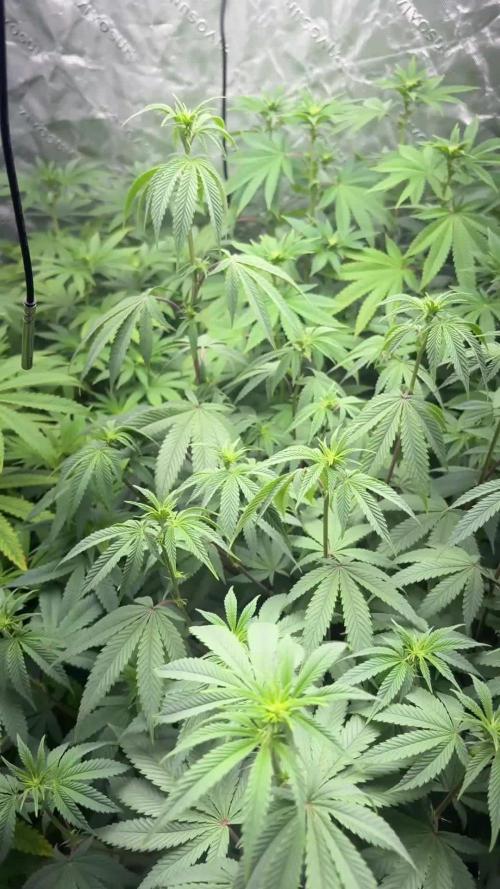
Hallo zusammen 🤙.
Habe die Lampe auf 50% gestellt hoffe das es klappt.
Sie wächst immer weiter 🤙😀 habe sie etwas runter gezogen damit sie nicht direkt an der Lampe ist.


Likes
82
Share


@BigBadLion
Follow
Hey all! 👋
Remember last week when I said Falco was getting some chlorosis? Well, the first photos show how bad it is (or was) but the plant is "old", she was quite special as a young plant and her main leaves are doing well so I suppose what is happening is just something normal or maybe some other weird factor... might be affecting her, but more probably I'm just way too worried. In my confusion I added 2ml of Green Grow (which is the growing fertilizer I previously used) thinking that she needed the extra nitrogen but in the end it seems it was unnecessary (as it's a normal process of the plant), I just removed the old leaves and left her to be. 😝
Besides what I previously said I saw a lot of bud progress this week (and I tried to picture all that! 😋). There are plenty photos of the same flower (most of the times!) showing how trichomes were constantly appearing during this week.
Next week I'll be adding some extra Potassium and Phosphorus and I hope those products will help my babies to get bigger buds! I also made a video at the end of the week to show how my plants look at a normal speed plus two time-lapses. There are also some photos I took with my DSLR and an inverse ring just to see how the plant would look... and I think they look amazing! 😍
Anyway, I hope you all like the photos and thanks for reading! 👋


Likes
27
Share


@Smokepurple137
Follow
Coming along nicely this week, hoping to see them explode in the next 2-3weeks. All are very healthy and have responded just how I like to LST. Purpinator is bringing out the smells in there definately and they are all smelling good in their own way. I recommend all the products I have used in this diary highly as they haven't failed me in the past(yield and quality). The only new product I am using is green planet purpinator, so I will let you know if I recommend this too when all is finished. I'll upload daily or every couple of days. To clarify I have 6x 55litre buckets with 3 plants of the same strain in each. I have used coco substrate and grown all of them from seed(courtesy of barney's farm) Thanks for looking.
Likes
11
Share


@GREENPHOENIX6262
Follow
*Week 3 Flower - 09/10*
Blimburn Apple Fritter - Seedsman Genetics Critical+2.0
Healthy - 0 signs on of deficiencies
Most fan leaves have been stripped; - Lighter defoliation - Aggressive LST on main colas
*Week 3 Flower Mid-week update 09/13*
Approximately 3 inch increase in Height on both plants - Critical+2.0 - Seedsman Genetics - Blumburn Apple Fritter
1 Gallon increase on water feed (Nutes included)
Budsite density has increased.
Light defoliation
*End of week recap 09/16* (Week 3 Flower)
BlimBurn - Apple Fritter - 47 Inches - Flowering processing accordingly - 0 deficiencies
Seedsman Genetics - Critical+2.0 - 46 Inches - Flowering processing accordingly - 0 deficiencies
Increased water feed (2.5 gallons every day +Nutes)
*SEE UPDATE END OF WEEK VIDEO RECAP*


Likes
9
Share


@BLAZED
Follow
Week 4 (8-7 to 14-7)
8-7
Temps: 20.7 to 26.1 degrees
Humidity: 49% to 57%
9-7
Temps: 22.2 to 27.5 degrees
Humidity: 52% to 65%
10-7
Temps: 22.8 to 27.4 degrees
Humidity: 51% to 65%
11-7
Temps: 22.2 to 25.9 degrees
Humidity: 47% to 56%
12-7
Temps: 19.9 to 25.9 degrees
Humidity: 47% to 62%
Watering: Both 1000 ml.
13-7
Temps: 19.9 to 25.1 degrees
Humidity: 47% to 60%
14-7
Temps: 19.9 to 26.6 degrees
Humidity: 45% to 60%
Watering: Both 1000 ml.
Today i topped both plants!
Light set to 60% strength with a distance of 60 cm.

Likes
190
Share


@Sparkles
Follow
April 8 - added a few more pics of lights ;)
Brought to u by Mars Hydro. Grow on Earth. Grow with Mars.
All pics and video flower day 56.
Lights are running at ~60%. 18” away from canopy.
Can’t wait for her to finish. Hope u enjoy the pics
Likes
16
Share


@osmrducks
Follow
Day 36: Girls looking pretty happy. Still some discoloration going on. Doesn't look to be spreading though.
Day 37: Ok, the girls obviously were not happy this morning. I watered with quite a good amount of runoff and measure the PPM at 3200!!!!!!!!!!!!!!!!!!!!! I'm surprised they are still alive! Had to make a quick run to get some water for a flush as I only have 5 gallons worth. Ran 2 gallons through each of them at a ph of 6.4 around 9:30 this morning. It's now 5pm and they have pulled through great. These OG Kush are extremely resilient.
Day 38: The girls look way better today after flushing yesterday. Two of the pots were almost completely dry already. Went ahead and fed at 500ppm with runoff.
Day 39: I think it's dialed in now. They are looking amazing and still stretching pretty good. Went ahead and pulled off a handful of leaves between the 5 of em.
Day 40: Did a little more defoliation and opened them up a bit. I am super worried about getting any type of mold or any issues in particular for this first round. One of the girls needs a touch more but ran out of time. Girls are looking super healthy! 💪
Day 41: They are looking super awesome. Got the runoff dialed in. 750 going in and roughly 800 coming out. May up it in a week or so.
Day 42: Nothing new to update. Girls still looking amazing. I think the stretch may be slowing just a tad.


Likes
15
Share


@InTheSmallSpace
Follow
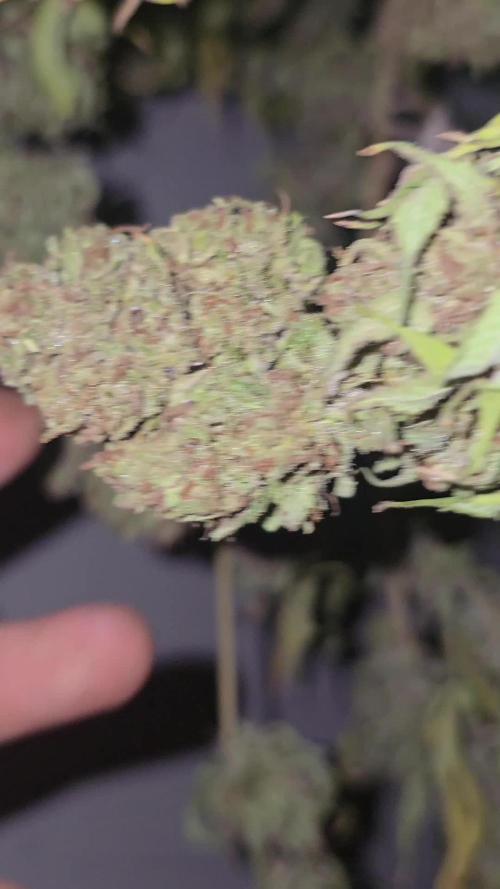
I harvested when go began to see some amber trichomes, the plant grew very well, the maturation of trichomes was quite slow. The buds are nice and full bodied and the scent is very sweet and pleasant, reminiscent of gesolmino and strawberry bubblegum.

Likes
31
Share


@THCpapa
Follow
What an incredible journey this has been! From start to finish, these plants dazzled at every stage. The drying process was a bit of a marathon – 21 days of suspense. But now, they are absolutely perfect. They snapped off the stems with a satisfying crunch – straight into my rolling paper for, ahem, "quality control" purposes.
I'm beyond excited to have 2 more seeds ready for the future. Though I won't be growing them in my next round, I can't wait to see what they'll do next time. These gorgeous ladies have rewarded me with a whopping 248 grams dry! I'm in absolute weed heaven.
Now comes the hard part – keeping my hands off while they cure and reach their full potential. My trusty humidor will help make sure they become everything they're meant to be. Here's to a fantastic harvest and many more green adventures ahead! 🌿🎉


Likes
119
Share

@DogDoctorOfficial
Follow
Salutations, my fellow cultivators and botanical enthusiasts! Welcome to the much-anticipated Week 3 Flower Report for our radiant queen, Jealousy, in the Power Buds competition. The journey through the flowering phase is akin to watching a mesmerizing performance, and Jealousy, true to her name, has us all captivated.
As we transition into the third week of flowering, the grow room has transformed into a sanctuary of delicate buds, and Jealousy, adorned in green jewels, is perpetually in prayer. It's like witnessing a botanical congregation, where each bud is a devout follower, reaching for the heavens in pursuit of the ultimate floral nirvana.
Now, let's talk about the delay. The ticking clock of the contest deadline has kept us on our toes, and yet, Jealousy stands resilient. Despite the time constraints, she continues to unfurl her petals with grace, and I can't help but marvel at her determination. It's like a race against time where our green queen is sprinting toward the finish line with unwavering resolve.
In the midst of this floral ballet, the clones, those green offshoots of our regal Jealousy, have rooted with astounding success. It's like witnessing the next generation of botanical royalty sprouting from the roots of their majestic ancestor. These rooted clones are not just a testament to Jealousy's genetic prowess but also a green insurance policy for the future.
And let's not forget the continuous prayer pose that Jealousy maintains. This phenomenon, known as "praying leaves," where the foliage points upward toward the light source, is a visual testament to the plant's happiness and optimal conditions. It's like Jealousy is sending leafy blessings to the botanical gods, asking for a plentiful harvest.
As we navigate the third week of flowering, let's extend our gratitude to Zamnesia and Plagron, the silent architects of our green utopia. Their contributions continue to shape the landscape of our horticultural adventure.
A hearty applause to the Grow Diaries community – your shared experiences and collective wisdom are the threads that weave the fabric of our green journey.
To my fellow contestants and growers, may your buds swell with abundance, and may the contest deadline bow down to the prowess of your green kingdom. Here's to a week of perpetual prayer, botanical grace, and the anticipation of a harvest that will leave us all in awe. Stay green, stay inspired, and keep cultivating those dreams!
As always, thank you all for stopping by, for the love and for it all. This journey of mine would just not be the same without you guys. The love and support are very much appreciated, and I feel honored and blessed with you all in my life !!!
With true love comes happiness. Always believe in yourself and always do things expecting nothing in return, with an open heart. Be a giver, and the universe will respond in ways you can’t even dream of .
Friendly reminder: all you see here is pure research and for educational purposes only.
Genetics - Jelousy @Zamnesia
Nutrients @Plagron
Light - @viparspectra P2000
Room size - 3x3 - 0,9x0,9
Likes
39
Share


@GrowWiththeBro
Follow
Mild flushes last week.
Day 54/ Day 1 of Flowering. Fed and light defoliation.

