
Likes
Comments
Share


@Bud_Spencer
Follow
Hi Grower!
Day 107Complete
Day 48 Flower
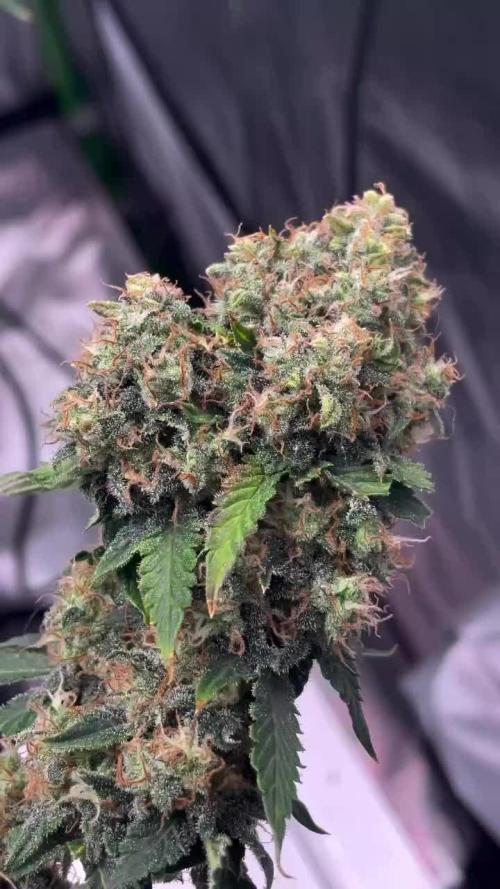
This strain just keeps getting better and better. It's amazing how it smells. Like cherry gelato !! Next week I'll get my Purple Pro, which means I can measure the THC / CBD ratio at the end of the grow and I'm more than excited about that !! A very educational and super grow, maybe even the reason that I will switch to photoperiodic plants.
follow me on Instagram for the best Shoots of all my Strains: bud_spencer_of_herbs
Grown under Spiderfarmer SF-1000
When you want to grow with the same professional Equipment then Checkout this Link
https://www.spider-farmer.com/?ref=budspencer
Discount Code: Budspencer420


Likes
1
Share

@LokalGrenz
Follow
7/22
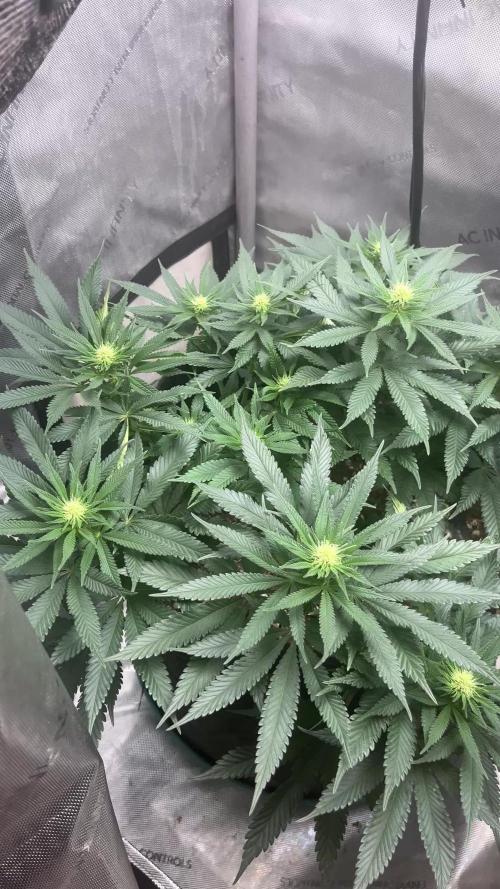
Probably do some more defoliation this thing is bushy and seems to grow leafs as soon as I cut em besides that everyting is cool

Likes
33
Share


@LouShott
Follow
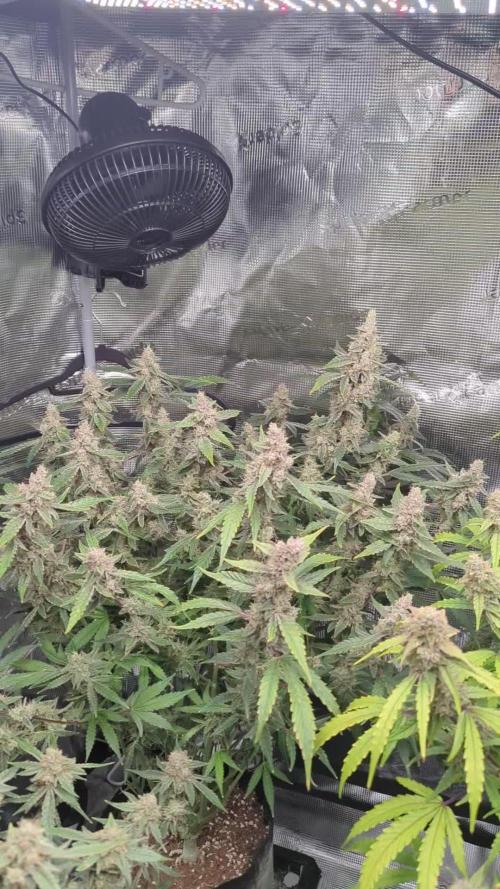
I added a dehumidifier towards the end of this week to reduce the RH, but the thing i didn't realise was there were some red and yellow led's on the dehumidifier, one displaying RH and another for the power. I didn't cover up either through the dark periods and i just hope this past few days with them on doesn't affect my final yield 😣
Looking at the trichomes am i correct to start flushing now? let me know what y'all think!!

Likes
6
Share


@Bengrowerbr
Follow
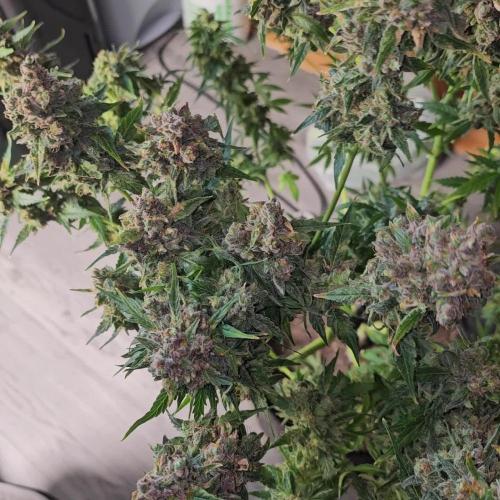
Growing this plant was a great experience. despite the cycle being under intense heat she responded very well. 115g dry
Likes
57
Share

@Kirsten
Follow
Well 10.7.25 is today, and its harvest time. Hopefully I can update with the dry weight and then also shortly thereafter give you a smoke report!
💚 Dry weight was 5.89 0z / 167g. This has been my highest yield per plant yet. I'm really pleased with this.
🔥Smoke 🔥
I tried some whilst trimming, it has a of citrusy, floral taste, and the smallest wisp of mint. 🍋💐🌿
It is more of a daytime smoke, it is 65% Sativa, very nice and chill, but surprisingly motivational! Just what I needed to trim this lady! 😁
There are some beautiful big, dense, sticky buds. Which I shall certainly enjoy.
This was the first seed pack I bought, and I'm very pleased that I finally popped this seed!
Thanks for coming along on this grow, it has been a journey. We made it though 😁🌱🙏💚✌️🍃
Likes
27
Share


@Rap_a_cap
Follow
Cropped Thursday evening, 3/4 days before necessary for complete maturation. Better to lose 2 ounces of weed now than having the plant destroyed by the storm later on. Yeld is below the expectations. Wet weight after 1 day fro crop (buds cleared of leaves) 2.91 lbs (1320 grams).
This is caused partially by my pheno (pheno #1 sativa-like, low yield and high THC) and by some mistakes I've done:
1- position in the garden (too close to the sisters)
2- I haven't considered the change in the sun's trajectory and inclination from August onwards.
3- too much LTS (but I was obliged to keep plants short and bushy)
4- underwater (this is my fault, I always tend to keep plants on the verge of thirst. I dug up the roots and the plant actually needed a lot more water).
Now she's gone I'm more relaxed and concerned on Special Kush #1, the next week crop and Pineapple Kush the October harvest. Without Royal Gorilla the smell around the home is reduced by 70%. Dry trimming. All buds have been washed before drying and will be dryed very very slowly in a strictly controlled environment. Stay tuned for the next week or 10 days , a generous crop is comin'.... with Special Kush #1. See you in a couple of weeks for harvest results and smoke report.
Happy growing folks


Likes
7
Share

@Kirsten
Follow
13.4.25:
This week has been so busy in the garden!
I forgot to take any notes, so I'll see what I can do from memory! 😅
I watered several times this week, and I used Ecothrive Biosys with dechlorinated water PH'd to 6.4.
I watered about 2 litres to each plant.
Throughout the week, I've been defoliating all the fan leaves 🍃
The trichomes are looking all milky to me. I stopped watering a couple of days ago, and the pots are totally dry.
14.4.25:
Today is Harvest Day!
I finally put together my clothes rail, which I'm using to hang my plants on.
I purchased a hanging mosquito net for a bed from Amazon.
It's black, which will hopefully block out what little light there is in my drying room. Also, to prevent debris from sticking to the buds whilst drying.
It hangs from the ceiling so it will just hang over the clothes rail. Additionally, the net will allow good airflow.
I put a bit of thought into this method, so I look forward to seeing it in action! 😅
So let's wait a while and find out how much we yielded here! 😃💚✌️🌱👌
Processing
Likes
2
Share


@krst97
Follow
17/06 - Starting week
The plant is increasingly purple shades and the flowers are growing well. The trauma caused by supercropping did not negatively affect the health of the plant.
19/06
Feeding:
Only Water 0.5L
23/06
Feeding:
Bloom Complex (7.5ml/1.5L)
SuperVit
pH 6.4 EC 1160
23/06 - End week
Likes
28
Share


@MadeInGermany
Follow
Hey everyone ☺️
Both phenotypes are great 👍.
The leaves look like a nice sativa 😍.
Because of training I am still thinking about it because for some time now I have wanted to do one round completely without topping etc.
I will decide that in the next 1-3 weeks 😀.
Both were poured this week with 1.3 l.
I'm really excited about the coming week and until then I wish you all a lot of fun with the update 😃.
Stay healthy and let it grow 🍀🍀
You can buy this Strain at :
https://www.royalqueenseeds.de/feminisierte-hanfsamen/115-amnesia-haze.html
Type:
Amnesia Haze
☝️🏼
Genetics:
Original Amnesia Haze
👍
Vega lamp:
2 x Todogrow Led
Quantum Board 100 W
💡
Bloom Lamp :
2 x Todogrow Led
Cxb 3590 COB 3500 K 205W
💡💡☝️🏼
Soil :
Canna Coco Professional +
☝️🏼
Fertilizer:
Green House Powder Feeding
☝️🏼🌱
Water:
Osmosis water mixed with normal water (24 hours stale that the chlorine evaporates) to 0.2 EC. Add Cal / Mag to 0.4 Ec Ph with Organic Ph - to 5.5 - 5.8 .


Likes
20
Share


@420DeepGrow
Follow
Ha sido un grow muy divertido, me ha gustado como ha quedado finalmente, una planta bajita, con muchas colas, algo finas pero bien prensadas y con mucha resina.
Ha sido una de las plantas que mejor ha consumido los nutrientes durante todas las fases de cultivo.
El aroma es bestial, tonos cítricos y a hachis .
Pronto actualizo con notas de humo.


Likes
104
Share


@Lordshiva83
Follow
Olá amigos! A minha árvore está com 1 mês de floração, o que acham??deixem o vosso comentário 🙏 esta semana fiz pulverização com óleo de neem, para combater possíveis pragas, tenho feito a rega com os nutrientes que a planta necessita, ainda continua um calor abrasador, espero que ela consiga suportar tanto calor até ao fim, sem a danificar 🙏 até agora está com um bom desenvolvimento! ✌️ Até para a semana que vem, obrigado!

Likes
44
Share

@Miketama
Follow
Harvest day! Cut her down at day 73 from seed. 170g wet off one plant, not a heavy yielder, but this particular pheno just grew that way. Buds are super compact, stacked calyxes, minimal sugar leaves, honestly a pleasure to trim. Smell is floral but complex and hard to pin down, not a typical profile. Can’t wait to see what she’s like after cure. ✂️🌸

Likes
12
Share


@cookingwithninja
Follow
day 14 added 1/2tbsp magnesium sulfate in 5gal water along with regular flower water amendments. 1gal of water per day average, bridal and thunder can take more water. Ph 6.8 today
day 15 I will defoliate in a few days :) day 15 video, you see some stem action
day 16 video
day 17 I added (4x20w daisy-chained)80w of poop purple ancient leds Keep adding soluble PK, organic booster etc. I see the stacks relax on defoliation for a few days, maybe tomorrow morning (skip day21) I feel like I will be able to chop week 6-7 as my last grow, push hard fast-continue everything is great, soon bridal and thunder will require 1gal water per day. I would like to see even more mass. I'm extremely happy, starting to see frost
day18. BIG UPDATE many short vids of final defoliation(ahead of "day 21"). Wild amendments appeared! Any recommendations for a lawnmower? Bridalparty stretched over an inch overnight, led touch diode burn on 1 spot. Raised lights slightly, Added new amendments into water. Bridal wants to drink more than 1gal per day, So I will be using almost 5gal-ish water per day not denying the plant needs-watering. I am very happy! defoliation took about 4h today.

Likes
13
Share


@LockDownGrow
Follow
Been a tough week as my ph pen failed so had signs of defiantly
But that’s now corrected so hope it didn’t set them all back too much
But this girl really has rippened up fast so will start too flush her this week coming
Likes
13
Share


@Oyziphar
Follow
This week wasn't as bad as last week 😊 Nights were cold 😰, but not to much rain 😿 and a few hours of sun 😍
Temperatures in the greenhouse were medium : during the day 20°C 💀; min temp 3.5°C ; max temp 31,7°C 😤
Cookies Gelato has turned completely purple 👍👍👍
I defoliated the plants 😙 and had to remove budrot (especially in the Cookies Gelatoes)😨
I took the prettiest Cookies Gelato outside for a photo session in my garden 😍
Probably these will be the last pictures of the plans, before harvesting ! 👍😄