The Grow Awards 2026 🏆 


Likes
Comments
Share
@UKBUDDOCTOR
Follow
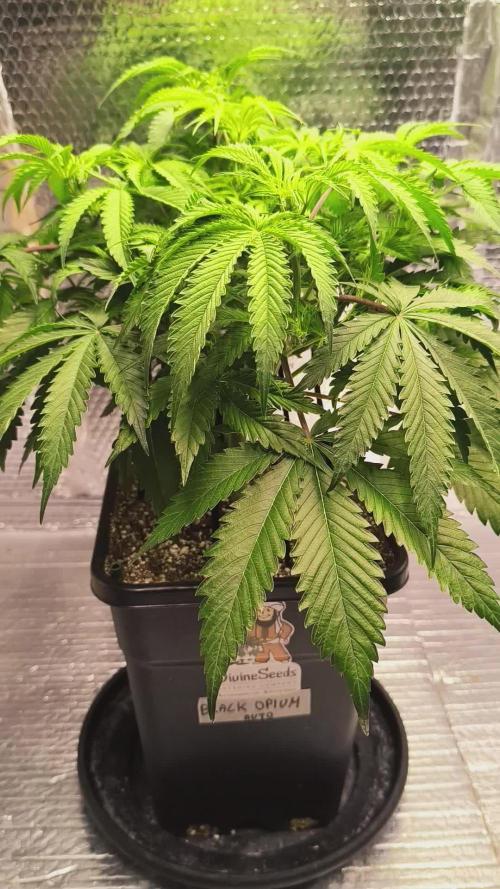
I f’d it from the start as it being my first grow😂 it’s tiny and the buds are small it’s been around 70+ days from seed I topped it way to early and was cutting any leaf off like a sausage but the mugs do look alright just not as dense as I would like but still got to flush yet so we’ll see!!

Likes
28
Share
@DudeGrowsWeed
Follow
October 1, 2021:
Looks like I overwatered a bit last weekend. Still trying to get used to these SIP Pots. I'll probably switch to a SIP system using 5 gallon buckets in the near future. I like the concept of SIP systems so I purchased these pots. But I don't like that these pots still require top dress watering instead of filling the reservoir at the bottom directly. On to the ladies...
Fast Buds Blackberry- She jumped in height and started pushing out bud sites this week. She's up to 13" tall, which is kinda short, but she has very tightly packed node spacing and is very bushy. Or she was very bushy before I did some defoliation. I did a light defoliation on her this week mainly so I could see what I was doing when giving her a LST bend. I like to bend plants over at a 45 degree angle I find this allows the lower branches to have better access to the lighting and produce better buds all around.
Dinafem Critical+- She grew about an inch this week and is up to 20" now. I did some heavy defoliation on her, I got a little carried away once I got started. She is still showing signs of nutrient burn and is also telling me she was overwatered (see above). However the bud sites look great! So I'm not too worried at this point.
I also posted a few pics of the plant I grew outdoors this summer. I just cut her down yesterday. I had to harvest a week or two early because we get very damp and cool falls here in New England. I've been going out every morning to shake the moisture off her and look her over closely. Yesterday I found 2 small patches of bud rot on 2 of the larger colas. I cut the bud rot out first, then chopped her down and brought her in for hang drying. I'll be doing another close inspection once she's dried out to make sure there is no bud rot on the remaining buds.
Cya next week!


Processing
Likes
13
Share
@ladyjane
Follow
6/29 - 4 days after I gave everyone the compost tea, the Wonder Woman ladies have sprung back to life! The compost tea was a literal life saver. Just a few days later and their leaves have lost the yellow tinting between the veins of the leaves and her leaves are more smooth.
6/30 - Top dressed all with Uprising Grow and Uprising Foundation
7/1 - Today I did a little selective defoliation on the Wonder Woman ladies. They are looking stronger and stronger each day.
7/2 - Today was feeding day. Gave them a dose of their regular nutrients. They are very happy!
7/3 - Added some red wigglers today! I ordered some Red Wigglers from Uncle Jim's Worm Farm and they arrived today. I added about 10 to each pot then moistened the soil a bit with just RO water pH to 6.6. I can't wait to watch them do their thing!


Likes
7
Share


Likes
17
Share
@CanadianFillmore
Follow
Harvest time, both divine storm ladies did amazing under the Mars-Hydro TSW2000. Pheno 1 was an absolute monster! Huge dense buds!! Pheno 2, while the runt of the grow, also produced impressive buds.
Will update in 7-10 days with weight and initial smoke report.
Update - April 16 - dry weight of 47 grams on DS2 and 77 grams on DS1. Results are close to round 1 grow, very impressed with the TSW2000 light!


Likes
16
Share
@BlackForestGrower
Follow
I have now trimmed and hung the plant after 9 weeks of flowering
Likes
17
Share
@The_420
Follow
J-33 Lemon Power Haze de Zamnesia Seeds
Bonjour la communauté GD ! Après avoir découvert ce site étonnant, nous nous embarquons! Nous sommes 2 grands passionnés prêts à partager, apprendre et recevoir tout ce qui est possible sur ce sujet!
Floraison J-11 (12h / 12h)
Pousse très bien, Plutôt haute par rapport aux autres genetiques.
A bien commencé sa floraison très impatient de voir la suite !!

Likes
38
Share
@Snakeking
Follow
Honestly i was thinking about this girls gonna grow big i mean BIG because all branches grow about 2-3cm everyday i put a stuck to make sure how much they grow every day! I think i should put a second layer of net .
Guys if you want use silicon for your plants make sure its mono silicic acid not potassium silicate or other silicate nutrients because they need months to absorbs by the plant,silicone can be absorbed by plant in mono silicic acid form
Update: one of my girls show signs of preflowering and i am so worry about. I want a big plant with large cola

Likes
18
Share
@Spiritual_Herb
Follow
This new week started better as with some flushes I brought the runoff back to 6.5/7, the plant seems to be growing well
Likes
44
Share
@Aedaone
Follow
The temperatures, humidity, and watering volume(if measured) in grow conditions are all averaged for the week. The pH is soil pH. Any watering done by me is well water which is 7.6 pH and 50° F. Any listed nutrients are ml/gallon of soil.
Day 1 we had sunshine and clear skies until the afternoon. We had clouds roll in and about 4:00 P.M. a severe thunderstorm hit. There was high wind, heavy rain, and grape sized hail. Fortunately the hail lasted only a few minutes.
Day 2 we have clear skies and sunshine. The temperature is mid 70's.
Day 3 we had rain and thunderstorms through the previous night and into the morning. We had sunshine, clear skies, and temperatures in the upper 70's. That was followed by severe thunderstorms, rain, and a touch of hail from 4p.m. to 6p.m. These were topped and had thr bottom nodes removed.
Day 4 we had relief from the rain. Temperatures were in the mid to upper 70's and lots of sunshine. We have a few days of sunshine in the forecast 🙏
Day 5 we had lots of sunshine and clear skies. Highs in the upper 70's and 49% humidity. We needed the dryness. 🙏.
Day 6 we had clear skies and sunshine. Temperatures were in the mid to upper 70's.
Day 7 we had partly cloudy skies and temps in the middle 70's.
This week was a success. The plants doubled in height and thankfully didn't have any serious damage from the hail.
Likes
Comments
Share
@pHilosophy420
Follow
Day 42 - The plant is spread nicely and no more LST so the plant can start stretch phase. So far all looking very promising

Likes
23
Share
@Seandawgemous
Follow
So looking like it's getting very close to harvest going by breeders advice and others i've sen with this variety. Mostly orange hairs nw only a few whites and they're starting to receed into the buds so i wanna flush well for a week or so and see how it go's

Likes
73
Share
@Roberts
Follow
Deep Forest Auto is still trucking along. She is still bulking and the ph has bee. Stable all week. She should be on her way to finish soon. Thank you again Doctor's Choice, Medic Grow, and Gen1:11. 🤜🏻🤛🏻🌱❄️

Likes
69
Share
@TOTEM
Follow
That’s impressive. This strain is amazing. Couldn’t be happier. Will keep going with this nutrient schedule until the two Royal Highness grow a bit more. I should do some LST asap because there are lot of hidden and trapped leaves under the bigger ones.
Update:
Did some LST to uncover the hidden leaves. I’m just a bit scared about how big she will get after this.

Processing
Likes
10
Share
@The_Chef_420
Follow
No signs of flowering yet, maybe slight formation of calxys beginning. Been spraying with molasses, neem, cal mag and liquid kelp (bioweed) and superthrive just once to hopefully delay flowering to increase yield. P.S. if youre new at growing DO NOT try this unless you know what your doing with hormones etc. Theres a chance it can turn your girls hermie. Just be aware!

Likes
224
Share
@Ju_Bps
Follow
Hello growmies 👩🌾👨🌾🌲🌲,
👋 Flowers continue maturation,
End is approaching, one more week with nutes, and flush for the next/last week.
💧Give water each 2 or 3 days
1,5l Water + Nutri NPK Bloom + Sugar Royal
1,5l Water + Nutri NPK Bloom
PH @6
- Nutri NPK
Bloom
1/2 tsp for 1 gal.
💡Mars Hydro - SP 3000
100% 43 cm.
🔥 Thanks community for follow, likes, comments, always a pleasure 👩🌾👨🌾💚🌲.
Mars Hydro - SP 3000 💡💡
https://www.mars-hydro.com/sp-3000-samsung-lm301b-greenhouse-led-grow-light
NUTRI NPK 💥🔥
https://www.nutrinpk.com/product/npk-mix-pak-for-4-to-5-plants-cannabis-fertilizer/
Pure Instinto - Strawberry Shortcake Auto🌲🌲
https://pureinstinto.com/product/strawberry-shortcake-autoflower/


Likes
2
Share
@Marynightlove
Follow
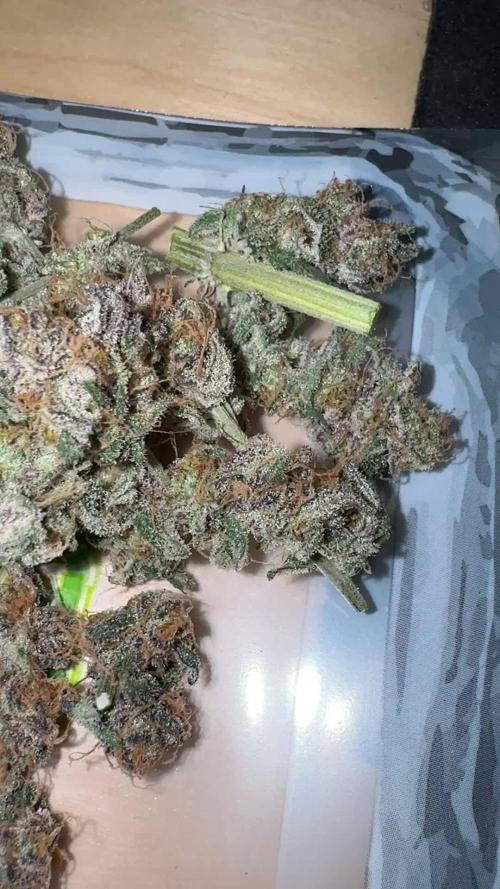
This strain is growing well and fast I’m it. The images with the damaged stem came from the ties I used they were too tight and it shouldn’t have done that much damage but it did so. But that’s some stress training and it’s healed nicely.
Likes
37
Share
@Ganjin
Follow
I tried the strain now several times. The yield is abysmal with 18g of that plant, but the buds have an amazing quality. Quality over quantity but some grams more would be nice. I still have 4 seeds and will 100% grow it again in the far future.

Likes
11
Share
@plant
Follow
Germinated using a glass of water. After 12 hours into a bag with tissue paper. Then I hung the bag up so gravity could make the tap root grow straight down.
