


Likes
Comments
Share


@GoldenArrow
Follow
Son 2 hafta civarına girdik someklerin en cok şişiceği dönemi gozlemleyecegiz .

Likes
18
Share


@RFarm21
Follow
Semana 30 março - 5 abril
1 abril feeding day
Cheese #2: 1.6L agua
Calmag 0.5ml; bio bloom 2.5 ml; topmax 1.2ml ; bio heaven 2.5ml; acti-vera 2ml; bio grow 1ml pH 6.5
4 abril - cheese #2 feeding day:
Calmag 0.8ml; bio bloom 2.5ml; topmax 1.5ml; bioheaven 1ml; acti-vera 3ml; bio grow 2ml.
pH 6.4

Likes
12
Share


@cheetah844
Follow
Looking healthy, hoping it'll be a girl. I'm ready to get my hands on some Blueberry OG again, I haven't had it in over 2 years. I remember it being a relaxing but still alert & dissipating my daytime migraine.
Likes
41
Share


@DOOBS_N_BREWS
Follow
I went away on vacation to Utah for a week so I wasn't able to update my grow journal at all unfortunately . She really exploded while I was gone she's roughly 14"tall x 17"wide. She is starting to give off a nice dank smell I had the carbon filter off but I switch it back on. The tents humidity will drop back to 35-40RH% because of this. I also switched the bloom lights back on so the temp is also going to rise up higher than 75F during the day. My guess is at night the tent hits a low of 62F but averages around 65F.
The co2 bag has some awesome growth and Its Cleary producing co2 because this lady is praying towards her lights ! I 100% recommend using c02 bag for sure even though most places online will say its useless.
DAY 40- Added tomato cage to help support it ! it is two feet exactly as of today!
*New time lapse*
2/10/20- Took 2 cuttings for clones, she is a cool plant and id like to keep her genetics alive for breeding projects this summer =) lollipoped the bottoms a bit and defoliated the lower fan leaves as well. Temp is back to 80F and 38RH%
2/11/20- Did absolutely nothing but admire this beauty today ;)
2/12/20- Watered with Recharge (double the strength), Cal Mag, and Mammoth P at 6.5 Ph
2/13/20-NFTG mis flower feed

Likes
45
Share


@Robbaus
Follow
Ciao a tutti! C'è stata un'accellerata imprevista e così mi sa che raccoglierò una settimana prima del previsto! Tra 3 o 4 giorni taglio tutto! Ho svuotato completamente i vasi e ho messo solamente acqua liscia per far sì che le radici scarichino bene tutti i nutrimenti ancora presenti. Devo registrare purtroppo un piccolo problema di muffa, dovuto sicuramente all'umidificatore (purtroppo ho dovuto tenerlo acceso per tenere bassa la temperatura) in quanto si è formata sugli 8 apicali della pianta più vicina ad esso. Ho dovuto purtroppo tagliarli e buttarli via quasi per intero, ci avrò rimesso una ventina di grammi, anche 30. Post memoria per me: l'anno prossimo a luglio non devo avere niente e iniziare il ciclo a metà agosto con le temperature più accessibili. Comunque sta andando benissimo a parte l'imprevisto, non vedo l'ora di raccogliere e fumare! Ci vediamo la prossima per l'ultima settimana 🤣🤣🍀🍀💪🏼💪🏼

Likes
9
Share


@JoeyGonz
Follow
Seems their all adapting pretty well.. Black Sugar and Gelato moving slow but still moving. Other two seem to be moving little quicker.

Likes
422
Share


@Crashoverite
Follow
Hi all 😁
Hope everyone keeping well and having a wonderful week!
Thank you all for such amazing support on this bananas journey 💚💚💚
Will be updating this week journal daily so please remember to revisit to see full week content.
So far this grow it's going great. Girls are stretching by hour. Great health, nice green colours, more and more squares taken on the netting, flowering nicely progressing, I'm very happy 😁
Planning to apply more selective defoliation, especially to Xena. No changes to nutes except few extra drops of calmag just in case and will try to fill the net entirely.
Week 7
Nov 27- Dec 3
Nov 27
Selective defoliation applied on Xena. 8-10 mainly small fan leaves. She is still a bit shy to open as much as her sister. No rush my girl. You still doing great!
Nov 28
First watering for this week.
7ltr beetwen them both with 4h spread. Runoffs. Xena 300ml PH 6.1 Athena 250ml PH 6.4 😁. So far the largest amount of my magic mixture consumed by my 🍌💜👊 girls. Well done👏
Nov 29-30
Leaves tucking and joyful observation🤓
Dec 1
Selective defoliation and first stage of lolipopping on both girls. Decided to go a bit heavier as tomorrow heading for trip and wont see my girls until Tuesday! They will be all alone without any supervision so hopefully they will behave and I will be nicely surprised of their development on my return. Watered with 2tr mixture and sprayed with water and fish mix solution right after defoliation. Planning to feed them tomorrow as much possible 6-7ltr before heading off to our voyage to Amsterdam 😎 do anyone know ls if any of coffeeshops have Fastbuds strains available? Would love to try 🍌💜👊🤤😋
Dec 2
Girls watered as above and both PH 6.4 on runoffs.
Dec 3
Girls are unsupervised until December 5th.
Thank you all for such amazing support on this journey 😊 love you all!!, 💚💚💚
Stay tuned for upcoming week update right after my return.
Peace and love brothers and sisters ✌️💚


Likes
77
Share


@Puffdamagikchillum
Follow
Day 49) 11/11 first week of flower has gone and still no pistils but I have no reason to think there won't; in due time. All waterings this week were 1/2 tsp of each nutrient per gallon of dechlorinated tap water ph’d between 5.5 - 6.5 and watered once a day and she just thrived on everything I gave her. OH! I almost for forgot my local hydroponic store gave me a sample of a beneficial bacteria conditioner called FishSh!t There are lots of diaries using this Sh!t and you can find them under the nutrient tab and search Fish Head Farms. They have a website with info and dosing and today was first day using so will update if I notice a substantial change. Dosing called for 1 ml per gallon of water mixed in with all other nutrients during bloom phase. I'm not really in bloom phase just yet but going light on the Sh!t till I test the effects.
Happy Growing and
Happy Harvesting
Likes
4
Share


@Mr_nugs_lover_David
Follow
Looks like she's completely healthy and developing well,I got scared a little bit at first due to three fact that she didn't pop after 48hs in the paper towel,but now that I see her coming up from the soil I'm much more relaxed and expecting the best from this amazing medicinal strain by Dutch passion. I Prepared the soil using bactrex, mycotrex and 2 bio tabs by bio tabs organics. Let's see how this wonderful lady performs.😍💚🌱🤞

Likes
13
Share


@gr3g4l
Follow
Sigo pulverizando cada dia un par o tres veces con agua destilada y regando a ojo las que voy viendo secas cada dos más o menos. No son ciencias exactas y unas demandan más o menos segun fenotipo , el sitio donde están dentro del armario, por el riego anterior por si fué excesivo o insuficiente, etc etc . La idea es regar cuando veo que lo necesitan. regar y dejar secar.
A mitad de semana las cambié a maceta de 5,5L téxtil y las pasé bajo los COB , 4 cri97 4000K y 5cri 97 2700K ,250W áprox.
En estos momentos aumento el riego a 500ml por planta cada dos dias áprox. según.
Armario de doble capa de DM con aislante y las medidas serian 76x76x180. El armario está fuera de casa por lo que tengo que luchar contra las inclemencias meteorológicas añadiendo un par o tres de calefactores de 80W. en momentos de mucho frio o aumentar caudal de extracción y tiempo de ventilador cuando hace mucho calor. Los calefactores van con sensor de temperatura graduado para que el sustrato se mantenga a 20- 22ºC áprox
Esta semana empiezo a regar con agua del grifo , de base 0.4 áprox. y 6´5 de PH.

Likes
6
Share


@Dutchhobby
Follow
The lst one is making denser and bigger buds .u can see she wants to make me happy..the other one smells very citrus..like it..green one smells bit like original jack her.dont expect high hield.but the people from growers choice say on website that they only produce 30 gr...looking forward to smoke it do


Likes
Comments
Share

@c1note
Follow
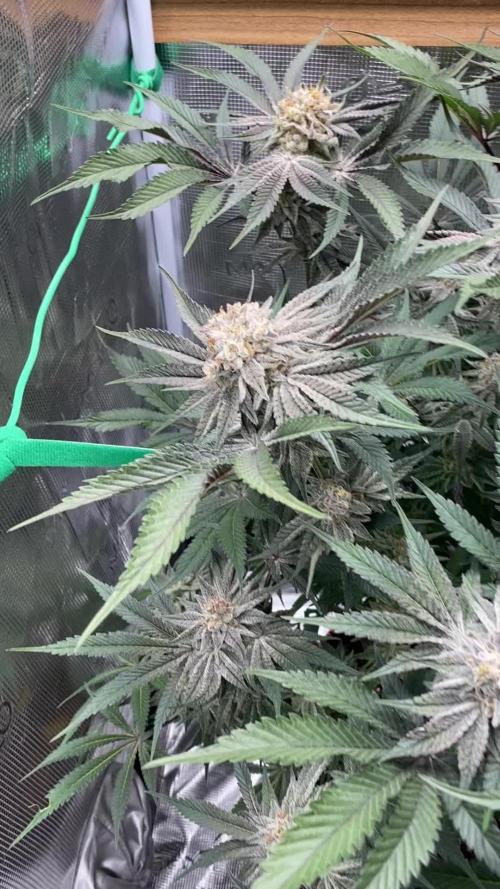
05.01 letzten 2 Tage. Die Trichome sind fertig, 5ter Tag nur Wasser. Dli 20-24.

Likes
31
Share


@Tweak
Follow
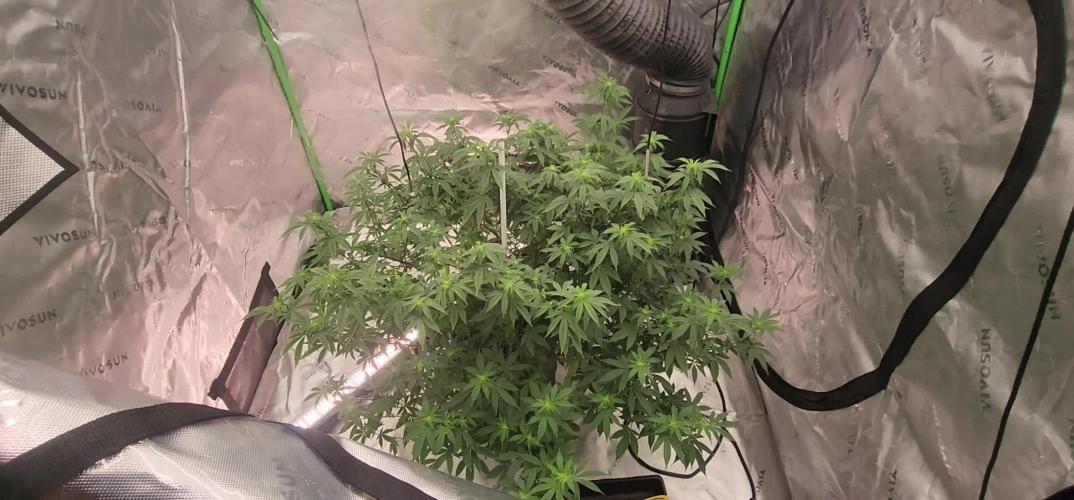
Lots of new growth this week, looks like the screen is about 50% full, I’m thinking in the next week or two I’ll get to 12/12. In the mean time I’m adding an extra hour of darkness every few days to make her transition to flower smooth and stress less for her.


Likes
54
Share


@Hou_Stone
Follow
I cleaned the roots this week with lots of tap water. The PPM drain was at 1100 and I lowered it to 550. Then I gave 1L of fertilized water at 850PPM to each plant. Then let it dry for 5 days
Green house Mineral fertilizers: : 0.5g booster PK+,0.5g Hybrids and 0.3g Calcium per liter
Lamp power of the week: 400w
--------------------------------------------------------
Grow Room: trafika urban hydroponics 100x100x200 cm
Lamp: kit trafika urban hydroponics ballast & lampe HPS : 250-600w
Extractor & carbon filter : Mars hydro 6 inch 402 CFM ( power 3/10 )
Soil : 20% perlite, 20% vermiculite, 60% universal soil
Average daily temperature & humidity : 24-30°C 40-60%
Average nigth temperature & humidity : 17-22°C & 50-70 %

Likes
10
Share


@DeepRootsGrowTrees
Follow
MIMOSA ZKITTLEZ / GANJA FARMER
WEEK #17 OVERALL
WEEK #7 FLOWER
This week she's in week #7 of flower got another week or so left befor harvest. She's stacking up nicely and she's got good trichome coverage she's a big plant. Stay Growing!!
Thank you for stopping my and taking a look it's much appreciated!!
THANK YOU GANJA FARMER!!
BUDTRAINER.COM BUD CLIPS
MIMOSA ZKITTLEZ / GANJA FARMER

Likes
16
Share


@Moose82
Follow
Week was good. Hope y'all like what I got done on my door. Things are starting to grow fast

Likes
459
Share


@Ju_Bps
Follow
Hello my friends 👩🌾👨🌾,
This 8th flowering week was good 👊, maturation Buds continue 🌲❄️, I thought it will be the last week, but need one more.
The end is for this week end I think, for moment trichromes not really full milky, and I like something like 20% amber.
I've started flush with flash cleaner
The senesence is started on the #2 and #3.
💦 1 Watering this week 1.8l/plant .
Water + flash cleaner
PH@6
Lamp @100%
Thanks community for follow, likes, comments, always a pleasure 👩🌾👨🌾❤️🌲
See you next week 👊👊
Mars Hydro - TS 1000
https://www.mars-hydro.com/ts-1000-led-grow-light
Mars Hydro - FC3000
https://www.mars-hydro.com/fc-3000-samsung-lm301b-led-grow-light
Mars Hydro - SP3000
https://www.mars-hydro.com/sp-3000-samsung-lm301b-greenhouse-led-grow-light
The High Chameleon - Vannila T
https://www.thehighchameleon.com/shop/vanilla-t-5

Likes
9
Share


@Rastaluna
Follow
Helloo, planties are roughtly 3 week into vegetative growth.
Into second week our cat snucked into the tent and being the motivated gardener she is, dug out quick one and speedy chille, we put them both back into place gave planties some water, and with time they recovered, speedy chille got most stress, but being photoperiod, recovered slowly aswell, still the shortest and very loved.
:) so everythings good
Royal kush has the strongest smell of them all, few leafs we defoliated we grind in our hard and smell a deep green canna scent.
Northen lights is the leader in hight since begining
When planties grew 5 tops we topped them, began doing LST and a bit of defoliation, bended stems away from the lamp and taking off leaf that blocks light reaching tops.
The stems hardened and remind me now more of a tree