
Likes
Comments
Share


@coriander
Follow
Pretty simple first week! Seed took 3 nights for the taproot to pop and it was planted in its final pot on day 4. On day 6, it finally popped through the soil and on day 7 the little sprout is starting to grow up. There is a small piece of seed casing left attached. Going to leave it for a day or two. If it doesn't fall off, I'll do it myself.
Thanks for stopping by! 🥦

Likes
12
Share


@Oldwied
Follow
After four days of darkness it is time for harvest.
Day 113
Flower day 66
Christmas harvest
After I divided the plant in two, it was hung up and dried at 19°C for 7 days. It was then dry trimmed.
Cherry High = 133g + 12g trimm
Likes
17
Share


@420DeepGrow
Follow
Gracias al equipo de Kannabia Seed, Marshydro, XpertNutrients y Trolmaster sin ellos esto no sería posible.
💐🍁 Moby Dick 🐋:
Criada a partir de dos parentales icónicos, como es el cruce de White Widow y una Haze pura G13, este choque de titanes provoca un híbrido que golpea a las puertas de las sativas más fuertes disponibles en el mercado.
Estamos ante una criatura impresionante en todos los sentidos, con ejemplares que florecen en solo 9-10 semanas en interior y arrojan un peso en lonja de 550 gr./m²
Al igual que su padre Haze, nuestra Moby Dick ofrece agradables notas cítricas, pero con efluvios de vainilla y eucalipto, una mezcla de aromas que genera una combinación intrigante, que puede llenar cualquier habitación con una fragancia inolvidable.
El sabor es muy parecido a su olor, con toques de limón agrio que harán que tu lengua cosquillee al inhalar, convirtiéndose lentamente en un humo dulce y terroso, con pinceladas de madera e incienso que se adhieren al interior de la boca al exhalar.
💡TS-3000 + TS-1000: se usaran dos de las lámparas de la serie TS de Marshydro, para cubrir todas las necesidades de las plantas durante el ciclo de cultivo, uso las dos lámparas en floracion para llegar a toda la carpa de 1.50 x 1.50 x 1.80.
https://marshydro.eu/products/mars-hydro-ts-3000-led-grow-light/
🏠 : Marshydro 1.50 x 1.50 x 1.80, carpa 100% estanca con ventanas laterales para llegar a todos los lugares durante el grow
https://marshydro.eu/products/diy-150x150x200cm-grow-tent-kit
🌬️💨 Marshydro 6inch + filtro carbon para evitar olores indeseables.
https://marshydro.eu/products/ifresh-smart-6inch-filter-kits/
💻 Trolmaster Tent-X TCS-1 como controlador de luz, optimiza tu cultivo con la última tecnología del mercado, desde donde puedes controlar todos los parametros.
https://www.trolmaster.com/Products/Details/TCS-1
🍣🍦🌴 Xpert Nutrients es una empresa especializada en la producción y comercialización de fertilizantes líquidos y tierras, que garantizan excelentes cosechas y un crecimiento activo para sus plantas durante todas las fases de cultivo.
Consigue aqui tus Nutrientes:
https://xpertnutrients.com/es/shop/
📆 Semana 4:
Aparecieron un monton de erizos esta semana, el temporal ha hecho algo de mella en la carpa al bajar las temperaturas aunque todo sigue correcto.
Continuamos con las dosis de nutrientes recomendadas por el fabricante.

Likes
5
Share


@B4niTa
Follow
Growing strong💪 Stretch should begin soon.
I'll be switching to bloom nutrients next week🌸
Doing some light defoliation daily just 2–3 leaves to keep those lower sites exposed🌿

Likes
12
Share


@ChitownCannaChica
Follow
She’s getting a little bigger day by day! Popped when it was pretty cold outside, but it’s has been very hot and humid this past week—- and she loves it!

Processing
Likes
10
Share


Likes
41
Share


@Santica_Garden
Follow
How's it growing guys, just a quick update on the Alien OG by The Cali Connection, end of Week 3 of Flower, I have uploaded a video for you guys so any questions just ask 👍🏾 Happy Growing 🌱💚

Likes
6
Share


@dfgh95
Follow
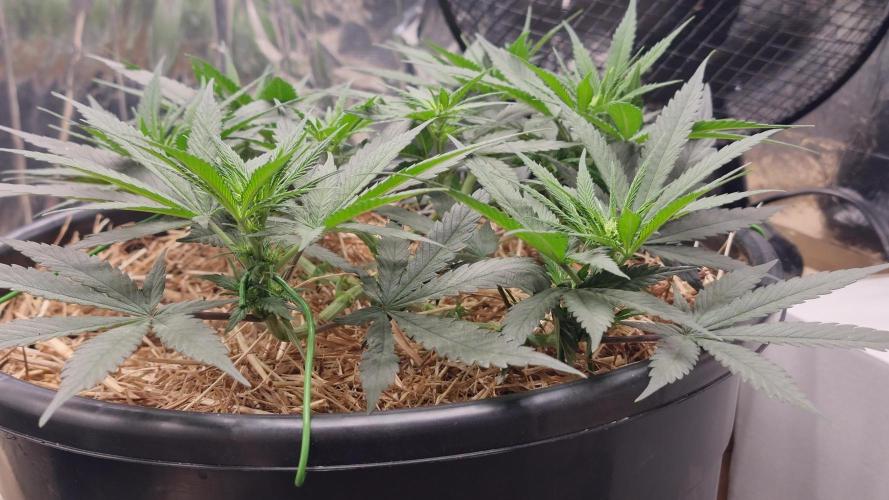
This is the first week of flower for Juana, today 01/11 is the first day she is in 12/12 schedule.
I will be doing the same top dress for her.
They are ragging and showing some good health as well. Maria is behind them in growth but that's ok, i feel i'm running out of space right know.
Last week I accidentally broke one Maria's cola :(, poor girl. I was doing some lst and the stem was really tough. I should've been more carefull, my fault.


Likes
50
Share


@Mrs_Larimar
Follow
May, 18th. 2021
The Limoncello performs liike aQueen,
She has such a wonderful Structure, and alot of Flowers are
appearing along the Branches... and she already smells hmmmmm
Delicious


Likes
6
Share


@TerpyOG
Follow
This week I did a fair amount of work on my grow.
I did a bit of defoliation and spent some time tying down branches to shape the canopy.
My goal is to get buds growing wall to wall! I can't wait to see the results of my efforts.

Likes
12
Share


@cookingwithninja
Follow
day 49 just pure water phed down.
it is day 51, morning before lights on, I might chop today. I use a zero water filter pitcher got off walmart. My humidifier is only a sonic wave. If you use regular tap water it will get gunky in a sonic humidifier. If you have a heat humidifier that boils the water the mist should be clean. These are the 2 types of water humidifiers. Researching best water filters this "zero water" also comes with a free ppm meter! yay! Other water pitcher brands; the water still has ppm. So water misted will still have ppm contamination. You can easily used distilled water only, and reverse osmosis. I just fill a 4gal office water jug with the pitcher and fill my humidifier when needed. I do not use a humidifier in my entire grow up to this point when I chop, I need the perfect rh or this whole effort can fail. growing up to this point only requires 20% effort, chopping now for the 2 weeks dry is this 80% of crucial determination, succeed. A lot of tasks are required today for a clean chop. I feel confident, observed my cross seeds with pink paradise and one with a slightly open caylex looks dark enough for successful germination. I figured 8-16 seeds may be created, 3-4 buds were potentially pollinated. Many growers don't understand when creating genetics with female/female there is a slight chance of herm. You lose 50% of your genetic function. Just water last 2 days, no humic no folvic, 1st time entire grow ha!
There is a lot of cleaning to do, remove the trees, clean the entire tent and environment with bleach water, hacksaw.
I am very proud of my grow. I have sampled 3 of the strains, dr. thunder legit made my lips numb but it could have just been the terps removing my skin cells from the sticky filter, no lie. This is my best grow to date. I did this for you, and to document hype or not under the best conditions I could give my plants, full max potential, although I wish I had more lights, I am not looking for industrial lol, this is how I grow. Learn a lot on youtube and podcasts there is many good content and I may dab into it. You can have a room full of growers and you have 1 seed in your hand, they will all tell you that their way is correct ;) and the best way. Oreo is stinky AF, Bridal is just amazing glad its massive, just not into sativa but the test seemed slight sativa with majority indica, pink untested, dr, thunder just a lip numming plant aha, its very nice, all 4 amazing appeal like advertised, and excited for next run. Either crosses from this or other copycat genetics.
I will give you beautiful glamout shots today, the sizes of the plants, My guesstimate bridal 1lb, thunder 1lb, pink, 0.4lb, bridal 0.5, I am ambitious off 640w lm301h, and 4x 20w blurples daisy chained.
day 51 4 chopped see you in a few weeks :D


Processing
Likes
46
Share


@TessaMaria
Follow
This week went well I am continuing to harvest buds as they become ready. The leaves are yellowing more and more letting me know that she is almost complete. I think the lower bids have about one more week until they are ready and that will complete the harvest for Big Girl.
Little girl is now declining, she has not branches out or grown new tops.

Likes
10
Share


@Boomdrawfyah
Follow
80 dias y han empezado a florecer la mas avanzada es la 1051 que es la variedad con mas predominancia indica.
He empezado la primera semana de floracion con la tabla de elicitación y nutrición de terranabis, subiendole 0.2 ml de Terrateina y terra vigor , vamos a ver como responden

Likes
14
Share


@Diips
Follow
day 15 - 27/11/2025.
all looking good, healthy foliage all around.
beginning of week 3.
did a early def on the tiniest of them all, due to her leaves shadowing herself. so hopefully it will help her to get more light into the canopy

Likes
Comments
Share

@SpliffDoc
Follow
She got flipped on day 36. Saw pistils a couple of days later. She isn't big, but she's a beauty. I think this strain would be better left to grow naturally rather than pissing around LST'ing. The response hasn't been what i expected. The proof is in the end product though so let's see😁🏻


Likes
47
Share


@hannabis420
Follow
10/10 indoor grow, highly resistant strain, quick to flower after only 5 weeks of veg... light stress being too close to the lights caused fox tailing buds...live and learn!

Likes
8
Share


@Cali_Rayy
Follow
Did a defol on the covered budsites; feeding straight h20 at 6.0 this week I may have pushed the nutes a bit but that’s okay atleast I know he’s eating. Next few weeks I hope to get some smells coming off for an update 🤟
Likes
7
Share


@Epwood
Follow
Things are moving along as they should. I've been keeping a closer eye on the pH in the trays themselves (as opposed to in the reservoir only) due to some noticeably high pH (>7) in the trays. Doing so seems to have halted any further chlorosis (yellowing of leaves).
Additionally, I've started supplementing with Orca as well to help with controlling algae in the reservoir as well as giving the plants a bit of a boost to root health. We'll see how that goes.
