




Likes
Comments
Share


@kilton_420
Follow
il y a eu un pique de chaleur, depuis j'ai eu des apparitions de carences

Likes
4
Share


@DrewbieDoobieNoobie
Follow
Hello Folks, 17 days from spraying the CS on MILF A we got Lots of nanners. I have a theory that the stronger the Colloidal silver PPM the more it will affect the plant I have been told that 30 to 50 ppm is good. The stuff I have clocked in at 158 PPM with my meter the bottle said 500 ppm so either way it did its job but I only sprayed 2 nodes and 95% of the plant started growing balls. there was 1 branch that had all girl parts on it see the pic above. Today was the day I hacked her up as she started to pop in the tent and I will find out how many buds got knocked up in 2 months or so, I did do a few on purpose with a paint brush and marked then with a loose Zip tie around the branch. I have been reading that the way to tell if a bud has been pollenated that the hairs will turn brown as a first sign and then the calyx will swell with the seed. this is my first time as a "pollen chucker" I really hope these will makes feminized seeds for this strain it looks like its worth keeping around. heat and stress resistant and I am seeing minimal tip burn, they are heavy drinkers. I will have to watch the 5 gallon pots closely every day. They look promising lets see what happens. Stay safe y'all Cheers and don't forget our fallen Hero's this Memorial Day
Likes
34
Share


@marihoochi
Follow
Oct 20 Starting Well Water 0.9EC or 450PPM (Hard Water) @ 19 Degrees
Inputs : EC 2.0. PH 6.4 Temp 19-21 2 Gallons each
Runoffs: EC 2.0, 2.1, 2.2 & 2.3
Goal is to Grow High Brix 12-15% better than the medical grade cannabis to help with a myeloproliferative neoplasm😧 as well as for fun😎.
Any tips, working knowledge or suggestions towards this goal is greatly welcomed and would be played forward.
Just read that if a plant has a BRIX of 12% or higher that some insects won't lunch on it! Loving this plant😀
Flavonoids and Cannaflavins are phytonutrients and along with carotenoids are responsible for colours. They are anti-mutagenic, anti-cancer, antioxidant, antiviral, anti-inflammatory, immuno-protective .. Maybe better than aspirin for inflammation trial is still out😉. Catechins are anti-proliferative, cardio-protective and reduce cholesterol. More medical studies need to be done on this plant😶
Some plants are showing signs of a deficiency. I believe I have locked out calcium. I watered yesterday with 2 Gal each of Dutch Nutrient Diamond which has amino acids, humic and fulvic ,kelp (has b vitamins and amino acids in it). Green Planet Terpinator for the 4% Sulphate of Potash (SOP) or potassium sulfate...I saw a Video with the awesome Dr. Harley Smith and wrote 7 pages of full scape and he mentions to use amino acids to help plants uptake calcium. These products contained them and I had them on hand...hope it helps.

Likes
27
Share


@OldDabKing
Follow
Performed the "back building" technique this week to help bulk up the top cola. Watering the soil when dry, and defoliating the dry-dying fan leaves.
Likes
58
Share


@AsNoriu
Follow
Day 97. Fast Buds Thank You !!!!
Day 109. Girl is in jars and waiting for Christmas ;)))
Happy Growing !
Likes
23
Share


@cherokee
Follow
Привет всем.
Клоны растут очень хорошо и быстро вытягиваются в высоту.
На некоторых листах я заметил проблемы, надеюсь это голод а не болезнь.

Likes
11
Share

@MyWetPussy
Follow
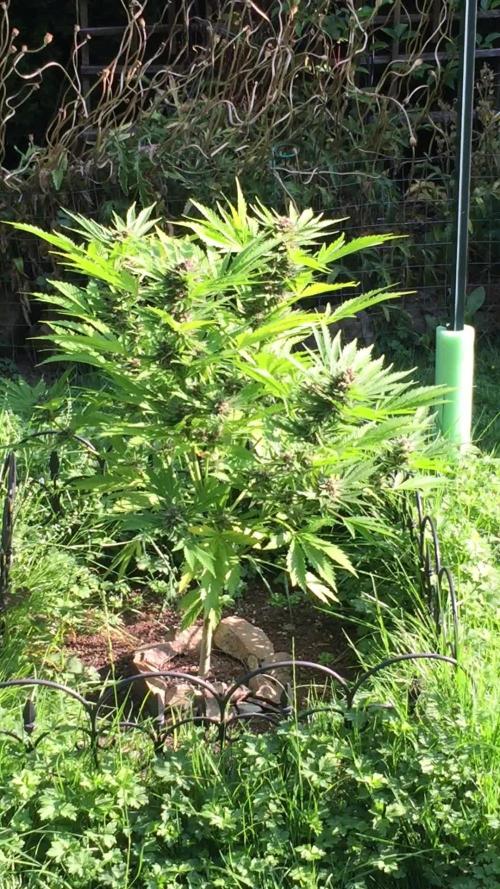
Day 78 Sunny
Day 79 Cloudy with some drizzle
Day 80 Sunny
Day 81 Sunny
Day 82 Cloudy
Day 83 Sunny
Day 84 Sunny
Week review: The diary is now caught up.😍The plant started to bring in the color of her buds fast. She is also starting to bring in the fade. Looking like she wants to finish up in the near future. Gave the plant 1 good watering this week.
😍
Likes
4
Share

@lebrongrows
Follow
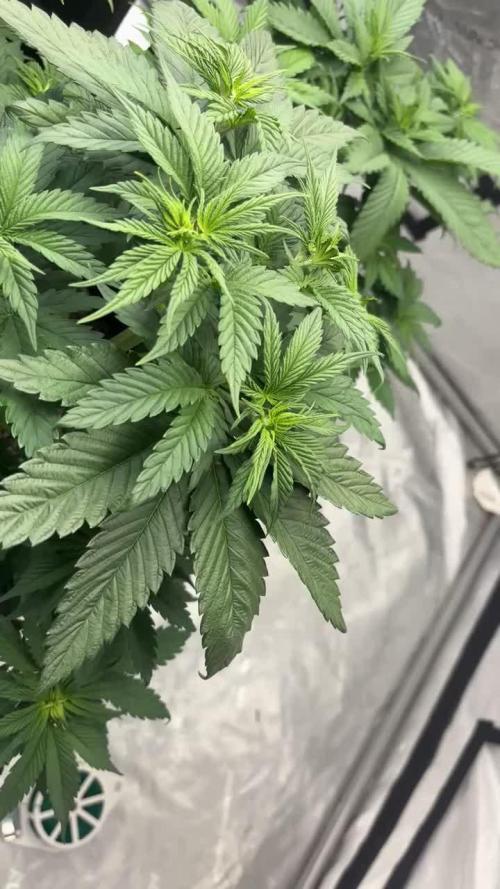
2/18: 4 weeks since we planted them. Some of the new nodes since topping are starting to come in. Also finally got to doing some lst. First time, so I didn't rlly know what I was doing all that much, but my main goal was to pull branches outward and have more light reaching all the nodes. I should definitely have topped and done LST earlier, but oh well, now I know for next time. I also removed some of the new fan leaves that were covering the new nodes. My roommate wanted to experiment with the smallest one so removed some of its big fan leaves. I don't really think that was the right call, but whatever we'll see what happens. Would also have loved to try mainlining but its also pretty late for that. It would have slowed down veg quite a bit too, and since we have to go home from college in early may, they have to be harvested by then. Gonna water later this afternoon as well.
2/19: Watered them last night. 0.75 gallons each. 4 tsp grow big, 6 tsp big bloom, 1.5 tsp calimagic per 2 gallons. I'm not sure why I didn't realize earlier I can just partially tuck the higher fan leaves under the lower nodes coming in. It makes the plant look droopy since big leaves are tucked, but I feel like it helps the lower nodes receive light and catch up, while being able to keep the fan leaves without cutting them. The small plant has 10 main nodes, and the rest have between 12-14, with many smaller additional nodes coming in under. I'm not sure how much I should try to grow these smaller nodes on the lower branches, or if I should just snip them off. Main focus right now is to get the nodes at similar hight and horizontal grow.
2/23: Watered this morning. Should have watered last night but my roommates were asleep and I was a bit too lazy to do it myself (took me an hour last time to do it all myself). I think I'm gonna start filling up a 5 gallon bucket instead of the 2 gallon one I was using, since I won't have to spend as much time refilling the water, nutrients, and get correct ph. Nutes doseage was 3 tsp grow big, 6 tsp big bloom, 2 tsp calimagic per 2 gallons. Roughly 0.8 gallons each plant. Ran out of big bloom for a few of the plants, but I don't think that should cause any big issues. Me and my roommate were debating if we should feed them nutes this water, or do straight water and calmag. Ended up feeding them since I didn't think we already have much salt buildup, but I think we will do a straight water and calmag flush next time. I also remembered we have a TDS meter, so I used it for the first time. Water in was about 750 or so ppm, and runoff was about 1350. I think thats kinda high for runoff, but like I said we will flush next time, and plants look healthy for the most part. Will definitely look more into that starting now. Also, the ph meter I had previously bought is complete garbage, so I had only been setting ph to around 6.2-6.5 with one of those visual mixing solution kit. I'd been doing this before mixing nutrients, and hoping that they don't throw the ph values off too much. I know this is pretty reckless and stupid, but it seems to somehow be working for now. I think it's probably a better idea we get a working ph meter so we can make sure levels are good after mixing in nutrients, but I'm feeling a bit lazy and frugal to buy a meter, so we'll see. Overall, plants look fairly healthy. They were a bit droopy today because I think I waited a bit too long before watering them, but oh well. One of the two plants that is a leggier and less bushy phenotype is turning pretty yellow however. I'm assuming it's a nitrogen deficiency but I'm not certain. Seems to have gotten a bit worse the last few days, but I'm hoping things will sort themselves out. Might also just up the doseage for grow big, which contains more nitrogen than big bloom. On a few of the other plants, the older and lower fan leaves also seemed to have some spotting resulting from calcium deficiency. Newer leaves all seem fine, and with the recentish addition of calmagic, I'm hoping this won't be an issue going forward. Have also been snipping very small nodes that are coming in on the lower branches. Not snipping them all, just trying to predict which ones have a chance at reaching quality light and developing into good colas. Anything I think will turn into larf im just snipping.
Looking back on the last few weeks, there are a lot of things I have learned that I hope to carry over to our next grow next year. I should have started lst and topping sooner, I understand how much and often to water them much better now, and there are a plethora of other small things that I have learned. I wish I didn't cut corners on some small things and overall was a bit more attentive to details, but for how well it seems to be going, I really can't complain. I'm incredibly stoked about how this is going, and I still can't believe I'm growing these plants with my roommates in our garage as a college student.
Processing
Likes
34
Share


@Grey_Wolf
Follow
Original Sensible seeds Girl Scout Cookies 10th week of Veg Completed . 13th Jan 2020
Ok we are aprox halfway thru this Diary now as in about 3 weeks all my Photostrain plants that are mature enough , should begin to start Budding.
I'm expecting this Plant will probably need 8 weeks of Flowering to be ready so that makes it roughly 21 weeks From start to Finish give or take a week.
Ive added some support strings to her ready for the stretch and I also fed her some of the "High Tea" I made.
This Girl is starting to get her very own unique smell and when I rub the stems it is very Noticeable. 😎
Thankyou For Reading this weeks update I shall be back next week for another. 👍

Likes
1
Share


Likes
80
Share


@Roberts
Follow
Pure Ice cream clone is doing great. She is getting fully acclimated to the bigger potter. She has started to grow more so the roots have been making progress. I will be switching her to flowering in 2 to 3 weeks. Everything has been going good. Thank you Spider Farmer, and Pure Instinto Seeds. 🤜🏻🤛🏻🌱🌱🌱
Thank you grow diaries community for the 👇likes👇, follows, comments, and subscriptions on my YouTube channel👇. ❄️🌱🍻
Happy Growing 🌱🌱🌱
https://youtube.com/channel/UCAhN7yRzWLpcaRHhMIQ7X4g

Likes
2
Share

@ThatsmyGrow
Follow
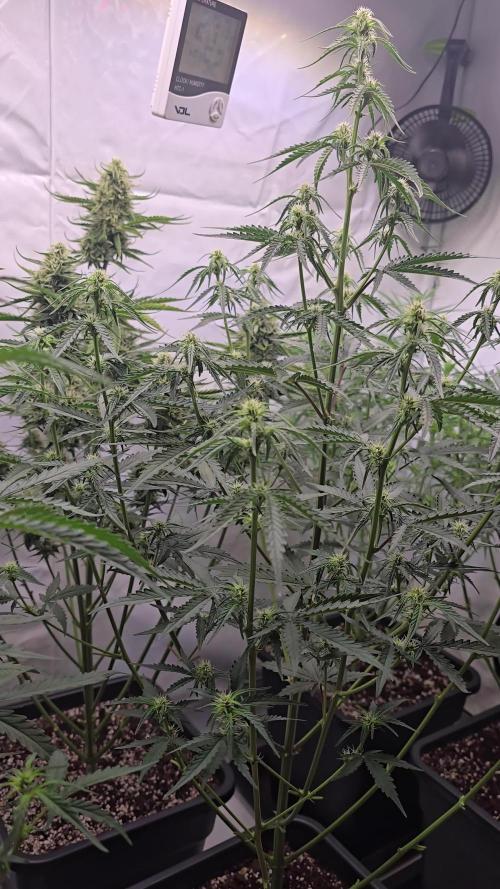
Sie scheint mit bisschen Lichtstress zu haben, aber da schauen wir einfach weg.


Likes
9
Share


@Soskar69
Follow
The plant is big enough, so I've done some LST :)
Also this is the last week that I can spray the mixture with neem oil because from the next, this girl will start flowering.
Likes
34
Share


@MadeInGermany
Follow
Info:
Unfortunately, I had to find out that my account is used for fake pages in social media.
I am only active here on growdiaries.
I am not on facebook instagram twitter etc All accounts except this one are fake.
Have fun with the Update 😃.
Flowering day 42
since time
change to 12/12.
Hi everyone 😀.
This week you can see how she puts all her energy into the flowers ☺️.
They smell better from week to week 👍.
This week it was poured twice with 1.2 l.
1 g enhancer per liter of water was added.
Otherwise, like every week, everything was checked, everything was cleaned and refilled.
Have fun with the update.
Stay healthy 🙏🏻
You can buy this Strain at :
https://www.exoticseed.eu/
Type:
Quick Sherbet
☝️🏼
Genetics:
75% Indica / 25% Sativa
Sunset Sherbet X Black Lemon
👍
Vega lamp:
2 x Todogrow Led
Quantum Board 100 W
💡
Bloom Lamp :
2 x Todogrow Led
Cxb 3590 COB 3500 K 205W
💡💡☝️🏼
Soil :
Canna Coco Professional +
☝️🏼
Fertilizer:
Green House Powder Feeding
☝️🏼🌱
Water:
Osmosis water mixed with normal water (24 hours stale that the chlorine evaporates) to 0.2 EC. Add Cal / Mag to 0.4 Ec Ph with Organic Ph - to 5.5 - 5.8

Likes
7
Share


Likes
Comments
Share


@spacetimeman
Follow
Mildew was detected in the beginning if the week, the plant sprayed with solution of hydro peroxide to kill spores and then solution of apple vinegar to stop prevent new mold. It worked.
I thenk the next eeek will be the last. I decreased 5he concentration of the watering solution, especially in Nitrogen part.

Likes
7
Share


@greenflipcali89
Follow
Completed Week 12 (Week 4 Bloom) with a bang, discovered I had Powdery Mildew! Culprit was a newer plant from another tent. Treated with a milk/water (60/40) solution and gave it a serious defoliation and even removed really bad PM'd bud sites. So pissed that I had left both tents open, when I should have kept only one open at a time. I am hoping I can stay on top of keeping it in control and will look to use an H2O2/water solution to briefly soak the harvest in afterwards to kill off any PM and other bacteria. I think next time, unless I know I can easily access all four sides of a scrog, it is very difficult to maintain and defoliate properly.
Processing
Likes
46
Share


@PureMedicin
Follow
Nice growth and bud developtment. Hps still doing its thing while im sitting back and relaxing. Got to keep an hawk eye on watering. I feed full strenght going over to full canna so they were transplanted into soil. Clones doing good but the Lemon skunk clone dont feel to good. Lets see what the week will bring.

Processing
Likes
26
Share


@GrowGuy97
Follow
Day 14, Two of the Orange Sherbets are a little behind & the one I’m trying to pull back from nutrient burn.. So far the White Widow Autos by Seedsman have been doing the best!
Day 17 two of the Orange sherbet are a little behind the rest of the plants but overall I would say everything is going good! Seems like the orange sherbet that had the nutrient burn is starting to bounce back!
Day 19 They are all really starting to take off! Probably gonna do some LST tonight or tomorrow!

