The Grow Awards 2026 🏆 


Likes
Comments
Share


Likes
12
Share
@BeHappyNtoke
Follow
The smell is so great wish I’d be getting more nuggets off of this girl but at least it is dense will continue to keep updating as the week goes on
Likes
6
Share
@Mr_nugs_lover_David
Follow
It was such a nice experience for me with this strain, first time ever growing her, she had a little bit of long internodes and thought she wasn't gonna be very productive, however the nuggets are so so hard and compact and the quality is just brutal, doesn't even look like she's s been outdoor grown, I love this strain for the rare strong smell like very sweet and floral with that strange diesel notes mix the sweet tones, I would love be growing her my whole life, I definitely will keep growing this lady FOR SURE!. thank you so much and hope you guys enjoy! 💎🙏🔝💚

Likes
6
Share
@IamCy
Follow
She's starting to fatten up nicely! Terps still off the meter,and the roots are ridiculous. Definitely one of the best plants I've ever grown.
Likes
12
Share
@ZzTooRightOGzZ
Follow
Week 3 going well.
Topped her and doing a bit of lst to her as well hope everything goes well.
Week 4 fead her with 25ml off grow auto from living Soils.
Likes
4
Share
@KannaGrowing
Follow
Esta semana toca trasplantar, ya que el sustrato ha sido colonizado.
Utilizamos Macetas textiles de 4L para mejorar el drenaje, esta vez solo añadimos Bio Terra Plus, nada de perlita.
Nada más finalizar los trasplantes, regamos abundantemente solo con agua y en el siguiente riego continuamos con la mezcla de fertilizantes.
La potencia de los LazerLite Pro 720 sigue al mínimo, aunque ya son cuatro conectados (uno por variedad = 1 m2).


Likes
Comments
Share
@Bombmom420den
Follow
This week was so mixed with the ladies and the heat issue we had this week. Cherry Bomb seemed to be the only one who didn't care that it got hot the rest have burned leaves from the heat. But they all are bouncing back and should be looking better over the next week.


Likes
6
Share
@Drobubba
Follow
Victory lap...week 13 is in the books. The girls are are just about done taking a beatdown. I came, i ve endured and over came, ive grown! Again, this was 12/12 courtesy to one photo followed by two auto pots. Unfortunately My photo( kalina asia)is a bit behind but will be pulled along with my autos (All gas Og auto& Banana Bread auto). They are 93 days from seed. I should've 84 and out the 🚪 them but whatever! I must of did something right!!! Right? Next stop the harvest...


Likes
15
Share
@CG420
Follow
Tras un pequeño fallo con la iluminación (5 horas apagado cuando tenía que estar encendido ).
He decidido hacer ya el cambio a floración,espero que no sea muy tempranero y se queden muy pekeñas las niñas .
Mañana mismo empezaremos con los fertilizantes de floración controlando el pH en 6.5.
Todavía no he defoliado nada y nose si quitaré alguna hoja o solo las intentaré apartar sin que moleste a las llemas .veremos cómo prosigue la cosa 💚
Adjunto un vídeo con el tutorado y la poda de bajos realizada ..
Gracias growers!💚

Likes
154
Share
@Tropicannibis_Todd
Follow
💩Holy Crap Growmies We Are Back💩
Code Name FBT2311
Well growmies we are at 49 days in and everything is going as good as it can 👌
👉Shes been doing really good , lots of buds and some nice colors and smells 👌💪she's the top of of the lot 💪
Lights being readjusted and chart updated .........👍rain water to be used entire growth👈
👉I used NutriNPK for nutrients for my grows and welcome anyone to give them a try .👈
👉 www.nutrinpk.com 👈
NutriNPK Cal MAG 14-0-14
NutriNPK Grow 28-14-14
NutriNPK Bloom 8-20-30
NutriNPK Bloom Booster 0-52-34
I GOT MULTIPLE DIARIES ON THE GO 😱 please check them out 😎
👉THANKS FOR TAKING THE TIME TO GO OVER MY DIARIES 👈
Likes
16
Share
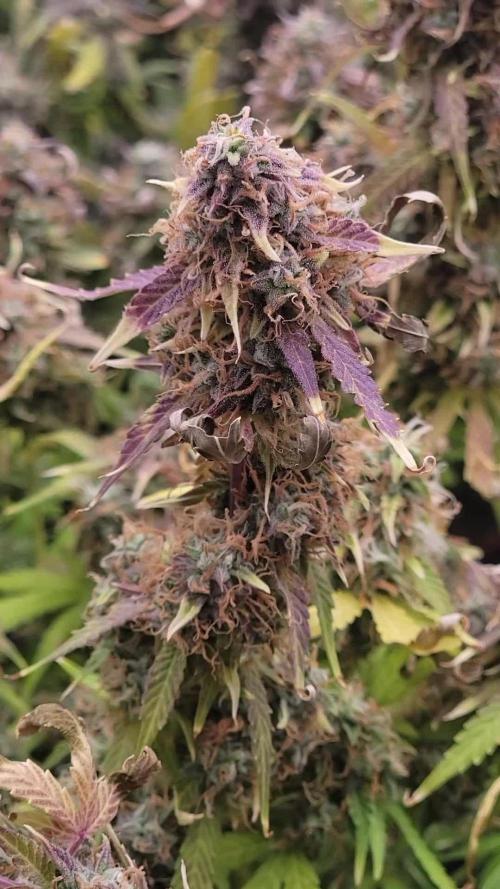
@OrganicPower
Follow
Week 6 flower, half way there! Buds are starting to fill in now and getting some decent frost. A couple of tops are getting more light than others, and fattening a bit more and looking real nice. It looks like there is some purple starting to come out at the tops. She is strong and will go as fast as the soil and environmental conditions will allow her to. Hand watered in Gaia Green Soluble Seaweed Extract 0-0-17, otherwise water drip is running on same schedule. Just using straight tap water that sits in a 30 gallon reservoir with a submergible water pump running 24/7 breaking surface and aerating water. Water comes out the tap @ 7ph and less than 15ppm. So I don’t do nothing to it, I drink it:) Thanks for the view 🤜 Have a great week!

Likes
32
Share
@ArtisticGrown
Follow
Over all it was a hell of a ride, but a good one. My first grow ever learned so much and still learning. Started with 4 plants ended with 3. One of them was mutated or something during veg so decided to pull. This strain grew strong and thrived the whole time. I learned a lot about ph and air flow and VPD still learning and trying to find that sweet spot! I loved getting to know these girls it’s crazy how plants talk to you! Also watching these girls flower and bloom! Into some sweet sticky dank yummy nuggs was amazing such a good feeling! Emm Over all I’m happy with 3 oz ready to keep on growing more and learn to get a better yeild! Super thankful and happy growing
Likes
22
Share
@Silverback_Guerilla
Follow
2/10:
I watered today with about 3/4 gallon each, plus cal-mag, signal, bembe, armor si, a little open sesame, and their final dose of endoboost.
I took photos today, but forgot to snap a shot of the Soooperrunt. She's as tall as the short one now, just not as bushy. I think she'll make a fair amount of bud despite her sloooow start, smaller stature, and smaller pot. The tall one is keeping pace with the biggest plants in the garden.
2/11:
Wife home sick today....postponing construction project to raise the lights....kinda scary....about 10"-12" from the tops now..
2/12:
I woke up to find the tallest of these bitches stretched another few inches and within 9 inches of the lights!!!
I quickly drug everybody out of the closet and undertook the project. In addition to that project, I installed and hooked up my new AC Infinity 6" intake fan. It's pulling in fresh air from the soffit vent on the eave of the attic, and currently feeding the garden with 46f fresh air. I'm able to easily maintain daytime temps in the lower 70f's now. I am able to drive the nighttime temps as low as I want. The only issue is that the outdoor RH varies quite a bit, so I ordered a 30-pint dehumidifier to put in the top of the closet. It will battle with the evaporative cooler while the lights are on to keep it at 45% RH, but after the lights go off, it will lower the RH to 35% unti morning. After another couple of weeks, I'll kill the evap cooler altogether and try to maintain 35% RH 24/7. I'm optimistic that it will be the difference-maker in maintaining lower RH while I'm flushing all the plants during the last couple of weeks. That's usually such a challenge...especially with a bunch of 5 gallon pots.
I also sprayed everybody with boomboom spray to try and mitigate the light burn damage that is likely to ensue.
2/13:
Still stretching... about 12" from the lights again. I will wait to raise the lights until tomorrow when I feed them. I'm seeing calcium deficiency on a few plants, including a #9. Will up the dose tomorrow when I feed.
2/14:
I fed them today with about 3/4 gallon each including grow big, big bloom, tiger bloom, cal-mag, signal, bembe, humic acid, and I switched over from Open Sesame to Beastie Bloomz. Raised the lights another couple of inches. I did some training on them and defo'd a little bit.
2/15:
Installed the new dehumidifier and rigged the continuous drain on it...works great.
2/16:
I rotated the edge plants and removed some old leaves. I added another 22w 3000k 4' bar light under the canopy.
2/17:
I rearranged the garden and defoliated a little bit. That's it for week 8-

Likes
74
Share
@KrautFabrik
Follow
Day 28: nutrients like plan
---------------------------------------------
Not much to say, we are in bloom now.
Happy growing 🍧✌️

Likes
13
Share
@Mrgreengrinch
Follow
One or two more day will start flushing 2 of the girls other two need Anthor week or so at least


Likes
30
Share
@TragicTerps
Follow
We are currently working on the recovery from the initial stem split on plant A. She's almost all the way recovered with only a slight crack still remaining. Hopefully that split and the overwatering won't disrupt or stunt the growth of this lady too much.
For the sake of experimenting I pulled off the first set of fan leaves that were stunted and discolored in hopes the energy used by the plant will be directed more towards the new growth.
Plant C is looking great and loving the increased Par values from our light as we are getting good vertical growth and the main stem is looking super healthy.
As we get through to the end of the week we will start transitioning plant A for LST in the form of tie down. The fan is currently applying pretty good stress to the already week stalk of plant A, but she again is almost 100% closed back up. The whole purpose of the fan is to strengthen the stalk with very light stress.
Plant C will see LST beginning in 2 weeks as she is 1 week behind Plant A.
Many people ask me about the LL on the guage and I will remind everyone, I live in a high climate desert around the 49th parallel so it's cold and dry. When the tent is closed I usually see rh values near 40% where the normal RH (Relative Humidity) is around 10%. It's just dry here. That said the grow community here and the quality of bud is top shelf as it gets. Rh doesn't necessarily impact the end results.
End goal is still 360g harvest out of this tent we will see if we get it.


