


Likes
22
Share


@EelGrows
Follow
Week 6 Summary: First off, Happy New Year! May the new year filled with peace, love, joy and dank buds! 😄😉
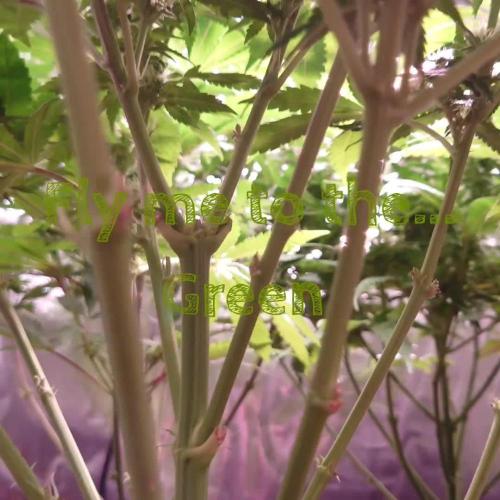
Day 36-39: Despite my heavy defoliation they seem to bounce back quite quickly every time, but this is my first grow so I could be completely wrong and slowly murdering my plants... 😅 WC1 starting to frost up, the two double buds are starting to split themselves up while stretching: WIN! WC2 and WC3 really starting to show their size compared to just a week or 2 ago, really spread out now, and starting to stretch.
Day 40-42: WC2 and WC3 really stretching now. WC2 almost catching up to WC1's height, and has probably spread out the most out of all plants when you compare it to a few weeks ago. Maybe defoliating is a good thing for Autos after all? I'm stoked about these. Although WC2 and WC3 are a few days behind of frost production it's definately starting to show itself by the end of week 6. Stoked for these!!
These are stinking aswell, but for now the 4AM in the tent is sweetening it up!
On to week7!!!


Likes
90
Share


@AsNoriu
Follow
Day 127. Chop day !!!!
Zkittalicious #6 is my first plant without any airy or small bud !!!! Plus he will be like others in 100g range ...
#2 should beat all single plant records ;)))
Happy Growing !!!

Likes
9
Share


@Jofflepov
Follow
Looking for optimal led height.
RQS' Northern Lights auto and Diesel auto look very sophisticated and detailed. They are standing in the middle. Rest of the plants are auto lemon Hazes and they have may varieties. Two are growing very fast and two are stunted.
At least one more week of indoor growing before going outside in a bigger pot.

Likes
15
Share


@BushDoctor740
Follow
Day 21 and the girls are really starting to take off.I did some LST on 3 of the 5 so far and will get the other 2 bent over in the next few days.
Day 27 I watered with recharge tea and tied down some branches to get some more light into the center of the plants.I have increased the light intensity to 50 percent and slightly lowered the humidity this week.

Likes
17
Share


@valiotoro
Follow
Impressed with the quality of the buds rock solid & the smell a mix between strawberry pear & peach🍓🍐🍑super sweet!
Easy trim✂️
Two different Pheno
The green Pheno is more sweet and the purple more sour🤤
Now 7-10 days on the dry rack then see you in 2025 for the smoke review
Take care 😎

Likes
15
Share


@tokesly
Follow
Spent eternity trimming! So this is why people call it trim jail.
Yield:
TM1: 205g Dry | 61g trim - Best growth and color, 7.2 oz yielder!
TM2: 177.5g dry | 72.5g trim - Frosty and colorful fruity
TM3: 154g dry | 67.2g trim - Even frostier than TM2 but no color more gas
TM4: 71g dry | 33.6g trim - Super larfy, still decent taste
TM5: 65.3g dry | 19.3g trim - Best Flavor, super gas and sweet
Total: 672.8g dry (23.8 oz) | 253.6g trim (9 oz)
Flavor is a gassy guava candy with sweet cake after tones. Frost and color is up there, structure is lacking in cola formation. There's a lot more popcorn nugs than hoped for. Definitely due to poor defoliation, lack of scrog, and late PK. Also
Besides that, a 672.8g yield would be ~1g/watt - an ideal goal for any starting growers


Likes
10
Share

@Leprechauns_Garden
Follow
Wochenupdate ...🌱🌿🍭
Start der Woche 5 der Blüte 🏵️
Alle Ladys sind gesund und ordentlich am blühen.
Es sind schon Trichome und schöne Zuckerblätter zu sehen.
Habe das Gießverhalten ein wenig erhöht. 💧Sie bekommen aktuell 3,5 - 4 Liter NL alle 4 Tage, möglichst ohne Drain.💧
Bis jetzt klappt es perfekt und sie trinken es auch zackig weg.
Ab jetzt füge ich Plagron *Green Sensation* hinzu.
Habe das Gefühl dass ein bisschen zu viel Stickstoff im Boden ist ... Sie sind ziemlich dunkelgrün. Aber eine
N-Claw ist nicht zu sehen, ich denke es passt noch.
Licht bleibt gleich. Und sie beten fleißig weiter 🙏💯😊
In diesem Sinne..
Let IT grow 🌱 🌿 💚
Likes
39
Share


@MrSpooky882
Follow
Das Blatt Blüte Verhältnis war sehr sehr gut! 👌
Ich habe die Pflanzen dieses Mal nicht komplett getrimmt, sondern mit Zucker Blätter aufgehangen um ein schonenderen trocken prozess zu bekommen und ich Maniküre die Pflanze dieses Mal erst wenn sie trocken ist das verhindert Verletzungen der Pflanze die ein zu schnelles austrocknen zu Folge haben!
Es ist mehr Arbeit weil man die Pflanzen Doppelt und dreifach in der Hand hat aber es lohnt sich, ich habe die komplette ernte fertig getrimmt in ein Cvault 21L für 2 Wochen Fermentiert mit einem 62 Prozent boveda, ich habe jeden Tag gelüftet und jeden zweiten Tag muss man es wenden vorsichtig! 👌 😊 Und raus kam richtig Premium gras ♥️♥️♥️😁
The leaf to flower ratio was very, very good! 👌
This time I didn't trim the plants completely, but instead hung leaves with sugar to get a gentler drying process and this time I only manicure the plant when it is dry, which prevents injuries to the plant that would result in it drying out too quickly!
It's more work because you have the plants twice or three times in your hand but it's worth it, I finished trimming the entire harvest in a Cvault 21L for 2 weeks. Fermented with a 62 percent boveda, I aired it every day and every other day you have to turn it carefully! 👌 😊 And out came really premium grass ♥️♥️♥️😁

Likes
3
Share


@Homestickycannabis
Follow
Doing really good. I've introduced some flower stacker, worm tea concentrate, hydro guard root inoculant and some calmag with iron.
I also started place a layer of ice on top of the medium to trigger trichome and to get them beautiful colors. I've been doing the ice thing in my last couple of harvest and I swear that it increased the trichome coverage and I get some nice colors to pop.
I usually go with organic soil amendment for nutrients. However I used a new to me soil called Biochar. It's like a bunch of small pieces of tree bark. It has simular characteristics like I have to water every day because this product dose not retain moisture at all.
I did add a good layer about 1 gallon of Purple Cow Indicanja mixed 50/50 with Happy Frog soil.
I loosened the first couple of inches in the container with my fingers and worked it into the soil and watered it in slowly.
The addition of the new top layer of soil and nutrients have paid off well. I'm still about 3 weeks out from harvest and I can't wait to see how fat these flowers get. They're already the size of golf balls and I swear I can literally see them growing before my eyes, at least a 1/8 of a inch of girth a day.
I have two more feedings to go before it's time to start the flushing process and with the addition of the ice I'm anticipating some lovely colors.
Cheers!!!
Likes
93
Share


@MadeInGermany
Follow
Welcome to the Zamnesia Spring Cup 🏆
Hello everyone :-)
A lot has happened this week 🤗.
It has developed very nicely and its roots have exploded properly 😍.
It is also slowly becoming lighter, since it has obviously been slowly consuming its nutrients from the soil :-)
That is why it was repotted today, mixing 3 layers with a total of 60-75 g Monster Bud Mix between the soil.
Then everything was mixed and distributed well, and the plant used.
Unfortunately I noticed too late that I didn't take any pictures of the root ball while repotting 🤦♂️🏻.
I look forward to seeing how it evolves this week. Above all, I am excited to see how she is doing with the Monster Bud Mix, as I have been used to mixing everything for each wash separately 😊.
During the course of this week I will also spontaneously decide whether I will give her an LST, topping fimming, etc., since I have to see how I am in the vegi phase, because the Spring Cup has a limited time 😁.
I wish you all a lot of fun watching, have a nice week, stay healthy 🙏🏻 and let it grow ☘️👍 .
Zamnesia Spring Cup 🏆
Type:
Runtz
☝️🏼
☝️🏼
Genetics:
Zkittlez x Gelato
👍
😍
Vega lamp: 2 x Todogrow Led
Quantum Board 100 W
💡
Bloom Lamp : 2 x Todogrow Led
Cxb 3590 COB 3500 K 220 W
💡💡☝️🏼
Soil : Canna Bio
☝️🏼
Nutrients : Monster Bud Mix
☝️🏼🌱💪🏻
Water: Osmosis water mixed with normal water (24 hours stale that the chlorine evaporates) to 0.2 EC. Add Cal / Mag to 0.4 Ec Ph with Organic Ph - to 6.0 - 6.3
💦💧
Likes
3
Share

@Pompeyblue
Follow
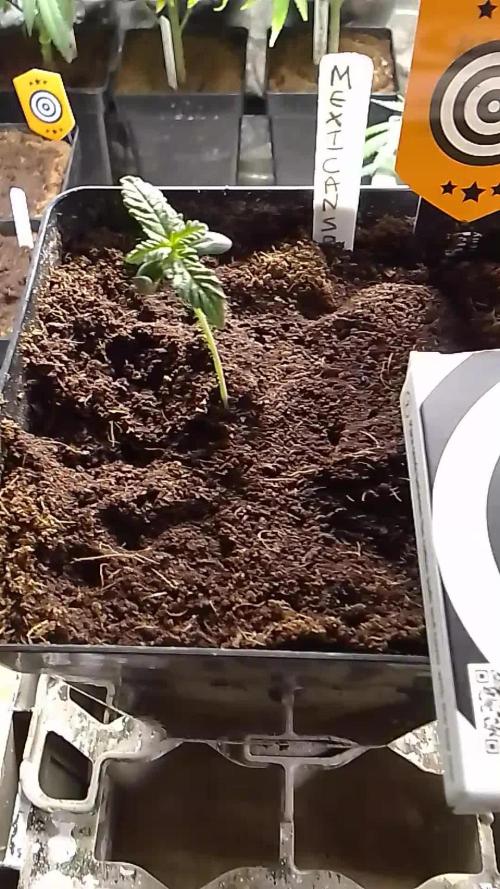
Seed's went in to the sproutly smart germinator 1 week ago and 2 days later went into a root riot cube then in my propagator 5days later have now been potted up BOOM
Starting them on the seedbooster plus ready for them to go on to nutrients

Likes
8
Share

@Rangaku
Follow
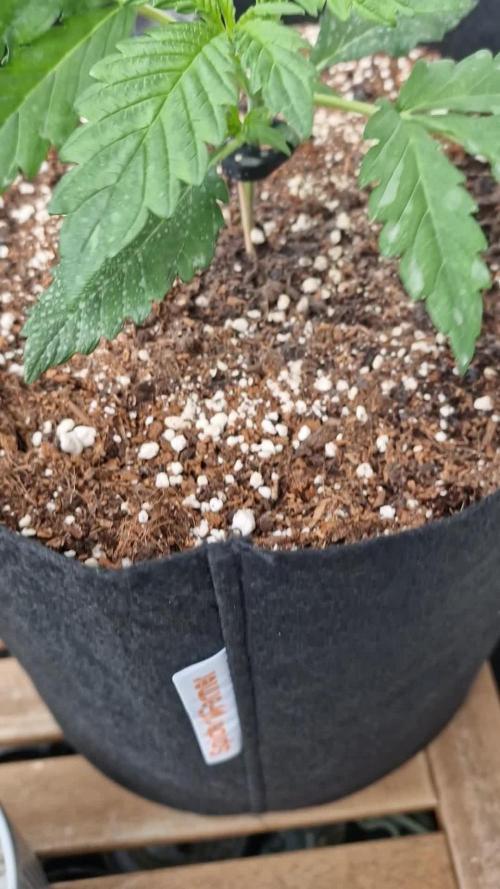
Future is coming on fast , filling out nice. She’s real pungent this one got that high THC look about her

Likes
20
Share


@Robin87
Follow
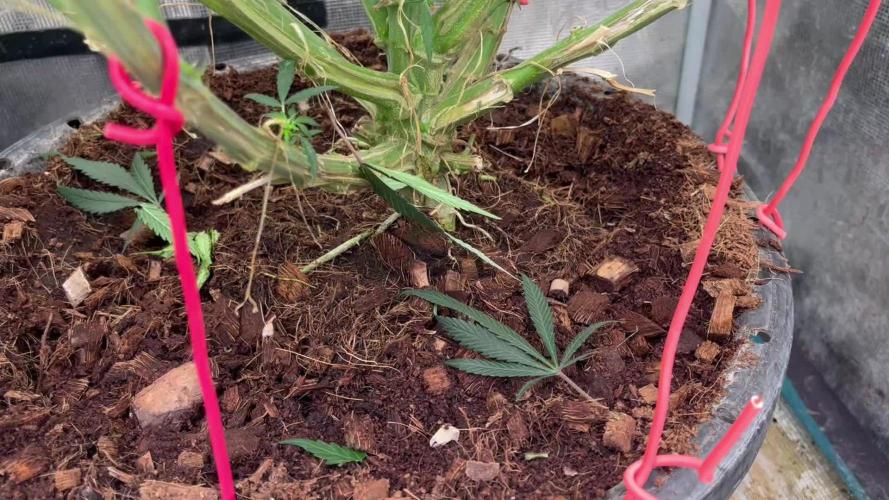
And the first week of flower is amongst us, I’m not sure if it’s the fast bud genetics, the living soil, or a mixture of both, but I think the videos say it all, the deep green throughout, day 41 and just look😍. Everything’s been sitting nicely 24/7
Humidity 49~56%, temps 23~26c
This week they all received there last top feed, along with a slight bit of defoliation, some massive fan leaves! slightly over watered as you will notice in one of the videos, but I won’t be surprised if they’ve grew another few inches over night.
Likes
1
Share


@GreenLupinCWB
Follow
Planta ficando robusta e gorda com a nova alimentação com plant prod Finisher,muito bom ,muitos tricomas e o cheiro está incrível.


Likes
5
Share

@SugarandTerps
Follow
Vegi W2
14.5
Tag 8 startet, heute wurde noch mal gegossen. 1L Ph-Wert 6,2 mit silik rocks und Power roots
15.5
Tag 9, Rootin seed treatment scheint zu wirken. Wirklich starkes Wachstum.
17.5 Gab es 2L auf PH-WERT 6,3 eingestellt mit Plagron Power Roots und Silic Rock


