
Likes
Comments
Share


@Eauderay
Follow
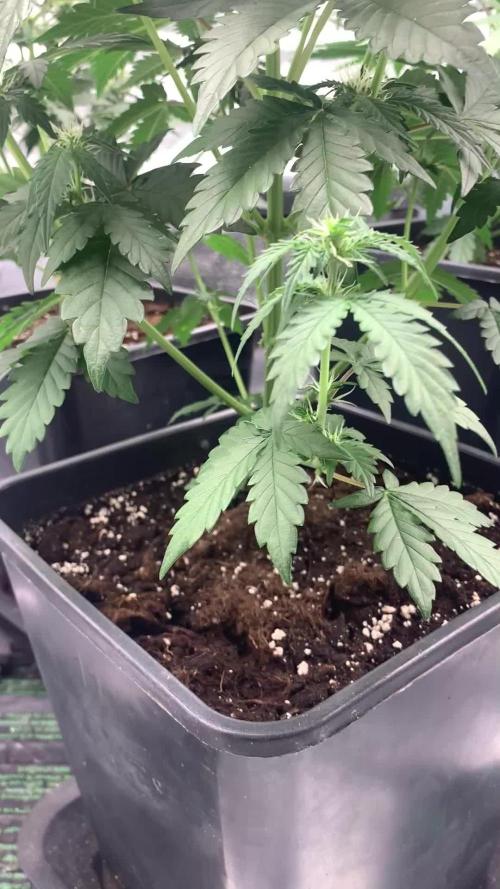
Such pretty and easy plant to grow, just top dressed with handful of worm castings and less than half handful of bat guano few days ago and she just is exploding with white pistols all over and trichomes also, she smells like sweet lavender with skunk.
Very pleased with Zambeza Critical++, anyone could grow her!
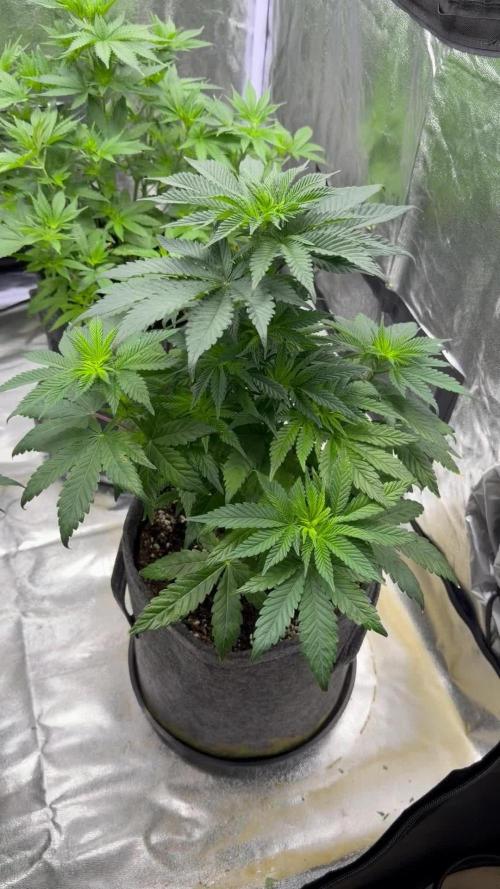
I cropped one of my Critical the other was LST
I can see bigger buds on the cropped one, but it is not obvious so far which one is producing more weights.
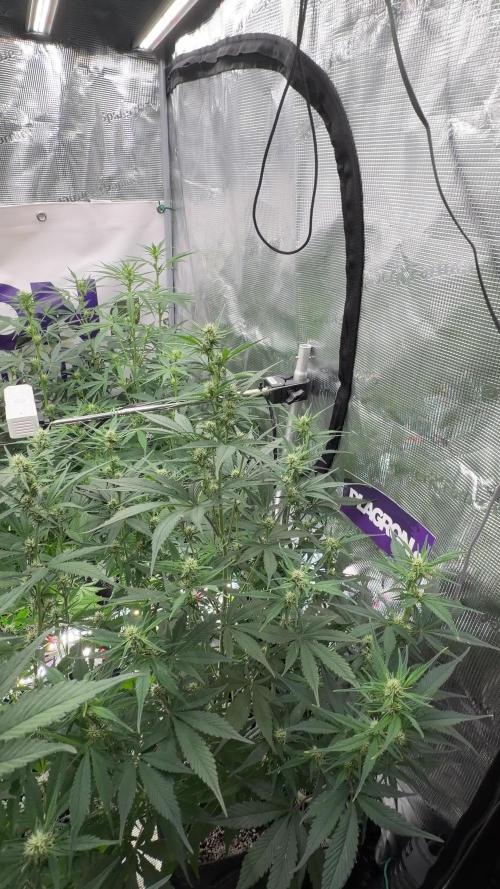
Just changed Hps 400w to Voost 240w, plants responded well, some older fan leaves were started to cook and burn under hps, way too hot mid day, I can tell some leaves needed a break...
Let's see if LEDS helps with heat/light stress...
They are at 60cm from canopy, I will bring them down little by little during the next few days...
That is it, thank you for following fellow Cannabis lovers!

Likes
3
Share


@elsolo1
Follow
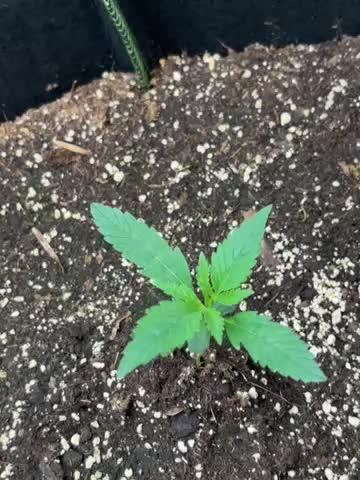
- Second Week
Started with a light dosage of Base A - Base B - Vege - Silica - around 0.5 ML per Liter
Kitty decided to be curious and do a taste test while I was changing the reservoir
Had a planned trip so I loaded up the water and left her to chill, hopefully my cat didn't do much damage.


Likes
27
Share


@Xpie77
Follow
💚Please Like This Diary and Leave a Comment!💚
No Nutrition, just water ph 6.5
Seeds Genetics information:
MAC is a highly sought after Cali cannabis strain. This strain was created by crossing Alien Cookies with Colombian X Starfighter. The plants develop beautiful colored buds that are covered in abundance with resin trichomes.
The flowers have an average THC content of 20-24% THC. This makes this strain a real Cali winner! The yield is also top with an average of 450-550 gr/m² within a flowering period of 8 to 9 weeks. It is a true balanced indica/sativa hybrid strain. Smoking this weed gives you a euphoric high with a delicious spicy diesel aroma with a hint of citrus. Its uplifting and joyful effects even helped MAC win a High Times Cup, cementing its top status as a Cali strain.
Flowering time: 8 – 9 weeks
Genetics: Alien Cookies x Colombian x Starfighter 50% sativa, 50% indica
Plant height outside: 100 – 180 cm
Outdoor harvest month: from June to October
Yield indoors: 450 – 550 gr/m²
Yield outdoors: 200 – 800 gr / plant
THC: 24%
💸💸💸Wanna buy MAC Seeds? 💸💸💸
https://seedsgenetics.nl/product/mac-gefeminiseerd/

Likes
1
Share


Likes
84
Share


@Hydro_Hiebs
Follow
🌱Welcome to my 2 x 4 ft autoflower tent. Here we have Ganja Farmer's Strawberry Banana Purp. We just finished the 8th week of flower and it's harvest time! The terps really changed more into a strawberry Orange on this one and I am not complaining it is mouth watering and I am looking forward to the harvest report in about a month and a half from this post. 😌💨
💧She has been receiving water every other day about 1 L of pH adjusted to 6.5.
✂️ TRAINING: NONE
💡⚡Check Mars Hydro out on Instagram! @marshydro_aliexpress2 💡⚡


Likes
110
Share


@SlowpokeFuegobud
Follow
💜 💚 😍🥤💜💜 💚 😍🥤💜💜 💚 😍🥤💜💜 💚 😍🥤💜💜 💚 😍🥤💜
Dear growmies, welcome to week 4!! ❤️
WOOOW she is growing like from another world!! 🚀 Can't wait to see the stretch!!
DAY 25
Watered with 2ml grow + 4ml more roots + 2ml growzymes + humics + 5ml fast buds + 2ml calmag + epsom💧
DAY 27
Watered with 4ml more roots + 2ml growzymes + humics + 5ml fast buds + 2ml calmag 💧
Thanks @Fast_Buds for your awesome genetics, growing Fastbuds is always a bit like riding a ferris wheel! Woohooo!! 😜 🙏 💚
Thanks to my sponsors @Green_Buzz_Nutrients, their nutes never ever let me down!! Check out my diaries on how well they work! 💚 😘 In case you want to give them a try, you can find a generous discount code in the setup description further down the road ⬇️
You can find more brand hot updates on my IG, where I share real time events from my growroom, don't miss this! 😝
_______________________________________________________________________
Purple Lemonade FF
As refreshing as cold lemonade on a hot Summer day. 🌞
• Quench your thirst. Just as good as lemonade on a hot Summer day.
• The gentle giant. Up to 550 g/m2 of gorgeous pinkish-purple buds.
• Refreshing for the mind and body. The ideal all-day strain with a perfectly balanced effect.
• Sweet n’ sour terps. Mouth-puckering lemon flavors that’ll hypnotize your taste buds.
• Properly purple. The perfect choice for purple hash and extractions. As refreshing as cold lemonade on a hot Summer day.
Arising from a cross between purple and citrus Cali genetics, Purple Lemonade FF (Fast Flowering) offers a complex high made up of perfectly balanced cerebral and body effects that are ideal for daytime use. Expect an extremely enjoyable high that boosts your mood while deeply relaxing your whole body and getting
rid of muscle pain. This meticulous cross produces up to 550 g/m2 of some of the most beautiful purple buds, with pinkish and reddish hues that will catch everyone’s attention. The beautiful purple buds are ready for harvest in 7-8 weeks and come hand-in-hand with unbelievably sugary citrus terps that are just as refreshing as a cold lemonade on a hot Summer day. It’s the ideal variety for the sweet-tooth stoner seeking strains that deliver both in quality and quantity of resin.
Bud Description 🦔
Purple Lemonade FF grows chunky, spade-shaped buds that boast a whole range of pinkish-purple hues with rich, dark orange pistils shooting out of every direction. This variety stands out for the, oftentimes, lilac trichomes that give them a gorgeous pink tint and make for outstanding purple concentrates. The buds give off a delicious tart lemon aroma that reveals a sweeter, more fruity scent as you break the buds open. Definitely a must for flavor chasers and those looking for pungent terpene profiles.
Smoke Reports 💨
Purple Lemonade FF offers an effect that’s just as unique as the flavor. Expect a potent uplifting high that gives you that energy boost you need to get things done while 100% happy and stress-free. The effect gradually transforms into a wave that works its way along the limbs and through the muscles, deeply relaxing your body and putting you in the right mindset to go through a busy day with a huge smile on your face. This is an excellent all-day smoke as it not only increases energy but can also help combat chronic pain, migraine and stress.
Plant Appearance 💄
This feminized photoperiod variety develops a thick and strong structure, growing a medium-sized main cola with multiple shorter side branches, typical of hybrid strains. Purple Lemonade FF develops fairly short internodal spacing with gorgeous purple buds growing stacked on top of each other, making it the perfect choice for growers of all levels looking to get lots and lots of top-shelf purple weed, as this variety can produce up to 550 g/m2 in a 7-8 week flower cycle.
Grow Tips 🤓
This is a super fast feminized photoperiod version that takes approximately 7-8 weeks to flower with a 5-week vegetation cycle,, this means you can have faster harvests by shortening the veg cycle or have a longer veg cycle for bigger yields. Purple Lemonade FF (Fast Flowering) makes for a great candidate for growers of all levels as it’s a vigorous strain that will thrive with basic maintenance both indoors and outdoors. This is a resin powerhouse so make sure to have your trim bin close by as all the resinous sugar leaves will make for the most mouth- watering hash and extracts.
Flavor 😋
Expect a long-lasting citrus zest that taste just like it smells. Purple Lemonade FF reeks of a delicious blend of sweet fruits and tart citrus that’ll make your mouth water. On the inhale, expect sour flavors that taste just like lemon candy with hints of orange and a really subtle earthy background. And on the exhale, the citrus flavors open up, giving place to a more sugary berry fruitiness that leaves your whole mouth tasting like an extremely sweet weed-infused lemonade.
https://2fast4buds.com/seeds/purple-lemonade-fast-flowering
_______________________________________________________________
Setup:
140x70x200 cm Spiderfarmer tent
2x Monkey 16W fans (not oscillating)
1x Secret Jardin 30W
1x box fan 50W oscillating (on lowest level)
LED
Full Spectrum 320W AGLEX AGL-320W-MA
5,6 kg
foldable, dimmable
864 pieces Samsung LH301H
864umol/s
2,7umol/J
full spectrum white + RED 660nm + IR 740nm
wavelength range 380-780nm
covering 3x4ft
Green Buzz Nutrients https://greenbuzzliquids.com/
❗ Use code GD42025 for generous 25% discount (for orders of minimum 75€)
Biobizz Lightmix + coco + wormcastings + perlite
Carbon Active Granulate Filter 125/360 cm³/h
PrimaKlima exhaust EC 125-400/240 cm³/h

Likes
2
Share

@Philhsy
Follow
Strawberry Gorilla RF3 Auto – Week 5 🍓🦍
This week Strawberry Gorilla RF3 has really started to show her character. Flower sites are forming nicely all over the plant, and the early frost is beginning to appear on the sugar leaves. The stretch has been steady, creating a nice open structure that should allow plenty of light to reach the developing buds.
She’s been enjoying the transition into bloom, staying healthy with strong stems and vibrant growth. Nutrients are being kept at a comfortable level, and the plant has responded with excellent vigor and no signs of stress. The canopy is filling out nicely, and the sweet aroma is already becoming noticeable when opening the tent.
The new think grow icl i put in will push the lower nodes to produce aswell hopefully :)
Plagron seems to be a reliable nutrient so far no hickups yet !
Processing
Likes
3
Share


Likes
14
Share


@Chi_K24
Follow
Hey folks. Into week 5. Nothing much happening here, some lst, hst, topping and some more defoil. Broke a branch while applying lst and taped her back up. They have been consuming more water now so I increased it from 4L every 2-3 days to 6L for the larger gals.

Likes
Comments
Share

@Weedbuddy420
Follow
Alles in einwandfreien Zustand hab auch nichts anderes erwartet

Likes
6
Share


@Roberts
Follow
I did a solution change on her a week ago. She has grow a lot since then. She is looking good now and making progress. Nothing else to report at the moment. Thank you ILGM, and Medic Grow. 🤜🏻🤛🏻🌱🌱🌱
Thank you grow diaries community for the 👇likes👇, follows, comments, and subscriptions on my YouTube channel👇.
❄️🌱🍻 Happy Growing 🌱🌱🌱
https://youtube.com/channel/UCAhN7yRzWLpcaRHhMIQ7X4g.


Likes
12
Share


@BlackXwidow
Follow
Updates:
-4 weeks of flower complete.
-La Niña branches are filing in nicely.
-Gorilla candy continues to underwhelm. Runt phenos,lots of long skinny branches. Looks good and smells good though.
-Misnamed the gorilla candy pheno that looked different from the 2 runt phenos. The 3rd one is actually a Gorilla White widow from expert seeds. Explosive veg, big stretch, nice buds, could use more frost early on.
-Looking forward to the La Niña the most ( haze x black widow)
-Started using coast of Maine liquid fertilizer liquid kelp and liquid crab fertilizer.
Feel free to add any questions or comments.


Likes
14
Share


@TOMI08
Follow
74.nap
A videón az első egy special kush kush
Tegnap ketté lehúztam a lombkoronát mert sűrű volt..így több a fény és a levegő...
Mindig 3.napon itatom

Likes
4
Share


@Phatlad187
Follow
Week 5 from seeds and they are grow fast and started to LST, looking good and health growing perfect under 24 of light set at 400watts
@growerchoice ..
@shogun
All shogun feed to be used
@ShogunA&B coco
@Shogun calmag
@Shogun active boost
@Shogun zamzym

Likes
Comments
Share


@Growhome_90
Follow
26/06
Sie wächst großartig. Die Buds entwickeln sich und bekommen langsam Trichome.
Man kann erkennen, dass Sie anfängt zu purplen.
- - - - - - - - - - - - -
Dünger wurde bisher nicht zugegeben.
Likes
8
Share


@TegridyCal
Follow
We are literally drooling. In the vegetative phase it was seen that it was beautiful but in the flowering phase it really gave its best. The two lateral peaks are large, white and full of trichomes, the central ones due to the topping effect a little lower but equally slender. We are moved by having made one of the myths of our 20 years and believe me it seems to get on the delorean and take a journey through time, when as young university students we experienced this spectacle of nature for the first times. Taste, beauty, flavor and memory <3
