


Likes
Comments
Share


@Adam420
Follow
Good news: managed to transplant a tree out the ground into a neutral space. Took 5 days to bounce back. Tallest plant is growing with no stress
Bad news: male plant found. My 2nd tallest and favorite plant looks to be male and will be cutting it

Likes
15
Share


Likes
57
Share


@Roberts
Follow
Pablo Escobar is growing great. She just had a solution change today. The colas are starting to bulk and get some good frost on them. She is starting to give off a sweet pine smell. Everything is going well. Thank you Divine Seeds, and Spider Farmer. 🤜🏻🤛🏻🌱🌱🌱
Thank you grow diaries community for the 👇likes👇, follows, comments, and subscriptions on my YouTube channel👇.
Thank you Happy Growing 🌱🌱🌱
https://youtube.com/channel/UCAhN7yRzWLpcaRHhMIQ7X4g

Likes
1
Share

@Dr_Green_Thumb87
Follow
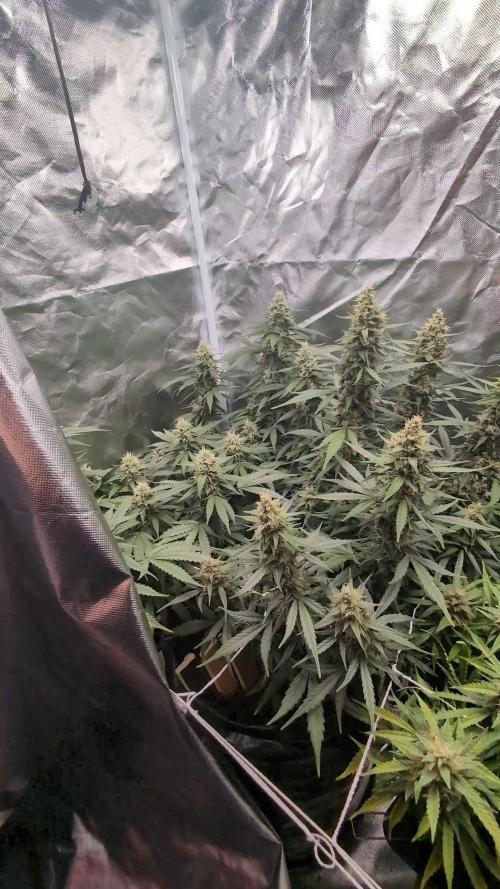
8/12 day 64 plants in smaller pots suffer a bit from nutrient deficiency.
Living soil seems to fit better in large setups, anyways they will be feeded with tap water only until i chop them.


Likes
50
Share


@DogDoctorOfficial
Follow
Eternity Grow Cup - Week 9 Veg Update
We are stepping into Week 9 of vegetation, and things are getting exciting! The plants are thriving—compact, bushy, and growing beautifully. This week, we introduced a SCROG (Screen of Green) net, an essential tool for maximizing yield and optimizing plant structure. Let’s dive deep into the why and how of scrogging:
Why Install a SCROG Net Now?
Maximizes Light Exposure: The net allows even light distribution across all branches, ensuring every bud site gets the optimal amount of light.
Controls Plant Height: By guiding the branches through the net, we keep the canopy even and prevent excessive vertical growth.
Enhances Airflow & Reduces Mold Risks: Spreading the plant out increases air circulation, reducing humidity pockets and minimizing risks of mold and pests.
Increases Yield: More bud sites exposed to light mean higher-quality flowers and greater overall production.
For now, we’re still not using the under-canopy lights, though they will come into play soon. The ICL 300 is positioned strategically, and we will likely move them around as needed later. For now, the focus is on structuring the plants and ensuring they fill out the available space properly.
Optimizing Airflow - The Vortex Effect
Air circulation is crucial for plant health, and this week, we’ve optimized airflow by positioning the fans to create a vortex effect:
Fan Positioning: Each fan is placed at the tent corners, pointing in different directions, ensuring dynamic airflow instead of direct wind hitting the plants.
Benefits of a Vortex System:
Reduces hot spots and evenly distributes CO₂.
Strengthens stems by creating a natural resistance.
Prevents stagnant air, reducing mold and pest risks.
The extraction system is powered by an AeroFan, connected to the AeroFan Smart Remote FRC1, currently running at 60% speed. This setup efficiently manages humidity and temperature while maintaining optimal air exchange.
Current Environmental Conditions & Feeding
For now, we’re maintaining the same water schedule and nutrient regimen. The environmental conditions remain stable:
Temperature: Holding steady at ideal growth levels.
Relative Humidity: Balanced to encourage healthy transpiration.
PPFD (Photosynthetic Photon Flux Density): Kept at optimal levels to support vigorous vegetative growth.
CO₂ Levels: Elevated but within safe limits, promoting faster growth.
The plants are filling the space beautifully, but we know that the flip to flower is approaching soon! The next phase will depend on how fast they continue to spread, and adjustments will be made accordingly.
Closing Thoughts & What’s Next?
This week was all about structural optimization—ensuring proper airflow, training the plants with the SCROG net, and keeping everything in balance before the transition to flower. The upcoming weeks will be crucial, as we fine-tune the environment, possibly introduce the under-canopy lighting, and prepare for the flowering stage.
A huge thank you to our sponsors Aptus Holland, TrolMaster, CannaKan, Grove Bags, Ziggi Papers, and of course, Zamnesia, Plagron, and Grow Diaries for making the Eternity Cup possible. And to our incredible community—followers, supporters, and even the critics—we appreciate every single one of you!
Stay tuned for next week’s update, and don’t forget to follow along on YouTube and Instagram for exclusive content and behind-the-scenes looks! See you soon, and happy growing!
Let’s keep pushing forward, and best of luck to all the competitors—we’re all growing something incredible together. Until next time!
Genetics - Runtz https://www.zamnesia.com/6000-zamnesia-seeds-runtz-feminized.html
Nutrients - Plagron https://plagron.com/en/hobby
- Aptus Holland https://aptus-holland.com/
Controls - Trol Master https://www.trolmaster.eu/
LED - https://www.futureofgrow.com/en
LED - https://www.thinkgrowled.com
Soil - https://www.promixgardening.com/en
Germination - Cannakan https://cannakan.com/?srsltid=AfmBOopXr-inLXajXu3QFgKXCXXos4F1oEvScjMKIB5MR5dk8-GJ-F49
DOGDOCTOR 15% off
Smoking Papers - https://ziggioriginal.com/
Terpene saver - https://grovebags.com/
As always thank you all for stopping by, for the love and for it all , this journey of mine wold just not be the same without you guys, the love and support is very much appreciloved and i fell honored with you all in my life
With true love comes happiness Always believe in your self and always do things expecting nothing and with an open heart , be a giver and the universe will give back to you in ways you could not even imagine so
As always, this is shared for educational purposes, aiming to spread understanding and appreciation for this plant. The journey with nature is one of discovery, creativity, and respect. Let’s celebrate it responsibly and continue to learn and grow together!
Growers Love To you All 💚
#EternityGrowCup #RuntzHunt #GrowersLove #CannabisCommunity #AptusHolland #ProMixSoil #TrolMaster #Zamnesia #Plagron #ZiggiPapers #Grovebags


Likes
6
Share


@High_And_Hydro
Follow
- Ich hab die erste Woche des Biobizz Allmix Düngeschemas gestartet und gebe wie immer erstmal vorsichtige 100%, da meine Erde an sich durch den Kompost recht potent sein sollte.
- Außerdem hab ich mit meinem Calmag-Rechner mein Leitungswasser angepasst. Die Werte könnt ihr auf den Bildern sehen.
- Den PH-Wert passe ich ebenfalls auf 6,5 an.#
- Die Lampe bringt zur Zeit etwa einen PPFD-Wert von 350 - 360 µmol/s/m² bei 18 Stunden Beleuchtungszeit (DLI von 22 - 23 mol/d/m²). Sie wird aber nur eingesetzt bis es warm genug draußen bleibt. Tagsüber stehen sie jetzt schon draußen, sofern es nicht regnet oder stürmt.
Die Guava macht sich hervorragend und sie ist sehr uniform mit den anderen Fastbuds Strains bis jetzt. Sieht gut aus finde ich 💪😁👍
Likes
3
Share

@FeebleSnane
Follow
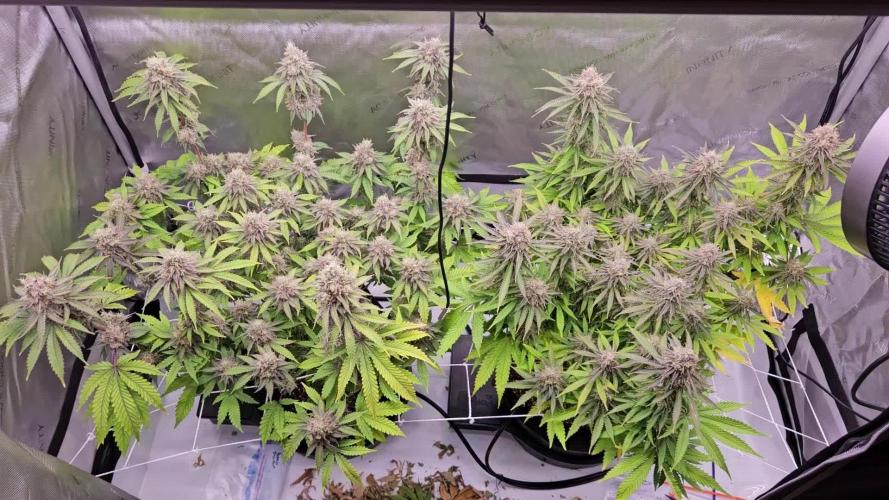
Today is day 105 since the plants sprouted, and day 49 of flower (week 7).
The plants look like they'll be finishing up nicely. I haven't seen any more pollen sacks or nanners forming on the Papaya Sherbert, and the buds on that plant don't look like they've been affected by pollen.
The buds on both plants are hard as rocks, and still getting a little bulkier. The buds on the Papaya Sherbert (left plant in the tent) are getting pretty big, and I really look forward to seeing them after getting trimmed. The buds on the Orange Sherbert have definitely been smaller than the buds on the Papaya, but the buds still look nice. I think the Orange Sherbert naturally has more buds sites, however.
Trichomes are developing nicely. The flower time on Orange Sherbert is 7 weeks, and I think it still needs closer to 2 weeks to form more amber trichomes, but the milky trichomes are looking great. The Papaya Sherbert has a 9-10 week flower time, so hopefully it lines up with the Orange Sherbet. The trichomes on Papaya Sherbert are noticeably behind, but not too far.
Likes
38
Share


@Babylongrower42
Follow
O ciclo foi uma aventura desde o princípio, fiquei muito feliz com o resultado que consegui com a técnica do lst no ScrOG, além de principalmente começar com 4 galhos principais e terminar cmem 16 topos e vários intermediarios (que se tornaram topos também).
Ainda não pesei pois vou deixar 14 dias secando, já foram 7 e na próxima sexta venho atualizar tudo pra vocês!


Likes
11
Share


Likes
17
Share


@gottagrowsometime
Follow
Was a good week. Both phenos have ripened nicely. Both harvested together, being done in the same pot. That's always a plus.
Only added LemonPaya and will do Lemonmandrin in a few days. And update on drying of the bud. 9-12 days. The buds are super dense.
Temp 19.5-20.5c
RH 62-6
Likes
10
Share


@SAC87
Follow
Hey Growers.
With the Gaia Green all I have to do is water for the first 3-4 weeks, then top dress. So I’m already on auto pilot. Love it!! When I introduced the fan one did slump over. I propped her up out of the mud on a bambo X and she found her way back free standing.
Just watering with cal pow water and watching for light stress. This XS2000 is a powerful unit and I’m sure would rock a 3x3 perfectly.
Happy Growing 🌱
Likes
18
Share


@DeadJoke
Follow
i think pistills are changing more oranger this week..
but i guess buds are not growing fat this week ..
something isn't right...

Likes
9
Share


@Grey_Wolf
Follow
Puggles Autos Ruby Dragon BX
14th November 2020
Well He stretched to double the height it was when I put it out bush last week.
I also put a Fastbuds Sour diesel plant with him so I can make some Auto seeds 😎
The End is nigh for Mr Dragon tho as the next time I visit , it will be getting the Chop.
That's all for this weeks update Don't forget to watch the highly technical and advanced methods I use to
pollinate the female 😉 & Thanks for stopping by 👍
Likes
9
Share


@DeepRootsGrowTrees
Follow
TRIPLE G by ROYAL QUEEN SEEDS
WEEK #19 Overall
Week #2 Flower
This week she doing good and looking good dealing with the heat is been hot this summer ☀️!! Stay Growing!!
ROYAL QUEEN SEEDS TRIPLE G

Likes
6
Share


@wheedtobeus420
Follow
Day 33 she’s beautiful and flowering and wonderful. I’m really excited for how she’s turning out. I used recycled dirt for the first time ever because they were my last cycle for summer break. But she’s impressing me like always none the less. can’t not wait for her!

Likes
2
Share

@HoneyBlunt42
Follow
Day 90
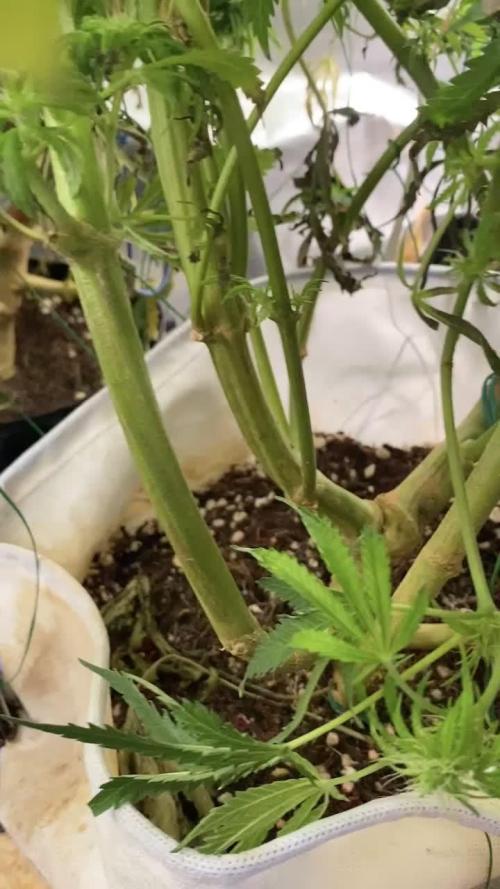
The Sativa plant is beautifully swollen at the top. I've watered it minimally for the last three days.
Today I'll mix up the solution and add a 1 g/l Bio Enchanter. It's alkaline (pH 8), so I'll first dilute 15 liters of the solution with 2 ml/l CalMag in the aquapot to 250 PPM. Then I'll lower the pH to 5.0, as recommended by the fertilizer manufacturer. After that, I'll dissolve a capful—one and a half liters of black powder. These 15 liters should be used within 24 hours.
My slightly drying bushes will appreciate a third of the pot's volume being watered.
The stems are showing red spots—it looks like I need to add 1-2 g/l Bio Bloom to the coco and mix 2-5 liters of the coco into the top layer. After bending and pruning, the plants feel stronger and healthier.
To correct the nitrogen deficiency, I'll also add a liter of Simplex Start Up 4 ml/l.
Day 95
They're doing well after moving to their new space. I didn't change the photoperiod to avoid stress. Yesterday, I didn't water them at all because they were experiencing water deficiencies. Today, I watered each plant 2 liters of solution, 10% of the solution before draining. I also added a weak concentration of Simplex Coco mineral fertilizer, 1 ml/l.

Likes
7
Share

@Thedibber
Follow
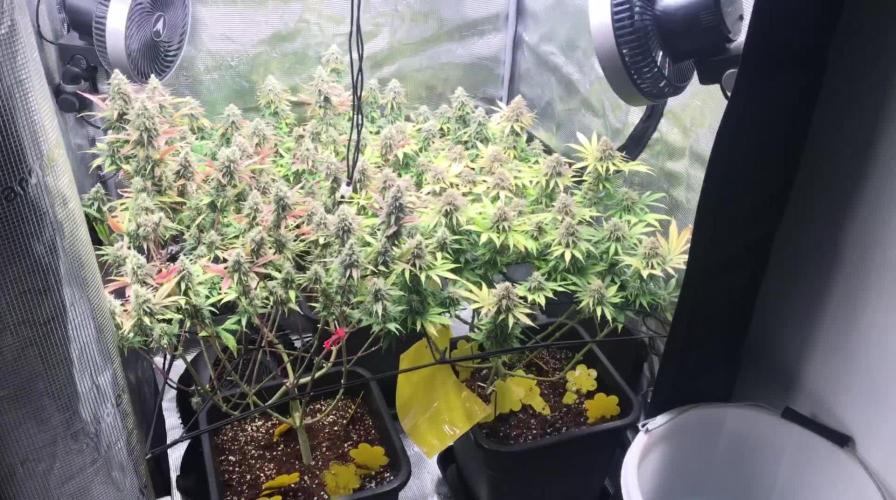
02/11/25 - Watered 2.5L each Ph6.8
04/11/25 - Watered 2.5L each Ph6.8. Few weeks left now and shes smelling dank
07/11/25 - Watered 2.5L each Ph 6.9
💪
Likes
19
Share


@Master_weeda
Follow
Bonjour à tous les padawans et maîtres jedis
Tout d'abord merci à James de Royal queen seeds de me permettre de faire cette culture
Je rappelle je n'utilise que le strict minimum du matériel nécessaire à une culture correcte au prix le plus bas possible
MATÉRIEL CONFIGURATION
Box 80×80×160
Lampe led greenception GC4 250WATTS
Ventilateur à pince 15 watts
Xiaomi Deerma humidificateurs 5L
Hygrometre thermomètre
Extracteur PROFAN 107 m3/h - 100
Prise programmable électronique ×2
1 pot geotextile noir 10 litres (RQS)
RQS feeding easy boost organic
RQS easy combo tablets
Substrat cellmax bio ligthmix
Fil de fer et pince coupante
Microscope
Petite balance de précision
CULTURE ÉTAPE PAR ÉTAPE
J'ai tout dabord fais germé ma graine avec le easy start de Royal queen seed et je suis agréablement surpris car franchement le taux de réussite est très élevé (9 graines sur 10) simple d'utilisation et très efficace.
Une fois la plantule sortie et d'une hauteur de 2 ou 3 centimètres je la prend délicatement et la place directement dans son pot définitif. Je préconise des pots allant entre 10 litres et 15 litres pour des autofloraisons cultivées en intérieur.
Le pot aura été préalablement préparé (video dans diarie) avec 50 grammes d'engrais RQS easy boost organic, soit l'équivalent de à peu près 5 grammes par litre de substrat.
Je dépose donc la plantule dans son pot définitif je recouvre un peu de avec de terre je tasse légèrement et j'arrose pour garder le substrat humide pas plus
Je place ma lampe led 300watts à environ 90 centimètres de la plantule avec un cycle de lumière de 24/24 pendant une semaine. Au début de la semaine 2 le cycle de lumière passera en 20/4 grace a un programmateur car c'est pour moi le cycle de lumière qui offre le meilleur rendement pour une autofloraison.
Jour1: léger arrosage
Jour2: léger arrosage
Jour5: préparation de 3 litres d'eau ph6.3 à laquelle j'ajoute une tablette grow easy combo RQS ensuite arrosage avec 1,5 litre d'eau ph6.3
Likes
37
Share

@Roberts
Follow
Mandarin XL auto looks like she is done stretching. She is starting to for trichromes and start bulking. I did a solution change in her several days ago. Everything Is looking good. 🤞🏻for some nice buds to form. Nothing more to report. Thank you Gen1:11, Medic Grow, and Ganja Farmer. 🤜🏻🤛🏻🌱🌱🌱
Thank you grow diaries community for the 👇likes👇, follows, comments, and subscriptions on my YouTube channel👇. ❄️🌱🍻
Happy Growing 🌱🌱🌱
https://youtube.com/channel/UCAhN7yRzWLpcaRHhMIQ7X4g
