


Processing
Likes
142
Share


@MadeInGermany
Follow
Hey everyone :-)
This week it smells more and more sweet and fruity in the whole room 😍.
There is actually not much to report, everyone is now under 12/12 :-).
This is the last grow that comes in the entire diary.
From now on, each plant will be added to the diary 👍.
I wish you all a lot of fun watching, stay healthy 🙏🏻 and let it grow 😎👌


Likes
42
Share


@GanjaReaper
Follow
This week was a very cold week. 13 to 18 degrees during the day and at night like 10 to 13 degrees.
Therefore the buds didn't swell properly. Luckly one Critical Kush is still swelling but the other one seems to have slowed down.
It's oke, i knew this would happen and the kushes might not finish in time.
Might harvest my Shamans at the end of the month. The kushes I will keep until half/end oktober.
Since this is only a outside fungrow, I'm not making any effort to heat up the climate by putting heaters arround the plants.
Critical Kushes are in their 3th week of flowering.
Somehow GD minimalize the videos after putting 10pictures on the diary, Just click on the next picture and
click on the right arrow to go to the videos.
Have fun looking arround :)

Likes
24
Share


@Mr_Cannuccia19
Follow
Ottimo raccolto, bei fiori sani buoni e sopratutto forti. Sono contento di avere da parte 2 semi nuovi da coltivare!! La pianta da subito è cresciuta in altezza mantenendo lo spirito sativo

Likes
6
Share


Likes
14
Share


@eurorack
Follow
Pretty much the same state as last week, plants growing well, still have the runty Pink Kush plant but its pushing flowers out well and getting some good colour to it. Red Pure plants are growing great though one of them has some leaf spotting but its not seeming to hinder growth.
Nutes same as last week, only watering when I get a full finger-depth of dry Coir and checking with soil probe for pH and Moisture too, getting a regular pH7 in the soil, I've got some pH Down to add a drop into my tap water just to ensure I'm watering with the right pH.

Likes
18
Share


@VI_Cannabis
Follow
June 28 - They are doing great, We switched to the recommended amount of nutrients for flowering, Also 2 air stones I ordered have come in so now those are on 24/7 with the nutrient water in a 5 gallon bucket.
June 29 - Still just growing away, I am still feeding roughly 3L per plant of nutrient water every 24-36hr depending on how dry they feel.
June 30 - Totally forgot to take pictures/videos today. I gave them there daily watering and they are still just growing away. They are in flower now I believe!
July 1 - Awesome to see this amount of progression. Tons of hairs and a decently even canopy. There is a small smell coming from in the room!
July 2 - Again I forgot to take pictures, But as always they are still just growing away. so far so good!
July 3 - Tons of growth and they are starting to become uneven. I don't have a ton of time so I think I will leave them for another week before doing some LST or HST. Tons of colas forming, lots of hairs and they are starting to have a heavier smell! So far so good!
July 4 - Same thing as yesterday, still growing away, Ive turned the lights up to 100% now and I have removed the SF-1000 as I needed it for another project! (be sure to check out my other diary's which I will be uploading today!
Likes
9
Share

@Mrs_Larimar
Follow
2025-11-30
shes doing well, pistils start to change- so i think 10 more days for her.
🌿 Soil Preparation
Base Medium: 35L Terrapreta soil
Nutrient Integration: Mixed according to Aptus Living Soil Schedule
Method: Nutrients pre-mixed into soil for optimal distribution
📋 Growing Schedule
Phase 3:Flowering
Final Home: 35L Smart Pots
Location: Main grow room alongside comparison studies (documented in separate diary)
xxxxxxxxxxxxxxxxxxxxxxxxxxxxxxxxxxxxxxxxxxxxxxxxxxxxxxxxxxxxxxxxxxxxxxxxxxxxxxxxxx
BREEDERS INFO
🌟 Strain Profile: Permanent Marker
🏆 Award Excellence
Recognition: Leafly's Strain of the Year 2023
Genetics: Premium award-winning lineage
⚡ Potency Profile
THC Content: Up to 31% - Extreme potency levels
Effect: High-impact experience for seasoned consumers
Breeder Heritage
Master Breeder: JBeezy @ Seed Junky Genetics
Reputation: Industry-leading genetic specialist
🌸 Aromatic Signature
Base Notes: Lingering floral foundation
Unique Accents: Distinctive soap & gas undertones
Profile: Complex, memorable terpene expression

Likes
35
Share


@SmokingTiki
Follow
The buds grow and more pistils are turning brown. O.G. Kush top buds which are just under the light are fox-tailing a little bit but the rest of the buds look nice.
I'm watering with BioBloom as the previous week and overall, the leaves are still green so I think it works well.
This week, the plants reached the 100th day since the start of the germination :)


Likes
2
Share


@CalGonJim
Follow
9/15 12AM MONDAY. HEAVY AMINO EXPERIMENT WAS GOOD. EC WAS 1.3 HIGH BUT WORKED, LITTLE BURNS BUT I DEIGNED THEM TO WORK UNDER THESE CONDITIONS.
9/16 1:30AM!!!!!!
Analysis of Your Grow Progress
Cookie Apple F1 Auto (Mid-Late Flower):
Butter Frosting Resin: The thicker, smoother resin suggests peak terpene and flavonoid production, likely driven by your 200 mg/L phenylalanine and 125 mg/L glutathione from the heavy amino spray. The “butter” texture could indicate high myrcene or limonene, enhanced by FruitnFusion (0.5 mL/L) and Purpinator (0.5 mL/L) (‽web:5, ‽web:10). This is a sign of top-tier flavor and potency.
Next: Monitor for overfeeding (minor tip burn persists)—consider diluting amino acids to 100–150 mg/L each in the next 2 L mix to sustain resin without stress.Conclusion
The “butter frosting” resin on Cookie Apple F1, healthy yellow-green fusiform, and Blueberry KO’s pigmented cotyledons show your anthocyanin-glutathione-phenylalanine strategy is working—phenylalanine drives synthesis, glutathione ensures transport. Tweak amino acids to 100–150 mg/L to reduce tip burn.👍👍.
9/16 926am COOKIE APPLE LOOKS LIKE 3 STICKS OF BUTTER!!!!!! WOW!!!
9/163:45AM I BUILT A TIME MACHINE!!!!! GOING TO TELL THE GERMANS TO FIGHT HARDER👍
That is a practical effect...no computers no grok just AWESOMETASTIC ME!!!!!
9/17 3PM sorry it didn't work... :(
9/18 3:25AM Kitten Academy live stream, no commercials https://www.youtube.com/watch?v=r3YdBqqDLQk
9/18 11:45AM
Mixed up Aminos first and separate and used 16 oz for foliar spray. Then mixed up:
Root: 1.5 mL/L Connoisseur A & B Bloom, 0.25 mL/L CaliMagic, .5 mL/L Purpinator, .5 mL/L FloraNectar.
Setria Glutathione: 150 mg/L = 300 mg (Brand: Emerald 250mg capsule.)
TMG: 150 mg/L = 300 mg/L (Brand Nutricost)
Phenylalanine: 150 mg/L = 300 mg/L. (Brand Nutricost)
Proline: 150 mg/L = 300 mg/ (Brand Nutricost).
9/19 10:30AM EC 1.1
Foliar Spray pH 5.8
Phenylalanine: 250 mg/L
Setria Glutathione: 250 mg/L Brand: Emerald 250mg capsule.
ROOT: cut above in half and Root: 1.5 mL/L Connoisseur A & B Bloom, 0.25 mL/L CaliMagic, 1 mL/L Purpinator, 1 mL/L FloraNectar.
9/19 316PM BETTER THAN I COULD HAVE IMAGINED!!!!! THE SPRAY FOLLOWED BY ROOT A FEW HOURS LATER. RESIN IS GREAT, FLOWERS ARE FORMING JUST PERFECT. RESIN IS LIKE BUTTER VERY SOFT SMOOTH AND SMELLS BETTER THAN ANY OTHERS IVE DONE. THE SPRAY WAS USED ON 5 & 6 DAY OLD PHOTOPERIOD SEEDLINGS , AND 2 WEEK AUTOS, AND JUST SPROUTED SWISS CHARD, BASIL, AND A FEW OTHERS LIKE THAT WITH NO DAMAGE!!! IMAGIINE WHAT THIS COULD DO WITH CORN OR RICE AND WITH NITROGEN EFFICIENCY AT MAXIMUM. AMINOS MAN, WOW. IM SOFA KING AWESOME OR RE-TODD IT, WHICHEVER IS FUNNIER. 👽👍😎
9/20 CA1 sample, smells PERFECT &FRESH ALMOST LIKE SOME MAD AS HATTER FIGURED OUT A WAY TO INCREASE TERPENES THROUGH NOVEL AND PROBABLY BORDERLINE GENIUS, OR AT LEAST BORDERLINE SOMETHING WAYS.....THIS GUY MOTHERFUCKERS!!!!!
9/21 10AM Based on information for cannabis plants and the recommended dose for Setria Glutathione, the nitrogen content from 250 mg each of phenylalanine and Setria Glutathione is minimal compared to the required macro- and micro-nutrients for an autoflower plant in its 6th week of flowering. Here is an analysis of the nitrogen content and the role of these substances. Phenylalanine analysis Phenylalanine is an amino acid, and like all amino acids, it contains nitrogen. Formula: The chemical formula for phenylalanine is (C_{9}H_{11}NO_{2}).Molecular weight: The molar mass is approximately 165.19 g/mol.Nitrogen contribution: Each molecule contains one nitrogen atom. The atomic weight of nitrogen is 14.01 g/mol.Calculation:The percentage of nitrogen in phenylalanine is ((14.01/165.19)times 100approx 8.48%).The amount of nitrogen in a 250 mg dose of phenylalanine is (250text{ mg}times 0.0848approx 21.2text{ mg}). Setria Glutathione analysis Setria Glutathione is a reduced L-glutathione compound, which is a tripeptide composed of three amino acids: L-cysteine, L-glutamic acid, and glycine. Formula: The chemical formula is (C_{10}H_{17}N_{3}O_{6}S).Molecular weight: The molar mass is approximately 307.32 g/mol.Nitrogen contribution: Each molecule contains three nitrogen atoms.Calculation:The percentage of nitrogen in Setria Glutathione is (((3times 14.01)/307.32)times 100approx 13.68%).The amount of nitrogen in a 250 mg dose of Setria Glutathione is (250text{ mg}times 0.1368approx 34.2text{ mg}). Summary of total nitrogen The total nitrogen contributed by both supplements is: (21.2text{ mg (from phenylalanine)}+34.2text{ mg (from glutathione)}=55.4text{ mg N})When dissolved in 2 liters of water, this results in a concentration of (27.7text{ mg N per liter}). "
9/21

Likes
24
Share


@Aleks555
Follow
Our Sticky Orange XXL Automatic from Sensi Seeds is now 9 weeks old, and she’s absolutely stunning! 🌱 The buds are dense, sticky, and smell incredibly delicious. She looks amazing – a true beauty! 😍
We’ve been using Xpert Nutrients fertilizers, and they really help in growing such gorgeous plants. Seeing these results is pure joy! Thanks to Sensi Seeds for the fantastic genetics and Xpert Nutrients for the support along the way.


Likes
Comments
Share


@german_growing
Follow
Really nonflexibal cells - breaks very easylie when low stress trained with Bud Clips
But she recovered every stem break and growing healthy and vigorously
Likes
58
Share


@pifflestikkz
Follow
Day 99
Day 49 Flower
09/08/24 Friday (Morning)
FLUSH- de-chlorinated tap water pH 6 with flawless finish. She's taken a full 5L with 1L run off, I shall continue to do this daily or every 1.5 days when top soil dries out.
Starting her flush this week, seeing those trichomes maturing, and pistils now forming 50-60% red.
Flush for 10-14 days depending on trichomes.
Day 100
Day 50 Flower
10/08/24 Saturday (Evening)
FLUSH- de-chlorinated tap water pH 6 with flawless finish.
Another 5L and seeing about 10-15% run off. Not quite the 1L.
Day 101
Day 51
11/08/24 Sunday (morning)
FLUSH- de-chlorinated tap water pH 6 with flawless finish. 5L run off 10%
Majority of pistils now maturing, trichomes flooded with cloudy , barely seen clear anymore, spotting a few amber's.
Day 102
Day 52 Flower
12/08/24 Monday (Morning)
FLUSH- de-chlorinated tap water pH 6 with flawless finish. 5L again with run off 10%
Day 103
Day 53 Flower
13/08/24 Tuesday (Evening)
FLUSH- de-chlorinated tap water pH 6 today again with flawless finish.
Full 5L again with 10% run off.
All fans starting to fade now, tops all bending under the weight 🤩
Euphoric sweet lemon zest smell with a gassy slap.
Video and pictures ✌️💚
Day 105
Day 55 Flower
15/08/24 Thursday (end of week)
Final FLUSH- de-chlorinated tap water pH 6 with flawless finish. Full 5L again little run.
Finally!!! The FLUSH has finished!!
She has developed beautifully 😍
All buds are solid as rocks.
She is now entering her 2 day dark period from 10am today till 10am Saturday morning ✌️💚

Likes
49
Share


@masterofsmeagol
Follow
5/24 Woke up on payday to find that my father is in the hospital. My house was robbed a few days before so I guess the hits keep coming. The plants are doing good though. I'm glad I kept them in as we had a frost last night. I moved my cage yesterday onto the asphalt and put the big pallet in. I just need to sanitize the others before they go in the cage. I'm being super cautious. I think tomorrow will be the day I make the switch to the garage while they fill out these 3's.OK.
5/25 Plants were all moved to the garage with the door open for indirect light. It's 54 degrees. At night I'll pull them back in and give them a few more hours under the hps which will also help with heat. Knocked a stem sideways but it'll pop back. Feels good to get things moving. HST seems to being going good.
UPDATE: Went back over at one and noticed that the plant I hit with a wire (or something I didn't see what happened) was almost sideways and really loose. I had tied it to a clip with flagging. That didn't work. I asked a friend and I ended up pinching off the first true leaves then mounded happy drug up around it to keep it upright. It LOOKS much happier. Of course that shit happens to your biggest healthiest plants. Oh well all the 10th planet are doing phenomenal. Can't wait to move these girls to there final homes. Plants went under lights at seven. I'm acclimenting them to the right light schedule. I don't want to jump from 18/6 to 15 hours. They did really good in the cold Temps and wind. The big one I had to fix looks like it's doing great. Once they are hardened and fill these pots they go in their final home.
5/26 Plants did great being in direct sunlight for a few hours and staying in the garage at night. They look super healthy. I'm planning on watering tomorrow. Wondering if I should start to add some silica to strengthen the stalks. Also wondering if I should add more soil to some of the pots like I did to the other one as the stretched a little. This is something I may do tomorrow before I water.
Went back over to switch the lights on and pull the plants back and lock up at 7:30. Forgot my phone of course and these girls were looking amazing. I have to water tomorrow. I coukd add more soul to some of the pots but I'm reluctant due to stem rot. They'll get buried much deeper in there final homes. Don't want to mount up soil and then water and promote rot. Anyway plants are adapting amazing. Dialing the light closer to normal here. This is a great transition place for them to he. I've noticed a few wrinkled leaves but thats to be expected. Oh, I got my free pure Michigan seeds from premium cultivars!!!
5/27 WATERED EVERYTHING TODAY WITH HALF A Powerade BOTTLE APPROX. 16OZ. Plants are in direct light in the mornings and I haven't seem any burning yet. I noticed a small spot on one of the first true leaves but I think it's just a bite from an insect. Everything is green as hell. I'm wondering if I should add fresh soil to the pots but I didn't want to do it on a watering day. Plus the plants will be going in there final homes shortly. Very happy with progress this far.
UPDATE Went over at 1230 and everything looked great. I sanitized the cage AND the pallets. Also bought 3 more 30 gallon grow bags. Once they go in there they will explode! I can't wait. I'm considering ordering netting for moths. Depending on price i might get some. If not I'll keep using the BT.
UPDATE: Went and checked around 430. Temps were in the 70's and they had a few hours of direct sun. No burns evident as of yet. Pallets fit in the cage like puzzle pieces. Now I need to sanitize my grade stakes bamboo and trellis and setthat stuff up. I'm going to screw the grade stakes to the pallets and attach garden rods and bamboo with zip ties and I'll have a horizontal trellis. Once branches are a little bigger I'll begin LST. The plants that I topped AND the ones I FIMed are doing great. The FIMed ones with at least three colas some have four. Hoping the plants took that time growing roots.
5/28 Plants are all standing up tall. They loved that water. Haven't noticed any burns and they get direct sunlight in the mornings. Soon I can put them in the cage and start setting up my trellis and supports. Fan leaves on soms are bigger than my hands. These girls are probably the healthiest plants I've grown. I usually do clones and end up starting with problems. This is great starting with seeds and have no problems.
UPDATE: Went back around two because Temps had reached 92f and rh was only 20%. Nights cool off greatly so it's a dramatic temperature shift. Plants looked great. All standing up looking great. Put plants in at 7:30 ,and continue the light until 9 and have it turn on at 4am. Then they are out by sunrise. Did notice some burning on one of my plants a large fan leaf. What can I say? It was extremely hot. I'm surprised they did as well as they did.
5/29 Everything standing up perfectly looking great. Plantscget an extra hour of sun at night and morning and are on 19/7 with the extra added light. Trying to acclimate and finish hardening off this week. I'd love to be able to at least put them in full sunlight for the day. I think they'd be fine. I'm really impressed with how they are growing. Second guessing not HST all of them. However I think I might light dep a couple. We'll see. I've still got work to do.
UPDATE: put the plants in around 7. One of my lights shit the bed. They are just 150 watt hps but I was using them to finish hardening off my plants and slowly adjust them to the natural light. The on/off switch fell off. I'm sure my cousin can fix it bit the one is pe9bably fine as I'm only going fir a few more days. The thing about having this many plants to choose from is that I can pheno hunt and put the VERY best into the final containers and if I decide too I could light dep.
5/30 WATERED EVERYTHING TODAY WITH HALF A POWERADE BOTTLE. My cousin can probably fix the other light but I don't think it will matter. Within a week I'm going to have these girls in their final homes. I just need to sanitize the trellis and posts and then screw them to the pallets. I'll have this all taken care of before the plants go in the hole. I did notice another burn on a leaf. Def glad I'm taking the time to do this right.
UPDATE: I put the girls in the barn around 7:30 and flicked the one 150 watt HPS light I have working on. I added a half hour more of darkness to try to acclimate them quicker. Light stays on until 9 qnd came back on at four but i changed it to 4:30. I'm usually there by 5. I'm looking through my surveillance cameras and it doesn't even look like the light is on. Of course its super bright out but I should be able to see from that image. Luckily the building the go in has massive windows up top to let light in and windows on every side so the light is probably unnecessary. However due to my bullshit luck last year I'm being as cautious as I can. Tomorrow is supposed to be extremely hot again as is the next day. I think I'll leave the door down a little, open the other and move the plants back so they have no direct sunlight and adding a fan. That way they can continue to recover. They seem bigger everything I see them.
5/31 Another hot day. I figure a few more days (under a week) and I can transplant these girls! Supposed to be 85 today and 90 tomm. It was 45 when I got here. These girls are doing well handling this bipolar weather.
UPDATE: IM AN IDIOT AND THIS IS AN 8 DAY WEEK lol. Maybe I'll do a six day week next time to get back on track. Went back over at two and noticed some burns. Sent a video to a friend andcwith the sun we've had and the weather in the 90's he agreed the damage was minimal. However there was someone there working who opened more doors which let a lot more light in. It's supposed to be in the 90s tomorrow too. I may leave the doors shut. There are windows on everyside and an enormous cone at the top so the get plenty of sun. He also grows and I've been careful to not let anyone that grows go around my plants. I'm going to have to talk with family about this. To be honest I'm kinda pissed. Next watering I may add some kelp me kelp you and start a small nute regimen.
UPDATE Went back over at seven after having a panic attack. Half stoned half asleep. Stupidly I was looking at a plant and thought "shit" the FIM must not have took but in reality I was just stoned and tired so I topped a plant that had already been fimmed so we'll see how that goes. Purple punch is so far behind everything else it's not even funny. There might be one that's doing pretty well and that of course is the one with no HST. Branches on the other strains are thick and ready for LST though. What I think I'll do is transplant the 10th planets and the blueberry cheese ones that are ready and hold off on the rest for a while. Hopfully I'll be able to show plants in final homes next week.

Likes
31
Share


@Flauros
Follow
Пережил дефицит Кал-мага и засол почвы почти весь цикл. Справился с этой проблемой, дал не плохой урожай и приятный накур. Реально пахнет конфетами.
Likes
5
Share


@Mr_nugs_lover_David
Follow
Looks absolutely gorgeous, again I'm dealing with some fungus gnats and that's why it's full of yelllow sticky traps everywhere guys haha, the smell is now starting to be very noticeable It's pretty sweet and at the same time kind of spicy and herbal, let's see how this lady keeps developing her beautiful flowrs, stay tuned guys!! 👨🌾🔝

Likes
9
Share


@Green4H
Follow
Hello growers, I haven't shown you my plants for three weeks, I'm ashamed, I don't know what they are like, I let one dry and it weighs 5.68g, which is ridiculous... The second is still blooming and I have the impression that nothing will happen to it. .


Likes
8
Share


@Kirsten
Follow
26.12.24:
These are my 2 best plants P1 and P2 Purple Punch, they are looking great! Not sure what happened to P3.
They are in early flower/ pre-flower with the pistils clearly seen on P2. I am also hoping to tie some of the branches down to help light penetration on the lower canopies.
I have noticed light stress on my plants. I had moved the lights further away and increased the light intensity to 70%. Unfortunately that created some issues. Namely severe palour of the leaves.
To try and rectify the situation, I've dimmed the lights to about 30%, staying at the same distance, about 30 inches away. I measured the par levels, after I did this. They should a reading of anywhere between 40 and 150, at the canopy of the plants. They are all different sizes. This seems to have improved the colouring on all plants.
After this evenings watering, I will monitor recovery and increase lighting intensity again slowly. I am also using the light cycle of 21/3, so the plants have many hours more light to absorb, than for example 12/12 or 18/6.
I am pleased with the progress, considering all of my mistakes!
29.12.24:
So I finally gave LST a shot, it's probably a bit too late, however I really want to get the most of the triploid pheno, and I went a little crazy and LST'd all plants except 2, as they're too small.
I did that late last night, this afternoon I was amazed to see the plants turn their leaves back to the light source. I'm glad I overcame my fear of trying it. I'm very excited to see them adapt and progress! 😁 there are videos above with before and after of my LST process.
Thanks for checking out my diary 🍃 ✌️

Likes
15
Share

@Meisterwulle
Follow
Hallo zusammen 🍀👀,
Der Flush ist gestartet und es sieht wunderbar aus! Bin insgesamt sehr zufrieden mit der Größe der Pflanzen und auch mit dem Aussehen. Finde, das Training zu Beginn hat sich ausgezahlt und bin natürlich gespannt wie viel dabei rauskommt :D. Auch dem Dünger kann ich ein großes Lob aussprechen - im Vergleich zu Biobizz hat sich AN auf jeden Fall durchgesetzt. Natürlich hab ich auch im Vergleich zu den letzten Durchgängen eine stärkere Lampe benutzt, was das Ergebnis deutlich beeinflusst.
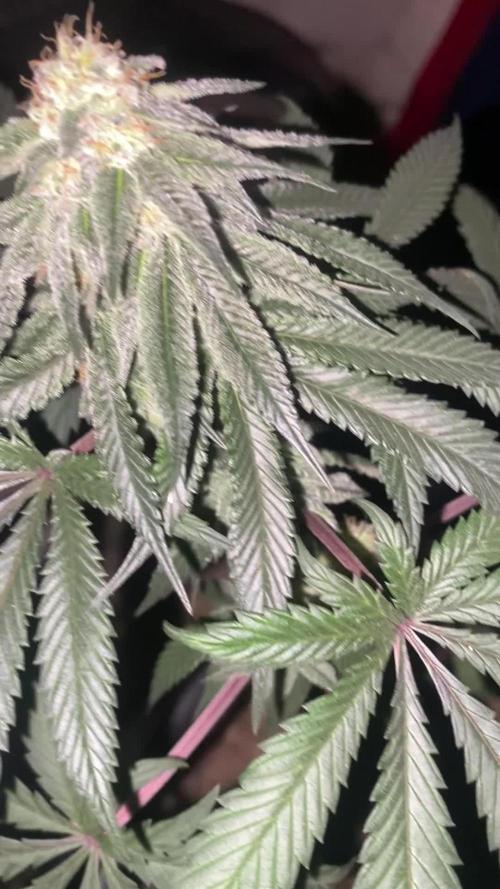
In den Nahaufnahmen sind schon deutlich orangene/braune Trichomköpfe erkennbar, weshalb ich nächste Woche auch ernten werde.
Ich danke bis hierhin allen, die mir folgen und mich Supporten. Würde mich riesig über ein Like freuen und folgt mir gerne für weitere Diaries in der Zukunft. Ich lerne auch immer wieder gerne dazu und merke, dass ich mein Können von Diary zu Diary steigere.
Nächste Woche kommt wie gesagt ein Report zur Ernte und in den kommenden Wochen dann ein Smoke Review.
Ich wünsche euch ein schönes Wochenende, lasst es krachen und stay high 🍀😎
LG Wulle