Likes
Comments
Share
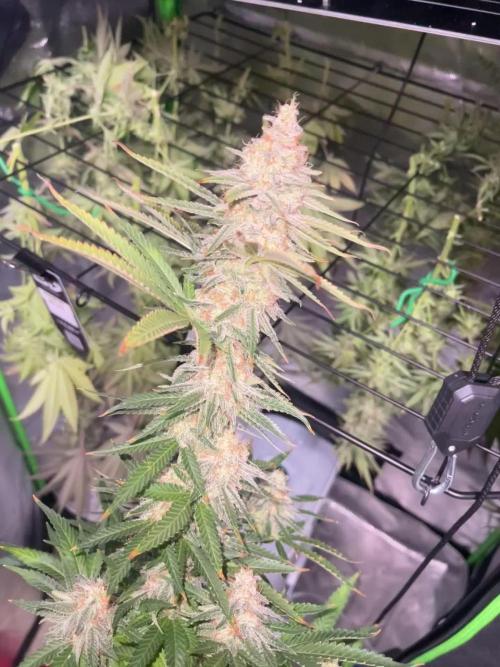
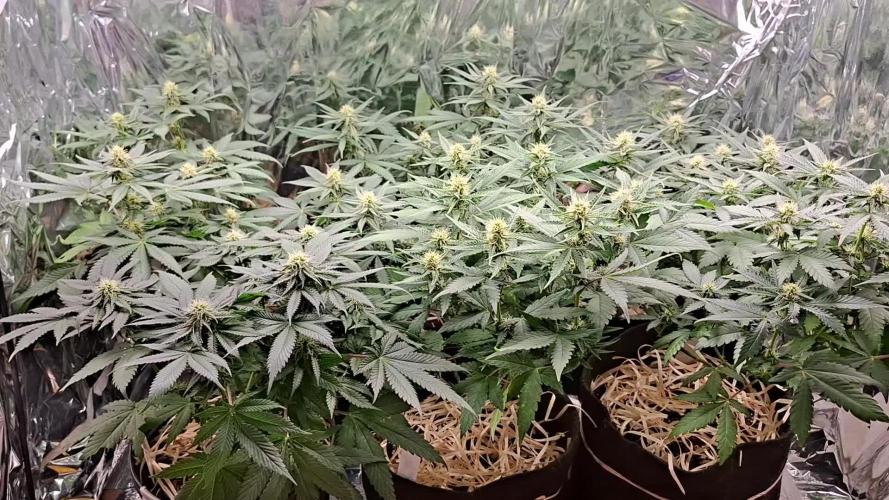
Day 18: The canopy is developping nice and evenly. I wonder how much mire they will stretch. I think that ill do some defoliation at the beginning of week 4 Day 20: Today I did a big defoliation right before the third flowering week ends. It was a tough job reaching all the leaves in the back because I cant move the plants.😅 But we made it! Now the light can reach much further down the plants for better/bigger buds and better aeration.
Likes
8
Share
Doucement mais sûrement les branches latéral progresse 🌱👍🏼😌
Likes
4
Share
@Ensign420
Follow
|»» LOG DISCLAIMER: Not intended as a grow guide. Grow log entries are usually posted 3 weeks later and are for my learning reference. ««| Introduction - Week 16 Summary - Ensign's log, stardate 17547.8, Wow what a great week in the garden! By the end of the week, the main tent has pretty much doubled in size! Upgraded the scrog frame and now have a second layer of netting about 14in above the original netting which is already filling in and looking incredible! The tent’s floor slightly flooded, but fixed it. Also trying Stash Blend for the first time! As for the veg tent. To preserve the genetics, started the mother plant cycling process and took more clone cuttings (which were rooting in Coco Coins by the end of the week). To make more room, also bonsaied all mother plants. The stretch is starting to slowing down and next week begins the first week of bloom! Ca-Caw! Let’s go! Onwards Ensign! [START OF WEEK 16] ========================================================== ---------- [ 4x4 MAIN TENT ] ---------- Heady OG BX1 #1 [Round4 ~Wk9] - WEEK 16 - Pre-Bloom [Stretch Wk2] TKO [Round2 ~Wk14] - WEEK 16 - Pre-Bloom [Stretch Wk2] ----------- [ 3x3 VEG TENT ] ------------ Garlic Budder OG#1 - WEEK 09 - Full Veg Garlic Budder OG#2 - WEEK 09 - Full Veg Gorilla Goat #1 - WEEK 09 - Full Veg Gorilla Goat #2 - WEEK 09 - Full Veg 08/04/25 → 08/10/25 This Week's Estimated Goals ---------------------------------------------------------------------------------------------- DLI: ~13 mol/m²/d PPFD: ~300 μmol/m²/s VPD: ~1.0 kPa This Week's Meter Readings & Averages ---------------------------------------------------------------------------------------------- Light On/Off: 19:00 - 07:00 | Wattage: ~326.5W [LV04] Distance From Canopy: ~31”, 27” DLI: ~15.60 mol/m²/d PPFD: ~361 μmol/m²/s VPD: ~0.69 kPa Soil %: [40.7, 47.0, 38.1, 56.6, 41.9, 42.7, 42.9, 43.9] ========================================================== Day 01 - Monday - 08/04/25 - Total Days: 113 ----------------------------------- Daily Averages ~[+01:00] - Temps: 83.6°F [28.7°C] - Humidity: 83.6% - VPD: 0.66 kPa - Soil %: [49, 37, 45, 60, 44, 43, 43, 45] ----------------------------------- - [+00:14]: Night check on the 4x4 tent. --- Holy Cannoli! Wow! These girls are in full stretch! --- Both cultivars have grown beyond the netting and have stretched beyond the (green) Vivosun’s CFM bars! Heady is a bit low on the left, but the canopy is pretty even and perky! --- Ca-Caw! Let’s go cuddies! --- Heady OG (BX1 #1) is starting off shorter than TKO, but am pretty confident that she’ll catch up. --- TKO is looking incredibly healthy! She’s the larger plant, but also in the smaller 20-gallon pot. Well she is 5 weeks older than Heady OG so makes sense. Regardless of the growth difference, absolutely stoked for this grow cycle!! - [+12:19]: Checked the Ecowitt soil moisture sensor data: ------------------ [ 4x4 MAIN TENT ] --------------- ------ 46% - [CH01 FT » G30 - Heady OG BX1 #1] ------ 37% - [CH02 FB » G30 - Heady OG BX1 #1] ------ 48% - [CH03 BT » G20 - TKO] ------ 62% - [CH04 BB » G20 - TKO] ------------------ [ 3x3 VEG TENT ] ---------------- ------ 41% - [CH05 BL » GR7 - Garlic Budder OG#1] ------ 44% - [CH06 BR » GR7 - Garlic Budder OG#2] ------ 40% - [CH07 FL » GR7 - Gorilla Goat #1] ------ 50% - [CH08 FR » GR7 - Gorilla Goat #2] --------- Veg: 38% - 45% | Flower: 45% - 55% --------- General: 30% [Dry] «| 45 - 60% [Moist] |» 70% [Wet] - [+00:14]: Checked the 3x3 veg tent. --- Ooo yea! The veg garden is looking incredible! --- All mamma plants are looking bushed out and beautiful! - [+00:37]: Super-cropped and bend the canopy down a bit. --- Lowered the canopy down a few inches. Really need to defoliate soon. The top growth is bushing out and getting really thick! --- Clones are also looking incredible and both are rotting along beautifully! Heady is going to make it and she is looking great! - [+00:38]: The cuttings are looking good for the most part. One is looking pretty droopy (damnit Ensign). --- Misted the cups with RO water. --- Think the RH may not be consistent enough and the cups might be drying out too quickly. - [+00:41]: Checked the humidifiers. --- Tanks are still full and no leaks found. --- Another day done! --- Okay! Since growth is raging upwards, decided to upgrade the scrog frame and plan to add a second layer tomorrow. --- Ahh yea! This grow is turning out to be an epic one! Day 02 - Tuesday - 08/05/25 - Total Days: 114 ----------------------------------- Daily Averages ~[+01:00] - Temps: 83.3°F [28.5°C] - Humidity: 83.3% - VPD: 0.67 kPa - Soil %: [49, 38, 47, 62, 41, 43, 43, 45] ----------------------------------- - [16:25]: Evening check on the 3x3 veg tent. --- Ooo yea! The clones are looking incredible! --- The cuttings still seem to be struggling. --- Hmm. - [16:27]: Misted the cups with RO water. --- Made a slight modification and wrapped the top of both cups with plastic wrap. --- Cut a slit from the middle to the edge. Misted the cup through the slit with RO water (2-3 sprays each). --- Then gently slipped the cups over each cutting. --- Also slightly misted each Coco Coin with RO water. --- Great! This should hopefully make a better seal and will keep the RH higher. I think. --- Anyways! --- The mother garden is vegging along beautifully! --- Growth is getting really bushy and need to do a heavy defoliation soon. - [16:56]: Checked the Ecowitt soil moisture sensor data: ------------------ [ 4x4 MAIN TENT ] --------------- ------ 48% - [CH01 FT » G30 - Heady OG BX1 #1] ------ 36% - [CH02 FB » G30 - Heady OG BX1 #1] ------ 47% - [CH03 BT » G20 - TKO] ------ 61% - [CH04 BB » G20 - TKO] ------------------ [ 3x3 VEG TENT ] ---------------- ------ 41% - [CH05 BL » GR7 - Garlic Budder OG#1] ------ 43% - [CH06 BR » GR7 - Garlic Budder OG#2] ------ 41% - [CH07 FL » GR7 - Gorilla Goat #1] ------ 49% - [CH08 FR » GR7 - Gorilla Goat #2] --------- Veg: 38% - 45% | Flower: 45% - 55% --------- General: 30% [Dry] «| 45 - 60% [Moist] |» 70% [Wet] - [19:03]: Night check on the 4x4 tent. --- Ooo yea! Wow these girls are stretching! --- Growth has clearly grown since the last checkup and getting taller! --- Ca-Caw! Let’s go ladies! - [19:14]: Wait. Uh-Oh! --- The tent seemed to have flooded slightly.. DAMNIT ENSIGN! ------ [» A FEW HOURS LATER.. «] --- Okay! Think I figured out why the tent flooded and how to fix it. --- The main reason was the new soil sensor which was probably not in proper contact with the soil. --- Fixed this by re-seating the unit. Also adjusted the drip ring a bit. --- Also poured about a cup of water straight onto new sensor. This should make the surrounding soil wetter and will hopefully fix the dry pocket. I think. --- For added redundancy, added additional trigger conditions to both Ecowitt WittFlows (TKO and Heady OG). - [23:45]: Adjusted the watering triggers for the auto-watering system for TKO. --- Changed the ON trigger from: --------- When CH3 soil moisture is under 45% ------------ Updated to: --------------- When CH3 soil moisture is UNDER 45% --------------- AND When CH4 soil moisture is UNDER 50% --- Changed the OFF trigger from: --------- When CH3 soil moisture is OVER 50% ------------ Updated to: --------------- When CH3 soil moisture is OVER 50% --------------- OR When CH3 soil moisture is OVER 50% --- Applied similar watering triggers for Heady OG. --- Changed the ON trigger from: --------- When CH1 soil moisture is under 45% ------------ Updated to: --------------- When CH1 soil moisture is UNDER 45% --------------- AND When CH2 soil moisture is UNDER 50% --- Changed the OFF trigger from: --------- When CH1 soil moisture is OVER 50% ------------ Updated to: --------------- When CH1 soil moisture is OVER 50% --------------- OR When CH2 soil moisture is OVER 50% --- Will check back daily to make sure the flooding has completely stopped. --- Well that pushed everything back a bit. --- Okay! Anyways, - [23:57]: Time to both build and install the second frame and netting. Let’s go! --- Got four 1in PVC corner fittings (local Lowes) along with four 1in PVC pipes (10ft long each). Also got more self-tapping screws. --- For the netting, using mason string. Usually use the braided nylon, but the twisted variant is a lot cheaper. --- To build the frame, I cut the 1in PVC pipes down to two different lengths: ------ [» x2 @ 42.5in «] – Front / Back ------ [» x2 @ 44in «] – Left / Right --- This makes the frame slightly thinner from left to right. --- Saving the extra piping for future projects. - [+04:04]: Okay! The new frame is built and looking sturdy! --- Did not use any glue and simply dry fitted each component. --- For easier fitting, smoothed the ends of each pipe with sand paper. --- Also marked each pipe to indicate the front, back, left, and right sides. --- For the fittings, used corner fittings and have open slot facing downwards. This way I can add the legs. --- After the frame was built, marked and drilled screws about 3in apart (self-tapping). Made sure to mirror the screw spacing on the opposite side. --- Time to weave the netting! - [+04:06]: Using some mason string, --- Started at one corner and strung all the horizontal lines. --- Double-wrapped each screw. --- After the horizontal lines were strung, continued and wrapped the vertical lines. - [+04:44]: Now that the frame is built and the netting fully weaved, time to install the frame! --- First the support poles. Cut and sanded more 1in PVC piping. ------ [» x4 @ 14in «] – Vertical Support - [17:56]: Installed the back support poles before the front ones. --- Temporarily removed the front CFM bar and had to raise the fan up a bit (was not easy, but got it done). --- Once the support poles were installed, gently set the new frame on top. - [+06:07]: Done and wow she’s a beauty! --- Well that took a bit longer than anticipated (also the flooding did not help), but glad the frame fit perfectly and the netting looks great! - [+06:12]: Checked the humidifiers. --- Tanks are still full and no leaks found. --- Ooo yea! What a day! Day 03 - Wednesday - 08/06/25 - Total Days: 115 ----------------------------------- Daily Averages ~[+01:00] - Temps: 83.9°F [28.8°C] - Humidity: 83.1% - VPD: 0.69 kPa - Soil %: [42, 54, 43, 60, 42, 43, 43, 45] ----------------------------------- - [+00:17]: Night check on the 4x4 tent. --- Ca-Caw!! Let’s go cuddies! Growth is looking beautiful and green! --- The second layer of scrog netting was not the easiest to install, but wow the garden is looking incredible! --- Both Heady OG and TKO are still stretching upwards with new nodes branching out everywhere! --- The canopy hasn’t reached the top net yet but hoping a few will make it. --- Regardless, absolutely hyped for this flower cycle! - [+00:23]: Checked the 3x3 veg tent. --- Looking beautiful in the veg garden! --- Wow the mothers have bushed out and have reached the grow light! - [+00:32]: Super-cropped and lowered the canopy --- The canopy is getting really thick! Plan to do a pretty heavy defoliation tomorrow. --- Clones look great and stoked that both Heady OG and TKO seem to be rooting along in the cups. Need to check the weights. Let’s go! - [+00:37]: Here are the starting initial watering ranges: ------ Heady OG BX1 » 261.4g → 301.2g ------ TKO » 240.9g → 301.4g --------- General Solo Range: [Dry] «| [Initial Cup Weight] + ~55-100g |» [Wet] --- All cups were last watered 5 days ago. - [+00:37]: Took the starting weight of both clones before watering, ------ Heady OG BX1 weighed 250.4g ------ TKO weighed 240.9g --- Oops! Probably should have watered earlier, sorry ladies! --- Stoked that Heady OG is clearly going to make it! Also good to know the soil dryback can be at least 10g from the initial pre-saturated weight. --- Anyways! --- While on a scale, --- Gently misted the straw mulch of both cups with RO water. --- Focused on the straw and sprayed as evenly as possible. --- Misted 10-20 sprays. Waited a moment, then misted again. --- Made sure to reference the watering weights. --- Repeated this process for both cups. --- There was no runoff. - [+01:08]: Took the saturated weight of both clones after watering, ------ Heady OG BX1 » 335.5g ------ TKO » 345.1g --- Marked the final wet weight on the back of each cup. Also marked the watering date on the front. --- Placed both phenos back into the tent. --- Cuttings are looking better! --- Glad that the slight modification to the cups helped to keep the moisture in (covered both with plastic wrap). --- Gently removed both cups and re-misted each with RO water (~2 mists). --- Carefully placed the cups back onto the cuttings. - [+01:21]: Checked the Ecowitt soil moisture sensor data: ------------------ [ 4x4 MAIN TENT ] --------------- ------ 34% - [CH01 FT » G30 - Heady OG BX1 #1] ------ 52% - [CH02 FB » G30 - Heady OG BX1 #1] ------ 39% - [CH03 BT » G20 - TKO] ------ 58% - [CH04 BB » G20 - TKO] ------------------ [ 3x3 VEG TENT ] ---------------- ------ 44% - [CH05 BL » GR7 - Garlic Budder OG#1] ------ 47% - [CH06 BR » GR7 - Garlic Budder OG#2] ------ 41% - [CH07 FL » GR7 - Gorilla Goat #1] ------ 46% - [CH08 FR » GR7 - Gorilla Goat #2] --------- Veg: 38% - 45% | Flower: 45% - 55% --------- General: 30% [Dry] «| 45 - 60% [Moist] |» 70% [Wet] - [+01:23]: Checked the humidifiers. --- Tanks are still full and no leaks found. Day 04 - Thursday - 08/07/25 - Total Days: 116 ----------------------------------- Daily Averages ~[+01:00] - Temps: 84.9°F [29.4°C] - Humidity: 82.0% - VPD: 0.75 kPa - Soil %: [32, 51, 37, 57, 42, 43, 43, 45] ----------------------------------- - [09:42]: Quickly checked on the propagation dome (in the 3x3 veg tent). --- Nice! Clones are both looking great! --- Heady OG is clearly recovering and looking better! --- Wow! TKO is looking incredibly healthy! Top growth has perky leaves with a few nodal growth sites starting to stretch. As far as cloning, she has been healthiest with no issues the entire way! --- Both Heady OG cuttings are looking beautiful and should be rooting. Plan to check for roots in a few days. --- Plan to do a pretty heave defoliation today. --- Also going to start the mother plant cloning process. - [17:12]: Evening check on the 3x3 veg tent. --- Mother garden is looking beautiful and the canopy is bushy with growth! --- Both Heady OG and TKO clones also look green and healthy! --- My main focus for today is the veg garden and the preservation of the genetics . --- Lots of work to do and time to also start the mother cycling process! --- This time, going to do a pretty heavy defoliation! --- Going to pretty much bonsai each mother while taking a few clones to preserve the genetics. --- Let’s go Ensign! - [17:58]: Filled a measuring cup with 1.5 cups of RO water. ------ Added 1/8tsp of Horticultural Aloe --- Mixed the solution and poured it straight into a clear solo cup. --- Repeated this process until 4 cups were filled. - [18:05]: Also marked each cup with the corresponding mother plant name. --- Time to defoliate and take the clone cuttings! - [18:07]: Using a pair of trimmers (AC Infinity), --- Bonsaied each mother plant. Removed over 75% of overall growth leaving several branches and nodes. - [19:44]: Done and wow what a difference! --- Pretty much removed all growth leaving a few nodal growth sites to heal. --- This is my first time going this heavy and am hoping that they recover. --- If this bonsai defoliation heals up with healthy growth, this can also be an alternative to a full plant cycling. --- Anyways! - [19:46]: To preserve the genetics, made sure to cut clone cuttings from each mother plant. --- To ensure successful rooting, took several cuttings. --- Made sure to clean each cutting by trimming most of the branches off leaving the top one or two nodes. --- Did not cut any leaf fingers and made sure to cut the tip of the stalk (about 45°) before placing into the cup of aloe solution. - [19:55]: Placed the fresh cuttings into the 3x3 veg tent. --- Have each cup resting on top of the corresponding mother plant. --- Okay! Let the two-day soak begin! - [20:00]: Mulched the trimmings in a paper bag. --- Since the bottom of the paper bags tend to decompose, have the bag in a used BuildASoil soil bag which should not decompose (these are meant for soil). --- Also added a bit of Kashi Blend and worm castings to the bottom of the bag. --- Back to the Heady OG cuttings! --- Gently removed the cups and misted the inside of each with RO water (~2 mists each). - [20:02]: Carefully placed the new cups onto the cuttings. --- Great! Plan to check for roots soon. - [20:08]: Checked the Ecowitt soil moisture sensor data: ------------------ [ 4x4 MAIN TENT ] --------------- ------ 31% - [CH01 FT » G30 - Heady OG BX1 #1] ------ 51% - [CH02 FB » G30 - Heady OG BX1 #1] ------ 35% - [CH03 BT » G20 - TKO] ------ 56% - [CH04 BB » G20 - TKO] ------------------ [ 3x3 VEG TENT ] ---------------- ------ 41% - [CH05 BL » GR7 - Garlic Budder OG#1] ------ 40% - [CH06 BR » GR7 - Garlic Budder OG#2] ------ 42% - [CH07 FL » GR7 - Gorilla Goat #1] ------ 44% - [CH08 FR » GR7 - Gorilla Goat #2] --------- Veg: 38% - 45% | Flower: 45% - 55% --------- General: 30% [Dry] «| 45 - 60% [Moist] |» 70% [Wet] - [20:12]: Checked the 4x4 tent. --- Ca-Caw! Ah yea! The garden is looking incredible and wow growth is raging! --- The tallest growth is just barely under the netting! --- Not much to do in the main tent now but to wait until the stretch slows down. --- Time to relax and let the grass grow! Let’s go! - [21:34]: Have an extra stainless steel rack and thought of a better way to hold the solo cups in the veg tent. --- The cups are balancing on the edge of the pots am concerned that they may tip over. --- Carefully too each cup out of the tent. - [21:36]: Placed the rack upside-down in the middle of the tent. --- Have the rack positioned on top of all 4 pots just above the center floor fan. - [21:39]: Gently placed each cutting cup onto the rack. --- The floor fan can easily still blow through the grid of the rack. Great! --- This should be way more stable while still allowing decent airflow. - [21:40]: Checked the humidifiers. --- Tanks are still full and no leaks found. Day 05 - Friday - 08/08/25 - Total Days: 117 ----------------------------------- Daily Averages ~[+01:00] - Temps: 84.5°F [29.2°C] - Humidity: 82.5% - VPD: 0.72 kPa - Soil %: [32, 50, 30, 53, 40, 42, 41, 42] ----------------------------------- - [23:02]: Night check on the 4x4 tent. --- Ahh yea! The garden is thriving! --- Both Heady OG and TKO are still stretching upwards and the canopy is getting dense! --- Wow! TKO has reached the top netting! Heady OG is just under the top netting. --- Ca-Caw! Let’s go ladies! - [23:11]: Checked the 3x3 veg tent. --- The veg garden is looking great! --- The bonsaied mother plants are still recovering from the heavy defoliation. But growth is looking a lot better than I would expect from such a large biomass reduction. Nice! --- Cuttings are looking great as well! - [23:13]: Time to swap the aloe water out! --- Replaced each solo cup with a clean one filled with fresh RO water (1.5cups). --- Plan to start using the propagation dome soon! --- Going to let these soak for another day before transplanting into Coco Coins for rooting. - [+02:05]: Quickly checked on the auto-watering system. --- System is still charged and no leaks or kinks found in the tubing. - [+02:08]: Checked the humidifiers. --- Tanks are still full and no leaks found. Day 06 - Saturday - 08/09/25 - Total Days: 118 ----------------------------------- Daily Averages ~[+01:00] - Temps: 83.4°F [28.6°C] - Humidity: 83.3% - VPD: 0.67 kPa - Soil %: [32, 50, 35, 52, 41, 40, 41, 41] ----------------------------------- - [07:55]: Quickly checked on the 3x3 veg tent. --- Looking great in the veg garden! --- Mothers are all recovering nicely from the bonsai defoliation. Great! --- Cuttings also look healthy and ready for transplanting! --- Both Heady OG and TKO clones are looking perky and getting bigger! --- Heady OG cuttings also looking green and rooting! I think. Will check for roots in a few days. - [20:58]: Night check on the 4x4 tent. --- Ca-Caw! This is why we grow! Wow! --- Also hyped that the canopy is getting dense with nodal growth! --- TKO has more tops stretching through the top scrog netting! Heady OG has not reached the net yet. --- Stoked the 14in space in between the netting is filling quite nicely and just going to let everything grow! - [21:01]: Checked the Ecowitt soil moisture sensor data: ------------------ [ 4x4 MAIN TENT ] --------------- ------ 29% - [CH01 FT » G30 - Heady OG BX1 #1] ------ 50% - [CH02 FB » G30 - Heady OG BX1 #1] ------ 34% - [CH03 BT » G20 - TKO] ------ 53% - [CH04 BB » G20 - TKO] ------------------ [ 3x3 VEG TENT ] ---------------- ------ 40% - [CH05 BL » GR7 - Garlic Budder OG#1] ------ 40% - [CH06 BR » GR7 - Garlic Budder OG#2] ------ 40% - [CH07 FL » GR7 - Gorilla Goat #1] ------ 40% - [CH08 FR » GR7 - Gorilla Goat #2] --------- Veg: 38% - 45% | Flower: 45% - 55% --------- General: 30% [Dry] «| 45 - 60% [Moist] |» 70% [Wet] - [21:05]: Checked the 3x3 veg tent. --- Growth is still recovering quite nicely! This may be my solution to maintain mother plants longer between cycles. --- Mother clone cuttings are also looking healthy and ready to be rooted! --- Was originally planning on rooting all of the cuttings, but since the mother plants are recovering better than anticipated, just going to plant one of each pheno. --- Let’s go! - [21:23]: Filled a measuring cup with 1.5 cups of RO water. ------ Added a pinch of Quillaja Saponaria Extract [60] ------ Added 1/64tsp of Horticultural Aloe ------ Added 1/32tsp of Mycrobe Complete --- Mixed the solution thoroughly. - [21:26]: Dropped 4 Coco Coins into the measuring cup. --- The coins immediately started to expand. ------ [» ~10 MINUTES LATER «] --- Placed each fully saturated Coco Coin into half-cut solo cups. - [21:41]: Using a squeeze bottle filled with Clonex, --- Gently filled each pre-made hole with Clonex rooting gel. - [21:43]: Time to plant the cuttings! --- Using a pair of clean trimmers, made a final 45° cut. --- Also stripped and scrapped some of the stem’s outer membrane. --- To help with planting, gave each Coco Coin a squeeze to loosen the coco. --- Made sure to insert each stem straight and snug with the tip about a 1/4 inch from the bottom of the Coco Coin. --- Also secured the stem by pinching and pressing in the top of the Coco Coin. --- Once each cutting was planted, - [22:11]: Placed each pheno into the propagation dome’s tray. --- Made sure to keep each clone properly tagged. --- Added 1/4 cup of RO water to the bottom of the tray. --- Placed the side extensions onto the tray. - [22:15]: Misted the top of the propagation dome before covering the cuttings. --- Vents are fully closed. --- Also lowered the intensity from 5 to 1. --- At the current light intensity (LV1), the PPFD is around 110 μmol/m²/s which gives a DLI of 7.13 mol/m²/d under an 18/6 light cycle --- Will check back daily to cycle the air under the dome. - [22:17]: Placed the extra mother cuttings back on the rack. Will try to keep these cuttings alive until the planted ones root. --- Will need to change the water every day or two. --- Also need to water the Heady OG and TKO clones. --- Ca-Caw! Let’s go! - [11:33]: Here are the starting initial watering ranges: ------ Heady OG BX1 » 261.4g → 301.2g ------ TKO » 240.9g → 301.4g --------- General Solo Range: [Dry] «| [Initial Cup Weight] + ~55-100g |» [Wet] --- All cups were last watered 3 days ago. --- Took the starting weight of both clones before watering, ------ Heady OG BX1 weighed 257.0g ------ TKO weighed 259.7g --- While on a scale, --- Gently misted the straw mulch of both cups with RO water. --- Focused on the straw and sprayed as evenly as possible. --- Misted 10-20 sprays. Waited a moment, then misted again. --- Made sure to reference the watering weights. --- Repeated this process for both cups. --- There was no runoff. --- Also defoliated and removed the lowest growth on both clones. - [23:03]: Took the saturated weight of both clones after watering, ------ Heady OG BX1 » 345.3g ------ TKO » 355.4g --- Marked the final wet weight on the back of each cup. Also marked the watering date on the front. --- Placed both phenos back into the tent. Have them now resting on the rack (on drip trays). - [23:14]: Checked the humidifiers. --- Tanks are still full and no leaks found. Day 07 - Sunday - 08/10/25 - Total Days: 119 ----------------------------------- Daily Averages ~[+01:00] - Temps: 83.9°F [28.8°C] - Humidity: 83.6% - VPD: 0.66 kPa - Soil %: [49, 49, 30, 52, 43, 45, 46, 44] ----------------------------------- - [08:02]: Quickly checked on the 3x3 veg tent. --- Ooo yea! Looking great in the veg garden! --- All mothers are still green and recovering. New growth is starting to develop and growth is looking healthy! --- Quickly checked on the propagation dome. --- All clone cuttings are looking green and healthy! - [19:04]: Night check on the 4x4 tent. --- Ca-Caw! Ah yea! Heady OG has reached the top scrog net! --- TKO has several tops above the netting and she is raging with healthy! --- Canopy is also showing more signs of pistil crowning and vertical growth seems to be slowing down. I think. - [19:07]: Checked the Ecowitt soil moisture sensor data: ------------------ [ 4x4 MAIN TENT ] --------------- ------ 48% - [CH01 FT » G30 - Heady OG BX1 #1] ------ 49% - [CH02 FB » G30 - Heady OG BX1 #1] ------ 36% - [CH03 BT » G20 - TKO] ------ 55% - [CH04 BB » G20 - TKO] ------------------ [ 3x3 VEG TENT ] ---------------- ------ 41% - [CH05 BL » GR7 - Garlic Budder OG#1] ------ 43% - [CH06 BR » GR7 - Garlic Budder OG#2] ------ 43% - [CH07 FL » GR7 - Gorilla Goat #1] ------ 43% - [CH08 FR » GR7 - Gorilla Goat #2] --------- Veg: 38% - 45% | Flower: 45% - 55% --------- General: 30% [Dry] «| 45 - 60% [Moist] |» 70% [Wet] - [19:10]: Checked the 3x3 veg tent. --- The veg garden is recovering beautifully! --- Since the stretch seems to be slowing down in the main tent, going to give these ladies a little extra. - [19:17]: Going to feed some Stash Blend for the first time. --- This blend of beneficial microbes and mycorrhizal fungi also includes a bit of silica which should help during the bloom phase. --- Also shout out to Mr. Grow It, Rob (from CLTV), and Pigeons420! Stay lifted! - [19:19]: Filled a pitcher with 16 cups (1gal) of RO water. ------ Added 1/8tsp of Quillaja Saponaria Extract [60] ------ Added 1tsp of Stash Blend --- Mixed the solution before pouring 6 cups straight into a pump sprayer. --- Gave the sprayer a good shake before spraying the entire solution onto Heady OG’s straw mulch. - [19:52]: Repeated this process again for TKO. --- Depending on how growth develops, may start feeding these ladies weekly. --- From personal experience, the veg phase can easily be grown with straight RO water. --- Flower is probably the most important time to feed because there are more roots and the plants are trying to produce more biomass. I think. --- Anyways! - [20:10]: In the veg tent, repeated the watering process for all mothers (1 cup + 1 cup RO each). --- Focused mainly on the straw (2 cups each). - [20:13]: Checked the humidifiers. --- Tanks are still full and no leaks found. --- Wow what a grow week! --- The difference in growth from Monday until now has been incredible! [END OF WEEK 16]
Likes
8
Share
💙 Project Blue Tent – Week 7 Blue Waffle F1 – Pheno A (Folder 13A) Welcome back everyone to another week inside Project Blue Tent! 💙🌱 If you're new here, welcome aboard. This project is all about exploring the incredible Blue Waffle F1 genetics from Zamnesia while putting the complete growing ecosystem through its paces. Rather than documenting four plants as a single diary, each phenotype receives its own individual journey from seed to harvest. They share the same tent, the same environment, the same nutrition, the same irrigation and the same lighting. And yet... They still manage to tell four completely different stories. As I always like to say: We're not just growing plants. We're getting to know them. ──────────────────────── 🌿 Week Seven – The Final Cleanup This week feels like a milestone. The SCROG has done its job. The canopy is full. The plants have established their structure. And now it's time to prepare everything for the next chapter... Flowering. 🌸 Plant A is looking absolutely beautiful at the moment. Her foliage has developed into the rich, healthy green I've been hoping to see, and the overall structure is remarkably balanced. After several weeks of gently guiding branches underneath the SCROG, we've managed to create a canopy that is surprisingly even from one side of the tent to the other. At approximately 60 cm, she's sitting comfortably within the space we've created for her. And although she could certainly continue growing vegetatively, I don't want to simply keep filling the tent with more and more foliage. At some point, you have to stop building the canopy... ...and start preparing it for what comes next. That's exactly where we are now. ──────────────────────── 🕸️ From SCROG to Flower Over the last couple of weeks, the SCROG has completely changed the way these plants occupy the tent. Instead of allowing individual branches to dominate vertically, we've been gently guiding them horizontally beneath the screen. The result is exactly what we were looking for: A broad, relatively even canopy with many developing tops sharing the available light. SCROG isn't about forcing a plant into submission. It's about working with its natural growth and redistributing that growth across the available space. And looking at the tent now... I'd say the mission has been accomplished. The screen is filled. The plants have claimed their territory. Now we need to create the best possible starting point for flowering. Which brings us to this week's main job. ──────────────────────── ✂️ Defoliation – Cleaning Today for a Better Tomorrow This week we're performing a deep, purposeful defoliation across the canopy. For anyone unfamiliar with the technique, defoliation simply means selectively removing leaves from the plant. But it's important to understand what defoliation isn't. It isn't stripping a plant bare. It isn't removing leaves just because they're in the way. And it isn't something that should automatically be performed every week. The purpose is to improve the structure we've already created. After several weeks of SCROG training, there is now a tremendous amount of foliage packed into a relatively small space. While those leaves are essential during vegetative growth, too much overlapping foliage can eventually create unnecessary congestion inside the canopy. So we're removing selected leaves that are: • Blocking developing growth • Creating unnecessary overlap • Restricting airflow through the interior • Shading lower areas that we've decided to retain • Or simply no longer contributing enough to justify occupying that space The goal isn't to make the plant look empty. The goal is to make the plant efficient. ──────────────────────── 🌬️ Why Defoliate Before Flower? Timing is everything. We're doing this now because the plants are still in vegetative growth and have time to recover before we ask them to transition into flowering. Defoliation is a form of stress. Even when performed carefully, removing a significant amount of foliage temporarily changes the plant's balance between its leaves, roots and growing points. That's why I don't want to perform a major cleanup deep into flowering unless there's a very good reason. Right now, the plants can take that short period of recovery while they're still operating under an 18/6 light schedule and actively producing new vegetative growth. After the cleanup, we'll give them time to recover, settle and rebuild their foliage before flipping the lights. The idea is simple: Stress now. Recover now. Flower later. Rather than asking the plant to simultaneously deal with a major transition into flowering and a significant amount of pruning, we're separating those events. One step at a time. That's especially important in a project like this, where I'm trying to observe the plants rather than simply push them as hard as possible. ──────────────────────── 🌿 Plant A – Looking Better Than Ever Plant A continues to impress me. The first thing that stands out this week is the colour. That slightly lighter appearance we saw earlier in the grow has completely disappeared. The foliage is now displaying that rich, healthy green that tells me the current nutritional strategy is working extremely well. She's vigorous without looking excessive. Healthy without showing signs of nutritional stress. And most importantly... She's balanced. Her branches have responded beautifully to the SCROG, and the canopy has developed into a very usable structure for flowering. This is one of those moments where you can look at the plant and realize that the weeks of small adjustments have finally come together. The topping. The recovery. The daily SCROG work. The irrigation. The feeding. The environmental stability. None of those things created this canopy by themselves. They're all pieces of the same puzzle. ──────────────────────── 💧 The Drip Irrigation System One of the things I have become particularly impressed with during this project is the automatic drip irrigation system. It's working beautifully. With the plants now drinking more consistently and the canopy becoming increasingly demanding, having a reliable irrigation system makes maintaining uniformity across the tent considerably easier. Each plant is currently receiving approximately 1.2 L per 24 hours, delivered through the drip system. And the plants are clearly enjoying the consistency. One of the advantages of automated irrigation isn't simply saving time. It's repeatability. Instead of relying on every watering being manually performed at exactly the same interval and volume, the system provides a much more consistent routine for the plants. That consistency becomes increasingly valuable as the root systems develop and the plants transition toward flowering. So far... The system is doing exactly what I wanted it to do. And honestly, watching four plants respond so uniformly to the same irrigation strategy has been one of the most satisfying parts of this project. ──────────────────────── 🥥 Feeding Program The feeding recipe remains unchanged this week. And for now, I don't see a reason to interfere with something that is clearly working. Current nutrition: • Plagron Hydro A — 1.9 ml/L • Plagron Hydro B — 1.9 ml/L • Plagron Hydro Roots — 1 ml/L Current EC remains approximately: 1.92 mS/cm with the solution maintained around 18°C and pH at 5.8. The plants are showing excellent colour, strong growth and healthy leaf development, so I'm perfectly comfortable maintaining the current recipe for now. We may increase the nutritional strength next week depending on how the plants respond after defoliation and as flowering approaches. But that's exactly why I don't like changing several variables at once. First, we observe. Then we adjust. The plants will tell us what they need. ──────────────────────── 🌡️ Environmental Conditions The Blue Tent continues to remain remarkably stable. This week's average conditions were: • 🌡️ Day Temperature: 28°C • 🌙 Night Temperature: 27°C • 💧 Relative Humidity: 65% • 🥥 Substrate Temperature: 24°C • 💦 Nutrient Solution: 18°C • ⚗️ pH: 5.8 • ⚡ EC: 1.92 mS/cm • 💨 CO₂: approximately 450 ppm • 💡 Light Schedule: 18/6 • 💧 Irrigation: approximately 1.2 L/plant/24h • ? Pot Size: 8 L • 📏 Plant Height: approximately 60 cm The plants are continuing to respond beautifully to these conditions. The root-zone temperature remains particularly stable, irrigation is consistent, and the canopy has enough air movement to support vigorous transpiration. As we move toward flowering, environmental management will become even more important. The room we've created now needs to support not only vegetative growth... ...but the much denser flowering structure that is coming next. ──────────────────────── 🌬️ Why the Cleanup Matters One of my main objectives with this defoliation isn't simply aesthetics. It's airflow. When four vigorous plants completely fill a 100 × 100 × 200 cm tent, the amount of foliage inside that space becomes considerable. From above, everything can look absolutely perfect. But underneath that beautiful canopy is another story. Leaves overlap. Branches cross. Interior spaces become crowded. Air needs to move through all of that. By selectively removing excess foliage now, we're opening those internal spaces before flowering begins. That gives us a cleaner structure going forward and makes it much easier to inspect the plants, maintain airflow and monitor the developing flowers. This is also one reason I'm much happier doing the major cleanup before the flip rather than waiting until the plants are deep into flowering. Once flowering begins, the priorities change. I want the plant concentrating its energy on developing flowers rather than repeatedly recovering from major structural work. So we're preparing the room now. Clean canopy. Good airflow. Healthy structure. Then... Flower. ──────────────────────── 🧠 Defoliation Isn't About Removing Leaves One of the biggest misconceptions surrounding defoliation is that more leaves automatically means a worse plant. That's not true. Leaves are incredibly important. They're the plant's solar panels. They capture light and help drive photosynthesis. So the objective should never be: "How many leaves can I remove?" The better question is: "Which leaves are no longer contributing enough to justify occupying this space?" That's the philosophy I'm following here. We're not trying to weaken the plant. We're trying to improve the relationship between: Light → canopy → airflow → growing sites. And because we've already spent weeks creating the structure with SCROG, this cleanup is simply the final refinement of that work. ──────────────────────── 🌱 Plant A's Personality Every phenotype continues to develop its own personality, even when all four plants are living under almost identical conditions. Plant A has consistently been one of the more balanced girls in the tent. She doesn't appear interested in becoming the biggest plant in the room. Instead, she seems much more interested in becoming an efficient one. Her growth is structured. Her canopy is balanced. Her foliage is beautiful. And after weeks of training, she has settled into the SCROG extremely well. Now, after today's cleanup, she looks almost like a different plant. Less crowded. More open. More organized. And ready for the next chapter. That's the part of growing I really enjoy. You spend weeks slowly building something... Then one day you step back and suddenly realize: It all came together. ──────────────────────── 👀 Looking Ahead The next few days will be about one thing: Recovery. No unnecessary training. No chasing perfection. No constantly changing the environment. Just observation. The plants have been through topping. They've been trained beneath the SCROG. They've filled the canopy. And now they've received their final major vegetative cleanup. So we're going to let them breathe. Let them recover. Let them continue growing. And then, assuming everything continues to look as good as it does today... we flip the Blue Tent into flower. 🌸 This is the point where all those weeks of preparation finally start paying off. The screen is full. The structure is ready. The plants are healthy. Now we just need to let them do what plants do best. Grow. ──────────────────────── 💙 Thank You A huge thank you to Zamnesia for making Project Blue Tent possible, from these fantastic Blue Waffle F1 genetics to the complete ecosystem surrounding this grow. A massive thank you to Plagron for providing the Premium Growbags together with the Hydro nutrient line, which continues delivering excellent results and beautifully healthy growth. A special thank you to Mars Hydro for the drip irrigation and automatic drainage system. After watching these plants respond to the consistency of automated irrigation week after week, I'm genuinely impressed with how well the system is performing. Thank you as well to GrowDiaries, for giving growers around the world a place to document their journeys, exchange knowledge and learn from one another. And finally... Thank you to everyone following Project Blue Tent. Every comment, every question, every bit of feedback and every person simply stopping by to see how these four phenotypes are developing means more than you probably realize. We've spent weeks building this canopy together. Now the really exciting part is about to begin. The plants are cleaned. The SCROG has been filled. The room is ready. Flower is next. 🌸💙 Until next week... Growers Love, happy growing, and take care everyone! 🌱💙
Processing
Likes
15
Share
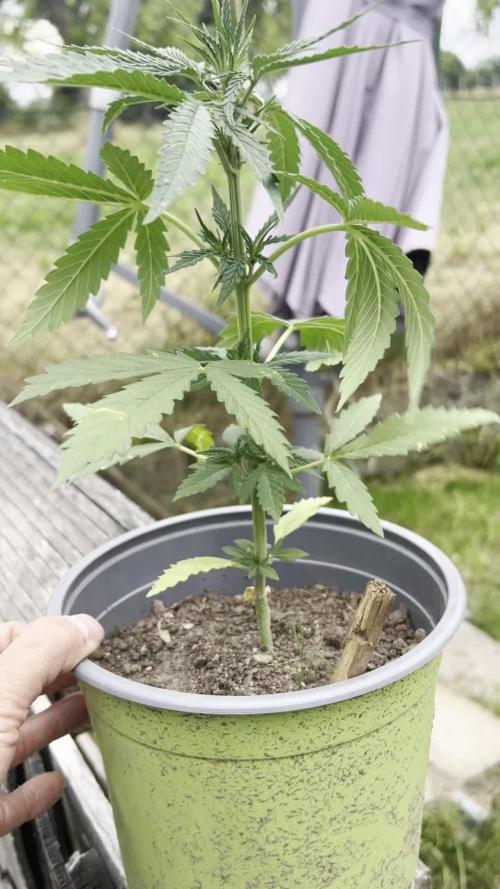
It's time for the outdoor flower stage from a 4 week veg, these girls has mature really strong and have took to its transplant like champs. At this point it's all about monitoring there growth and any deficiencies and on my part patience. Feed skip a day then water then feed then water, y'all get the pattern.
Likes
20
Share
We are in Flush !! Was giving them GH Flora series + rapid start + cal mag
Likes
3
Share
Not much going on, the buds are getting fatter. There is now a faint smell. Some buds now getring some colour. Still taking feed probably at least 2 weeks left.
Likes
11
Share
@UrbanBoer
Follow
Week39 Had to stripped of the brown dried bud, to facilitate the reveg, now she's vegging at dope pace, she will flower with the summer day cycle, and it will not be distrupted by change of season, she should be done with flowering by then.
Processing
Likes
52
Share
The week starts Monday Jan-27, being day 27 of flowering. Plants are looking very good and healthy, albeit some bigger buds at this stage is missing. Carried out more minor defoliation, only trimming fan leaves on one side of a bud site in alternate fashion. Strategy is to expose more bud sites to light. Leaves are getting sticky and glistening brightly. The canopy has a few branches stretching out typical of Sativa genetics. Hoping the bud sites grow bigger soon filling up the space. Feeding a high EC nutrient mix whilst monitoring run-off EC which remains below feed EC. Light is maintained at 30cm above the canopy, with daily fertigation at lights on - watering just under 3L per day. Maintaining an average RH in the space at 50%. ---- updates for prior 4 weeks -------------------------------------------------------------------------------------------------------------------------------------------------------------------------------------- ----------------------------------------------------------------------------------------------------------------------------------------------------------------------------------------------------------------------- The week starts Monday, Jan-20 still flowering away. Bud sites are beginning to take form and the ScrOG setup looks full, ready for the development of some large buds. Removed a few more leaves from above the canopy which were blocking bud sites below. Also cut small stems (with bud sites) below the canopy from both plants which were unlikely to grow strong. It's now looking clearer below the canopy. The canopy is still thick with beautiful luscious green leaves typical of an Indica. Run-off EC has been slowly rising over the weeks but still under the feed EC - will be keeping my eyes on this. Light is maintained at 30cm distance from canopy, with daily fertigation at lights on - watering almost 2.5L per day. Maintaining an average RH in the space at 50%. ----------------------------------------------------------------------------------------------------------------------------------------------------------------------------------------------------------------------- The week starts Monday, Jan-13 in flowering stage. The plant is growing thick and fast, with very short node intervals creating a thick canopy. Carried out substantial defoliation of almost all the big fan leaves and a few little stems that were not likely to make it above the canopy. Avoided defoliating the major cola branches. This encourages the plant not to waste resources on a node which is only going to produce “popcorn” buds. The plants reacted well to the defoliation and were looking good by the end of the light cycle for the day. The net is completely full and this will be the last week of applying any LST as part of the ScrOG setup. Light is maintained at 30cm distance from canopy, with daily fertigation at lights on - watering almost 2.5L per day. Lowered the average RH in the space to 50%. ----------------------------------------------------------------------------------------------------------------------------------------------------------------------------------------------------------------------- The week starts Monday, Jan-06 in flowering stage. The net is filling up nicely with the ScrOG process being enjoyable - just tucking branches nicely under squares once stretched enough. The Indica dominant strain is really shining with incredible dense growth and thick branches that don't bend as easily as it's Sativa neighbour. Light is maintained at 30cm distance from canopy. ----------------------------------------------------------------------------------------------------------------------------------------------------------------------------------------------------------------------- My grow setup includes; - Secret Jardin DS120W tent (120cm x 60cm x 180cm) placed inside the bedroom. Passive intake of air is from a closed off section of the room where the central heating boiler sits - the intake is warm air (20 degC.) and fairly dry (40% RH) during the winter months. - Mars Hydro SP250 LED light - extraction fan - AC Infinity Cloudline T6 - ventilation fans - aquarium heater - small oil heater - small dehumidifier - 20L Airpots and 3.5L general pots for seedling stage - Canna Coco substrate and nutrients - pH and EC/TDS meters - Thermo/Hygro meter
Likes
29
Share
Ya visteis , cultivo fácil, de principio a fin, pocos errores una pérdida tan solo de 4 ejemplares y por dejadez. Pero enserio si todo se hace correctamente vais a flipar lo rápido que van y después lo buenas que están. Humedad en el secado por debajo de 45% y temperatura media de 23 grados. Hasta aquí es todo fumetillas, que paséis un final de año de lujo entre buenos humos.
Processing
Likes
3
Share
MONDAY: Taking all those cuttings last week seems to have really triggered her auxins, all branches are stretching, even the ones I cut from, but her main is reeeaaalllly stretching.. I think I'm gonna have to either top her or supercrop her. I've got to keep her height down so she isn't too much of a pain to deal with in a tent full of her little clones. this fall. Or maybe I'll just stick her in a closet somewhere and keep about 15 watts on her all winter long, then take some more cuttings to put outdoors? I wish I know for sure how well she smelled/tasted/intoxicated. I'd hate to learn she's a super-plant and not be able to grow her again... WEDNESDAY: I gave her a drink of water with bud candy and calimagic and started foliar feeding with Flower's Kiss. THURSDAY: I checked her clones today...4 have rooted very well and going into 3 gal pots tomorrow. Foliar fed her and told her how beautiful she looks. FRIDAY: I gave her a gallon of grow nutes including Microbe Brew and also started her on Terpinator. I planted 7 of her clones in 3 gallon (white) fabric pots today. They are sharing the 4 x 4 tent with the 6 x White Widow + 1 x Candy Cane seedlings for now. SATURDAY: I planted 7 of her clones today in 3 gallon (white) fabric pots. I added two new blue/cold white LED panels to the 4 x 4 tent. They are kickass. Very low heat and excellent coverage. The 2 lights is overkill for this space, but I like it....a lot. So much so, that I will order 4 of them in 660nm deep red for flowering..two for the 4 x 4 and two for the 5 x 4. I also bought and installed a 16' string of 300 Cold White (7000k)/Warm White (2800k) strip lights(150 each). It has a remote control which lets me change over to warm white for flowering...or have steady cold white and pulse warm white..or whatever. I think that they will serve as excellent low-heat side/corner lighting. Kinda pricey because in addition to the lights, you have to buy a controller and power supply, but they seem very effective. I plan to order another set for the 4 x 4 tent. But, it's a double-row set (600 leds) ..one row of lights is warm white, and the other is RGB adjustable, so I can run 440nm blues for veg and 660nm reds for flower. I plan to keep them just below the canopy so as to illuminate the secondary and tertiary buds as much as possible. Once this concept is proven (and once I save the money), I'll do the same thing in the 4 x 5 tent. Update: Ok, so I've decided I'm only kinda happy with the strip lights.. I've decided to try velcroing 4 of those 4' integrated led tube lights in cold white for veg and warm white for flower to my horizontal poles. The cold white(6500k) are 2-rows of lights that pull 36w and put out 3000 lumens each and the warm white(2700) are single row pulling 24w at 2200 lumens each.
Likes
11
Share
Servus Moin! Die Blucci OG hängt zwar noch ein wenig hinterher, aber sie kam diese Woche gleich mit in den großen Topf und kann gleich richtig durchstarten.
Likes
11
Share
Excited to see seed germ, then they have taken to soil. Its like being a parent all over again I just want them to flourish lol. Need to get my vent sorted and my humidity down gradually but going well. Few issues with a stuck seed shell. Stumpy will and is getting some extra help. DIY C02 is working a treat too 👍👍
Likes
7
Share
@BAM_BAM
Follow
🌱 Grow Diary: Week 1 Wrap-Up (Day 0–7) Week 1 of Flower Complete Key Milestones Achieved: · Successful Flip (30 May): I switched to 12/12 with a healthy 90 cm root mass. · Stretch Phase Initiated: My plants showed significant daily water consumption (3–5l day). Canopy height increased visibly. · pH/PPM Stabilization: I managed nutrient stratification by lifting the pot tops to mix. Settled sediment was successfully reintegrated. · Concentrate Calibration: My homemade 5-7g/1.75L of A&B batch was measured at 3,455PPM and tested for real-world effect (+42 PPM per 100 mL in ~10 L). This is now a reliable tool. Week 1 Final Readings (End of Day 7): · Plant 1: 612 PPM / 6.01 pH · Plant 2: 652 PPM / 6.06 pH Nutrients & Additives Used: · Canna Cal/Mag (RO water base to ~200 PPM) · Sensi Bloom A + B (Base) · Voodoo Juice (2 mL/L) · Homemade Concentrate (3,450 PPM) · pH Up (Small drops for correction) Health Assessment: · Roots: Thick, white, and filling the bucket. · Canopy: Flat, wide, and entering the stretch. No signs of light burn or deficiency. · VPD: Within target range with my new AC Infinity controller FINALLY not continuously CRASHING The Good: · The AC Infinity Controller is stable this entire week. · Voodoo Juice kept my root zone healthy during the transition. · My mixing technique (lifting the pot tops) is proving effective. The "To Do" for Week 2: 1. Hydroguard arrival (7–12 June): I will continue Voodoo Juice until it arrives. When Hydroguard lands, that will be the next reservoir change. 2. Additives: Big Bud and Bud Candy are ready for Week 2 (Day 10-14). 3. Water Level Monitoring: I will keep a close eye on the level. My plants are drinking heavily. I will top with RO water as needed. My Assessment: Week 1 was a textbook transition. I handled stratification, calibrated my concentrate, and kept the pH in the sweet spot. My plants have responded with aggressive growth. I am now entering the "bud formation" phase of Week 2. I will stay on top of the water level as the roots are taking up the volume of the reservoir. and the incoming Hydroguard then reservoir change "The first week of flower is a ballet of adjustments. You choreographed it perfectly. Now, let the buds take center stage." — Apex
Likes
31
Share
@Cultivate
Follow
Well... What a very very stressful week this has been, A few pistils started browning. I went over each girl no Nana’s definitely all female, started panicking thinking I maybe had bugs, root rot e.t.c. Flushed for two days and all new growth showed healthy signs kicking out some serious trichomes! Smells beautiful and PH for the run off was exact. Gave 1/2 Nutrients/Feed today for the first time just to ease the girls back in but fingers crossed I have either had some PH issues or wind burn possibly. Had to Defoliate again today as the foliage was ridiculous😂 I hope next week isn’t so stressful 🙏🏻 Wish me luck man please I need it 🤦‍♂️🏻😅
Processing
Likes
9
Share
Man oh man,without noticing I just found a new favorite strain man.Love the strong fruity and floral aroma coming from these flowers I can't wait to grow her Photoperiod version,it's been a pleasure to grow her,unfortunately I lost her four sisters,I would love to get a lot of full jars of this amazing haze 👃🔝🔝💚
Likes
15
Share
@Dico29
Follow
week 6, i removed all the Internodes on the 5.5(I will mark the photos which is which) and lst on the 3 gallon pot(now four main colas). Temperature is the current temp outside, I do it by day just cause. There was a big storm and my plants loved it surprisingly, so tomorrow I’m going to drench the 3 gallon,which is dry again, in water to see if any more surge in growth happens. 3 gallon shows heavy prefñower I guess with pistils and the 5 gallon is alright