
Likes
Comments
Share


@AmokNewb
Follow
Day 22: Well we made it to the beginning of week 4! Who would of thunk! So we are starting week 4 on a good foot. No issues at this time and growing really well. Still such a squat plant. The nodes spacing is only like a half inch apart. WTH 🤷♂️🏻 Other than that the PH in my reservoir is dropping, usually it rises a bit everyday. I will have to remedy that before my midday feeding. I mean it was at 5.85-5.9PH so not out of whack but I was hoping for a drift of 5.9-61ish before I had to do a top off or change of the solution. Did some more light LST and leaf tucking last night before bed and will probably have to do more this afternoon.
Day 23: River and Clara are growing really fast now. However I did notice the darkening of some of the new growth tips and a potential N burn. I believe this to be from a faulty PH tester I bought from nutetools dot com. Junk! So back to my old cheap meter. I will have to empty and clean out my reservoir today and make some more sauce for my plants so that I know it is PH’d correctly. What a pain in the ass. I am going to have a chat with them this afternoon for perhaps a replacement. Other than that onward and upward.
Day 24: Not a whole lot to say today. Filled the reservoir yesterday. Sat and tried to figure out how to LST these super squat plants. I am thinking a couple haircuts are in order today. I think this will be beneficial to the little bud site that are partiallly blocked, but also for me to see what the structure looks like to get a better idea what I am working with 🤪 I am also thinking of upping my watering schedule to 4 times a day during lights on. I feel they are starting to drink a lot more and are probably just about to go into flowering mode.
Day 24 Update:
So I took the plunge and did some major defoliation and retied up all the LST work I did previously. They look so pissed off at me now… lmao. 🤬 You can see the before pics in my previous post from this morning. Also posting pics of how tiny my node spacing is..
Day 25 06/25/2021 - Today should be pretty hands off. Just letting them do their thing after the harsh treatment they got from me yesterday. (Defoliation and LST). I’m assuming they will need a couple days to recover, but, I will say they do look a bit less pissed off today than yesterday. Still no signs of sex. the tops are a nice bright green and the leaves are starting to deform like it really wants to flower. Hopefully, I didn’t screw it up by defoliating. The wait for flower continues.
Day 26: These plants have bounced back awesomely after my heavy handed defoliation and LST. Putting on an inch a day and growing faster by the minute. They must have loved my nutrient ratio last feeding. I am going to do the same mix again today to refill the reservoir. Speaking of reservoir and watering… I think I am watering a bit munch per feeding as I am going through 5-6 gallons every 2-3 days for two plants. So I think today I am going to finally go to a 4 feed per day schedule and drop the time from 1min 10secs to 50secs or so. They should realistically only be getting a gallon a day a piece and still get good runoff to avoid any salt buildup. Have a 4inch and 6inch stretch a scrog nets ordered as well. Other than all that I think this first grow is going great so far!
Day 27: Another day of mostly hands off and just watching the stretch. If my scrog nets come today I will hang the first one and that is about it today. Last night however, I did find a few pistils on Clara the smaller of the two and the no longer late bloomer. I also got my new Milwaukee MW804 4in1 ph/ec/tds/temp pen. Excited to have a reliable testing tool. One more grow day in the books! Cheers!
Day 28: Well last day of week four. I was really hoping it would have started flowering by now, but we will hope for week 5. I got my scrog nets late yesterday afternoon and I put the first 4” net up. As you can probably see by the pics I really have no clue what I am doing. Also these plants are so so squat and compact I almost wish I had a 2” net. But, I think they are in stretch mode so we will see how that might effect my ability to a rig these a bit better. My plans for today are to do a quick clean and rinse of the reservoir and refill with a new batch of mutes I mixed up in the middle of the night last night. Then just let them grow I suppose. Not much else for me to do. 🤷♂️🏻Now on to week 5 tomorrow and continue to have a good grow. Cheers! 🥃


Likes
7
Share


@Nikkov
Follow
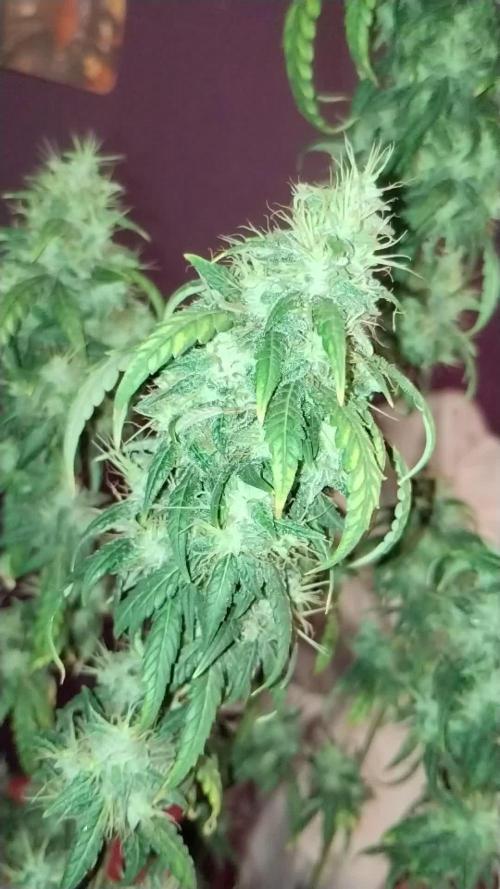
What's up guys
let's go to a week passing by, right?
and I'm happy that they have resined a lot, it's a shame they didn't develop better but due to the heat and low humidity this cycle they didn't grow much but I'm already improving in the next cycle and we'll see what happens. =D
Likes
16
Share


@JohnnyBlaz3
Follow
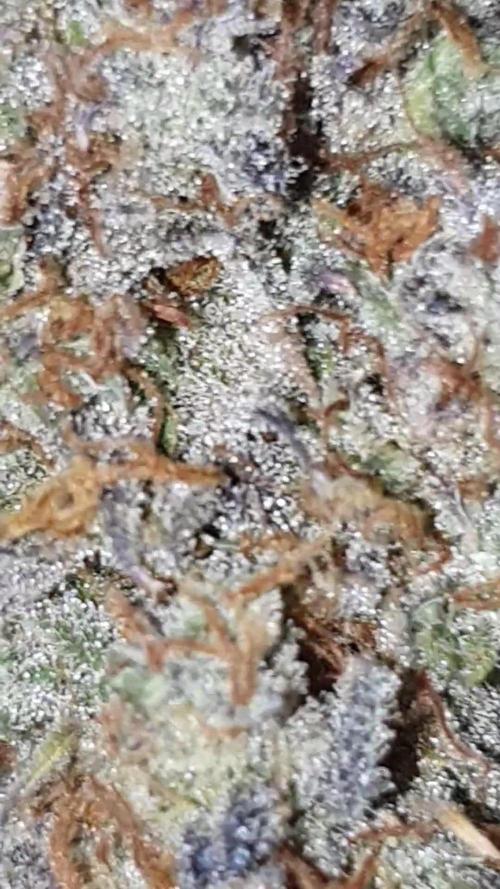
CLOSE!!!!!! she is absolutely friggin caked with trichs!!!! just need her to plump up a little so we got some weight to her but she definelty looks potent af!!!!! only issue this run really was the stretching. I have a theory about why this happened and will test it out next crop, got the next ladies germed up already. I think removing the third fan allowed it to be to calm in there and the ladies to stretch more, this is just a theory i'll test out. If i had the space, i wouldnt mind the stretch but being in my little 5.5 x 5.5 tent i cant waste any space!!! am i going to break the tent record of just under 800 grams dried? probably not lol but lets hope for 600+

Likes
33
Share


@GreenAutoConsumo
Follow
Como ya he dicho, siempre ofrece resultados increíbles, la he cultivado tanto en interior como en exterior y siempre sale increíble


Likes
20
Share


@THcHunteR23
Follow
Elle va bien . Rien de trop compliqué avec Gaïa Green et environ 3 l d’eau à tout les 2 3 jours…

Likes
9
Share


@HIAZ_urbanbudfarmer
Follow
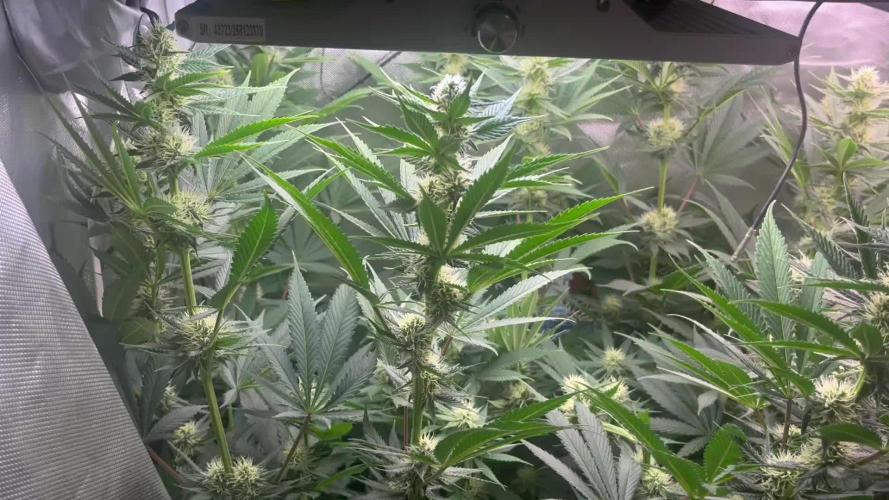
Plant is going well has about 24 colas starting to develop budlets. Light could be a lot closer but can't lower it due to height of other plants. Is currently in 3rd week of flower
Likes
8
Share

@MrsHinduGod
Follow
wow look at dat!! da plant is in da fade stage!!! dis is a little early i think!!! der is a few things i could do!!! after pondering i decided to just let her fade!!!!
Processing
Likes
3
Share


@420cfm
Follow
Week 8! Home stretch now. I'm seeing a few nanners so I'm tempted to pull this week instead of next. Will give them a few days to see how they do with the new reservoir refill and go from there! Lots of crystal build up even if the nanners kick my butt.
Likes
6
Share

@Smev1337
Follow
This is the end of this journey with my first grow and it turned out pretty good for an newbie grower like me, i let the plant cure properly also to get the maximum out of the terps 😋 i'm really happy with the grow and will continue to grow more and more 😈


Processing
Likes
37
Share


@MG2009
Follow
07/12/2018
All looking healthy and happy,females everyone!. In pre-flower 15.03 min of light by August 12, it will be down to 14 hours of light an in flower.
07/15/2018 Uploaded a couple videos enjoy
Likes
3
Share


@Bluemels
Follow
Tag 18: Umzug in eine 2. Growbox.
Tag 19: Die Sorte scheint recht groß zu werden, ich behalte daher nur eine Pflanze.
Tag 20: Die Pflanze ist in die Blüte gegangen.
Processing
Likes
10
Share


@mkrmkr
Follow
Completing the fourth week, pruning "topping" performed on 05/30/20, apparently the plants are fine.
Plant 1 - Completing the fifth week of life.
Plant 2 - Completing the fourth week of life.
Plant 3 - Completing the fourth week of life.
Plant 4 - Completing the third week of life.
Pot transplant and LST performed today 06/06/20, let's see how they will behave.


Likes
26
Share


@CanarianGrow92
Follow
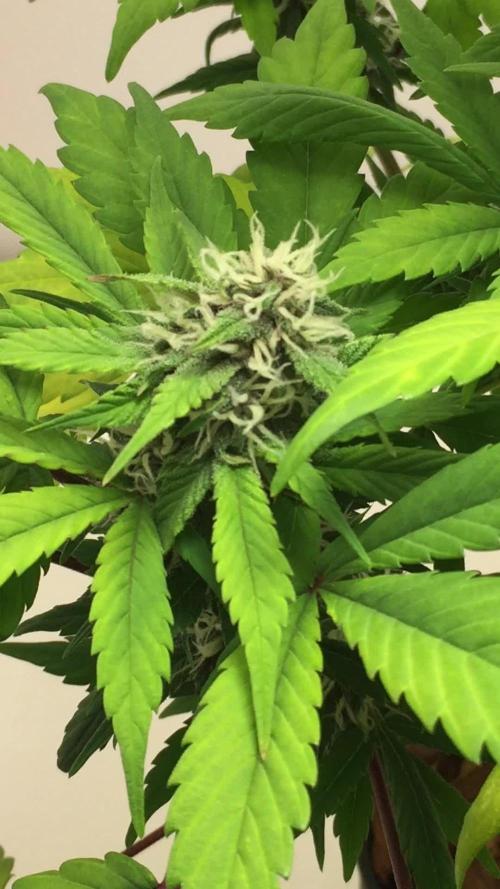
Oreoz from the super sativa seed club is a bomb!!
This plants has all the checks on my list. Potency, size, terpenes, trichomes, she has it all...
The buds are extremely potent, with a very nice structure, we did some defoliation and the lower buds got also a decent size. The terpenes observed are like chocolate, with hints of coffee but a nice creamy and gassy background. Extremely potent and totally covered in trichomes buds, amazing...

Likes
4
Share

@MADMANk
Follow
Cant wait to smoke this Sour D! Still have 2 other phenos in flower, drying this in a dry tent currently 55rh, will be bumping rh too 60 after 2/3 days
Processing
Likes
16
Share


@ShowsWorld
Follow
This is my first time growing a kush strain. The growth is explosive. Short and stocky build on this pheno type. I hoping for a great harvest with a tasteful nightcap kind of smoke.

Likes
3
Share

@PlantMike
Follow
Check these forming buds out this week on BMR. These look like some of the biggest buds I will have ever grown. Not a ton of smell yet, what terpenes are there seem a bit woody with an underlying sweetness. Continuing with the sugar sources for the microbial life, the plants aren't showing any signs of deficiency so I'm just letting them ride at this point. Let's keep swelling!
