


Likes
Comments
Share


@agustinnnv
Follow
Un hermoso cultivo recuperado de algunas deficiencias, un armazón bastante bueno e increíble calidad de cogollos. Una planta que tuvo 121 de vida. Tuvo 60 días de flora

Likes
8
Share


@Fa5Venom
Follow
End week 3 plants still looking healthy. Removed couple fan leaves blocking bud sites. Temps getting hot outside in spring so tent temps have gone up but still in range to thrive. Humidity is mostly the easiest to control

Likes
17
Share


@m0use
Follow
This was a fun project that was a few years in the making and a year later to see if they would last a season for this upload to happen. Before any of this I would bike aorund town grabbing up all the old Ikea solid pine bed slats that I could find and storing them in the basement. I have a lot of wood down there, any size worked as long as I have enough of them. The hot days to find them were the first and last of the months because that's when people where moving in/out. I also kept an eye on the free section on local online classifieds as well. The entire purpose of this was to recycle as much off the streets as I could before buying anything to finalize the project. In the end I only bought sealer, screws and some takeaway/beers. All the wood was 100% free and salvaged off the streets of Toronto saving it from the dumpster bin.
After collecting all the slats for about 2 years I was playing aorund with them on how I wanted to make this work. I had previously done a little project like this before but I messed it up and the boxes where crap. did not last longer then 2 seasons, they where thin and shallow as well could not grow much of anything in them. I Was talking to my friend who is renovating their house and we brainstormed some ideas on the boxes, I found some designs I liked online and said lets make something like this out of what I have here. We tossed out a few of the design features when looking at them as it would have been wasted wood and extra work not needed. If I had more wood them maybe it could have been an option but simple was the name of the game. They taught me what I needed to know like how the miter saw and sander worked, plus all the other tools I was using. They did help out with a table saw and creating the triangle support joints in the corners, They used some pine left overs they had while making a staircase indoors. I did not feel up to the task of using a table saw given all the relatives I know who have lost a finger to them.
In the end we decided the design would be three boards high and take an alternating pattern on corners. layer one short, layer 2 long, layer 3 short. Went with a galvanized and painted deck screw so it can take the weathering. Ran into some problems like making everything level as some of the boards were warped and other ones had undesired aspects like knots and tacky sticker goo I could not remove. So I used them for the base that will not been seen so much. Clamped everything down and called it a day.
Once it was all done and over with, I then brought them back home from my buddies work garage and started to seal them. I went with a boiled linseed oil as its a food safe option should the wood degrade into the soil I will plant in them. I will need to reapply it to the boxes year after year but the main coat is the most important one and I put it on 3 layers with a good dry in between coats. the inside of the boxes that where coated did not degrade at all as the sun did not hit them so it will not need a new coat just the outside. Overall the end result was very impressive for myself, I've never taken a woodworking class ever and It was a near perfect outcome for me. Heavy Duty Planter Boxes for all my gardening needs. I made a last min decision to add in a plastic liner to preserve the wood even longer and stapled that into the frame. it has held up quite well and may need replacing end of 2nd or 3rd year out in the sun. Used a thick moisture wrap plastic with UV protectors in its formula.
Lets see what I can grow in them this year!
m0use's haus of projects - garden box edition
Likes
3
Share


@Trinidad
Follow
Day 70. She is looking good. Coming along nicely. Frosty buds. Can't wait to smoke this one.

Likes
5
Share


@Pureleelove
Follow
This was an amazing experience for my first grow. Was super unsure of what I was going to yield, but I think 27 grams is a realistic harvest and Im looking forward to see if I can get bit larger of a yield on the next run. I want to try main-lining, see for better energy distribution and more equal bud growth. Also investment into a proper reflector and possibly enclosed space.
Note- I trimmed my plant the night before harvest morning. I removed than fan leaves to start, and then proceeded to trim the plant. I pulled out a lot of the leaves with no frost by hand. The sugar leaves had so much crystal on it I thought I would leave the smaller ones on the bud. I gave it a light trim, and used all the trim to make Isopropyl Alcahol (99%) based extract. Got about 1 gram from the run. I also had a nice little ball of finger charas from the trimming.
I harvested it in the morning at about 04:30 am before the light cycle triggered at 7am. She hung and dried for about a week, where I then chopped her into buds. She cured for 2 weeks before i started smoking.
Ask anything you want to know! Or if I can be more clear on any areas of the grow!
One Love!

Likes
167
Share

@Schnabeldino
Follow
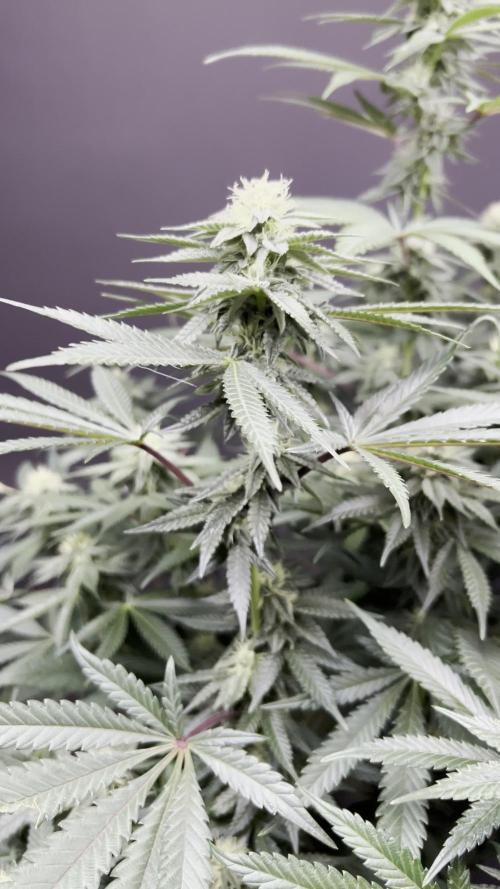
📅 Week 11 | 🗓️ Day 71–77 — 3rd week of flowering
Biscotti Gelato 🍪🍨 – elegant, fragrant, stacking and frosting up beautifully
🔸 The stretch has clearly settled — she’s holding a sturdy, balanced canopy with strong verticals and consistent cola height. Buds are now clearly formed clusters, each topped with thick tufts of bright white pistils. Calyxes are beginning to swell and stack neatly, and there’s a noticeable layer of early trichome sparkle spreading over the sugar leaves.
🔸 The foliage remains deep, lush green, with broad, slightly glossy leaves showing no signs of stress. The overall posture is confident and vigorous — she’s thriving in her rhythm. Those slightly purple petioles add a nice touch of personality under the lights.
🔸 Watering & care: Keeping the same steady routine — moist but not soaked, around 30% soil moisture before watering. Airflow through the canopy looks solid, and humidity is still in a safe zone for mid-flower. I'm still at half the amount specified for fertilizer.
📈 Current Conditions
🌡️ Day: 27 °C
🌡️ Night: 18 °C
💨 Humidity: 59 %
🔦 PPFD: 800–900 µmol (12/12 light cycle)
🛠️ Setup
💡 Cosmos 200 W
⛺ Tent: 120 × 120 × 180 cm
🍯 Pots: 18 L plastic pots
🌱 Medium: Bio-Bizz Light Mix
💊 Nutrients: Advanced Nutrients ≈ ½ of the schedule)
💧 Water: Tap water (0.5 EC)
Likes
23
Share


@adam_pawloski87
Follow
Today is day 71 for these ladies and they are doing just amazing! Stacking up densely with a Very sweet smell , I still get hints of vanilla ! Not to much longer to go these girls few more weeks an they should be done! Stay tuned for next week ! ✌️
Likes
9
Share


@Hypnogrow
Follow
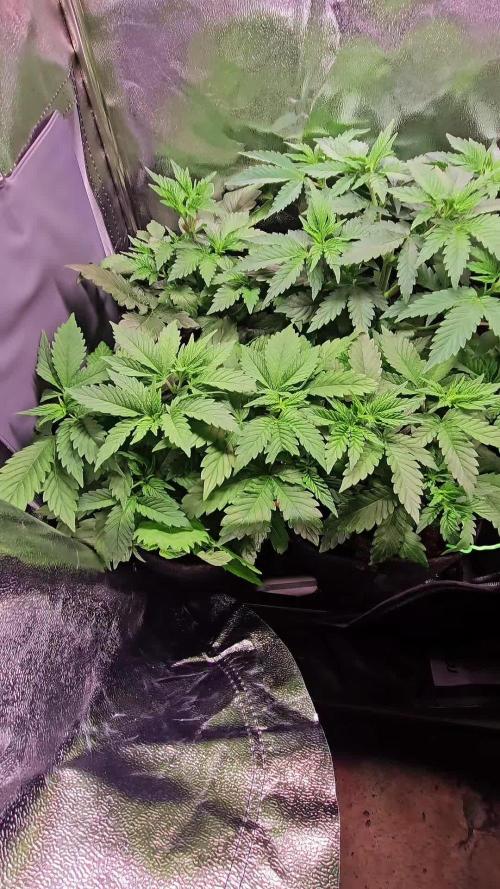
Recovery week. Last week everything went to hell this week everything is looking up. Squanch Queen is turning into my favorite one of the bunch. She is super resilient and bounced back quickly, the Skywalker and Quarter Pounder are both going to finish early due to all the stresses and stunting early on in the grow. Squanch Queen looks to be going 9 to 10 weeks inspite of all the issues. Definitely a good strain from Night Owl to pick up if your a beginner, much more forgiving. I definitely want to try the Skywalker again with a better setup. Ph runoff is looking much much better.



Likes
8
Share


@Sobreruedas
Follow
This week the focus was mainly on LST.
I continued guiding and adjusting the branches to keep everything level and well structured, helping the plant maintain a clean and symmetrical shape.
Apart from that, everything remains the same with no major changes. The plant is responding well and recovering nicely from the previous training, so I’m just letting her grow and settle in 🌿💪

Likes
17
Share


@Naujas
Follow
She is much prettier than she was a week ago :) I remembered that I have my first grow light, which is more compact and it will give me more space, so I changed my light, now the girl's side branches get light too:) I add a lot of video memes, because I really want to win Iphone16 pro ;) and those who don't take risks don't drink champagne:) good luck to everyone.
Likes
39
Share


@GreenBloodGrower
Follow
Saludos de nuevo compañeros! Siento el retraso en actualizar, vamos a ponernos al día!!
Entrando en la semana 3 comienzan a verse algunas necesidades, las plantas necesitan un trasplante y mas intensidad lumínica. pronto se efectuara el cambio y comienzo a prepararlas. ✊
16-10-2018 Riego con pulverizador en tierra, uso 1mlxL de Voodoo, 1mlxL de B-52 1mlxL de Sensi Grow A+B a EC 0.9
19-10-2018 Riego con pulverizador y Sensizym de Advanced Nutrient 2mlxL, con abundante agua. 350ml por planta.
21-10-2018 riego solo agua a PH 6.
Observaciones: el día 19 aprecio que algunas plantas muestran carencias y algunas algún posible bloqueo, por miedo a no haber echo las cosas bien desde el principio, decido dar un lavado de encimas a las raíces con Sensizym y dar descanso de nutrientes hasta finalizar la semana 3.
Vamos a por la 4ª semana familia!
Muchas gracias por el apoyo, espero poder dar el máximo de información posible para todos! 👊👽
---
Greetings again, comrades! I feel the delay in updating, let's get up to date!
Entering week 3 begin to see some needs, plants need a transplant and more light intensity. The change will be made soon and I begin to prepare them. ✊
10-16-2018 Irrigation with soil sprayer, use 1mlxL of Voodoo, 1mlxL of B-52 1mlxL of Sensi Grow A + B to EC 0.9
10-19-2018 Irrigation with spray and Sensizym of Advanced Nutrient 2mlxL, with plenty of water. 350ml per plant.
10-21-2018 irrigation only water at PH 6.
Observations: the 19th day I appreciate that some plants show deficiencies and some possible blockage, for fear of not having done well from the beginning, I decided to wash the roots with Sensizym and give rest of nutrients until the end of the week 3.
Let's go for the 4th week family!
Thank you very much for the support, I hope to give as much information as possible to all! 👊👽


Likes
20
Share


@GanjagrowingGal
Follow
Get my scope tomorrow to find out finally what is going on with the trichomes!

Likes
14
Share

@all_about_420
Follow
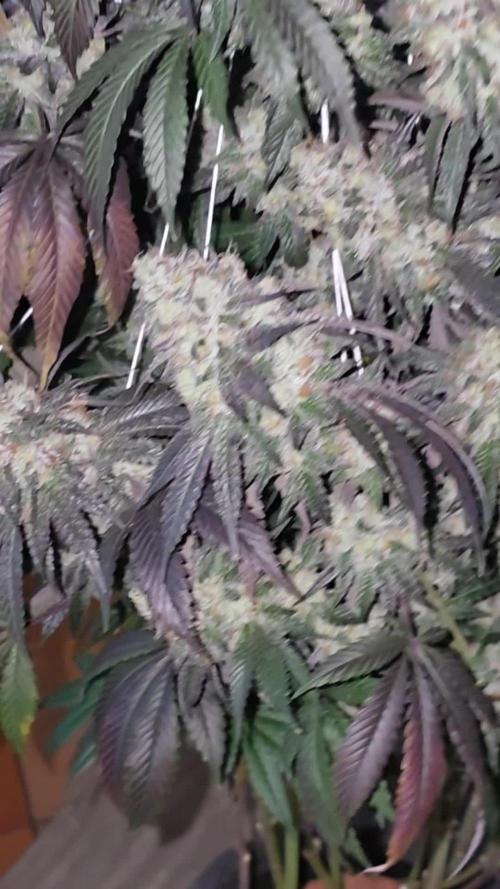
Der Erntetag markiert den beeindruckenden Abschluss für diese Naughty Dawg. Wie deutlich zu sehen ist, haben die Blüten eine solche Masse entwickelt, dass die installierte Stützkonstruktion bis zur letzten Minute notwendig war, um die schweren Zweige zu stabilisieren. Die Pflanze zeigt eine exzellente Struktur mit voll besetzten, kompakten Fruchtständen.
Besonders hervorzuheben ist der extreme Besatz mit Trichomen, der in den Nahaufnahmen fast wie eine glitzernde Kristallschicht wirkt. Passend zur Abstammung der Genetik verströmt die Lady nun ihren markanten, stechenden Geruch: Ein schweres, chemisch-dieseliges Aroma, das von einer erdigen Würze und einer dezenten, aber präsenten Note von feuchtem Waldboden begleitet wird – typisch für ein hochwertiges „Dawg“-Profil.
Diese Kombination aus visueller Brillanz und der intensiven Geruchskulisse macht das Endergebnis zu einem echten Highlight für jeden Enthusiasten. Ein absolut gelungener Run, der nun in die Trocknung geht.
Processing
Likes
17
Share


Likes
73
Share


@Herbz_Unkraut
Follow
1 plant was very ripe, 1 plant was almost perfect to harvest and the 3rd could take another 1-2 weeks...but it was end of 10th week of flower and i had to go on vacation, so i perhaps choped 1 plant abit too early....still awesome result!




Likes
30
Share


@zGucciCameToGrow
Follow
Все моем малышек финишом и харвим!
мне наконец то пришла моя лампа!!! ура товарищи! да будут камни!!Ё!!


Likes
12
Share


@RookieGrowerTH
Follow
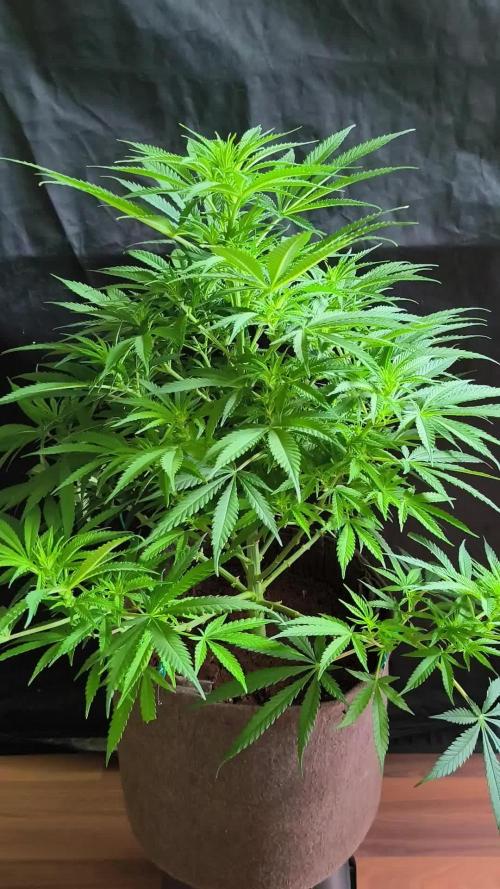
Week 4 of the Veg Stage ( 29 Aug - 4 Sep 22 )
- 29 Aug 22 LST with stalk sticks
- 3 Sep 22 - Defoliation and 2nd Topped
- 4 Sep 22 - Foliar sprayed B1, Seaweed Extract, Potassium Silicate, and IPM with T-Rex Shield
Water on Monday, Wednesday, Friday

Likes
17
Share


@Targona
Follow
02.10.2022 - 56 days since my little girl sprouted from seeds🌱
The fourth week of flowering of my Orange Sherbet 🍨🍨🍨
Nutrients:
Jungle Indabox - I serve the same as last week
Advanced Nutrientiens - Bud Candy - carbohydrates for my plants 🍭🍭
Building Stimulators 🌼🌼🌼:
Jungle Indabox Environ X
Advanced Nutrientiens - Big Bud - I applied this week for the last time
ATAMI - ATA CALMAG - When growing under LED lights it is recommended to use Calmag and Atami is an excellent brand
The plants tolerate the nutrients well, some of the lower leaves showed slight signs of burning, they turned a little yellow and the tips of the leaves were brown 🍃🍃
Therefore, I will continue to use only one Bud Stimulator and that - Jungle Indabox Environ X, I will leave Big Bud from Advanced Nutrientiens for other plants.
Training:
Defoliation: I still remove the large and lower leaves so that they do not shade themselves 🌞🌞
I'm not planning a bigger defoliation until next week, the girls are a little leafy, but not enough to need more trimming 🌴🌴
General: The girl is already blooming strongly, dense buds are forming 🌸🌸, the branches reach the same height, exactly as I wanted 👍 At the moment it has more leaves than I would like, but I will do more defoliation later, as I wrote 🍃
I will adjust the nutrients from the next watering, I will leave the only bud stimulator 🏵️
🏵️
The girl no longer grows tall, she puts all her strength and energy into her buds 🌸
Light: Believe - the best light of sponsor Mars Hydro TS 1000 💡💡
Smell: The whole box already smells a lot, the smells mix and flow out of the box, when I open the tent, I get a strong smell of flowering cannabis 🍇🍊
Thanks for your opinions, smile and fun with my diary, you can follow me on Twitter 🐦: @targona666
See you soon 😍