


Likes
Comments
Share


@Grower2021253
Follow
This diary is going to be a day by day if I keep up. Unless I am on vacation I will take pictures every day.
Sorry for some of the potato quality pics earlier on. After week 2 or so I'm going to only take pics with my camera flash.
The first image is about a day after sprouting. No pictures for the pineapple for the first week as I wasn't sure if it was going to grow or perish. It must have had a mild root infection but it has won the battle against it as of now and is doubling in size daily after a week of not doing much.
I am using a uv light in the reservoir. My method is using 3-D printer root sprayers to pump water directly to the roots, I also have an air stone in each 5 gallon bucket. I have an overflow on each bucket to drain the water back into the reservoir. I positioned the buckets on top of chairs to let gravity do its thing there. Humidity has been fine lately so I am not using the dehumidifier. Future grows I will get a controller to turn the dehumidifier on if needed. I wanted to clone these but realized it's not good to do with autoflowers so I have ordered regular feminized purple haze and cbd blueberry for my next grow. Stay tuned!

Likes
10
Share


Likes
6
Share


@IamCy
Follow
Week 3. This is where the fun begins. The smell is amazing.
The stretch is crazy and the stems are stiff like bamboo. There's no loss in terps. They're actually getting a lot stronger!!
Likes
25
Share


@pifflestikkz
Follow
Day 22
25/07/24 Thursday
Still no Feed/water since Tuesday.
Been a humid and overcast two days so not as much evaporation as normal.
All plants happy and healthy 💚
Video updates
Day 23
26/07/24 Friday
De-chlorinated watering pH 6 with 5ml calmag to 5L water.
Watered each with 250ml and had small run off.
I will continue to feed/water with small run offs to help prevent salt build ups.
Video update.
Day 26
29/07/24 Monday
Nice feed today, using de-chlorinated tap water pH 6.
They each had 300ml with small run off.
All looks incredibly happy and healthy!
The Auto Kabul that was mutated and twisted has pulled herself through and is just a bit shorter than the others.
Day 28
31/07/24 Wednesday
End of week😁
De-chlorinated water pH 6 today with Plagron pk13-14 5ml to 5L
Plagron power buds 5ml to 5L
Used 300ml of the 5L solution.
I will be using these on water days from now on as they are advised to be used every irrigation.
We'll see how they perform 💪💚


Likes
6
Share


@pzwags420
Follow
On day 3 -4 of 5 seeds have germinated!
On day 4 all 4 seedlings were fed 500 ppm veg nutes.
On day 5 seedlings were transplanted into 4" nursery pots with myco. I watered them in with 600 ppm of feed. Ppfd 450-500.

Likes
22
Share


@GoldenWeedGrower
Follow
D15/V13 - 07/09/23 - She's ok now, new home and lot of space 🏠
D16/V14 - 08/09/23 - I cutted the lower branches and leaves ✂️✂️
D17/V15 - 09/09/23 - Added a CO2 dispenser. The set up is ok 🛠️🛠️🛠️
D18/V16 - 10/09/23 - Added some nutes 🍗
D19/V17 - 11/09/23 - Waiting to start bending her down 🧠
D20/V18 - 12/09/23 - Added water 💦💦 and nutes 🍗🍗 - pH is too low, I added some pH+ 📒
D21/V19 - 13/09/23 - Started LST, one worker is bending her properly 🌿🌿🌿

Likes
27
Share


@Dunk_Junk
Follow
Last couple of weeks she's been affected by high tent temps, hence all her curled leaves 😓
She is also a big plant in her little 10L fabric pot. I've noticed fabric pots really do dry out faster than airpots. That is a good thing, but you have to watch her drying out too quickly also!
I think she'd make a monster plant in a 20L or 40L airpot.😍

Likes
517
Share


@Legendaryseedthumb
Follow
170g dried buds
Mars hydro TS-1000
Increase Yield & Crop Quality in Led Grow
Newest SMD Led technology provides the highest Par/Lumen output, makes you get 30% higher yield compare old led lights, can get up to 2.5g/watt yield.
Only 150 watts true output so you don't have to check your bill every month. 342 pcs LEDs, more scientifically and energy-efficient! Perfect for 3'x3' (100x100cm) veg stage and 2'x2' (60x60cm) bloom stage
https://www.instagram.com/marshydro_aliexpress2/
Peace & love - L.S.T🌟

Likes
3
Share

@PhinolaGreen
Follow
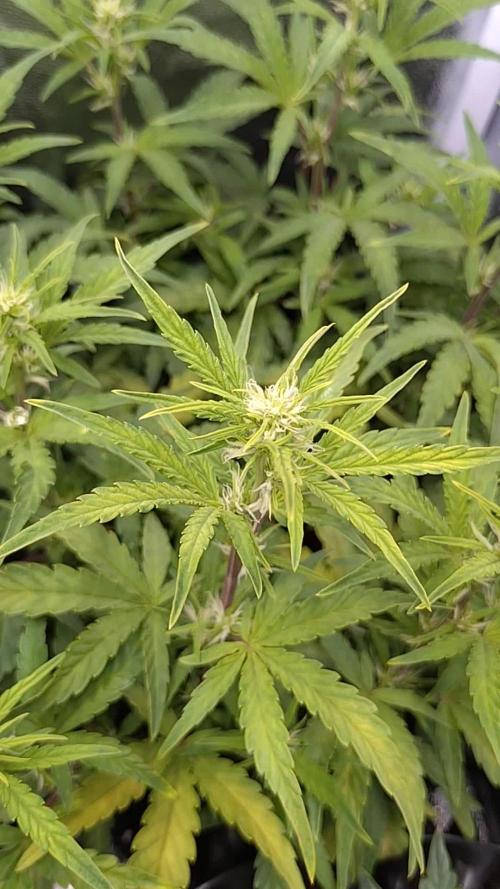
6. Woche
Das Mainlining ist abgeschlossen und jetzt darf sie sich auf die Blüte konzentrieren. Das Mainlining war etwas stressig für sie aber am Ende hat sie sich wie ein echter Champion durchgebissen 😉😊

Likes
148
Share


@BioBuds
Follow
Gorilla, gorilla, my problem child. The only one popping out of 5 but she is weaker than her roommates. She stays behind compared to them. But what can I do other than TLC, she has the best conditions, which are optimal in this grow room, also judging by the other two plants. Until I have a bigger operation, which in the current political climate, is not soon, where I can make mothers and clone them, breed my own strains, and root out runts like this, we do it like life. We play the hand as it is dealt to us and we love all our children the same... although this one is special.
So not a genderfluid Silverback yet, but it ain't over till the voluptuous lady sings. We shall nurse this little runt until adulthood, who knows she might surprise us, she should have the mighty Gorilla Glue Number Fouh genes in there somewhere. Now come on out here and show daddy what you're made of...
This week we spread out the leaves and branches, some leaf tucking and gentle LST, to prepare for some higher stress and super cropping today. Two days back we made the switch and set the lights to 12/12. Now the flowering stretch will begin, thus we bend the branches further outward in preparation for the canopy. When I do this I notice the branches are thick and sturdy, with no breakage at all unlike my previous grow, the gelato 33. I snapped some branches applying the super cropping and just normal bending with those. It seems like the fan (I didn't have a good option previous grow, hence the flimsier branches there) but also this lighting and soil regime are topnotch, asides from outdoor I haven't seen such lush bushiness yet, even on a more runt-like plant.
This MarsHydro SP3000 is still performing great, such controlled temperatures, such an ocean of light. I only wish I started growing with this earlier. Thanks again @MarsHydroLED for trusting us to test your mighty flagship light. It is so well made, it oozes quality, I just want to touch it every time (also to check if it stays cool) and it is just sexy, slender, and compared to my other 300 watt light, a completely different spectrum and clarity. If you are looking for new lights, look no further. At www.mars-hydro.com they have excellent and unbeatable deals on tent and light combinations where you practically get a tent for free, it is ridiculous.
I was afraid the light wouldn't cover the sides of my tent with my 4.5-foot space. Penny at MarsHydro had to laugh at this a bit, said not to worry. What an understatement. This light could signal to other galaxies. I sincerely recommend good sunglasses with this light.
Only thing I'm adding is an infrared light Sunshine found. With this I'm going to simulate sunrise and sunset and try to prevent stress by easing the light in and out, like in nature.
We are in flowering now, very excited to see what she will do here. What can she perform? Will she cover the net? Will she deliver gorgeous buds, like she is known to do? On these cliffhangers I hope you will tune in next week for more gorilla-related plantporn... go on... you know you want it.
Hug Bud!!


Likes
12
Share


@2SeedsToParadise
Follow
Some deficiencies or burn in bottom leaves but show goes on.Bout to hit the Jumanji weeks of upward growth
letzgetit
Likes
35
Share


@Nor_Cal_Kannabliss
Follow
Welp, These took a Bit longer than my Cream Cookies and still didn't fill out quite like I thought they would.. But they are still a very beautiful strain and a joy to have grown. They smell stronger and way more lovely than the cream cookies thou just a beautiful aroma
I'd really like to grow these again Indoors where I can control them easier. (Sadly they dried into wispy nothings and we turned them all into bubble hash)
#3 took the hit of some aphids and ended up in a frozen hash pile in our fridge along with two cream cookies from the run. It's frozen weight combined was 203g. *will update with dry*
Likes
16
Share


@HowtoBubatz
Follow
The cannabis plant is generally growing well and is progressing as expected during the flowering stage.
Despite the positive overall growth, brown spots have appeared on some of the leaves and I dont really know what it is.
While the appearance of brown spots is concerning, the overall health of the cannabis plant remains good. With careful monitoring and appropriate adjustments, the plant should continue to develop successfully.
It will be exciting to see how the plant progresses as it matures, even if its growth rate is somewhat slower than expected.


Likes
19
Share


Likes
147
Share


@MrJones
Follow
MrJones Black Berry OG
🔹🔹🔹🔹🔹🔹GOALS🔹🔹🔹🔹🔹🔹
🌞Drying Environment - 62/65F & 60% RH should take about 10 to 14 days to dry.
🔹🔹🔹🔹🔹🔹🔹🔹🔹🔹🔹🔹🔹🔹🔹🔹🔹🔹
📝 PRE-HARVEST REPORT- Currently the buds are in curing totes and will trim up on Friday or Saturday / Purchased a Trim Bag will see how it goes.
🔹🔹🔹🔹🔹🔹🔹🔹🔹🔹🔹🔹🔹🔹🔹🔹🔹🔹
▶️ Friday - 04.30.21 /Just feeding H20 PH 6.2
▶️ Saturday - 05.01.21/Just feeding H20 PH 6.2
▶️ Sunday - 05.02.21 / Harvested plants today, and boy they looked amazing!
▶️ Monday - 05.03.21 / 1 Week into the drying process, the plants are being kept within environmental scope.
▶️ Tuesday - 05.04.21 / Dry Room Variables 55%/58% RH and 65F/68F Light Air Movement / In Darkness.
▶️ Wednesday - 05.05.21/ Dry Room Variables 55%/58% RH and 65F/68F Light Air Movement / In Darkness.
▶️ Thursday - 05.06.21/ Dry Room Variables 55%/58% RH and 65F/68F Light Air Movement / In Darkness.
▶️ Friday - 05.07.21/ Dry Room Variables 55%/58% RH and 65F/68F Light Air Movement / In Darkness.
▶️ Saturday - 05.08.21/ Dry Room Variables 55%/58% RH and 65F/68F Light Air Movement / In Darkness.
▶️ Sunday - 05.09.21/ Dry Room Variables 55%/58% RH and 65F/68F Light Air Movement / In Darkness.
▶️ Monday - 05.10.21 / Start of Week 2 in the Dry Tent Moving Along Nice and Slow Dry Room Variables 55%/58% RH and 65F/68F Light Air Movement / In Darkness.
▶️ Tuesday - 05.114.21/ Dry Room Variables 55%/58% RH and 65F/68F Light Air Movement / In Darkness.
▶️ Wednesday - 05.12.21/ Dry Room Variables 55%/58% RH and 65F/68F Light Air Movement / In Darkness.
▶️ Thursday - 05.13.21/ Dry Room Variables 55%/58% RH and 65F/68F Light Air Movement / In Darkness.
▶️ Friday - 05.14.21/ Dry Room Variables 55%/58% RH and 65F/68F Light Air Movement / In Darkness.
▶️ Saturday - 05.15.21/ Dry Room Variables 55%/58% RH and 65F/68F Light Air Movement / In Darkness.
▶️ Sunday - 05.16.21/ Dry Room Variables 55%/58% RH and 65F/68F Light Air Movement / In Darkness.
▶️ Monday - 05.17.21 / Moved the buds into drying/curing totes with stems on for a week- Dry Room Variables 55%/58% RH and 65F/68F Light Air Movement / In Darkness.
▶️ Tuesday - 05.18.4.21/ Currig, Dry Room Variables 55%/58% RH, and 65F/68F Light Air Movement / In Darkness.
▶️ Wednesday - 05.19.21/ Removed the buds from the steams and continuing to cure in the totes. Planning to trim on Friday or Saturday.
▶️ Thursday - 05.20.21/ Removed the buds from the steams and continuing to cure in the totes. Planning to trim on Friday or Saturday.
🔹🔹🔹🔹🔹🔹🔹🔹🔹🔹🔹🔹🔹🔹🔹🔹🔹🔹
📜 Cultivar Information - We have created this strain by crossing the best Black Domina available with Very Berry and our own Lost Coast OG Kush, this plant produces large colas with a super intense sweet berry flavor with a sweet-smelling aroma that varies from fruit and berries to sweet candy. This lady offers tight internal stacking giving a perfect structure for those super heavy colas, which is perfect for growth both indoors and out, if grown outside she is fairly resistant to mold and powdery mildew which is a real bonus with such large colas.
🔹🔹🔹🔹🔹🔹🔹🔹🔹🔹🔹🔹🔹🔹🔹🔹🔹🔹

Processing
Likes
7
Share


@Kushizlez
Follow
(Days 15-21)
(Day 21) Everything is looking really good this week. I got my MH hooked up and dimmed to 250w. Plants are responding very well. Not a single sign of yellowing and plants are all a nice healthy green. I covered up the transparent solo cups with some newspaper as the roots are starting to pool around the bottom of the cups. I’m going to transplant everything into 2gal pots with my inoculated 50/50 coco blend sometime next week. There is a nice layer of mycorrhizal fungi starting to coat the surface now.
Blackberry breath #1 is still looking oddly deformed still but I am concluding it’s genetic.
Going to be trying this ‘Boogie Brew’ tea stuff in the next few days as well.
I’m pretty sure the leaf discoloring I saw that one day was from using unstable RO water. I am making sure to stabilize all water with rain/snow/brita before watering. It seems to have cleared up in a just a few days of proper water.
I didn’t get around to getting a c02 canister this week but I will grab it at the same time I get those 2gal nursery pots.
I’m shocked at how well the air pump is helping the bbb#2. It is always the perkiest plant in the tent and despite being a runt, it’s already outpacing most of the others in terms of new growth. I guess air is an often overlooked factor when growing. Hopefully the coco blend will help get things a little more aerated when I transplant.
Been thinking I’m going to just veg until they all show sex and then flip them.
(Day 17) I gave my first pest/mold prevention spray today. I then raised the light all the way up to the top of the tent for a few hours. Plants responded well and no spots, burn ect.
I’m also going to give my first top dressing today. I’m using my new organic dry amendments scratched into the surface of the solo cups with some added promix as a layer of mulch. I don’t want to see any yellowing at all in veg this run. I fucked up hard last time so I’m going to make sure it doesn’t happen again.
Likes
3
Share

@Jardineiro_Br
Follow
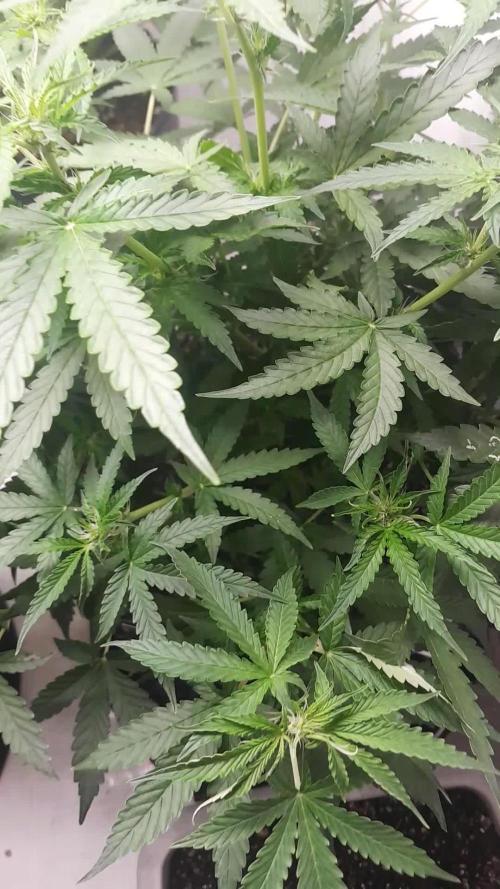
Uma estrutura muito linda essas pequenas árvores da Mirtilo, muitos galhos, muitos botões surgindo um caule bem forte para passar bastante nutrientes.
Likes
13
Share

@Gram_Solo
Follow
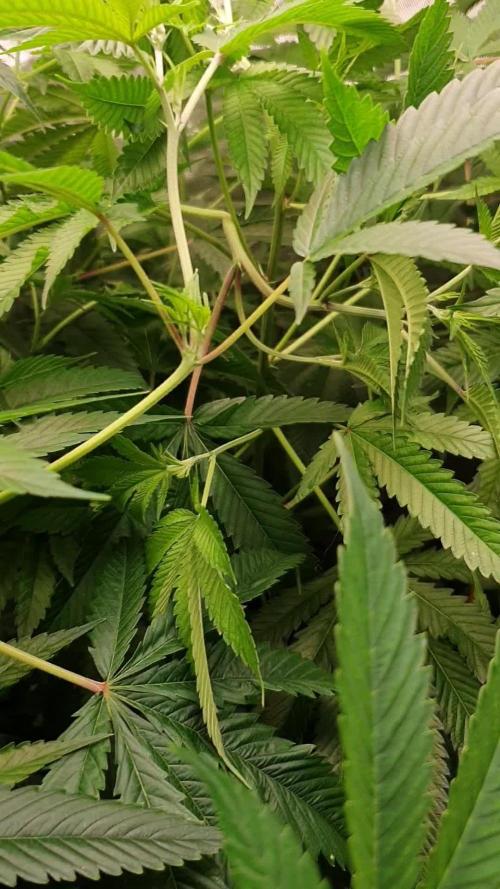
Back in business
Got some Lst work to do on these to keep em low
I've been away for few weeks and they gone mental , started flower 12/12 3 days ago.
Will be keeping stems as low as possible.
Just ph water this week then onto flower nutrients.
They had a 13 week veg