
Likes
Comments
Share


@MrWolfe
Follow
This round is going great, I didn't top them the extra time and they have just absolutely loved it. Supercropping has to be the better option. Last round did hit my highest numbers but I feel this is just going to make that feel like amateur hour. These girls are huge and thick, I can't wait to see how some of these Hunts turn out.

Likes
11
Share


@Pr3m_85
Follow
This time I made the decision not to carve the main apex. The stretch of the plants is endless. I am getting 1.5 meter stakes next week. I recommend doing SCrOG for this variety !!!


Likes
15
Share


@NewOfficialDrillInvaders
Follow
Ladys Start to drink much more also one of 10 seed bag show off as a Autoflower i pass it to my friend because i dont like auto so i upload video how it looks she got really fruity smell

Likes
36
Share


@Coopmc
Follow
A few more weeks for the strawberry banana I’ll start pulling the Tropicana cookies and the wedding glue down this week


Processing
Likes
26
Share


@eldruida_lamota
Follow
Esa familiaa, estoy impresionado porque estas skunk están muy compactas, es una cepa increíble, y no la fume todavía, solo hay que verlas no solo lo prietas que van, si no lo tricomas as que están .
Hay que felicitar a Zambezaseeds ya que esta variedad es muy estable y sencilla de llevar.
Ph controlado, quitamos productos y lavamos raíces, pronto solo agua.
Ph controlado, temperatura por debajo de 29 y humedad por debajo del 40%, deseando que estén listas para ver la producción, esss flores pesarán, hasta la semana que viene fumetillas.

Likes
18
Share


@HippyHemulen
Follow
Weather is starting to get warmer finally and now we can see she start growing little bit. Nothing issues or anything just little bit worried if she start flowering like in next week cause its already 3 weeks veg to autoflower. 😊

Likes
16
Share


@DreamIT
Follow
Sponsored by:
💫PARADISE SEEDS💫-💡VIPARSPECTRA💡-💐GREEN BUZZ LIQUIDS💐-🛠️WEDRYER🛠️
28/7 everything is going well, soon she too is in bloom🤘🐉
2/8 I am considering whether to clone before flowering, but I will consider tonight
__________________________________________
Personal advertising (contains affiliate links)
__________________________________________
🦄 winners and holders of the most prestigious awards, since 1994 they offer genetics of the highest quality! Anonymous shipping!
✅https: //bit.ly/Paradiseseeds_
__________________________________________
Did you know that Green Buzz Liquids fertilizers are 100% vegan? A complete line of products ready to give the best to each of your plants!
__________________________________________
Personal advertising (contains affiliate links)
__________________________________________
🦄 winners and holders of the most prestigious awards, since 1994 they offer genetics of the highest quality! Anonymous shipping!
✅https: //bit.ly/Paradiseseeds_
__________________________________________
Did you know that Green Buzz Liquids fertilizers are 100% vegan? A complete line of products ready to give the best to each of your plants! Visit the site and see my journals to see how they work 🦄
🤯 And with the code "dreami t" you will immediately receive a 15% discount on your purchases
✅https: //bit.ly/GreenBuzzLiquidsPro
__________________________________________
👀 Are you looking for a good lamp to start with? 👀
🌞Viparspectra has something more than the others, take a look at their site.
⏩ Use "GDVIP" for an extra discount or "DREMIT3" for an extra 5 %% discount
👀 Search for it on Amazon
✅Amazon USA: https://amzn.to/30xSTVq
✅Amazon Canada: https://amzn.to/38udUVe
✅Viparspectra UE: bit.ly/ViparspectraUE
✅Viparspectra USA: bit.ly/ViparspectraUS
______________________________________________
🌈 Tired of blowing on your weed hoping it dries quickly? Check out the Wedryer website! You will find a well-made accessory that will help your weed dry in just 8-10 days without the annoying risk of finding mold or other annoyances! (no affiliate links)
✅https: //bit.ly/Wedryer_
______________________________________________
📷🥇Follow the best photos on Instagram 🥇📷
https://www.instagram.com/dreamit420/
Backup
https://www.instagram.com/dreamit4200/
🔻🔻Leave a comment with your opinion if you pass by here🔻🔻
🤟🦄💚 Thank you and good growth 💚🦄🤟

Likes
50
Share


@CapitanKush
Follow
been a slow week i think. had a problem with my power going out for 8-9 hours sunday (rcd tripped)
before i opened the tent to 98% rh and water covering the leaves but turned all my fans up and it dried quick so all is good now
UPDATE: done some defoliation to get more light through, lets see how that goes

Likes
33
Share


Likes
4
Share

@Hempface86
Follow
So I did a light defoliation, with a little bit of lollipopping and this girl did not slow down one bit... She is stretching nicely and the inner nodel spacing looks good to me... She's a very healthy, happy plant. And she has a good size to her, so pretty impressed with these dots.. It's only been dots, recharge and a little bit of silica .. very awesome ... @Grow4releaf thank you again, brother.I hope you are doing well.. Did you everyone else. God bless and happy growing

Likes
Comments
Share


@GrowDiaries
Follow
Growers' rating for Sensi Seeds with Adam iLL!
Crowning moment! Sensi Seeds gets their rating from the growdiaries.com growers—a true testament to their legacy in the grower's world! #SensiSeeds #GrowDiaries
Likes
21
Share


@m0use
Follow
***Sponsored Grow*** = Medic || https://medicgrow.com || Grow = ***Sponsored Grow***
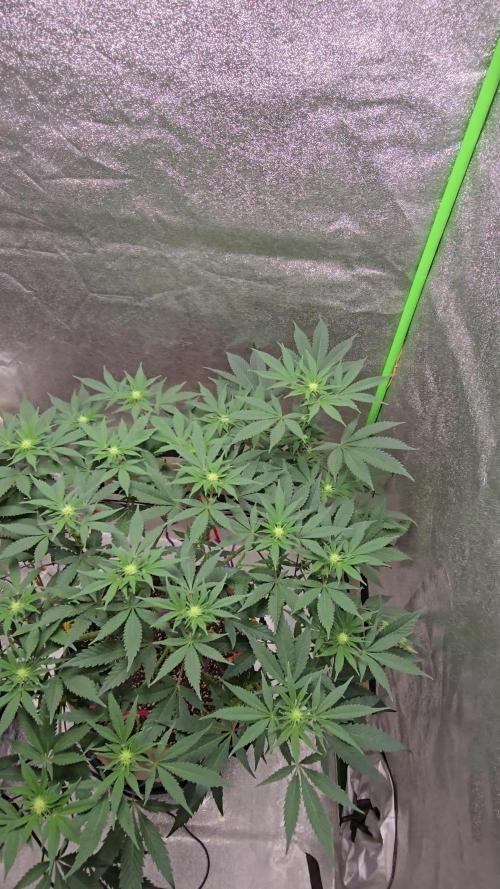
Ok, so bigger news this week, I got rid of one of the plants in the tent as it was an auto vs fast flower :/ and I performed a bunch of LST and some Defoliation to all the plants. This plant did not need a lot of defoliation if any at all. I just trimmed some of the lower nodes off as they would not get all that much light once it started to stretch and tied back some of its branches so it was a bit more even. The growth pattern on this plant vs the others in the tent this aorund is completely different. its so floppy and bendy, I have a feeling I am going to need to break a lot of branches come flower time to keep it from sky rocketing to the top of the tent. This will be the last week they are in Veg and switching to flower cycle next week with a 12/12 photoperiod. I was going to try a 13/11 but I wanted to test out the automatic light functions on the Medic Grows Minisun-2, So this will be relieved next week.
Been having issues with PH in the medium again and some nutrient uptake. I am thinking I will switch to another brand I have to use up, trip tonic from my last grow on the balcony. Its a bit more complex and not as easy as mix into water and feed but I think its going to help me solve a lot of the issues I am getting. Given this update is a few days late some of these pics are not from today. the clones in the photos above are from the beginning of the week when I potted them up. They have not done well at all and may not make it. can only hope for the next few weeks they pull through.
Till next week.
***Sponsored Grow***
Official Website: https://medicgrow.com/
Facebook:
https://www.facebook.com/medicgrowled
Twitter:
https://twitter.com/medicgrow
Instagram:
https://www.instagram.com/medicgrow420/
YouTube:
https://www.youtube.com/channel/UCNmiY4F9z94u-8eGj7R1CSQ
Growdiaries:
https://growdiaries.com/grower/medicgrowled
https://growdiaries.com/grow-lights/medic-grow

Processing
Likes
88
Share


@Fergie
Follow
hey guys so another week is over and these girls jusre just beasting out . Have order a Aircon unit this week as temps are soaring outside and is getting hard to keep below 30at times . So arrives in aweek and am goj g to re adjust my grow setup again .all looking nice and a defo haze smell coming from these ladies . Til next week 😀
Likes
54
Share


@Mimi420
Follow
Hi guys!
Last week I topetd them,and removed the lowest coals.Next week gona put them under a net.I watter them every two-thre days.

Likes
57
Share


@GreenISR
Follow
10.1.19 day 1
Wow that was fast for the sex sight .
11.1.19 day 2
Fix the lst for even spred .
12.1.19 day 3
The smell is amazing and the big leaf's AF .
14.1.19 day 5
Some purple color apear .
15.1.19 day 6
Did some leafs remove .
16.1.19 day 7 end of the week
What a grate week ,starting to get some buds 😇😇😇found that im not giving much water as she needs .


Likes
8
Share


@BudahBudz2020
Follow
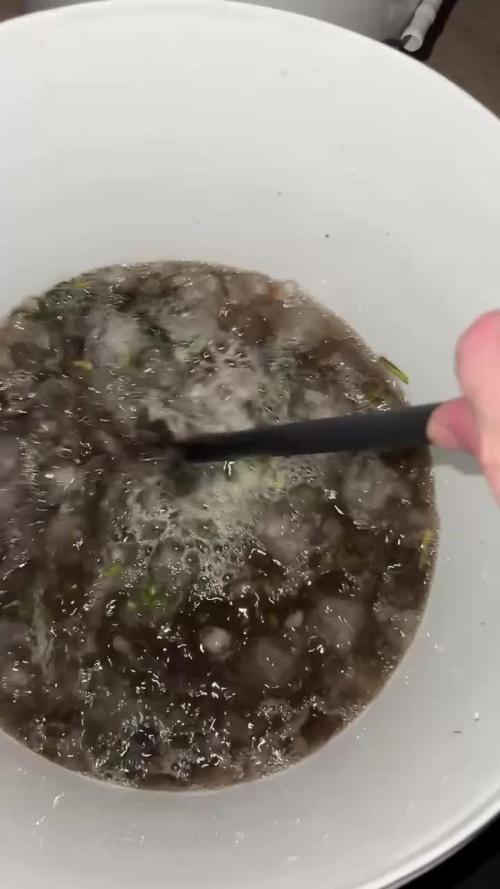
Day 16 Notes
Took a few fan leaves off from the top they was blocking precious light...
I watered with about 1.5lt
I used.
1.3ml of bio grow to 2lt of tap water.
Have been removing leaves here and there
Day 21 Notes
I watered with 1.5 liters of tap water along with 1.3ml of bio grow and 3 drops of monkey Nutrients Root Shoot this root shoot stuff is actually really good they gave me a full free run and it's a UK brand