The Grow Awards 2026 🏆 


Likes
8
Share
@PEAKYPLANTERS
Follow
Hello everyone, fellow growers!
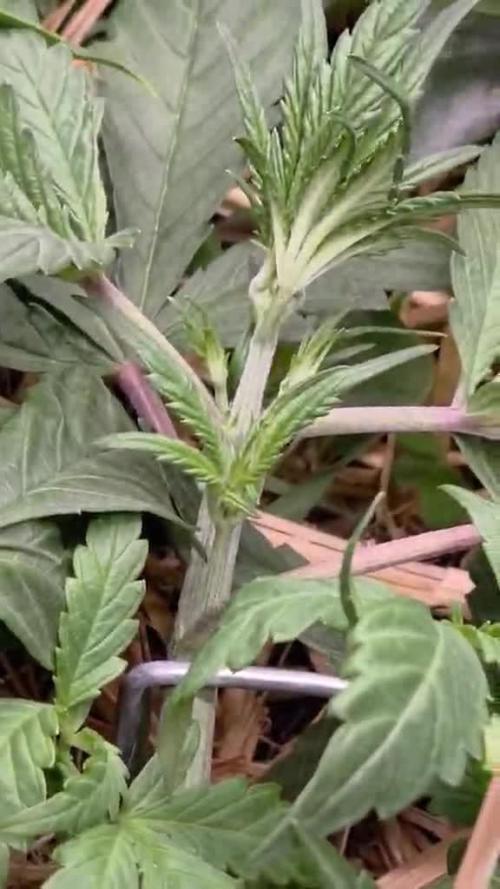
my girlfriend continues the vegetative phase without problems. we are trying to twist the stem around the structure of the vase :)
We are testing a new line of fertilizers and so far they are doing pretty well.
excellent nuggets are expected!

Likes
8
Share
@cannacat777
Follow
8/26 - sporty looking great, praying hard! Posh is working on it. But look who finally showed up to the party! I’m calling her Baby spice. She sprouted 12 days after going in the soil. Way to be a fighter girl!
This is going to be a tricky thing to manage I feel like my gals are tracking a week apart. I’ll keep this journal’s timeline on sporty spice. -1 week for posh and -2 weeks for baby spice. spice girls let’s grooooow!
8/30 - exactly two weeks from sprout for Sporty and Posh. Pretty wild how big a difference there is between the two. Baby is getting her footing. Now.
Sporty already pushing 4-5 nodes and I saw a tiny root through the drain hole. Wanted to pot her up! About 8 cups pro mix, one cup perlite. About 1.5 tbs of Gaia green 4-4-4, some worm castings and sprinkled mycorrhiza around where the rootball would be. God speed girly!
9/3. Potted up Posh today. About a half gallon pro mix, plus about 1.5 tbsp of the Gaia green 4-4-4. Plus about a cup of worm castings, perlite, and mycorrhiza. Sporty is looking very happy, 5 nodes and counting. Added back my second light, let’s go girls!!!
9/5. Wrapping up week 2 here, so far I’ve been really impressed with the pro mix Gaia green and soil support so far. The girls seem happy and healthy. See you in week 3!

Likes
3
Share
@LandFarm420
Follow
Per questa pianta non ho voluto usare nessun tipo di stress per vedere come cresce la pianta siamo all'inizio della fioritura l'ora della luce resterà per tutto il ciclo a 18/6 in quanto autofiorente non ha bisogno del cambio di luce, in più abbiamo aggiunto al terriccio circa 15g di guaino di pipistrello e 25 g di fertilizzanti rqs a pellet a rilascio lento vedendo già un miglioramento della crescita da 2/5 cm al giorno a quasi 7 cm. Dalla settimana prossima inizierò con i fertilizzanti b-52 partendo da 1 ml arrivando tra 2 settimane a 2 ml/L.

Likes
4
Share
@Ninjabuds
Follow
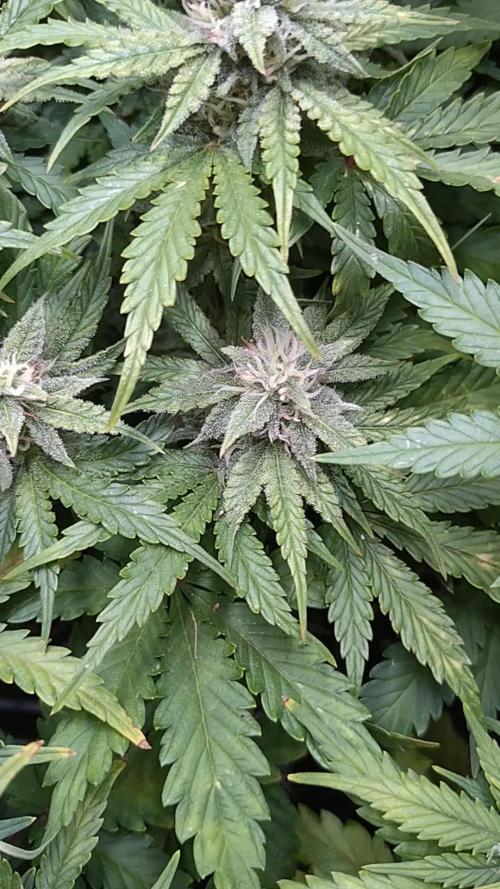
My Rainbow Melon plant is still one of the biggest in the tent, and it's definitely the smelliest so far. The only thing I'm not crazy about is how big the leaves are getting.
It's been a challenging week with the constant rain and ridiculously high humidity. Keeping things dry indoors has been a real struggle. Despite the weather, I managed to flip all my feminized photoperiod plants to flower this week. I'm hoping the switch will go smoothly, but with this humidity, it's going to be tough.

Processing
Likes
1
Share
@Esebees
Follow
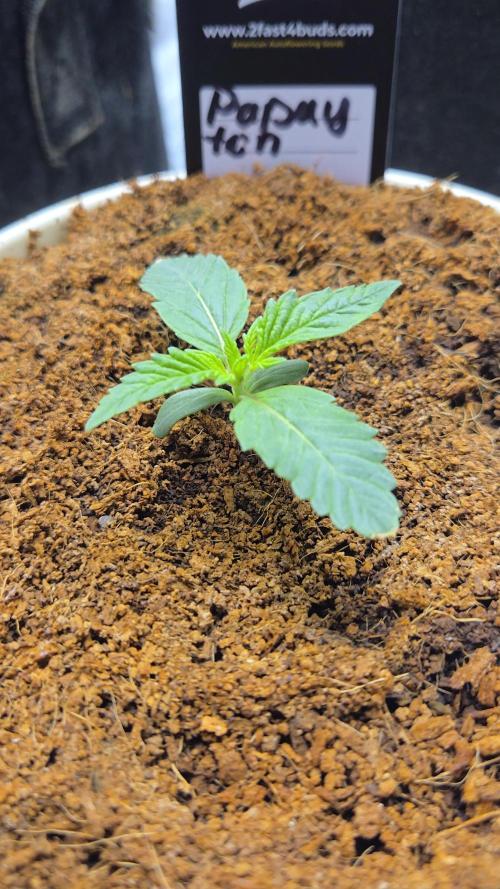
4 de 4 semillas germinaron empiezan a salir los cotiledones y las primeras hojas
Likes
13
Share
@Tazard
Follow
She grew very slowly I vegged her for a long time. I finally got her big enough where if she doubled in size I would have a nice plant, well she stretched almost none whatsoever. However, for the small size I was expecting about 56g instead I got 98! What a pleasant surprise to see all the lower buds fully developed and ripe!

Likes
19
Share
@MrGrowDiarie
Follow
So far so good , looks healthy and growing fast ,
I will love to see them grow and how fast they are
Lets see what the next weeks brings.


Likes
7
Share
@Staffedition
Follow
Всем привет!
Моему малашу сегодня 11 дней.
Выглядит здоровым и счасиливым.
Поливаю водой, ни чем не кормлю
Признаков болезни и нехватки элементов не замечено!
Всем и мира и добра!

Processing
Likes
3
Share
@Cultivo_buenhumo96
Follow
Dia 15 desde que se germinaron estas
#gorillazkittelz y #bluegelato41

Likes
12
Share
@cherokee
Follow
Это было прекрасное приключение. Девочки цвели 60+ дней и все еще были готовы продолжать... стигмы все лезли и лезли, убеждаюсь в том что 55 дней указанные заводчиком это слишком маленький срок, растению нужно 65-70 или даже 75 дней что бы созреть на 100%. У меня к сожалению не было возможности продолжить цикл из за отсутствия места,пришлось резать ((( ну ничего уже новые 7-8 клонов готовы к новому дневнику и к новому приключению))) С каждим циклом вижу как мой результат стает все лучше и лучше, я начинаю понимать этот сорт и что он любит и как с ним нужно себя вести , соответственно с каждым циклом урожай все больше и больше, думаю в горшках 5л этот результат будет еще больше. ))) Великолепное растение OG !


Likes
21
Share
@MG2009
Follow
01/09/2022
Finally time to flower, and all girls went into flower room at lights out.The males will be next week, don't want to put them in to early so I will carefully check every day and separate before they open their flowers. I'm guessing week 3-4
I Will select two branches on each female to selectively pollinate.
01/11/2022
Blue Matter #5 (update #5 culled male) repotted with lemon og seed
Will continue in her own evolving diary. My hope is to eventually graft different cuts for a multiple variety mom plant, I can have 6 total plants
And would be nice to be able to maintain only one mom.


Likes
3
Share
@PhinolaGreen
Follow
9. Woche
Der eine Pheno ist wesentlich schneller als der andere, bin gespannt, wie lange es bei dem noch dauert, sonst sehen beide soweit gut aus 😃
Likes
142
Share
@PapaNugs
Follow
This grow went well overall. No herming. No nutrient deficiencys. Can't complain there. However the bud structure wasn't there. And the smell isn't of strawberry sugar or at least during the grow. It's mostly gas with a little sweetness. No real strawberry so far.

Likes
29
Share
@mrb11
Follow
Had a few mishaps this week with my light schedule. Working nights now so I was not home when the lights were on and it was screwing up everything so I bumped the lights up and hour every night till it was turning on at midnight which is when I get off of work now. Well during that process a few things happened. My ac infinity controller 69 pro had lost wifi so I had been needing to do a reset because it’s still throwing an alert but I don’t use alerts so something’s wrong anyway I unplugged it during lights out and during the process of plugging it back in or something the lights decided to come on for a few seconds I believe is all it was so no worries it’s only once. Well that reset didn’t work so CS told me how to do it another way and I was able to do the reset but it didn’t work and I can’t remember exactly how it happened but later on the afternoon when the lights supposed to be off I realized I had the on for 23 hours 59 minutes and 59 sec lmao oops. So I went over 12hr by 2 hours so I just changed the schedule to give her 12hrs of dark then went back to my normal schedule but she only get 10 hrs of light that day. That was like a 2 or 3 day span of screwing up and I think I had another blip of the light turning on during dark period but can’t remember, trying to put that behind me and hope I didn’t stress her too much. She has been doing well besides that drama. Her ph has been crashing down to 5.5 fairly quick lately but I been on top of it. Got my auto top off setup I’ll see if I can add a pic, very simple gravity feed. I’ve noticed I’m pushing my limits on ppm, seeing some slight tip burn. Oh yeah bumped the light up to 7. Now on 7 of 10 which according to my new meter is not as bright as i expected


Likes
2
Share
@Dameon0803
Follow
Day 22 - No keeping this beast down! Any kind of LST thrown at her has nothing but amazing results! Time to start leaf tucking!
Day 23 - Doing what I can to get those lowers as much light as they can! I saw a pistol or two. Can't wait to see her ignite into flower!
Day 24 - She's filling out and that cover crop is just insane!! I have not been able to get any of my water soluble nutrients in because of the run off. Tomorrow will be the day as its been a few days since I've needed the shop vac.
Day 25 - Early morning feeding. I take my pictures consistently in the evening around 8-10pm. Insane 24 hour difference! Hard to keep the leaves under control.
Day 26 - Installed a trellis net for a few reasons. I like to have a baseline for later lollipopping, it'll help support later buds, and its opening lower sites up for light, giving them their final chance to not get the later cut.
Day 27 - Final tuck with some pulley assistance in areas before I head out of town for a day in the morning. Moving the cover crop to not allow shadow casting. I could always chop it and give it to the soil, but im enjoying the sight.
Day 28 - Had to go out of town for the night, so no picture for today. I'm sure shes happy and raging.
Processing
Likes
8
Share
@Energie111
Follow
it was a super week, the girls grew nicely, the full moon is always effective. :) I like to grow cannabis.
