


Likes
Comments
Share


@StonedandSteady
Follow
AutoBlueberry 10th w/ 5th W/ Flower breed by #DivineSeeds #DivineSeedsSquad #DivineSeedsBreedingCompany
3rd feed of #NukeHeads Nutrients #PlutoniumBloom and a look at my #Opium by #DivineSeeds at her 4th day of Dry! Can't Wait to Blaze!!! This AB is Flowering out and her Smells are Super Strong of Gasy and Candied Blueberries! I recently Trained down her branches to expose more Bud sites and Removed the Biggest fan leaves to expose the Bud site's to this Glorious #OsreeQB1000w Full Spectrum Grow Light! I've also Super Cropped, Topped um, Defoliated, Leaf tucked, and Implement the 3D's method like my Broski #TigerfishOrganics to remove the Dead, Dying and Diseased leaves!
Origin:Afghani/Thai
Type:50% Indica/ 40% Sativa/ 10% Ruderalis
Flowering:56 days
THC:22%
Harvest:400-550 g/m2
Height:110-150 cm
They were Growing under the #Growatt600w and in my #TopoLite 24×24×48 Grow Tent but I've Upgraded and Updated it to my #OsreeQB100W I'm also using #TNBNaturals #TheEnhancer Co2 Despersal Canister and using thier Ph⬆️⬇️ for my Decolinated Tap Water!
Green and Growing Up Great! She's Growing into her 5th week of Flower! She's Growing in my special blend of ProMix potting mix, a 1/2 bag of Earthworm castings and 2 light handfuls of Diatomaceous Earth mixed Up well for before transplanted! Diatomaceous Earth: Diatomaceous earth is made from the fossilized remains of tiny, aquatic organisms called diatoms. Their skeletons are made of a natural substance called silica. WHAT IS DIATOMACEOUS EARTH?
In a nutshell, DE comes from the fossilised remains of small marine organisms called diatoms. Over a 30 million year period, these hard-shelled algae collected on the bottom of bodies of water, eventually forming into a type of sedimentary rock. Fast forwarding, it wasn’t until around 1836 that a German peasant Peter Kasten discovered the ivory-coloured, powdery substance while drilling a well in northern Germany. Ever since, the usefulness of DE for multiple purposes, including industrial and horticultural applications, has been well-reported. Just sprinkle some diatomaceous earth on top of your soil and watch mother nature's secret weapon work its magic.CONDITIONS THE SOIL
When it comes to growing cannabis, everyone strives to provide the best soil to grow the best plants—but there’s always a way to make it even better. Making the soil a better medium is called soil conditioning, which is exactly what diatomaceous earth does. It works by improving the retention of moisture in your potting soil, holding a large amount of fluid and drying at a rate that’s much slower. This natural soil additive also helps to retain nutrients and allows for better oxygenation of the substrate. NATURALLY CONTROLS PESTS
DE is an all-natural, safe-to-use substance that doesn’t harm the cannabis plant with toxic chemicals. The nature of diatomaceous earth makes it useful against most types of insect infestation you might be experiencing; and unlike chemical insecticides, insects can’t develop a resistance to the effects of DE. So once they’re gone, they’re gone for good. DE is an abrasive. and when used as an insecticide, it gradually scrapes away an insect’s exoskeleton, absorbs the fluids, and dehydrates insects and other critters to eventual death. IMPROVES PLANT STABILITY
When using DE in your soil, it can be especially beneficial as it frees up nutrients so that they are made available to the plants as needed. This works via the silica content of DE being absorbed into the plant tissue, which helps improve the plant’s ability to respond and receive more nutrients as DE activates. This in turn results in greater yields and better stability under small pH fluctuations!
https://divineseeds.net/
https://instagram.com/divine.seeds?igshid=osxe2v7en33v https://divineseeds.net/
Thanks Again to All my Friends, Family's, Teams, Sponsors, Followers and Subscribers!!! Your Genetics are Merry Magnificent, Mega Marvelous and Mighty Medical! Love um!!! I really Can't stress enough how Thankful and Grateful I am of All of you and what you've Shared with Us! Means the World!!! It's definitely a Pleasure being able to Grow with these Phenomenal Grow Lights! Please Enjoy! BudBrothers4-Life! Cheers Famz!!! Much Props and Much Topz!💯🔥 #Osree #GrowStarStore #Growatt #TNBNaturals #TNBTeam #GrowYourOwn #Bliss
https://instagram.com/osree.light?utm_medium=copy_link
https://instagram.com/as420.ca?igshid=1f116alw054wp
The Grow Bags: https://www.as420
https://instagram.com/tigerfish_organics?utm_medium=copy_link
https://www.facebook.com/Tigerfishorganic/
#TigerfishOrganics YouTube Channel Link: https://youtube.com/channel/UC6OSXTda1JYaVNoCxdcYqIg

Likes
142
Share


@MadeInGermany
Follow
Hi everyone 🤗.
The tent bursts at the seams 😍.
The buds are getting bigger and bigger :-).
The blue chesse pheno 1 is harvested this week 😎.
next week both Tangie Kosher Kush will be harvested :-) everyone else needs something 😊.
I wish you all a nice week, stay healthy 🙏🏻 and let it grow 🌱


Likes
2
Share


@ChiTaN
Follow
The girls coped with the induction very well, we are starting the flowering period 💪 The plants are healthy and strong, and the extra light clearly serves them 😍


Likes
22
Share


@Aedaone
Follow
The temperatures, humidity, and watering volume(if measured) in grow conditions are all averaged for the week. The pH is soil pH. Any watering done by me is well water which is 7.6 pH and 50° F. Any listed nutrients are ml/gallon of soil.
Day 1 we had partly cloudy skies, low humidity, and temps in the lower 80's. I watered about 1/4 gallons from the water hose for each pot.
Day 2 we had lite showers in the morning, partly cloudy skies and temperatures in the low 80's the remainder of the day. The rain provided the water today.
Day 3 we had showers in the early morning until afternoon. Then it was mostly sunny with high temperature around 79. I noticed a few spots of powdery mildew on the leaves. I removed the leaves.
Day 4 we had lots of sunshine and temperatures in the low 80's. I watered about a half gallon out of the water hose.
Day 5 we had thunderstorms, rain, and drizzle early morning and intermittently throughout the day. Temperatures were in the lower 80's.
Day 6 we had thunderstorms and rain in the morning, then rain and drizzle intermittently throughout the day. High temperature for the day was 71°. It was raining so much I brought them inside. They've proven very resistant to boytritis, but this close to finish, I'm not testing them further. Four hours of rain in below 70°F temps at night is tuff enough.
Day 7 we had lots of sunshine and high temperature around 84°.
The #2 plant had a very mild outbreak of powdery mildew on the lower leaves this week. The #1 plant has proven immune. These girls are nearly finished. They've gotten loud smelling. The #2 plant smells like straight cat piss and very loud. The #1 plant smells like fruit roll ups berry and loud. I'll harvest these sometime next week. Over a very hardy strain that's taken a beating in the Ozarks Spring.


Likes
3
Share


@macrocefalo
Follow
We finally arrived at the flowering of the 5 plants. # B3 presents some type of blockage, which is still very early in flowering. Despite the tragic accident with # B5 the buds' formation is going very well she still showed signs of phosphorus deficiency despite using both FloraBloom and Liquid KoolBloom in the next irrigation I will try to leave the PH in 6.4 since as I researched the phosphorus is better absorbed with soil pH between 6.2 and 6.7. The other plants are doing well and do not have the same deficiencies. This week I released the LST and applied defoliation on some leaves to favor the light on the apical buds where buds are forming. Updating with 55 days # B3 already has some white pistils but the buds did not start to form. I begin to think that it is a photoperiod.


Processing
Likes
13
Share


Processing
Likes
2
Share


@Mampy
Follow
White Castle aka Iced Widow has a light smell, very pleasant and floral! Each branch will easily have a quarter Oz on them ! This girl is a big producer! I have found a seed here and there, unfortunately my other plant in the tent hermid on me and I didn’t see until to late !

Likes
155
Share


@deFharo
Follow
Bienvenidos cultivadores de marihuana clandestinos y también a los que tienen la fortuna de no serlo!🖐️👨🌾👍
Este es un relato semanal de técnicas, experiencias de cultivo y Bio preparados orgánicos caseros, los cuales llevo experimentando dos años en cultivos de marihuana interior.
Esta semana voy a escribir sobre: CARBÓN VEGETAL ACTIVADO CON MICROORGANISMOS DE MONTAÑA. esta es una práctica avanzada pues al menos se necesita tener el inóculo sólido de Microorganismos de Montaña (MMS), aunque al final intentaré dar otras opciones para aquellos que no tengan MMS. Puedes consultar en la semana 3 la manera de hacer Microorganismos de Montaña Sólidos (MMS): https://growdiaries.com/diaries/134104-grow-journal-by-defharo/week/725879
El carbón vegetal es un excelente componente para toda clase se mezclas de sustrato, tiene varias propiedades muy interesantes, ayuda a la estructuración del suelo y la creación de humus, es un regulador térmico en lugares fríos, favorece la expansión de las raíces y su estructura de microporos promueve la retención de humedad y nutrientes, se dice que en 1cm cúbico de carbón puede contener de 8 a 30 millones de Microorganismos. Y es precisamente la propiedad de retención de humedad y nutrientes, de la que se aprovecha esta práctica.
El carbón vegetal llamado "activado" que se usa en filtros de agua o aire, tiene mala fama entre los aficionados a las peceras, porque se dice que roba nutrientes, principalmente Nitrógeno, esto tiene una explicación y no es un problema para cultivo en macetas, el carbón seco tiende a absorber humedad y los nutrientes que se encuentra en el sustrato o en los riegos, porque es muy poroso, y de repente, tiene que saturar todos sus microporos, pero esto apenas va a tener incidencia en un cultivo.
En mi caso lo que hago es mezclar el carbón con los Microorganismos Sólidos y después lo humedezco con agua y melaza para activar la Microbiología del inóculo, dándole la energía necesaria, de esta manera tengo un carbón inoculado con Microorganismos de Montaña, y una vez en el sustrato, con humedad, estos MM, se propagarán. En este caso el carbón, de momento, no captura nutrientes porque está saturado, pero después de unos riegos, será la casa perfecta donde los Microorganismos y los nutrientes convivirán ofreciendo una fuente extra de nutrientes, para que las raíces se alimenten en periodos de escasez de alimento o humedad.
Supongo que quien tenga inóculos bacterianos comerciales, podría usar esta práctica para multiplicarlos.
INGREDIENTES BÁSICOS:
Agua pura: 500ml
Carbón vegetal, para usarlo en macetas conviene que los trozos de carbón no sean grandes. 750 gramos.
Melaza: 75g
Microorganismos de Montaña Sólidos (MMS): 225g
PROCEDIMIENTO:
Se mezcla el carbón y los Microorganismos sólidos.
Se disuelve la melaza en el agua.
Se humedece el carbón lentamente, mezclándolo bien, porque el carbón vegetal puede almacenar mucha humedad y necesita tiempo para saturarse.
Se guarda a oscuras durante un mes en un recipiente cerrado.
Hasta aquí la fórmula básica, yo hago algunos añadidos, como se puede ver en las fotos.
Añado 260g de Leonardita, que es un carbón vegetal con millones de años y en el proceso de convertirse en mineral, aunque todavía no lo es, es además, la mayor fuente de ácidos húmicos y comparte las propiedades del carbón.
Añado Microorganismos de Montaña Activados (MMA) de forma líquida para aumentar la inoculación de microbiología, también un lacto fermento de frutas que aporta muchas vitaminas, nutrientes y enzimas... en la última foto se ve el recipiente después de un mes.
Siguiendo el principio de saturación previa de los poros del carbón, para mezclas de sustratos, y sin tener acceso a microbiología, se podría, por ejemplo, saturar el carbón con alguna mezcla nitrogenada para el comienzo del cultivo, después el carbón seguirá cumpliendo sus funciones de estructuración de suelos, creación de humus y para retener humedad y nutrientes.
Hasta la próxima...
SALUDOS A TODOS LOS CULTIVADORES... 🖐️👨🌾
Likes
2
Share


@Bear_Grows_Green
Follow
12/25 Merry Xmas. The ladies got a priming light feed this morning to get ready to clone in 2 days. Watered on 3 gallons plain water and 3 gallons of the mix the bed was thirsty
12/26 got a priming foliar feed. Very light.
12/27 took all the tops as cuttings for clones
12/29 watered in 3 gallons plain water and 3 gallons of full supplemental feed.
Likes
6
Share


@DisTentAint4Campin
Follow
Shit getting heavy in the veg tent but I got too many plants up in there so gna have too make some decisions and start moving some gals in too the flower tent ⛺️ alot of real-estate in there
but been stressing this girl topping her defol and I just transplanted her into 3gal pot with roots organic soil

Likes
1
Share

@all_about_420
Follow
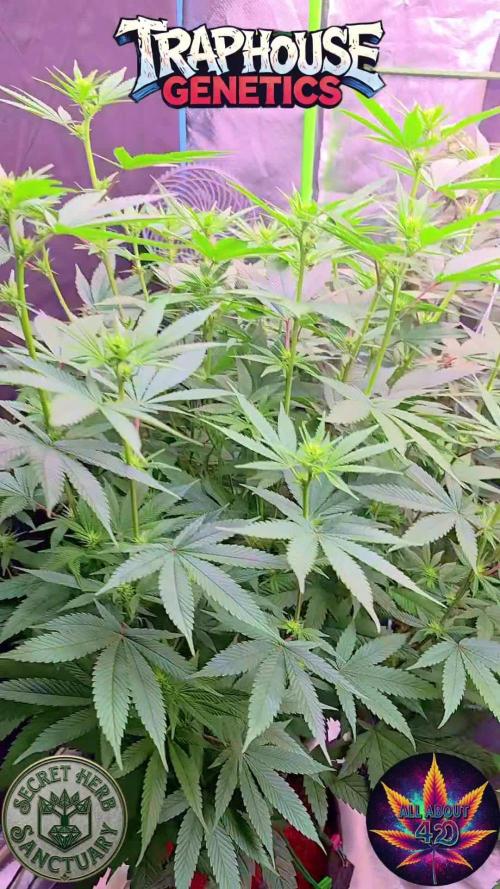
Der Stretch geht unaufhaltsam weiter und treibt diese Lady auf ein völlig neues Niveau. In der zweiten Blütewoche hat die Traphouse Genetics mittlerweile die Marke von einem guten Meter geknackt, und ein Ende ist vorerst nicht in Sicht – schließlich befinden wir uns gefühlt gerade erst in der Hälfte des Stretches. Dass die Pflanze diese enorme Wucht so mühelos wegsteckt, verdankt sie nicht zuletzt ihrem extrem massiven, holzigen Stamm, der als ultrastabiles Fundament für die in die Höhe schießenden Triebe dient. Die Nährstoffversorgung schlägt voll an, und während die Verzweigung weiter an Höhe gewinnt, formieren sich an den Spitzen bereits die nächsten, deutlich ausgeprägteren Blütenansätze.
Likes
42
Share


@iLoveGoodWeed
Follow
Week 11 - both ladies look amazing can't wait for the smoke.
9L Pot she is almost ready to harvest so I on next watering she will receive the final part for 7 days then flush and water for 3 days.
12L Pot she look amazing a lot of buds and she have 2 weeks left till harvest
Likes
10
Share


@GingFreecss
Follow
Mi scuso per avere aggiornato il diario così in ritardo, sto lavorando molto🙉🙉🙉
Venendo al punto
Ho iniziato il flush per eliminare i nutrienti rimanenti dal terreno all'inizio dell'ottava settimana.
Le piccole hanno sviluppato un intenso odore, le note dolci richiamano le rose, mentre quelle acide il limone.
Che dire di più!?
Fantastiche
Grazie per essere passati 👍🐵👍


Likes
22
Share

@Growbody
Follow
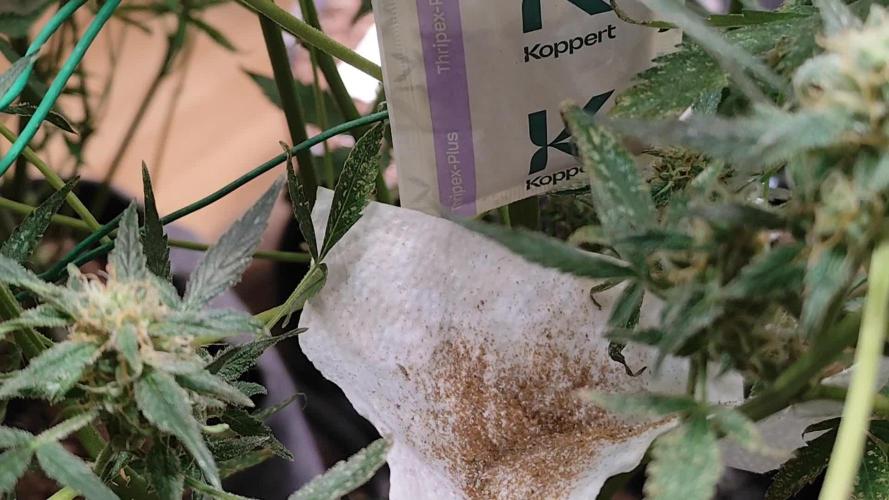
Willkommen zu meinem Growbericht der Cafe Racer Automatik von Blimburn Seeds. Die Samen sind von Zamnesias Tribe Programm als automatische Überraschungssamen angeboten worden.
Der neue AirPot Gen. 7 mit 20 Liter kommt hier wieder zum Einsatz.
Die Bio Hanferde von Sonnenerde wird wiederverwendet und mit 220 Gramm Monster Bud Mix Living Soil von BIONOVA x zamnesia und 2 Litern BioBizz Wurmhumus angereichert.
Und die zamnesia Smart Start Plugs mit Plagron's seedbooster plus haben sich bewährt.
Tag 99: 1,25 Liter Wasser.
Tag 100: Für die Cafe Racer Automatik von Blimburn Seeds kommt die Ernte näher. Keine frische Blütenknospen mehr.
Tag 101: 0,75 Liter Wasser.
Tag 103: 0,5 Liter Wasser.
Schön, das du dir meinen Bericht ansiehst. Schau gerne wieder rein. Schöne Pfingsten 👋😎

Likes
53
Share


@Roberts
Follow
Merlin Mintz is doing good. She just got into the solution. Everything is looking really good at the moment. Thank you Spider Farmer, Aeque Genetics, and Athena. 🤜🏻🤛🏻🌱🌱🌱
Thank you grow diaries community for the likes, follows, comments, and subscriptions on my YouTube channel. I greatly appreciate all the support. 🌱🌱
🌱https://youtube.com/channel/UCAhN7yRzWLpcaRHhMIQ7X4g
Likes
7
Share


@Kali420Autoflower
Follow
Lemon AK Autoflower - 420 Fast Buds
Tercera semana de cultivo.
La planta se adapta al cambio de dosis de nutrientes. Además, esta creciendo vigorosa, frondosa y claramente destaca su fenotipo principalmente Sativa.
Como se puede apreciar en las fotografías, tomadas a principio de semana tiene unas hojas estrechas y largas representativo del genotipo proporcionado por la Ak47.
Se aprecia una zoña internodal más amplia y sus pequeñas ramas largas. Estoy disfrutando este ciclo de cultivo con tres verdaderas joyas.
Sin embargo, veo que esta planta me va a dar algo de problema en mi pequeño armario.
Likes
16
Share


@FreedomOfSeeds2009
Follow
Germinating 3 Purple Kush Feminised seeds.
filtered water in glass, also add 3/5 drops of hydrogen peroxide, stir water well before adding the seeds, and stir again after adding seeds to water.
I will leave it for 24 hours
The seed coat softens by soaking your seeds in a hydrogen peroxide solution, allowing the seeds to absorb more oxygen. This results in increased germination speed
Hopefully all 3 seeds will germinate by tomorrow?
Seeds popped today:-)transferred 3 Purple Kush seeds in to small pots 10/09/23
3 Purple Kush seeds, 1 seed in each small pot.
Each Pot is Half filled with lite mix compost and Half filled with Vermiculite , watered planting medium before sowing seeds 2cm deep in planting medium.
The seed will push through the vermiculite easley with very little effort, in effect increasing higher successful germination rate, the compost will offer the first tap root an immediate lite nutrient supply.
Placed 3 pots on top of a Propagation heating mat for correct germination temperature, position in a shaded place, and keep out of direct sunlight.
This may seem like a lot of effort? and it is, but it will be highly beneficial by increasing a higher germination rate and higher amount of seeds will germinate from using this method :-) especially if your seeds were expensive.
11/09/23 no sprouts above the vermiculite yet, i will check it again tomorrow.
Today 2 Purple Kush Germinate and rise above the vermiculite 3 days after sowing.
Purple Kush is going ok, it could be growing faster, unfortunately i can't upload new photos because there is a problem in the GD system, they are doing there best to fix this problem as soon as possible.
GMO Cookies where started 16/09/23 filtered water in glass, also add 3/5 drops of hydrogen peroxide, stir water well before adding the seeds, and stir again after adding seeds to water.
3 seeds sprouted, but only 2 survived, it become to hot and one GMO Cookie sprout died.
I have now started another strain (Party Monster) 19/09/23 filtered water in glass, also add 3/5 drops of hydrogen peroxide, stir water well before adding the seeds, and stir again after adding seeds to water.
I will leave it for 24 hours, 5 seeds of Party Monster have sprouted and are under the same 100W LED grow light.
GMO Cookies have all come up above the vermiculite and are now positioned under a 100W LED, there is a small clip on fan blowing and circulating the air. This is my second attempt to grow GMO Cookies from 3 feminised seeds, i messed up on the first 3 seeds, i put them under a 250 Watt LED and it fried them, my folt.
Growing from germinating seeds is a very delicate situation, your environment temperature needs good control.
2 Party Monster seedlings are looking good, coming along well under the 100W LED light.
3 GMO Cookies are looking good also under the 100W LED light.
Plus i have now started soaking in glass of water 03/10/23, 5 Strawberry Yields fem seeds aka Strawberry Fields.
filtered water in glass, also add 3/5 drops of hydrogen peroxide, stir water well before adding the seeds, and stir again after adding seeds to water.
I will leave it for 24 hours.
The seed coat softens by soaking your seeds in a hydrogen peroxide solution, allowing the seeds to absorb more oxygen. This results in increased germination speed
Hopefully all 5 seeds will germinate by tomorrow?
The 3 GMO Cookies fem seedlings are coming along well, keeping them under the hood of a propagator, i have many mixed seedlings under the same hood, to keep seedlings protected from this relentless Spanish heat.
5 Strawberry Yields fem seeds have all sprouted and are above vermiculite, keeping them under the hood of a propagator, i have many mixed seedlings under the same hood, to keep seedlings protected from this relentless Spanish heat.
Also positioned also under the 100W LED light, indoor temp 29 degrees humidity 65%, still to hot for seedlings to be directly under lights due to high temp in the room.
3 Strawberry Yields sprouts are doing well, gave 2 seedlings away, no space for all 5 plants, coming along well under the 100W LED light.
27 degrees humidity 55% good growing conditions
Super Lemon Haze
I began soaking 13 feminised seeds SLH since 27/10, after 24 hours soaking 11 seeds opened in
filtered water in glass, also added 3/5 drops of hydrogen peroxide, stir water well before adding the seeds, and stir again after adding seeds to water.
The seed coat softens by soaking your seeds in a hydrogen peroxide solution, allowing the seeds to absorb more oxygen. This results in increased germination speed!
1 Super Lemon Haze fem seed planted in a 2 ltr pot 28/10, this is the only plant i will keep for flowering.
The Pot is Half filled with lite mix compost, and the rest of the pot is half filled to the top with Vermiculite , watered planting medium thoroughly soaking it before sowing seeds 2cm deep in vermiculite.
The seed will push through the vermiculite easley with very little effort, in effect encouraging a higher successful germination rate, the compost will offer the first tap root an immediate lite nutrient supply.
And i planted the 11 remaining popped SLH seeds in the brown round pot, this is just to see how many will rise above the vermiculite from the 13 SLH fems seeds soaked on 27/10.
I will give these away to a friend.
Both pots have been placed on a propagating heating mat for consistent and ideal germination temperature until all seeds have risen above the vermiculite.
Once my 1 fem seed has germinated! i will cover the pot with a transparen plastic bag and place the pot 20cm below a 100W LED light.
Super Lemon Haze feminised seeds
Seeds sourced from Satdica Bulk Seeds
Soaked seeds 27/10 planted up on 28/10, 12 out of 13 seeds have transformed in to 12 healthy little seedlings.
11 seedlings will be given away to a friend, and i will keep the one seedling you see already planted up in a black 2 ltr size pot.
Now positioned under my 100W LED light, distance 15cm above seedlings.
Light cycle 24 hours.
Keeping them covered with propagating hood for a few days longer to allow seedlings to become better established before removing the hood.
The vents on hood are fully open to allow seedling to slowly become accustomed to the outside vege room space.
Gelato Cookies 3 Feminised seeds
Satdica Bulk Seeds
Popped 3 Gelato Cookies Feminised seeds today 06/11
filtered water or bottled water in a glass, also add 3/5 drops of hydrogen peroxide, stir water well before adding the seeds, and stir again after adding seeds to water.
I will leave it for 24 hours
The seed coat softens by soaking your seeds in a hydrogen peroxide solution, allowing the seeds to absorb more oxygen.
After placing on propagating heating mat for 24 hours.
This resulted in increased germination speed! and today i can see little white taproot tails protruding out from the seed husk 👌
3 Gelato Cookies seeds, 1 seed in each small pot.
Each Pot is Half filled with lite mix compost and Half filled with Vermiculite , watered planting medium before sowing seeds 2cm deep in planting medium.
Spoon your seeds into it's planting medium, do not touch with fingers, spoon it in with half spoon of water and a seed, place the seed in the center 2cm deep in the planting medium, water it in again very lightly to help the seed settle into a comfortable position before leaving it to rest covered on your heating mat.
The seed will push through the vermiculite easley with very little effort, in effect increasing higher successful germination rate, the compost will offer the first tap root an immediate lite nutrient supply.
Watered and fed them in with Plagron Terra Grow 5ml to a ltr of water, i may have added too much, perhaps 2/3ml to a ltr of water would have been enough?
placed 3 pots on top of a Propagation heating mat for correct germination temperature, position in a shaded place, and keep out of direct sunlight.
This may seem like a lot of effort? and it is, but it will be highly beneficial by increasing a higher germination rate and higher amount of seeds will germinate from using this method :) especially if your seeds were expensive.
3 Gelato Cookies have come through the vermiculite, 09/11 and now they are positioned under my 100W LED grow light.
I didn't expect all 3 seeds to pop, because 1 seed looked like perhaps not viable, because i only keep the bad looking seeds for myself and keep the best seeds for customers.
I am keeping them covered with transparent plastic bags for a few days to protect them in case it's to hot in the 24/7 grow room which is 24 degrees, this is probably an ok temp for them? but i'd rather not run the risk.
Romulan Feminised seeds
Germinating 3 Romulan Feminised seeds 26/11
filtered water in glass, also add 3/5 drops of hydrogen peroxide, stir water well before adding the seeds, and stir again after adding seeds to water.
I will leave it for 24 hours
The seed coat softens by soaking your seeds in a hydrogen peroxide solution, allowing the seeds to absorb more oxygen. This results in increased germination speed
Hopefully all 3 seeds will germinate by tomorrow? 27/11