


Likes
Comments
Share


@3lementa1
Follow
August 23: Just finishing up about 36 hours of darkness, then I'm going to wash the buds, then hang them. Harvesting a bit early due to time constraints but it looks good. The smell is very dank, not a tropical skittles smell, much more like wood glue as I've seen mentioned in other reviews, although I'm starting to occasionally catch a sweeter tropical scent as well.
I wanted to leave it a little longer. There were still a lot of white hairs when I started the dark period, but a lot of them seem to have developed into swollen calyxes so I'm pretty happy. I was a little worried they were making seed pods after last time, but I broke one open and all that was inside was red hairs. I'm going to keep an eye on the RH while they're drying and get them into jars and try to wait as long as possible before I start sampling. I can tell this is one of those batches that's going to get better and better if left alone for a couple months.
Just did the wash, did 1.25 cups of 34% food grade H202 and a squeezed lemon in a 5 gal bucket. Another bucket of just water to rinse. Then I had a fan on it while hanging in the sunlight from a skylight in the bathroom for 30 min, then put the fan further back and on oscillate, then turned it down an hour later. Left it in there for a few hours, then hung it in the grow tent with everything removed except an oscillating fan, pointed away from the buds. I have the whole plant hanging in the middle of the tent and the tent is holding at 60% rh.
Next run I'm going to do 2 buckets and only top once. I might leave them a bit longer in veg too to maximize the height in my grow space, and I'll get a proper 500w bulb instead of continuing to run 1000w bulbs at 50% to lower the heat a bit. The weather will be cooler and I'll only run one air stone in each bucket which should help with res temp. I'll probably foil-wrap the buckets again as well. I should be able to get another run done by the end of the year. I have a White Widow fem seed I've been waiting to use but I'm not sure what else I want to grow yet. Maybe Granddaddy Purp.
I'll take some micro pics of the trichomes this week and start curing, and I'll post a proper review in a couple weeks.
Happy growing everyone!
August 24: I took it out of the tent to inspect. No mold or mildew. The middle of some buds are still pretty wet. I'll keep an eye on it. Wet weight on the stem is 158 grams/ 5.5oz.
I harvested a couple branches last week and hung them up. I just ground up one of the buds, left it overnight and vaped some today. There was a bit of Chemdawg Tangerine in the grinder already but overall I got a lot of thick vapour, instant effects, and a really great tropical taste.
I busted out the microscope camera and I realized I had a couple buds that fell off before I washed the plant in the H202, and a couple buds that came off in the washing process. It doesn't look like washing the buds took off any of the trichomes. I do seem to find less debris in the buds, not that there was much there before. The trichs look great. Just a light toasting of amber. The washed bud actually seems more dry than the unwashed bud.
August 25: there's a real chlorophyll smell coming from the drying room today, it was much terpier yesterday. Leaves are getting crunchy, stems are still fully bendy. I ended up taking it down in the evening. The drying room rh dropped from 60% to 55% and the buds were starting to look too dry based on my last grow. I put it all in a paper bag for the night and I'll put it in jars tomorrow morning. Broken down most of the way it came out to 48-49 grams. From the bud structure, I definitely feel like it would have benefitted from more grow time if I didn't have to travel. More to come.
August 26 - the edges of the buds are getting really crispy and the buds are getting tighter. I checked the paper bag earlier and it was 65-70%. I got the impression it was time to put it into jars. I'll keep the lids off for a bit.

Likes
119
Share


@Rangaku
Follow
The Pineapple Express is ready to come out soon and has started her flush with crystal clear , it tastes as good as it looks , I’ve pulled a bit more off to smoke ( the last pic ) . She’s got some purple coming out and is absolutely stacked in trichomes and sticky to the touch .
The Gorilla Zkittles is another 2 weeks behind and will love getting the place to herself next week , she’s so stinky it burns your nose but every now and then that fruit orchards smell will come thru , she’s starting to fill out nicely and is standing a bit over 1.2 metres, I’ll spread her out some next week when I have the space and keep feeding her for another two weeks .
For now it’s drier sheets at the exhaust vent and and giving these two a great finish.
Likes
5
Share


@mobbly
Follow
Week 3: Since this is my first grow, I love to see how quickly the cannabis plant grows, and it's accelerating rapidly. They are thriving and healthy. This week, I used fertilizer for the first time, starting with half the amount recommended in the feeding schedule. 0,5/ml per liter.

Likes
2
Share


@Comfrey
Follow
Diese Woche musste ich am Ball bleiben, ein krasser Stretch machte ein fast tägliches LST und eine dezente Entlaubung notwendig. Um einen schönen Ertag für zwei zu generieren, habe ich mich aufgrund der Lage unseres Balkons entschieden, alle Pflanzen kräftig runterzubinden. Zwei Ziele habe ich dabei verfolgt. Zum Einen haben wir hier maximal sieben Stunden mit direkter Sonneneinstrahlung. Durch LST erhoffe ich mir eine gleichmäßige Blütenbildung und Konzentration von Terpenen. Zum Anderen liegen wir mit unserem Balkon mitten im Dorfzentrum mit regem „Publikumsverkehr“. Das deutsche Cannabis Gesetz sieht vor, dass der Anbau nicht öffentlich einsehbar sein darf. Ohne das herunter Binden könnte man die Damen allerdings sehen. Die Anordnung der Pflanzen ist auch so vorgenommen worden, das sich eine Art Sonnenfalle bildet. Jede Pflanze und insbesondere die Blüten bekommen das maximal Mögliche an Sonneneinstrahlung. 🌞
Gegossen wird nun morgens und abends nach Gefühl.
Purple Punch Auto fühlt sich ganz wohl hier. Die Vorblüte sieht vielversprechend aus.

Likes
16
Share


@Ssio91
Follow
Erste „richtige“ Entlaubung bei diesem Grow hinter mich gebracht. Sonst läuft alles gut dafür das ich sie komplett selber machen lass


Likes
25
Share


@Vincent11
Follow
Hi everyone
Hope you are all well guys.
Another week gone and the Gorilla Automatic 2th grow from RQS looks about ready to finish.
I flushed her day 65 with Flawless Finish.
Today she's Day 70.
Any day now she will be ready for chop.
She's so beautiful 😍. Sad she will go down soon.
70% milky white trichomes and a few amber. At the moment.
She's grown big again.
Buds are big, nice and hard starting to get some purple on the buds.
And she's smelly.
For one or another reason I can't add Text to Pictures in GD. Sorry for that.
Happy Growing
Likes
30
Share


@PrairieFrostGrow
Follow
***** Week 7 December 26 to Jan 1, 2020 - Days 43 to 49 from germination *****
Oh yeah baby.......that was a stretch week in week 6!!!.......she gained roughly 10 inches last week😀👍 Only 7 days ago I was not sure where we stood with transition and stretch but she took off by mid week last week. I expect this week to be similar to last and she will keep stretching through mid week at minimum but then likely be pretty close to end of stretch and focus on buds. Using this week to ensure we keep her tied down and try and maintain an even canopy in order to have lights at optimum height.
She is consuming a couple of liters a day now and will continue this way for a few weeks I suspect. Ensuring that she is getting silica now to strengthen the branches to help support weight. She has some nice thickness to her 8 main branches reaching for the top. Good signs that she will be able to support weight of bigger buds. Its also time to get Terpinator going in full gear as well. This girl has tons of terps according to other diaries so want to ensure we support their production as well👍 Not sure if I will add Rezin from Green Planet to help with trichome production this go or not.....I wanted to stay with just Remo's line of nutes but I still have to add silica, microbes, beneficial bacteria, and enzymes........yes healthy microbes will produce beneficial enzymes but I always add them as well.......so am I really staying with just that line already???
She had more yellow leaves at the below than I realized when I pulled her out. Not what we want at this point in life so ppm have been stepped up and frequency will increase for both Fast Buds girls😀 Healthy and strong growers need the meat and potatoes!!!!! Really want the flavors to come out for this girl so I have been watching the feed and trying to make sure I don't find myself unable to flush her well enough. Finding the balance😃
Little more daily detail.........
Dec 26/20, Day 43
- 2L full feed again. Had mixed up 12L yesterday.
- Added 2ml/L of Microbial Mass and Piranha = 1200ppm and 5.9pH.
- The girls needed their microbe allotment as we get closer to the end.
- Bacteria added to help keep some of the nutrients in the media as she finishes.
- next watering is more of plain water and add Terpinator.
Dec 27/20, Day 44
- pots are light again in the afternoon.
- 2L watering with Magnifical and Microbes and Rezin @ 2ml. Terpinator @ 3ml = 400ppm and 5.8pH
- She is a hungry girl but backing off the ppm on this watering a bit.
- trimmed lower branching on the outside and down low. No need for her to waist energy on four branches so cut them off.
- I have added Green Planet Rezin because it has become part of my routine now for the last few grows and my girls have been frosty......continuing with it on this grow......in moderation😜
Dec 28/20, Day 45
- the girl is hungry so feeding again today with full nutrients.
- 2.5L watering today, stepping up from 2L volume.
- Full line of Remo, all 6 parts plus silica again @ 2ml = 1150ppm and 5.9pH
Dec 29/20, Day 46
- another feeding in the morning today. Pot was really light.
- 2L in the morning giving with same feed of 1150ppm and 5.9pH.
- in the evening, 12 hours later, pots were pretty light so gave another 1.25L of feed that was left over for 16L mixture yesterday.
- she had a total of 3.5L feed today......water tomorrow and not feed.
- observing today that she is slow accepting new water into the media......root issues starting?
- stripped off two lower outside branches again today that are too low.
- will keep talking some lower branches from this girl this week and then leave her alone after that.......not too radical, just a few that will not amount to much in the end.
Dec 30/20, Day 47
- she has not finished her stretch just yet......she is taller again this morning.
- Pulled them out quickly to test the weight of the pots and they need watering again today.
- The leaf colour is quite green now when you pull them out and look at them under natural light.......back off ppm next two watering's and keep CalMag, Terpinator, and microbes for now only.
- 11:00am she had 2L watering with Magnifical @ 1ml, Enzymes Komplete and Microbial Mass @ 2ml = 175ppm and 5.7pH
Dec 31/20, Day 48
- pots are really light this morning.
- 2.5L feeding with Terpinator @ 3ml, MagNifiCal and Rezin @ 2ml Natures Candy @ 1ml = 600ppm and 5.9pH
- pulled her out and trimmed off a fair bit of lower branching. Did it now before she gets too far into flower.
- she has really vigorous branching so trimmed a lot of inside growth and the bottom 1/3 of her.
- It was actually fairly aggressive stripping so will keep an eye on her and see how she reacts......should have added some kelp and vitamin B to the feed but didn't😶
Jan 1/21, Day 49
- watering in the morning.
- 2.5L watering with CalMag, VeloKelp and Vitathrive @ 1.5ml = 400ppm and 6.0pH (Had to add Terpinator for 1ml/L to bring down the pH......missed it so added something, too much pH up was added.)
- they have been given a lot of ppm this week so backing off a bit and just giving some basics as using RO water.
- bud sites mid way down the stems are getting bigger and stacking more........she has some huge potential to yield but with her only in a 3 gal pot.......I feel like I shot myself in the foot and she should have certainly had a 5gal pot!!!!
Likes
58
Share


@pifflestikkz
Follow
Day 65
Day 15 Flower
06/07/24 Saturday
Water de-chlorinated tap pH 6.2 today.
I have had to do a deep defoliation, and light LST, she just climbed last week 🤦♂️😅 and air flow was becoming a problem finding wet spots under leaves is no go at this stage in flower .
So here is her update, she is absolutely huge 🤩 thank you SSSC for allowing me this run, I'm going to dedicate my whole space to a full auto run for her next. She has un tapped potential 👌.
Updated pictures and a video today.
Day 66
Day 16 Flower
07/07/24 Sunday
no water/feed today letting her dry off a little more.
Updated with a short video 🤩
Single plant monster ✌️💚
Day 68
Day 18 Flower
09/07/24 Tuesday
She seems happy and dark green so just a water today, 3L. Updated a short video 😁
Day 69
Day 19 Flower
10/07/24 Wednesday
Big feed today, de-chlorinated tap water pH 6.0 5L feed. Run off 5-10%.

Likes
8
Share


@Bryankush
Follow
Giorno 1 molto bene le ragazze sono state defogliate per entrare pulite nella terza settimana di fioritura
Giorno 7 annaffiata con 2L di acqua


Likes
17
Share


@JohnnyBarrel
Follow
Week 15
Coming back from holidays: left the plants 13 days in self sufficiently.
-grow spot: greenhouse
-Automatic Watering Blumat with 5L supply of water / plant
-ventilation: 6 AM to 22 PM = 15 min/h - 22 PM to 6 AM = 15min/2h
-companion plants: dill, basil + in front of the greenhouse: lavender, sunflower
-insect traps ; artificial (paper glue) and natural : numbers of spiders around
-1 manual watering day 7
Really good surprise: all plants look healthy and particularly the Sleepy Joe, growing 40cm higher in 13 days + a good side stretching. No pest or predators around (I will have a meticulous check soon), no signs of dehydration just some dead leaves on the floor causing by heat or the minimum water quantity, proving by the root system around the ‘carrot clay’ (Blumat) cf photo.
Daylight 6h34 to 21h43 = 15h09 👇🏼- Lucky weather: sunny, not too hot 🤙
Nutrient cocktail BioBizz 2L
Sprayed Neem Oil early in the morning
🤔thinking about the size problem….this Phenotype is very vigorous: 1m30 high and the vegetative period is not achieved 😬: the plantation must remained imperatively discrete.
I decided to train the 2 top branches (photo): the final form is pretty cool…
For the moment all is running well….the perfect cool weather but it’s minimum 10 weeks before harvest: a pretty long way…

Likes
26
Share


@420DeepGrow
Follow
Gracias al equipo de FastBuds y XpertNutrients sin ellos esto no sería posible.
💐🍁 Gorilla Punch (Auto):
Niveles fulminantes de THC. Testado en laboratorio con un 25,695 % en cannabinoides.
Perfil rico en terpenos. Los complejos y sabrosos terpenos de esta variedad son codiciados tanto por los extractores como por los fabricantes de hachís.
Rendimientos impresionantes. Los cultivadores pueden esperar hasta 550 g/m² de flores deliciosas y aromáticas, rebosantes de THC y otros jugosos cannabinoides.
Prueba de excelencia. Dos premios al primer puesto en menos de dos años dejan claro que esta cepa es una auténtica campeona.
🌻🚀 Consigue aqui tus semillas:
https://2fast4buds.com/es/seeds/gorilla-punch-auto
⛽ XpertNutrients: es una empresa especializada en la producción y comercialización de fertilizantes líquidos 🍶y sustratos🐛, que garantizan los mejores resultados y cosechas de la más alta calidad. A través de una cuidadosa selección de materias primas y un proceso de producción avanzado, sus productos son sinónimo de resultados confiables.
🛒 Consigue aqui tus fertilizantes:
https://xpertnutrients.com/es/sobre-nosotros/#:~:text=Xpert%20Nutrients%20es%20una%20empresa,de%20la%20m%C3%A1s%20alta%20calidad.
📆 Semana 6:
Parece que el temporal por fin se va a pasar esta semana, todo esto le ha afectado aunque puede que de un estiron esta semana.
Se aprecian las primeras preflores.
Voy a aplicar unas enzimas para ver si asi se recupera de todo este estrés que tuvo.
Likes
21
Share


@TheStrainAlchemist
Follow
The time has come, here we are into the first couple of days of flowering, slightly upset because I can’t look at them during the day and their light cycle runs at night but I have to get used to, I used to spend hours staring at them.
My Gf told me to get for a second into the feeling of the plants and imagine this human look at me for hours 🤣🤣 I have to admit that would be slightly creepy and they don’t know yet that I’ll chop them down and smoke ☠️
Enjoy fellow growers ☮️✌️🏼😎

Likes
22
Share


@EhJay
Follow
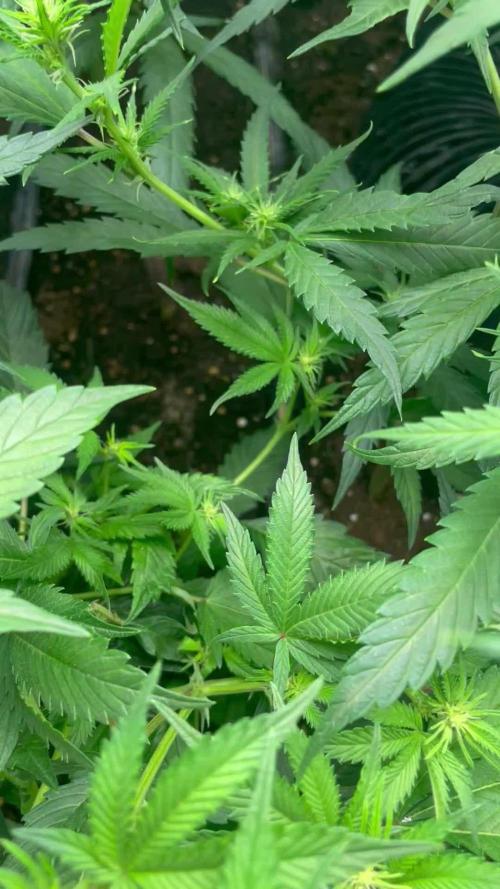
D29 Did top dressing with bone and kelp meal as well as worm castings.
D31 Performed a little more LST, a few more days and I will let her do her thing.
D32 More LST exposed lower nodes and evened out the canopy.
D33 Removed all bonsai wire and rolled down the rim of the pot to even it out with to soil, more airflow.
D35 Not much growth but overall looking pretty good. Heatwave last couple days keep temperatures higher than desired.



Likes
15
Share


@NyBushDr
Follow
Good morning, weekly update time! Today is day 41 of flower, the fade has started but the ladies are still bulking up and putting on weight! Prob start checking trichs in ten -14 days or so but like I said weight is stil increasing and white pistils are still dominant. Last week they got their last dose of recharge tea, I’ll probably give them fish shit one more week! I also gave them one last fruit compost tea I made with apple, cucumber, kiwi, and banana peels! Here on out there isn’t much to do and it’s getting boring for me, I liked working with them topping and training etc but now I just check on them once a day. Thanks for reading and see you next Tuesday :)

Likes
3
Share

@carlitospiratahaze
Follow
Aquí está la pequeña banana tirando como puede de manera que pelea por el espacio de iluminación contra las amnesia.
Una locura este híbrido entre tantas sativas!
E de decir que me gusta 😊
Seguimos subiendo poco a poco la ec este riego en el día de hoy 30/3/26 le e metido un pequeño chute de 70l con un ph6,4
Estamos alimentando a la pequeña con 1800ec
Y parece aceptarlos bastante bien!!

Likes
18
Share


@CanarianGrow92
Follow
I think that in around 1 week this girl is ready, nice plant to grow, i like the bud structure, the calyxes vs leave proportion is great, a very nice and sweet smell and an easy to grow plant! 😋 🍰🍰🍰
Likes
9
Share


Likes
11
Share


@Hickhhdgk
Follow
All looks good with this freak, starting to get big. Has more than doubled in size in 10 days, think I might have upped the feed a bit soon and got a bit of nute burn so back down a bit and seems to be fine. Gonna have to thin her out a bit as she is hella bushy. 🔥🔥🔥🔥🔥🔥🔥🔥🔥
Processing
Likes
21
Share

@PrairieFrostGrow
Follow
********Week 1 Flower - Sept 19 to 25, 2020*******
We switched to flower this week and put in the first SCROG layer.....been busy😃These girls have been pretty happy this week given they have grown quite tall and buds are setting and moved on to stacking already. Great signs so early on😎🤞 I had LST on the girls and then decided to remove the ties since they were topped and under a net so maybe stretch wouldn’t be too bad.......ties went back on at the end of the week😃💪🤪 Pheno 4 has on branch that had HST done and knuckle formed, still growing up so had to keep it tied down as well. Down side to running a 9 week veg, if they want to get big, they will😂😂😂
Pest maintenance this week as we are getting the last days I am able to comfortably spray the girls. Lost Coast Plant Therapy to keep the gnats, aphids and thrips in check😃
Keeping the waterings up and getting a fair bit of runoff from the feedings but that is best for Coco to avoid lockouts and pH issues. There were only three feeding days this week. We switched to bloom nutes for base and added silica for supplementals. Vitamin B and Kelp coming from B52 and sweetener for the microbes from bud candy, Bud Ignitor doing its thing as PK boost. As well as Sensyzime to let the enzymes clean up the root zone because they have been in the pots for a few weeks now.
Little more detail:
Sept 19/20 - Day 1
- Plant Therapy @ 5ml in 1L water. Ph to 5.4.
- Folier spray applied to whole tent half hour before lights on, used 3/4 of mixture
- Feeding mixture was Sensyzime @ 1ml only
- 25ppm and 5.2pH......missed it a bit.
- each girl given 3L
- SCROG put in
Sept 20/20 - Day 2
- Sprayed the last of the IPM mixture on the tent tonight.
- Noticed several small shinny spots on leaves later today.....suspect from Folier spray on leaves.
Sept 21/20 - Day 3
- Nice full strength week 1 mixture applied today
- Rhino Skin, Cal Mag @ 2ml, Sensi Bloom A&B , B52, Bud Ignitor, Bud Candy @ 1ml.
- 625 ppm and 5.7pH
- 3L given to each girl.......not enough runoff.....bump feedings up to 4L going forward.
- silica added today.
Sept 23/20 - Day 5
- CalMag @ 2ml, Rhino, Sensi Bloom A&B, B52, Bud Candy, Bud Ignitor @ 1ml.
- 850ppm and 5.9pH
- 4L given to each girl.
- better run off amount
That wraps up the first week of flower........The net is in and the lights flipped. The girls were ready for flower and now we just need to keep giving them what they want for the next 6 weeks and then coast from there👍 These are some strong and fast growing girls.....keeps a grower on their toes! I expected the heights to be where they are but must admit I was hopeful that was the end of week 2. Issues will come in when trying to ripen the bud around week 8. They are growing so well right now.....keep them happy and in the end everyone is happy👍❤️👍
Such a solid strain @Sweet_Seeds......a great hybrid you should be very proud of!!! 🙏🙏🙏