


Likes
17
Share


@Mr_nugs_lover_David
Follow
It's been a beautiful strain to work with, the flowrs are definitely worth it after all this time, the quality is definitely high. However this pheno of ak420 smells very different from the other 2 phenos I've grown along with her. The flowrs are beautiful, very solid and frosty nuggets, I smoked a few little nuggets when trimming but I'm excited to taste the big buds, hope you guys enjoyed the process. I want to say that this pheno #1 has a different smell compared to the other 2 phenotypes of ak420 that you can see here on my page as well, so stay tuned guys! Overall result is very nice, good quality, strong weed, sticky, stinky. I can say that it's very great and also you can get them for a very cheap price so it's a very good investment if you're looking for a powerful and affordable strain. Cheers growmies! ❤️💚💛💎👨🌾

Likes
20
Share


@Insaniac_0
Follow
8set Mainline & 6/4set Manifold in Auto Pot - Selfie Seeds Sweet Slurry x Sugar Cane (6X4) - Week 10
Flower Week 1 Day 7 to 13 - 3/25 to 3/31
Simply watching the stretch from this point. Both plants recovered very nicely from Schwazze extreme defoliation and all of the colas/branches are mostly even at top.
Feed this week was again an auto pot reservoir feed at 650ppm total before add-ins. I used 325ppm Veg concentrate mix (recipe week 2) and 325ppm Bloom concentrate mix (recipe week 5). However, I also added 1ml/gal of CaliMagic (General Hydroponics 1-0-0) and ph balance this week was for 5.8 where Io plan to maintain it until harvest.
Next week nutes will increase in Bloom mix again but also reduce in Veg mix. Feed will be 700ppm before add-ins with 5.8ph before feeding.
Likes
27
Share


@Mosquito_Haarlem
Follow
Oogsttijd 🌲
Werkelijk waar boven verwachting, dikke vette keiharde wiettoppen.
Zamnesia strains blijven me verbazen.
Dit is zijn harde toppen zoals een indica, maar met de lange lengte van een sativa, heerlijk.
Ze vertoont paars, roze en oranje tinten en ruikt zoet.
Ik heb de plant in zijn geheel opgehangen en zal de resultaten delen wanneer de wiettoppen droog zijn.
Wordt vervolgd

Likes
69
Share


@Teamdirtbag2
Follow
She is now a skinny 17 inches tall. Defoleated all the bottom crap and cleaned her up. A little newt burn last week at 600 ppm. I have raised ppm to 680 so she may not be happy come the end of the week. She will have to get use to it. I'm sure she will be fine. Added second light, so it should get interesting.

Likes
13
Share


@Robeeriegenetics
Follow
Plants recovering well …heat is causing some problems in the indica room otherwise all is well …1 more week till flush then 1 more week after that til harvest
Likes
6
Share


@Chuckwaggon420
Follow
This week has been good for this group girls, they are awaiting room to get moved into 1 gallon pots. In the next couple days will fill up flower 1 and the room will have more space. These girls love their environment they are constantly happy plants. Just all standing their proud!
💧: They recieve about 125 ml of food every 2 days like clock ⏰️ work. Keep the ph around 5.6-5.7 and they all just seem toblove it.
Stay up

Likes
9
Share


@4F1M6
Follow
I started germination of 1 orange sherbert bean on 29/12/2020. I pre moistened my rockwool cubes with ph balanced water to 6.4. Made sure the plug was just damp and not soaked. Using a small wooden dowel I increased the size of the plugs pre made hole. Than I sowed my bean into the hole. Ripped off a small piece of rockwool and mulched it up. Lightly filled the hole in with the mulched rockwool. Than stuck the plug into a misted humidity dome, to complete germination.
Shouldn't take anymore than 4-5 days to see a sprout. Once I see some cotlydon leaves bursting to the surface. I will get the plug planted into some 1 gallon pots. Plus get this lady situated into her home. Cant wait!
Some Background information on history with Orange Sherbert. I have grown orange sherbert out 3 times and all times had the same result. A shorter extremely branchy robust plant. That dominated the room. Loves training and really ups yeilds doing so. She produces an amazing canopy... just a sea of daggers. Her huge chunky colas pack and amazing orange tangy aroma and just taste like heavenly candy! Barneys Farm hit the nail on the head with this variety!
She tends to have a little higher demand for potassium mid flower than most varieties. So a bit heavier on the pk booster and she will be mighty happy! Just a fabulous strain to work with.

Likes
20
Share


@m0use
Follow
Ok, so I forgot to take any pics on week two and holiday time week 3 came up real fast. so we are going to skip over any of the week two details. just watered em and they grew.
This week we did a nice little transplant into their final 2gal pots. Fortified with a bunch of amendments and Acti-Sol, everything is listed in the video. Any question just let me know.
I don't age my medium at all and I think I should start doing this to avoid some other things, I just find it hard to do it in winter time indoors as soil can be stinky with amendments and I like it to stay in the tent under the carbon filter.
Medium I used is 40% coir, 30% perlite, 20% compost, 10% vermiculite and 10% worm castings. Then the amendments are added into that at the rate of 30-60ml per 1Gal of medium. This batch has Gaia 4-4-4, Gaia Insect Frass, Giaia Diatomaceous Earth, Gaia Rock Dust, Acti-Sol Seaweed Meal, Acti-Sol Shrimp/Crab Meal, Acti-Sol 4-3-2, Acti-Sol 4-6-8 and Bokashi. Nice little mix, water it in with a bit of magnesium and microbes dissolved into the water. The bokashi should help break everything down and make a bit of a acidic environment for all the meals and rock dust to become available. Roots looked good, not a dense as some runs but still nice. I feel the soil might be a bit hot so will expect some burnage on them hopefully its nothing to crazy. Will ph down with a mix of citric, malic and ascorbic acids. They are in a rate of something like 50-60%/40-30%/5-10%, its written down in my of my notes just can't find the pad ATM.
Also more videos vs anything this week. I like em more but processing them is annoying AF.
Side note, my lights timer was on 12/12 not 16/8 so it explains why they went into bloom, switch it back and will top the plants next week one they start to reverse their ways and get comfortable in the new pots. Also got ride of the chive seed start as it was looking sad, plus I got a bunch of European chive varieties in the mail yesterday and want to try them out. see if they really have any different taste and what ones I like better.
Till next week.


Likes
72
Share


@Roberts
Follow
Auto Maxi Gom is making progress. She is shifting more into a stretching, and stronger pre flowering phase. She should start developing more colas in the next weeks to come. She is just doing her thing, and making progress. Thank you Xpert Nutrients, Medic Grow, and Seeds Mafia. 🤜🏻🤛🏻🌱🌱🌱
Thank you grow diaries community for the 👇likes👇, follows, comments, and subscriptions on my YouTube channel👇. ❄️🌱🍻
Happy Growing 🌱🌱🌱
https://youtube.com/channel/UCAhN7yRzWLpcaRHhMIQ7X4g
Likes
11
Share


@DimJesus
Follow
Saludos 🙌 completando la séptima semana y comienzo de floración 🙏
Cambié el fotoperiodo el día 2/04 y la planta dió una buena crecida desde entonces. Comenzó a oler un poco más también pero todavía sin señales de pistillos, ansioso para verlos.
Buenos humos 🍃

Likes
17
Share


@PCGrows
Follow
Started putting on weight and smelling really good. Hairs are tiring orange but trichs are all still clear. Might need to support the buds if they keep packing it on like they have.
Likes
4
Share

@TrickzGrowz
Follow
Der kleine Trieb von unten hat super aufgeholt. Auch der Trieb der nocheinmal getoppt wurde, damit er nicht abhaut, sieht mittlerweile wieder stark aus. Bin gespannt, wie sie sich noch entwickelt.
Likes
175
Share


@love_2_grow
Follow
Day 8
Another day, another cm of vertical growth. The Blumat Digitals showed that the soil moisture was still in an ok range (115-131 mbar) but the topsoil was a bit dry so I sprayed each plant with 1 liter of water (pH 6.3).
Day 9
The leaves are getting wider with no additional vertical growth. The right plant is noticeably larger but both look healthy.
Day 10
Plants are a bit wider but all in all pretty uneventful.
Day 11
Another day of the plants are getting wider but no vertical growth. The cover crop on the other hand has been growing quite a bit so I trimmed it down a bit.
Day 12
The Blumat Digitals showed that the soil moisture was in the 114-162 mbar range so I gave each plant around 1.3 liters of water. Dumb as I am I forgot to pH the water though so I guess it was around 8.0 as that is where my water normally is. Oh well, gotta remember it next time. I also removed the humidity domes as the leaves of both plants started to touch the side of the domes.
Day 13
The right plant is clearly larger than the left plant, being both 25% taller and 40% wider. Let's see how it progresses from here, maybe one plant is simply slower or maybe it's a different phenotype.
Day 14
Not much to report except that the right plant is still growing at a fast rate while the left plant is creeping along.
My girlfriend was transplanting our tomato plants today so I put a few in the tent as there was some extra space. I sure hope though I didn't bring in any silly bugs into the tent. Oh well, let's see... We keep the rest of the tomatoes and chilies under a ViparSpectra light in our front room until the weather finally gets good enough to move all the peppers and tomatoes outside.

Likes
422
Share


@Crashoverite
Follow
Hi everyone 😁
Welcome back in another week update!
Thank you all for this amazing support on this bananas journey💚💚💚
Uploading and updating each week content on daily bassis so please revisit this diary if week not over yet.
So far all going great. Girls looking very healthy and happy. Due to my short trip had to leave my 🍌💜👊 girls unsupervised for 3 days. Was stunned when opened my cabinet on the Dec 5th. Athena stretched like crazy. Good 3 inches. She better slow down as not much roof space left for her. May tie some taller branches to netting if necessary. Introducing blooming nutes for the first time this week on December 6th at smaller dosage and on the second watering as listed.
Week 8
Dec 4 - Dec 10
Dec 5
Leaves tucking
Dec 6
Heavier selective defoliation on both girls. Athena fully lolipopped and Xena at 75%. Watered with 8 ltr beetwen both with perfect runoofs PH 6.4. Girls were very thirsty 🤤
Dec 7-8
Just enjoying how my girls developing. Frost has landed and they are start showing colours. All is looking great.
Dec 9
Second watering for this week 7 ltr beetwen both. Runoffs PH 6.4
Even with so much difrence in size of my 🍌💜👊 girls it seems that they are drinking my juice almost equally.
Dec 10
Applied selective defoliation and tied 3 tallest branches of Athena to netting to avoid any potential burns on these beautiful baby colas.
It's the end of the week!
Thank you all again for such a great support, all the likes, dm's, comments and follows 💚💜💚💜
Stay tuned for coming week update 😁✌️💚
Likes
13
Share


@GrowGuy97
Follow
Flower day 31 - Having a little trouble with the temperature getting higher than I would like because my dehumidifier puts off some heat while it’s running so it’s been a constant struggle to keep the environment in this tent stable! Definitely will not have so many plants next run lol, but all in all the ladies are growing great & I can’t wait to see how they turn out! Thanks for following friends & happy growing!✌️🏼🌱
Flower day 33 - Fed half the plants today with PH at 6.4 to try and keep the humidity down some I’ll water the other half tomorrow!


Likes
19
Share


@MaxMo8
Follow
I transferred it to a half-gallon pot and I mixed the organic fertilizer with the soil.

Likes
18
Share


@Pokan187
Follow
The trichomes on the Runtz are all milky and I'm getting some amber on the sugar leaves, I think the end is near 😁
The G13 is looking great and smelling wonderful, the buds are getting heavier and same for the GDP

Likes
22
Share


@CBDezz
Follow
The buds on this girl are growing slow do too all the stress she has been thru. I plan to keep this girl in the ground for at least another 3 weeks. We had some crappy weather this week, lots of rain and high humidity. The buds are not that dense yet so I'm not too worried yet but there is more rain in the forecast fort next week. I'm gave her some nutrients as I did the last 3 weeks, There are so many leafs on this plant it's crazy. I have grown 7 plants outdoors now and I have never had one this big so so cropping, trimming and supportiing has been a learning curve. I put some wax in the big crack at the base that you at see in last weeks pictures but not before a bunch of potato bugs found there ways in there which has me very concerned. This plant may end up being used for extracts only but I hope not .

Likes
2
Share


@DeepSouthDank
Follow
Day 24 of Bloom!
Stretch is done and flowers are forming fast!
Happy with everything thus far. No issues :)
VPD: 1.25 -1.35
EC 2.5
PH: 5.9-6.1

Likes
25
Share


@Rob691
Follow
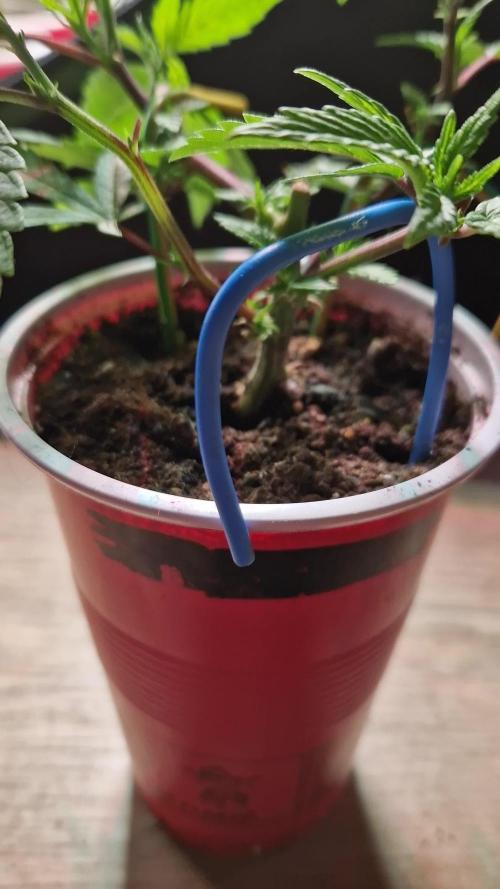
D-37 : Done the third topping, but I broke one of the branch of the most healthy Desfran :( I'm very sad about that so I will try to do a fourth topping to have the good amount of flowers. The others are going well !
D-43 : Everything still ok ! The LST is almost over, and I think I'll turn to flowering mode winthin 10 days max.