
Likes
Comments
Share


@RussianGrower
Follow
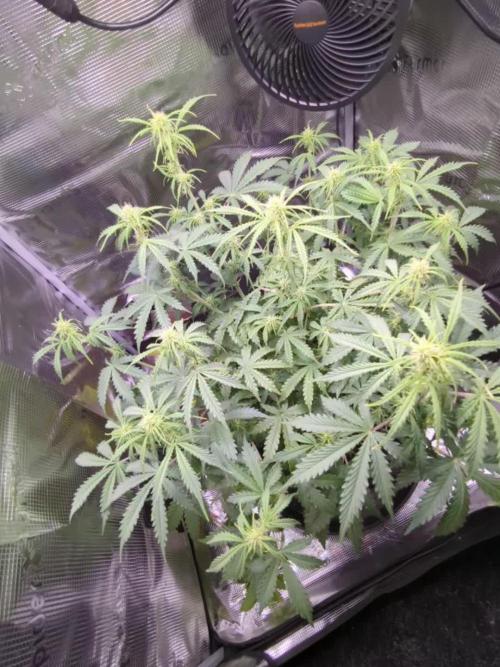
Greetings from Russia to my comrades! I was busy with work for a long time and could not deal with my diaries. Now I'm free and ready to devote every day to my plants. I have a lot of plans. My mom is coming to the end of 6 weeks. She feels great and cheerful, develops well, visible progress. While I do not train him, and give him free growth. I gave my plants the enzymes, together with the chief stimulator and the main force, Then I fed the plant folic acids under the root and on the leaves. Soon I will make my girl an intimate haircut. And in a few weeks, I'll be making the third tier of the pot.

Likes
13
Share

@DutchBarnacle
Follow
Day 31: 2L (PH6.3) with 1ml/L PK13-14
She's definitely well on her way to stretch, and some of the bud sites are already showing signs of consolidation and an increase of mass, not so much as to call it stacking or bulking, but a great early flower nonetheless.
To aid with bud forming, I've started mixing in some flower nutes. I'm starting at half dose and will probably follow up with a regular watering later this week.
Additionally, after taking the pictures, I removed the upper fan leaves of the main cola and the next highest too since it was outpacing the others. I'm trying to not agitate her too much to prevent stunting.
Since she's grown so much, the main cola was receiving 900 PPFD, and the lowest canopy budsite - in the front on the pictures - was receiving about 450 PPFD. Hence, I raised the light up to 30cm above the main cola. I haven't remeasured the PPFD afterwards.
Day 34: 2L (6.5PH) + 0.5mL/L CalMag

Likes
9
Share


@Mr_nugs_lover_David
Follow
I shouldn't have started the lst training on her because she started flower very fast and early so she ended uo being very small, which I hate because It has a very skunk citric aroma very powerful, I had a little harvest of 10g counting the little flowers which I used to make cannabutter to make some edibles.I wish I could have a huge harvest of this amazing strain, looking forward to grow her again. 🤞💚🌱💎

Likes
170
Share


@SlowpokeFuegobud
Follow
🍪 😍🍪 😍🍪 😍🍪 😍🍪 😍🍪 😍
Welcome to week 8, dear growmies!! 😘
DAY 51
Watered with 2ml bloom+ pk + 4ml humics, growzyme + 3ml bigfruits + 2ml calmag+ 2g/L LO 💧
DAY 54
Watered with 2ml bloom+ pk + 4ml humics, growzyme + 3ml bigfruits+ 2ml calmag 💧
Thanks for showing up and supporting me and the girls, bless you, growmies!! 😘
Shouts go out to my sponsors @GreenBuzzNutrients, thanks so much for your support!! 💚 💚 💚
If anyone would like to try their amazing organic products, you can find a generous discount code of 25% in my weekly comments! 😜 🙏
If you want a recommendation which product to get first.. BIGFRUITS!! 😍 I love the tasty terps with this one!!
https://greenbuzznutrients.com/
Thanks also of course @Anesia_Seeds, for the beautiful genetics!! 💜 💜 💜
________________________________________________________
Strain Information:
Foster
Foster is a balanced hybrid with a slight sativa dominance and it’s the result of crossing a particularly THC-rich Emperor Cookies Dough with our highly potent Sleepy Joe. The combination of these two exceptionally strong parents has resulted in a premium strain that delivers a fine balanced aroma and an insane high.
Foster’s high is deceptively slow at first and creeps up, but after a few minutes her outsized potency unfolds with dizzying energy and euphoria. The mind is suddenly full of motivation and a feeling of lightness spreads. At the same time, the body is flooded with tingling, warm effects and greatly relaxed. The strain clears your mind for new ideas and concepts, lets you dream and makes you feel really happy. Due to her high potency and measured THC levels of up to 35%, she will delight and challenge those with a high tolerance with ease, while certainly beaming away novices for several hours. Because of this, she is not recommended for beginners and you should not underestimate this fragrant beauty.
Growing Foster
Foster is a resilient and vigorous strain that produces excellent results indoors, outdoors and in the greenhouse. She tips the scales in yields of up to 550g/m² or 1000g per plant, grows quickly and forms many strong side branches with large heavy buds. Towards the end of the flowering period, the buds are covered in a thick layer of glistening resin and emit an intense sweet, fresh and floral scent.
She is perfect for growing in a SCROG or SOG and has a very favorable calyx-to-leaf ratio, making manicuring easy. Her terpene profile is complex, offering an aroma and flavor reminiscent of coffee, caramel, freshly baked cookies, and vanilla. It’s a seductive treat that shouldn’t fool you with her mind-blowing potency. She is among the strongest strains on the market and has enough THC to blow your head off.
Therapeutic effects
Due to its complex terpene and cannabinoid profile, it has a similar wide range of uses in the therapeutic field as in the recreational field. It helps to reduce stress, has a mood-enhancing effect and is extremely helpful for pain and inflammation.
https://anesiaseeds.com/product/foster/
________________________________________________________________________________
SETUP:
80x80x180 cm Zelsius
240W Full Spectrum LED IR UV dimmable
DW240H-A6-HS
Heatsink color red
LED Chips:
512pcs SAMSUNG LM301H + 24pcs Osram 660nm + 8pcs Osram IR 730nm + 8pcs UV 385nm
Color mix: 2700K + 4000K
2,8umol/J
Driver HLG-240H-C2100B
Coverage: veg 5x3ft / flower 4x2ft
Product size: 628x205x68mm
Green Buzz Nutrients
Shouts go out to my sponsors @GreenBuzzNutrients, thanks so much for your support! 💚 💚 💚
If anyone would like to try their amazing organic products, use code GD42025 for generous 25% discount (for orders of minimum 75€) ✨
https://greenbuzznutrients.com/
Biobizz Lightmix
custom exhaust fan 320/270cm³/h
Carbon Active Granulate 240cm³/h
tab water pH 8 - EC 0,25 with Calmag to 0,5
Advanced Hydroponics pH minus Grow + Bloom to pH 6.2
🍪 😍🍪 😍🍪 😍🍪 😍🍪 😍🍪 😍

Likes
28
Share


@GodZilla_Owner
Follow
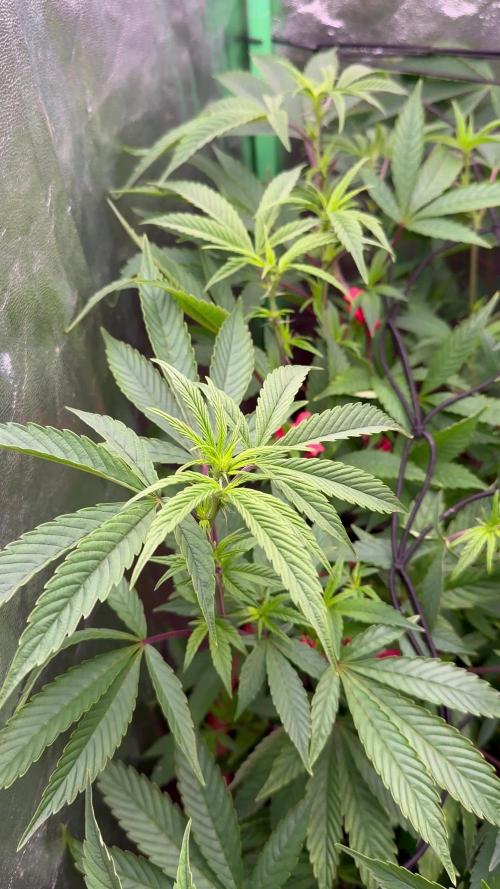
The plant is developing extremely well, was not impressed by the topping and is pushing well! It was topped after the 4th node and should fit so well in the tent.

Likes
11
Share


@Herroqitti
Follow
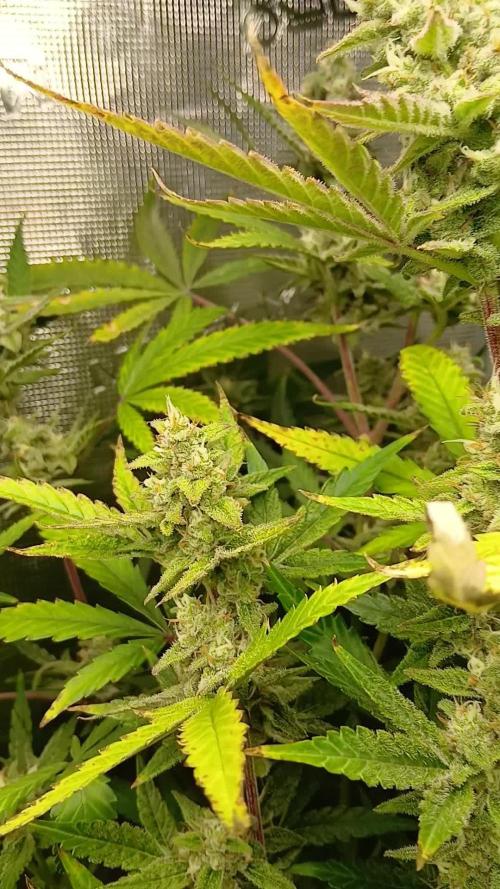
Some kind of deficiency going on. Threw some organic nutes at it and good ol cal mag plus. Trimmed those nasty leaves. She looks better, time will tell.
Likes
17
Share


@GhettoSetUp
Follow
I have upped the feed now to about 1/2 strength and the plants are loving it. They're starting to recover from the low stress training last week and stretching upwards. Budding is underway with white hairs, and a distinctive gassy smell on 3/4 of the plants.
I'm guessing I've got two phenos - 3x Chemdawg dominant and 1x Hindu Kush dominant. We'll find out when they start to flower fully.
Switched to 18/6 from 24/0 on day 36 - now that they're flowering they seem more sensitive to heat from the lights (Also backed the light off a couple inches). This resulted in an immediate growth spurt!

Likes
3
Share

@Trinidad
Follow
Day 77. Today I will harvest. This one did not get much attention, she was left to over stretch during veg and not the best feeding schedule in flower, however her buds are the most frosty I have grown thus far. Today was the 1st time i checked her trichomes and i saw some ambers, thats why i decide to take her down. Her smell is very sweet like apple pie. I will have to grow her again. I can't wait to taste her.
Likes
37
Share


@DaddyPrime2
Follow
5/5/2024
Pistils pistils pistils
5/8 these plants are fucking exploding! Super exciting to see them like this. Pistils everywhere and they’re just STACKING! don’t even see budlets yet, just pistils. The structure of these plants is beautiful. They handle training fairly well. I topped one and super cropped it and did a bit of lst. I was feeling impatient so I decided to see what happened if I pushed the one a little harder and left the other to grow naturally.
Likes
4
Share


@Thomas12477
Follow
The plants are doing beautifully after two waves of bug attacks. The first wave was spider mites that I located in my greenhouse before they had a chance to spread to my canibus.I had to spray two days in a row to kill them all. Than 5 days layer I see thrips, so I gave it another spray. I foiler fead my nutrients.

Likes
17
Share


@Herbz_Unkraut
Follow
Heat problems remain...
I upgraded the humidifier and installed a air hose from a cooler room...


Likes
12
Share


@TreeFarmerCharlie
Follow
Lots of growth and flower development over the last week. The smell is starting to come through, but I've been congested, and can't really pinpoint any particular aromas yet. Gave each plant 1TBSP Bloom fertilizer and wet top of soil down w/recharge on Saturday and have been slowly removing lower bud sites throughout the week.
Likes
7
Share


@Aleks555
Follow
Dutch Passion - Melonads Runtz Harvest
We’ve completed this amazing grow, and I must say, we truly enjoyed it! The plant grew easily and initially had a bush-like shape, but later, it transformed into a Christmas tree look. The aroma is incredibly delicious, and the yield is impressive. The buds are dense and covered in resin; while trimming, our fingers were coated in such a thick layer of sticky resin that the scissors wouldn’t cut the leaves anymore.
We want to extend our gratitude to Dutch Passion for such an amazing strain—we absolutely loved growing it. We also want to give a huge thanks to Xpert Nutrients for the outstanding fertilizer that has helped us grow such beautiful and powerful plants year after year. Without your products, it would have been much harder to achieve these results. The nutrients are easy to use and of exceptional quality!
Why I Choose Xpert Nutrients:
When it comes to growing strong, healthy plants, choosing the right fertilizer is key. After several years of experience in indoor cultivation, I can confidently say that Xpert Nutrients stands out from the rest, and here’s why:
1. Unmatched Quality: From the very first use, it’s clear that Xpert Nutrients is made from premium, high-quality ingredients. Every bottle is consistent, and the nutrients are perfectly balanced for each stage of the plant’s growth cycle. This attention to detail has allowed me to grow incredibly healthy plants with powerful roots, lush foliage, and dense, resin-packed buds.
2. Easy to Use: No complicated mixing instructions or guessing games. Xpert Nutrients provides clear guidelines, and I never have to worry about whether I’m giving too much or too little. The nutrients dissolve perfectly in water, leaving no residue or sediment in my system, making feeding a breeze.
3. Consistent Results Every Time: I’ve used Xpert Nutrients across multiple grows, and the results are consistently impressive. My plants grow faster, are more robust, and yield more, whether I’m growing autoflowers or photoperiod plants. Each time, the buds come out dense, sticky, and packed with potency.
4. Boosts Potency and Flavor: One thing I’ve noticed is that Xpert Nutrients doesn’t just help with growth; it also boosts the aroma and flavor of the final product. My plants consistently produce some of the most aromatic and flavorful buds I’ve ever grown, making each harvest a true sensory experience.
5. Optimal Performance with Every Strain: Whether I’m growing strains from Dutch Passion, Anesia Seeds, or Humboldt, Xpert Nutrients works wonders with all of them. I can rely on it to provide the essential nutrients my plants need to thrive, no matter the strain or growing conditions.
6. Support and Trust: The customer service and support from the Xpert Nutrients team have been incredible. They genuinely care about their customers' success and are always ready to provide advice and guidance. Knowing I have such a supportive company behind me is invaluable.
After years of growing, I’ve tried a lot of different fertilizers, but Xpert Nutrients has consistently delivered the best results. It’s a product I trust, and it never lets me down. If you’re serious about growing the best plants possible, Xpert Nutrients is a game-changer you can’t afford to miss.


Likes
70
Share


@Santica_Garden
Follow
In all this was a terrible harvest, and because I also do videos for my YouTube channel I don't update on Grow diaries properly which I will start doing with future grows.... Well on my next harvest will definitely do a better job of documenting my harvest details.
But in regards to the Dark Phoenix, yeah not a strain I'm a fan off. At first I kept telling myself that I done a terrible job that's why i don't like it... But I need to keep in mind that I'm not going to like all strains, all strains are different and we all have different preferences. Some people might like the Dark Phoenix, me personally I'm not a fan.
It has that earthy taste to it... Hashy/kushy...... Smoking it as I'm typing that's why 😅 and even with a longer cure I doubt it would make much of a difference to make me like it. But in all still a nice smoke, good high from her, the high hits you straight away and keeps you active and creative.... Don't know what else to say about her really, just trying to give you guys the best most accurate review that I can without bringing my own personal thoughts about the strain.
I might not like it but its still a good smoke. 👍🏾😎

Likes
30
Share


@SirSmokeALot333
Follow
So now week 6 started
3 of them are in Flower
Girls Scout Cookies still stressed from the Thrips
All of them hadn't any nutes till now
Because I added Floganic to the Biobizz Allmix Soil. Just tap water with a pH of 6,8. I think I gonna add nutes the next 10 days I will start with 30% Bio bizz grow and bloom and 100% Topmax.
That's my second grow and my first one with topping and Fimming just want to learn all of the growingcircle.
So that's all for this day 😁👍
Edit :
Day 40 Criticals and GSC
Day 37 Banana Blaze
All of them looking very good
My favorite is the crit 2 very good growing. 😍👌
Likes
2
Share

@PrinceOfHerbs
Follow
The plants look very healthy and are getting bigger and bigger, so a scrog net has now been stretched out and a few large sail leaves removed. An ac infinity humidifier has been installed and the vpd is now being kept at around 1.2-1.3.
Flowering day: 13

Likes
15
Share


@SmokingTiki
Follow
The weather was better this week and the plant grew well :) It clearly tilts towards the window to catch the light.
Day 13 picture is missing because I was not at home.
Likes
6
Share

@DaddyPrime2
Follow
1/28/25
She has a very strong berry smell to her. Very different from her sisters
1/31/25
kinda late but i lollipopped a bunch of lower branches
2/3/25
downloaded the photone app and noticed the levels of par are very displaced and was able to raise the lights to get a better reading.
Likes
10
Share


@Plzgrow4me
Follow
This week we switched both the bloom and veg lights on and that increased the heat in the tent drastically. The increase in light seems to be beneficial as they are growing a bunch daily. Started nutrients on Wednesday Apr 14

Likes
35
Share


@SAC87
Follow
Flower day 7ish
Hey Growers
I did a minor defoliation to remove the beastly fan leaves and the ones in the mud. I also did a bit more LST to even the canopy as much as possible. As it seems, I have no more control haha. One or 2 plants have stretched more than I’d have like but the entire canopy is pretty even.
The SF4000 is about 8” off the top of the tent at 78%.
They start to droop for end of day about 3 hours before lights out, I was concerned something was wrong as I’ve never really seen drooping that much in healthy plants.
Just gonna keep cruising along and hopefully things will be good in the end. I’ll keep my eyes open for any problems.
Happy Growing 🌱👍🏻