


Likes
Comments
Share


@StonedandSteady
Follow
AutoBlueberry 11th w/ 6th W/ Flower breed by #DivineSeeds #DivineSeedsSquad #DivineSeedsBreedingCompany
4th feed of #NukeHeads Nutrients #PlutoniumBloom Check out these Lush Ladies and those Awesomely Purple Budz with Trippy Trichomes Growing on! I'm also trying to make and/or convert one of my Budz into a Polyploid (Bigger and More Bulbous Bud) This AB is Flowering out and her Smells are Super Strong of Gasy and Candied Blueberries! I recently Trained down her branches to expose more Bud sites and Removed the Biggest fan leaves to expose the Bud site's to this Glorious #OsreeQB1000w Full Spectrum Grow Light! I've also Super Cropped, Topped um, Defoliated, Leaf tucked, and Implement the 3D's method like my Broski #TigerfishOrganics to remove the Dead, Dying and Diseased leaves!
Origin:Afghani/Thai
Type:50% Indica/ 40% Sativa/ 10% Ruderalis
Flowering:56 days
THC:22%
Harvest:400-550 g/m2
Height:110-150 cm
They were Growing under the #Growatt600w and in my #TopoLite 24×24×48 Grow Tent but I've Upgraded and Updated it to my #OsreeQB100W I'm also using #TNBNaturals #TheEnhancer Co2 Despersal Canister and using thier Ph⬆️⬇️ for my Decolinated Tap Water!
Green and Growing Up Great! She's Growing into her 6th week of Flower! She's Growing in my special blend of ProMix potting mix, a 1/2 bag of Earthworm castings and 2 light handfuls of Diatomaceous Earth mixed Up well for before transplanted! Diatomaceous Earth: Diatomaceous earth is made from the fossilized remains of tiny, aquatic organisms called diatoms. Their skeletons are made of a natural substance called silica. WHAT IS DIATOMACEOUS EARTH?
In a nutshell, DE comes from the fossilised remains of small marine organisms called diatoms. Over a 30 million year period, these hard-shelled algae collected on the bottom of bodies of water, eventually forming into a type of sedimentary rock. Fast forwarding, it wasn’t until around 1836 that a German peasant Peter Kasten discovered the ivory-coloured, powdery substance while drilling a well in northern Germany. Ever since, the usefulness of DE for multiple purposes, including industrial and horticultural applications, has been well-reported. Just sprinkle some diatomaceous earth on top of your soil and watch mother nature's secret weapon work its magic.CONDITIONS THE SOIL
When it comes to growing cannabis, everyone strives to provide the best soil to grow the best plants—but there’s always a way to make it even better. Making the soil a better medium is called soil conditioning, which is exactly what diatomaceous earth does. It works by improving the retention of moisture in your potting soil, holding a large amount of fluid and drying at a rate that’s much slower. This natural soil additive also helps to retain nutrients and allows for better oxygenation of the substrate. NATURALLY CONTROLS PESTS
DE is an all-natural, safe-to-use substance that doesn’t harm the cannabis plant with toxic chemicals. The nature of diatomaceous earth makes it useful against most types of insect infestation you might be experiencing; and unlike chemical insecticides, insects can’t develop a resistance to the effects of DE. So once they’re gone, they’re gone for good. DE is an abrasive. and when used as an insecticide, it gradually scrapes away an insect’s exoskeleton, absorbs the fluids, and dehydrates insects and other critters to eventual death. IMPROVES PLANT STABILITY
When using DE in your soil, it can be especially beneficial as it frees up nutrients so that they are made available to the plants as needed. This works via the silica content of DE being absorbed into the plant tissue, which helps improve the plant’s ability to respond and receive more nutrients as DE activates. This in turn results in greater yields and better stability under small pH fluctuations!
https://divineseeds.net/
https://instagram.com/divine.seeds?igshid=osxe2v7en33v https://divineseeds.net/
Thanks Again to All my Friends, Family's, Teams, Sponsors, Followers and Subscribers!!! Your Genetics are Merry Magnificent, Mega Marvelous and Mighty Medical! Love um!!! I really Can't stress enough how Thankful and Grateful I am of All of you and what you've Shared with Us! Means the World!!! It's definitely a Pleasure being able to Grow with these Phenomenal Grow Lights! Please Enjoy! BudBrothers4-Life! Cheers Famz!!! Much Props and Much Topz!💯🔥 #Osree #GrowStarStore #Growatt #TNBNaturals #TNBTeam #GrowYourOwn #Bliss
https://instagram.com/osree.light?utm_medium=copy_link
https://instagram.com/as420.ca?igshid=1f116alw054wp
The Grow Bags: https://www.as420
https://instagram.com/tigerfish_organics?utm_medium=copy_link
https://www.facebook.com/Tigerfishorganic/
#TigerfishOrganics YouTube Channel Link: https://youtube.com/channel/UC6OSXTda1JYaVNoCxdcYqIg

Likes
10
Share


@HanfHueter
Follow
Blüten werden inzwischen sehr Harzig und der Duft nimmt zu.
Dem Giesswasser wird täglich 1:10 Jauche zugegen. Zu dem jedes zweite Gießen Pro Sugar von Grow Pro ein Kohlenhydrat Blütedünger(von der Mary Jane ein Tester). Zu dem gibt es ein bis zweimal in der Woche Seafeed Xtra von envii.
Die ersten Blätter haben sich unten entfernt daher gebe ich gerade wieder Stickstoff zu den Pflanzen. Auch wenn es nur noch diese Woche war danach nur noch Blütedünger.
Zu dem habe ich Basilikum gepflanzt, Dill, Ringelblume und Koriander gesäat am Anfang der Woche und zum Ende noch Lupine und Rot Klee.

Likes
7
Share


@CannaGrowmie
Follow
She finished up beautifully with deep silver and purple colors throughout, extra frosty, and super dank!
Will update with dry weight
Likes
Comments
Share


@cultivateorganic420
Follow
An incredible sweet cheesy smell and taste with amazing depth no mould very strong smoke covered in thc so yummy

Likes
14
Share


@GronkLeague
Follow
18/07/2020- I've started some light defoliation on both plants to see if they can cope. Im removing lower and larger fan leaves to get more light onto the bud sites.
They look super healthy and are getting very sticky. Same nute mix used as last week.
19/07/2020 - More defoliation today; plant seems to like it as flowers are continuing to grow and leaves are going silver.
21/07/2020 - Doubled the number of pk13/14 used in my nute mix to 20ml/10L and continuing to defoliate both plants. They seem to be responding very well. Still using this nute mix
PH 6.2
a+b 40ml/10L
Pk 13/14 20ml/10L
PPM 1170
Temperature of solution ~20c
Runoff ph 6.2
22/07/2020 Really struggling to prune the excess leaves on the plant without coming out feeling like I'm covered in glue. I guess there's worse problems to have...
QO is going
23/07/2020 Had to travel away with work today; top cola has some minor light burn :(
24/07/2020 - Changed my ducting setup to improve airflow into the tent today and it's working well. I've also put some trellising above the plants so i can tie them up to prevent them from snapping or falling over. They're looking healthy.
Likes
23
Share


@Santica_Garden
Follow
Not much to say apart from the Auto Wedding Cake is budding along really nicely, by the smell I can see why this strain is called Wedding Cake. Definitely can't wait to have a smoke of this. Happy Growing guys


Likes
4
Share

@hinterhofgrower
Follow
.
📹 : Full Video on YouTube @hinterhofgrower, please like & subscribe
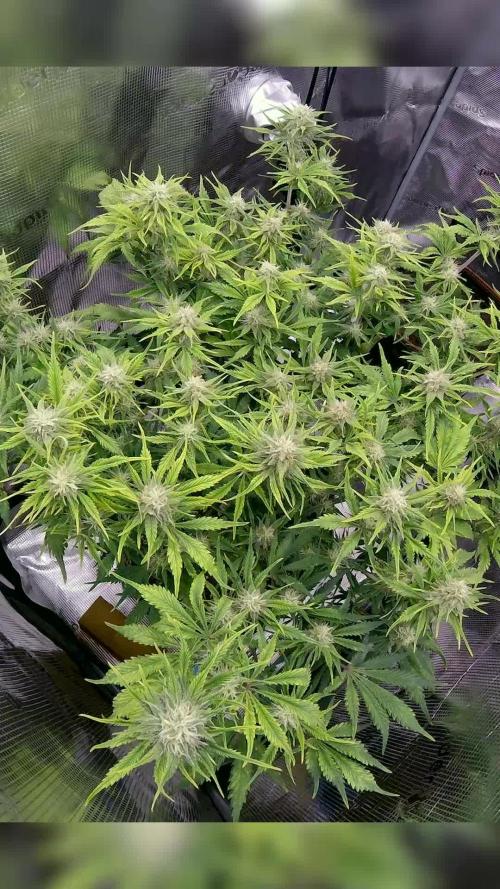
🌱 : LST & litttle defoliation on day 61
💧 : 4l day 58, 4l day 61
💡 : Dli: 45 mol/m²/d
🤔 : Week 9 was more relaxed. Just some LST (low stress training) and a little defoliation to give all the flowers more even light. She's now drinking about 1 liter of nutrient solution per day.

Likes
16
Share


@Djeemz
Follow
These beautifull ladies are sharing a tent with dutch passion Skywalker haze sisters and also doing very very wel with the Green House feeding nutrients and growing on Cocos with 70/30 perlite and water them daily or everyother day depending on their needs offcourse i also have some root stimulator from Hy-Pro that i add and seems to do its works. Al in al i am very happy with this grow so far and will make it a priority to keep it updated till the end even though i have to tear down the tent for a day due to getting a new boiler installed which in the same room offcourse and our plan is to change lighting to CMH in the future due to heat problems.

Processing
Likes
12
Share


@jennamontana
Follow
Growbox 100x100x200 cm // 900W VIPARSPECTRA LED // Biobizz light mix // 185m3 exhaust air system // FAN 40W
1-3 days // Germination and Planting into 0,5l Cups of Biobizz light mix
DAY 1 Plants coming out doing well

Likes
4
Share

@Simba732
Follow
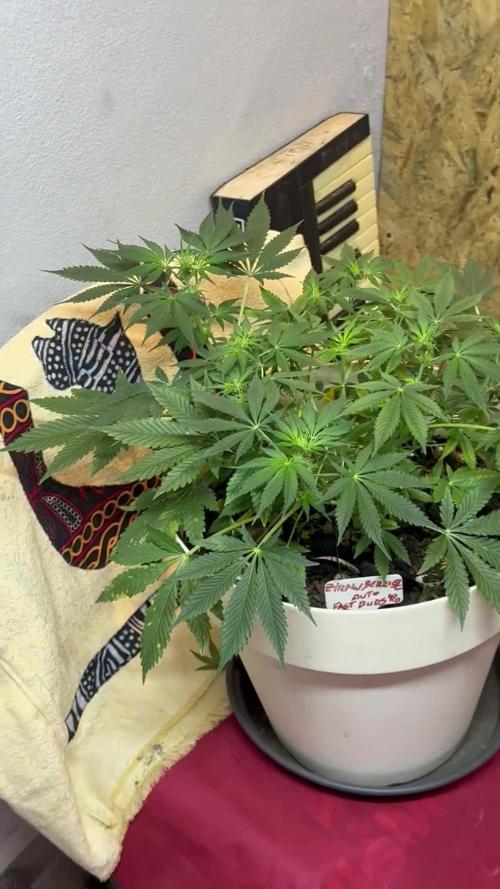
🍓 Lovely week for this beauty
🍓 She began to flower together with stretching too
🍓 I upped her water and added both Tarantula / Pirahna to my feed to help during the first weeks of flower.
🍓 excellent week to you. Happy growing ♥️
Likes
11
Share

@Mimi420
Follow
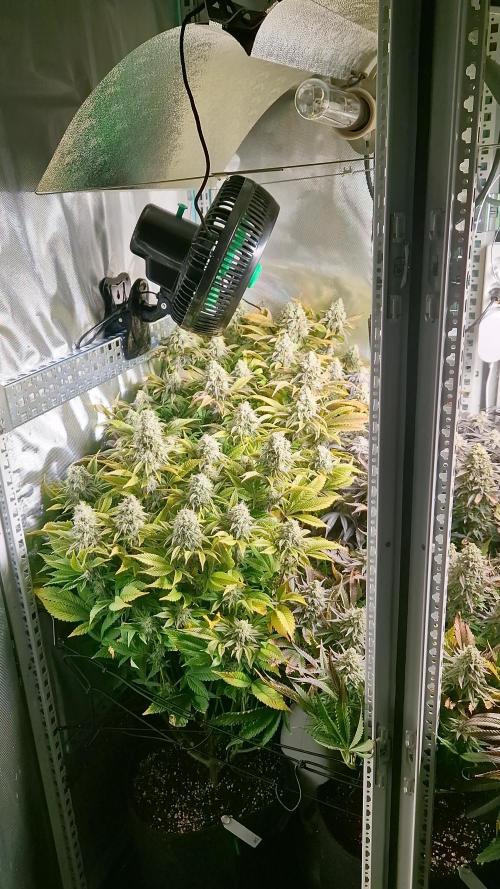
Day 49 of flower — Harvest season creeping up
Yo — quick GD drop from my 120×80 SCROG. Plants are looking proper: fat, frosty colas everywhere and the tent stinks so good. I’m switching to water-only from here — flushing the last stretch. Trichomes are mostly cloudy with the odd amber speck showing; I’d say the whole lot will be ready in ~7–14 days depending on how the last swing of amber develops.
Big realities: my garage is cold & wet (nights down near 5°C, RH ~80–85%), so humidity’s been the constant headache. Ordered a Spider Farmer heater to push intake under the canopy but delivery got delayed — super annoying. To avoid chill I’ve had to cycle the inline fan overnight and run a tiny cabinet heater to keep temps around 15–17°C, but humidity still spikes. Zero perfect conditions here, just making it work — and honestly the cold gave me some gorgeous colours on the buds.
Notes & general vibe: buds are tacky as hell — every time I touch a cola my fingers go sticky with resin. Little amber popping on the tricomes now, mostly milky — perfect for couch-locky daytime/ evening smoke depending on how much amber develops.
Strain-by-strain snapshot (positions + quick notes)
Back-left — Wedding Cake (Portland)
Nice chunky cakes, early fatteners. Lots of resin, big rounded colas. Colours starting to deepen on leaves, smells super dessert-y under HPS — heavy trich coverage, finishing fast.
Back-center — Kush Crasher
The Kush genetics show: purple/burgundy stacks and dense nodal buds. Slow to bulk but super frosty now. These ones are gonna be super sticky and couchy — big terp punch expected.
Back-right — AK-47
Classic heavy producer — loads of colas, reliable chunky structure. Stretches a bit less, packs resin fast. One of the more even finishers in the tent.
Front-left — Double Krush
Longer skinny colas but dense calyxes — nice structure for my net. Terp-forward, stacking trichs well. Good contender for chop in the next week.
Front-center — Wappa (PARADISE) — main cola boss
She’s my star. Main cola is packing insane weight and is the most consistently chunky plant in the line-up. Colours are gorgeous — deep purples, dark greens, and a thick resin coat. Wappa’s bulking like a champ and will be one of the fattest buds in the harvest. Massive praise for this one — she’s the poster child for this run.
Front-right — Detroit Runtz
Frost city — tiny sugary calyxes and lots of sparkle. Slightly looser than the Kush lines but super resinous and fruity-leaning. Good final week filler.
Quick operation notes
Water-only from now on (flushing).
Trichomes: ~mostly milky, some amber; keep checking under loupe.
Humidity = main enemy. Heater + proper intake/exhaust under canopy will help once the SF unit arrives.
I’ll do final clean-up lollipop & remove any really dead/dying leaves before chop.
Final thought — for an amateur out of practice I’m stoked. Learned a few lessons (humidity control = everything), but the tent’s delivering fat, sticky, colourful colas. Wappa deserves a medal — she’s the queen of this round.
Green vibes✌️🌿


Likes
37
Share


@GreenHouseLab
Follow
Apple Fritter smell for days, makes you want to keep your nose in the bag. Ill need to grow this one again.
Likes
29
Share


@Terp_Djiny
Follow
Diesmal habe ich mich dazu entschieden nur die Sonnensegel rauszuschneiden und die Zuckerblätter zum trocken an der Pflanze zu lassen. Vom ersten Eindruck her, ist der grow sehr gut verlaufen. Die Bude sind Fett und mit Trichomen überzogen.. Freue mich schon aufs Trimjail.
Nach 14 Tagen Trocknen habe ich mich an den Feinschnitt gewagt. Von den zwei Pflanzen konnte ich 155g feste dicke Buds und 110g Trim ernten. Die Buds sind zum curen in einen Cvault mit einem Boveda Pack (67g 58%) gekommen.

Likes
19
Share


@GuerillaSweed
Follow
They looked thirsty today so i gave em water!
Starting to flower now to 🤘🏾

Likes
4
Share


@TheGreenGroomer
Follow
🌱 Week 2, Day 2 of veg! The plants are looking happy and healthy overall. The one with the snapped taproot is catching up slowly and seems to be growing fairly well. I’m currently feeding them 300 ppm at a pH of 5.8, and they’re getting about 300-350 PPFD of light. Excited to see how they progress!
Likes
6
Share


@GuyPablo
Follow
Lowered height of light to stop seedlings stretching, also turned humidifier off as soil staying very moist, have barely watered this week once every 4 days, think the soil is absorbing water through the fabric pots from the humidifier. Clip on fan arriving tomorrow, as other fans a bit too powerful seedlings were starting to lean a little. No nutes other than root juice as biobizz allmix quite hot/nutrient rich to start with


Likes
23
Share


@UnitedStrainsGermany
Follow
Beide entwickeln sich prächtig ich denke die Pound cake ist früher reif weil sie die Wurzeln eher am Topf hat aber wenn ihr sie riechen könntet sie riecht nach Erholung. Apple Strudel hat meinerseits ein bisschen Mangel aus zuviel wässern deshalb etwas trockener fahren jetzt
Likes
14
Share


@Phurlax
Follow
Day 36: just tucking leafs
Day 37: cleaned and added new charcoal to my carbon filter lots of better airflow now old one was several years old
Day 38: watered 1 gal of ph water
Day 39: looking good lots of trichomes been reading that uvb light helps thc production so I ordered a bulb will have in the next few days
Day 40: tucking leafs
Day 41: watered 1 gal of ph water with .25 tsp tiger bloom.
Day 42: decided to water 2 more gallons of ph water just to be safe for any nute burn


