


Likes
68
Share


@Ferenc
Follow
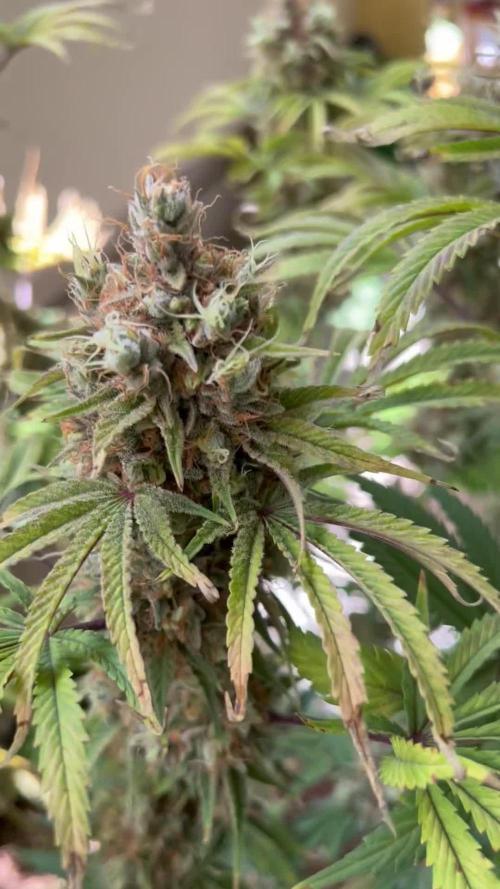
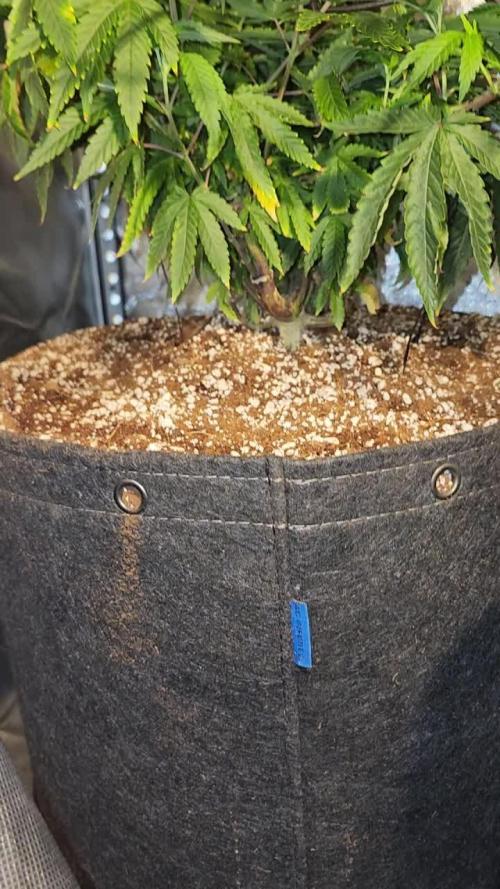
Day 78, 3rd of December 2020:
Wao.... such a beauty so lucky I have the red pheno for my bonsai OMG....
So happy! Looks soo good 👍
Great genetics Zamnesia!
Nothing much to report but the buds are fattening and getting towards the end.
No more epsom salt from this week and I am gonna stop giving nitrogen from the next week....
All good the lamp is now on 11 hours and off 13 hours. Every week 15 minutes was taken off and after 4 weeks here we go. Strated 12/12 and now 13/11 wanted try to imitate the nature as the light days are getting shorter.
Happy Growing fellas!

Likes
1
Share


@Genji
Follow
Woche 6 startet wie gewohnt ohne Probleme. Die Buds werden dicker und schwerer. RLF pendelt aktuell zwischen 45-52%, Temperaturen schwanken etwas mehr von 18-26°C. Noch halten die Buds sich von alleine aber ich denke zum Ende der Woche könnten sie Stützen gebrauchen. Der Geruch im Zelt ist extrem. Sie stinkt so stark, das ich das Zelt nicht lange offen lassen kann.😎 Die Masse der Blüten ist auch ziemlich gut. Wird bestimmt heftig.
Likes
Comments
Share


Likes
2
Share

@Drehpaper
Follow
So letzte Woche, könnte sicher noch länger aber die Temperaturen spielen nicht mit. Hab jetzt fast 30 Grad im Zelt und Nachts kühlt es nicht mehr ab. Denk übern Winter ist es sinnvoller in meiner Umgebung.

Likes
1
Share

@PhinolaGreen
Follow
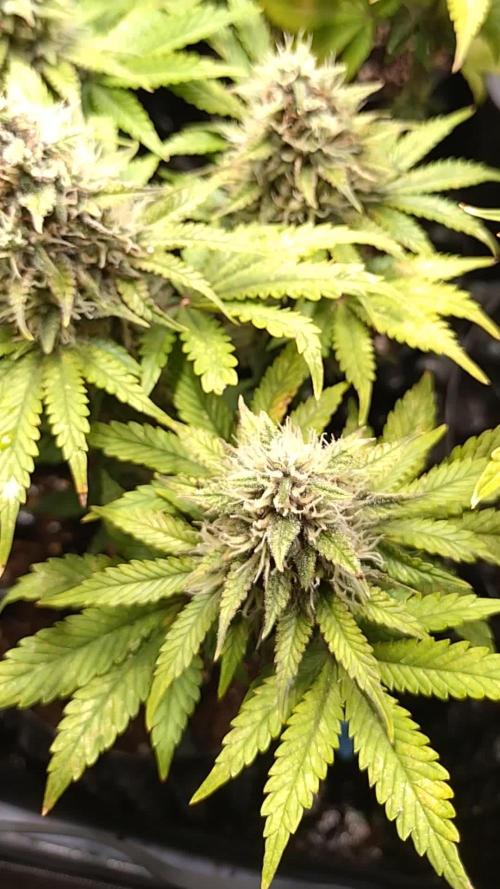
8. Woche
Oh sie sehen so wunderbar aus 😍 vom Wuchs her drei verschiedene Phenos und von der Farbe 2. Sie braucht denke noch 2-3 Wochen, dann sollte das Rdy sein 😊😄

Likes
16
Share

@sanibelisl
Follow
Well it been a week since the move indoors and she is just getting accustomed to the new surroundings. Things took a couple days pause and had no growth for the first few days but she seems to have finally started to fatten up her flowers again. She is drinking about a third less water than before but maybe that will pick up some more as well since her flowers are getting bigger. She is pretty sparse in terms of vegetation so will only remove leaves on a must need basis only. Watered her this morning and she received a low dose of calmag and bloom nutrients ( King Kola) by Emerald Harvest so should see an increase in flower size shortly. Have been increasing the duration of light each night and am currently at 18/6 have been toying with the idea of going to 20/4 and beyond to get the DLI up into flowering requirements. We are stuck at 450 PPFD so I don’t think I can her too many hours of light per day. I will be watering the other two girls later today with a update for them also.
Harvey Wallbanger. Miss Harvey is recovering well. Every day is better than yesterday and the past forty eight hours have been very good with her flowers starting to grow again. Trichomes and terpines have started to show up and she is going to be very sticky and have a pleasant sweet aroma. There are already fan leaves covered in trichomes and we have only just begun the process of flowering. She lost so much during the assault. She was going to be truly special. Maybe she will still be special we will see.
Vanilla Fizz. Ms. Fizz, alive and well. Had us scared for a while as she was slow to respond for a couple of days, no growth after her assault and subsequent relocation took its toll on her but happy to see things have turned around for her and now even doing better than expected. Prayers help. Flowers are growing and she has a certain perkiness to her that is inspiring after all that she’s been through. She is a bushy girl and removed a fair amount of foliage and will need to do some more later on some here some there. Trichomes and terpines arrive and are in abundance for both. Everything is covered in trichomes even fan leaves and smells like my Uncle John’s vanilla French toast and my Aunt Shelly’s Guava jelly, amazing!
*Update Day 68* 91 Grapes
She is doing well, blooming! Her flowers have decided to start growing and swelling in good ole Chem91 fashion, kind of just stacking up upon the flower below, and dense! Orange pistils have arrived and she is going to be pretty showing off an array of colors soon enough. With her being in flower mode and needing some extra energy decided to up the lights to 50 power despite my concerns for that being too high of power. We will see. I can always turn them back down if I see a problem. I hope to see a significant increase in flowering soon!
Vanilla Fizz. Ms. Fizz , we’re going to start calling her Ms. Fuzzy, she is so covered in trichomes! Bushy my goodness I have never had a plant with so much vegetation. I have seriously removed over a hundred leaves already and there will be more many more. But she is amazing in terms of smell, if you have ever smelled distant scent of a guava tree you would have an idea. Throw in just a little skunk and you nail it. She is going to be a sticky bitch to trim when the time comes.
Harvey Wallbanger. Miss Harvey, has the assault behind her now and the continuing rehab has proven to be beneficial. She had such perfect form and even after all the injuries she still shows off her balance. I picture her in a massive hotel lobby in a tropical destination in a corner where the elevators are. She was so perfect. Pinkish orange hairs now accompany her beauty as she displays the deepest of green fan leaves. Trichomes encapsulate the entire flower and she has a very floral scent. She seems to be the furthest along at the time. But we will see.


Likes
13
Share


@raulmoat123
Follow
Week 3 flowering some flowering quicker then others which is expected as its about 15 different fire strains
I have had to show my diaries in 3 parts this is my inhouse gentics I am so glad to finally get my hands on these , I'm pheno hunting a massive summer run with some fire gentics.
I have inhouse
2x platinum gushers
2x terples
1x dolato s1
1x slurmint
All from seed so hopefully I find a nice pheno
I also have seedsman
2x strawberry banana grape which are both the biggest in tent
2 x peyote gorrilla
2 x wedding cake limited editions . Smells aboustley fire already 🔥
I have zamiensa seeds
3x larry bird kush one of the phenos are smelling like nothing I have smelt before
Barneys farm
3x phantom OG which was clones from my last run
Phoenix seeds
X5 super kush clones from my last run
Also I have grew 2 super silver haze OG which I got as freebies from seedsman they smell beautiful 😍


Likes
11
Share


@Synkery
Follow
Lamentablemente al principio del cultivo tuve algun problema en los transplantes y se estancaron un poco i no crecieron lo que me hubiese gustado, pero con una media de 35g por planta en seco me doy por satisfecho


Likes
31
Share


@Reaper
Follow
next time i wont Veg under fluorescent lights, needs more power from the start for bigger stem and root system, i cant complain by the end result lol
Likes
123
Share

@yan402
Follow
06.07.25 FW1 TriPart Micro: 50→ 30ml
TriPart Bloom: 0 → 20ml
Home-made FFJ/FPJ (Watermelon + Pumpkin): 10 → 30ml
12.07.25 FW1 GreenBuzzBloom 60 →40ml, TriPart Bloom: 20 → 40ml, fpj 30→60ml
22.07.25 FW3 TriPartMicro 30→20ml , TriPartBloom 60→80ml , GreenBuzzBloom 40→50ml
24.07.25 FW3 Cal-Mag 60→40ml
26.07.25 got thrips but handled them with extra airflow and defoliation.
29.07.25 FW4 GreenBuzzBloom 50→20ml, Home-made FFJ/FPJ (new batch) 60→120ml
🌱💦🌱💦🌱💦🌱💦🌱💦🌱
🌿 Day to day tasks & actions 🌿
🌱💦🌱💦🌱💦🌱💦🌱💦🌱
26.07.25 FW3 – Fed 3l of #1 50% strength→ 2l runoff
27.07.25 FW34 – Fed 3l of #1 → 1.5l runoff
28.07.25 FW34 – Fed 3l of #1 → 2l runoff
29.07.25 FW34 – Fed 3l of #1 → 2l runoff
(*RUNOFF reused for tomato plants)
🍶💧🍶💧🍶💧🍶💧🍶
💧 Nutrients in 30L #1
🍶💧🍶💧🍶💧🍶💧🍶
💧 TriPart Micro:
10 → 15 → 20 → 30 → 40 → 50 → 30 → 20ml
= 0.67ml/L
🍶 TriPart Grow:
0ml
= 0.00ml/L
💧 TriPart Bloom:
0 → 20 → 60 → 80ml
= 2.67ml/L
🍶 GreenBuzz Bloom:
10 → 15 → 20 → 30 → 60 → 40 → 50 → 20ml
= 0.67ml/L
💧 Cal-Mag:
60 → 40ml
= 1.33ml/L
🍶 Home-made FFJ/FPJ (new batch):
10 → 30 → 60 → 120ml
= 4.00ml/L
💧 pH Down:
Citric acid (BuxXtrade) — adjust to ~pH 6.0
📦 TOTAL:
280ml per 30L
🔬 9.33ml/L
🍶💧🍶💧🍶💧🍶💧🍶
Likes
3
Share


@Shmoopy_me
Follow
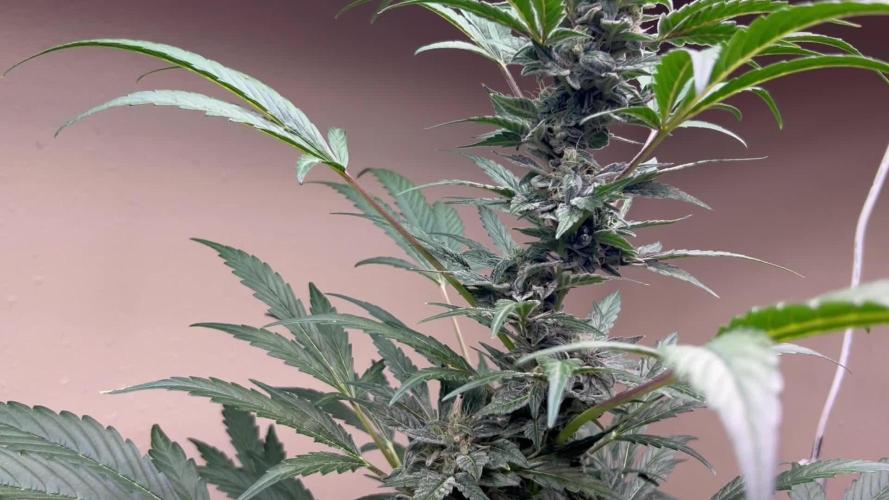
Getting close to the finish and it’s very pungent smelling it’s hard to pin a nose on her! Still filling out and getting dense towards the end!
Likes
3
Share


@Ghost17
Follow
Learned a bit this first week.
Switched up the set up in the tent a few times and didn't take light adjustment into consideration. Feeling like the plant on the left could stretch a bit more but keeping the light around 24" should so the trick.
Also, fed way too heavy the initial feeding switching from CannaStart to A&B. Minor signs of nute burn is coming into play with the tips but I dropped from 800+ PPM down to 5-600PPM 😆🤦♂️.
Taking notes on each feeding including Ph, PPM and EC so I'm cool with going through some lessons on this first run.
Either way I think they're truckin right along! Sitting on Day 12 from seed, I honestly feel like they're crankin!
Any comments, questions or suggestions are welcome!

Likes
9
Share


@HUMO_Cultiva
Follow
We are happy of the results, but in the next batch we will be put 8 plantas and AC

Likes
5
Share

@GREENPHOENIX6262
Follow
01/11 - No issues since transplant - dropped into a 7 gallon @ACINFINITYINC fabric pot - medium blend is Coco/Perlite/Worm castings/Myco/Silica/Microbores and Kelp
01/19 - Thus far no issue - laid her out flat for complete root and canopy coverage - she will be transferred into the 3x3 as soon as clones are dry - running high heat - high Humidity

Likes
2
Share


@Bluemels
Follow
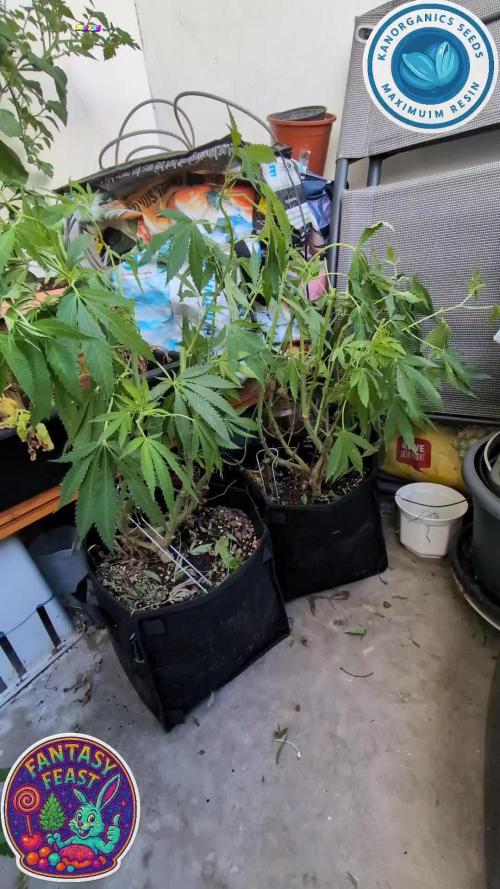
Tag 72: Die letzte Düngewoche hat begonnen, die Blätter der beiden Pflanzen sehen echt fies aus. Die Blüten gehen aber.

Likes
9
Share


@MMVSS
Follow
Way Behind But Back On Track! The Plants Are Ready The DWC Is Ready! Am I!? 😆 Going About This COMPLETELY Different.
Last Time I Washed The Soil Off And Stuck Them Roots And All Raw Dog Into The Hydro.
They Did Well At First!
But It Didn't Last They Barely Had ROOTS!
This Time We're Following Some New Found Knowledge And Advice, Keeping Lots Of Healthy Bacteria In Our Res With LAB
And Keeping Our Plants In Soil!
I Will Feed Both The Res And Through Top Water! Wish ME Luck!
Likes
15
Share


@Brickie74
Follow
First time trying this strain and seed company. I have an Altoids box that i lined with sand paper (120 git) i shake my seed(s) for about 30 seconds to a minute in the box. I then soak them in water for about 15-18 hours. When done soaking i put the seeds on a plate with paper towels until i get a tap root that is atleast 1/8" prefer 1/4". Then at that point i put them in a Jiffy Pod until about 1.5 - 2.0 inches.


Likes
9
Share


@Studabaker
Follow
Growing good. Trying to get fungus gnats under control. They are really loving this plant in particular. Giving mammoth p this week.
