
Likes
Comments
Share


@Horizon_Grow
Follow
Due to construction and revamping of our space, we had to leave all seedlings in their germination dome for approximately a month before getting them into veg. In order to not run into any space issues within the small dome, these young plants were kept under a low-wattage fluorescent tube to avoid any growth which may have been "too vigorous."
VEG WEEK 1:
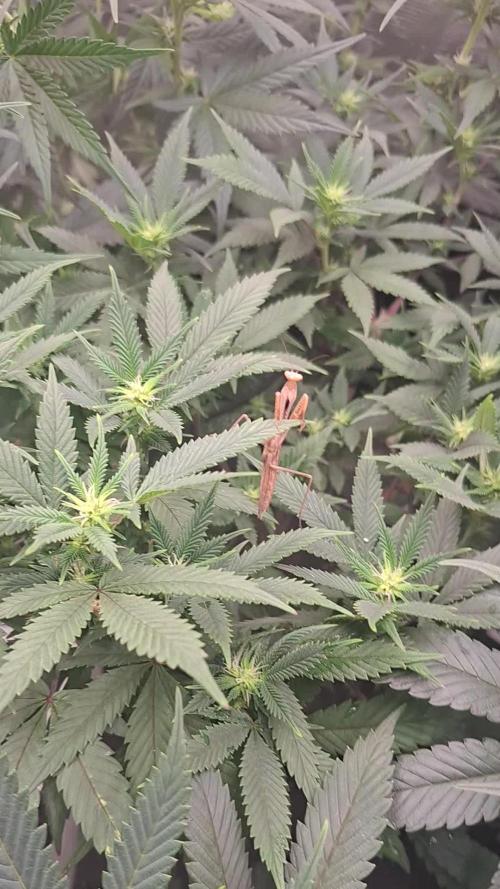
03/09/2021: (Image 1)
Each plant was potted into, and fed with the following nutrients during transplant:
1. 5l FF F1 medium
2. GHF: Biogrow - 15g worked into medium
3. Wormcastings (workd into medium and astop dress)
4. Organics Matter Mycoroot Supreme -placed at the bottom of the planting hole.
5. Watered each plant with a Silicon Plus feed solution .
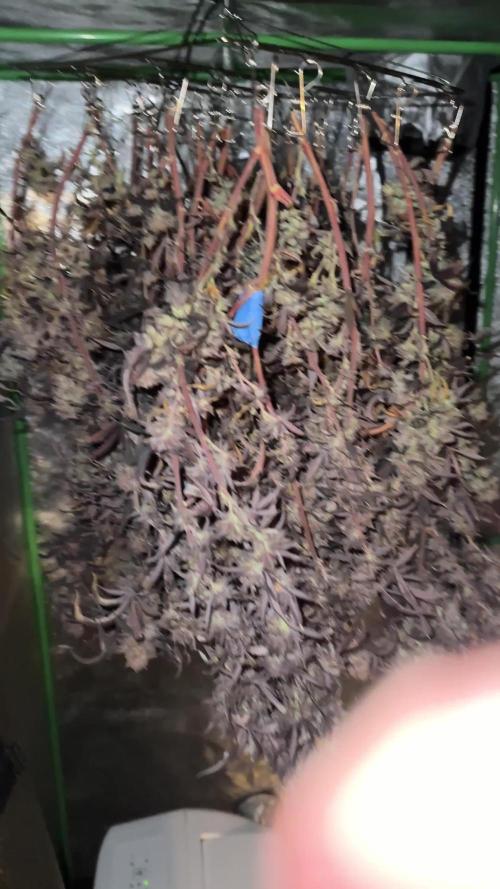
07/09/2021: (Image 2)
- All plants are now in 5l pos with Freedom Farms F1 medium, and are in their new veg home under a 3500K 320W Quantum Board.
- The 3 weakest seedlings of the total 19 seeds (1x Crit and 2x PC) were placed on the left side of the tent, and in different pots, as they are obviously struggling and may not even make it into our final flower room.


Likes
14
Share


@PREPPYPUNK
Follow
LAST 2 GROWS OF SAME STRAIN PLANTS GREW UP TO 3 FT USING LOW POWERED LIGHT. THIS NEW LIGHT IS UNBRANDED, WEIRD AND THE EBAY SELLER SOUNDS LIKE HES JUST DROP SHIPPING THEM AS THEY DONT SELL THE DAISY CHAIN BUT THIS THING LOOKS TO BE DOING A WAY BETTER THAN EXPECTED JOB AS LONG AS YOU GROW 2 PLANTS ONLY AND IN 3 GALLON POTS MAX. IM USING FOX FARM BIG BLOOM. I CAREFULLY STICK MY FINGER IN DIRT ABOUT AN INCH OR 2 TO DETERMINE IF NEEDS WATER. 4 CUPS OF WATER FROM MY WELL AND ABOUT EVERY 2 WEEKS I SPLASH AN EMERIL LEGASSI BAM OF BIG BLOOM. IM PROBABLY USING WAY MORE FERTILIZER THAN I SHOULD BUT IT LOOKS GOOD SO IM GOING WITH IT. BASICALLY JUST ENOUGH TO COVER THE BOTTOM OF A 4 CUP MEASURING CUP. THE THING I DIDNT REALIZE ABOUT BIG BLOOM FOR THE LAST 3 YEARS UP UNTIL ABOUT A WEEK AGO IS, YOU HAVE TO SHAKE UP THE FREAKING BOTTLE BEFORE YOU USE IT. I JUST CHECKED IT, IT SAYS SHAKE WELL. SO IM SHAKING THE BOTTLE NOW AND IM PRETTY PROUD ABOUT THE WHOLE FUCKING THING. I HAVE WATCHED HOURS OF VIDEOS AND READ ARTICLES AND ALOT OF PEOPLE ARE DOING DIFFERENT THINGS AND I CANT DO THEM ALL BUT ORDERED CHEAP PH METER FOR SOIL AND WATER SO I CAN FILL IN THE BLANK AND MAYBE FIND OUT ANOTHER PIECE OF THE PUZZLE. JUST AM A LITTLE AFRAID TO TRY ANY NEW TRICKS AS IT SEEMS TO BE GOING OK. THE REASON IM ONLY GROWING CRITICAL PURPLE? ITS LEGAL WHERE I LIVE BUT THEY DONT SELL SHIT LIKE THIS STUFF. YOU HAVE TO HONESTLY HAVE WHATEVER SUPPLIES YOU MAY NEED FOR A COUPLE HOURS CLOSE BY AS ITS A LITTLE TRIPPY. NO MATTER HOW BIG THE BUDS END UP, SMOKING THE BEST SHIT OF YOUR LIFE AND KNOWING YOU GREW IT YOURSELF IS AN OUT OF BODY LEVEL EXPERIENCE. I RECOMMEND IT HIGHLY. NO PUN INTENDED.

Likes
8
Share


@IQuSX
Follow
Hi, topman.
On the week was added red clips for bending, also realise solution of 35% refueling nutrients!
So, looking, please>>
Its has trichomes … I watch in full! They are have in second (AA rasty) too!
And, they are semi full adaptation after transplant from 0,7l in 25l.

Likes
3
Share


@julian100614
Follow
La semana fué realmente bien 👍😌🙌
Esta semana sera la última con el ciclo 18/6 para empezar con un 12/12 y comenzar la floración la semana que viene 💪
Hemos estado aplicando durante todo el proceso 2ml de Terra Vega para la etapa vegetativa de la planta y comenzamos a darle Pure Zym de Plagron para que absorba odos los nutrientes posibles sin saturación 👌

Likes
22
Share


@BlumenBot
Follow
2/28 - she got a feeding and I removed the shoots starting at each bottom node on every top. 6.0ph
3/3 - I took off the leaves that were at the nodes where I removed the shoots earlier this week. Now onto gaining height. Looking tight!
3/5 - Flush feeding
Likes
57
Share


@Zengrower
Follow
The Fruity Donutz have finally stopped stretching and are now fully growing their buds. The two plants are two very different phenos where one is turning into a beautiful purple lady. The ladies are very thirsty and I water them two times per day just to keep up. Overall they look very healty and the buds are developing fast. Can't wait to see how they grow this week!
🌿🌿🌿 Mid-week update
Because this strain only has 8 to 9 weeks from seed to harvest I started with a little bit of Green Sensation already to support the blooming. The two plants are developing quite differently. The plant in the back is producing lots of trichomes, even covering the smaller fan leafs as well as the sugar leafs. It would be cool to have leafs with thick resin trails at the end f this grow ✌️. The plant in the front doesn't produce that much trichomes just yet, but it has beautiful purple buds and sugar leafs. Even though they're very different in appearance, they are both beautiful.
The smell is getting stronger by the day and *spoiler alert* it's damn fruity 😅!
Likes
42
Share


@Gabarram
Follow
Day 29 since I first saw her cotyies...2nd day of Week 5 and the little Dr. shows growth at what seems to be a quicker rate. I'll envisoning some colas from LST and perhaps I top one or two of those just to get more colas, whatever it takes to fill the damned net. Well of course these are just plans. Continue fertigation twice a day., inflow 1200 and run-off 1000 units of EC.
Day 30 (10/10/2019) just fertigate her for the first time in the day, inflow and run-off are normal concentrations for the stage of growth.
Day 31 One month and a day already... the plant has shown herself very stubborn, growing very slowy but healthy, I'll tame her eventually.
Day 32 (12-10-2019) the little Dr seems to have kept up the growth pace, I see her growing remarkably more vigorously...👌
Fertigations, twice a day, getting 1200 uSm/cm in the run-off.
Day 33 (13-10-2019) When I get an extra buck I'll change the extraction fan, Temperature is getting high inside the tent for this time of the year. 450 W (real power) from DIY led lights raise the temperature quite a few degrees in a 0.80x0.80x1.60 m tent.
Day 34 last day of the 5th week. She's doing fine.

Likes
Comments
Share

@Ekoms
Follow
have a new friend. I found him almost dead, but once he's fully recovered, I'll send him back to nature.
Sorry, but I don't have time to make weekly diaries. For now, one update at a time is the only way.
The girls are now between 30 and 60 cm tall, and I hope this will be my last grow from seed.
My new friend is helping me with the bugs. Last week was extremely hot, and I couldn't get the temperature below 29°C. One of the girls is showing visible signs of heat stress.
Keep it grow !!! 💚
Likes
8
Share
@Growverse420
Follow
Today is the first day of Week 6! This past week in the 4x4 “Blackbox” Tent, the front right Hella Jelly continued to thrive and push new growth, this one seems to be the most vigorous of the plants in the tent. The front left Hella Jelly struggled with some droopiness this past week, and one or two of her fan leaves had holes from what I’m guessing may have been a caterpillar or some other pest. I ended up cutting some of the lower fan leaves to keep the plant high away from the soil. The Vanilla Frosting in the back left was stunted a bit by the topping, but now she seems to be doing well, she is sturdy and the new growth seems healthy. Her sister on the right is two weeks behind and hasn’t really taken off since being transplanted. I’m hoping Week 6 (her Week 4) will be her week to really start pushing new growth.
I needed to get the humidity higher in a couple of the tents and, not having any extra humidifiers available, I decided to try hanging a beach towel from a hanger in the tent. I dangled the end of the beach towel in a 5-gallon bucket of water, allowing it to wick up the moisture. This increased the humidity in the 4x4 by 20% (from 37%-57%). This was incredibly helpful because my “smart” humidifier is currently dedicated to the drying of my recent Apple Fritter harvest, and my other humidifier is not larger enough to maintain the humidity in the larger 5x9 tent for more than 18 hours before drying up.
When watering the 4x4 this week, I added 1/4 tsp/gal of Quillaja extract, 1 tsp/gal of Rootwise “Mycrobe Complete,” and 1 oz/gal of Thrive “Holy Cow” Yah-Whey fermented extract. I also top dressed with Kashi Gold from BuildaSoil and worm castings (about 1/2-1 inch layer). I water 3 times this week, the goal being to maintain even moisture.
The cover crop has been thriving, and by the end of the week it was time for a chop and drop. I did so and added it back to the soil and aLeo added more straw as a mulch layer.
Something else that was exciting this week, was adding 2,000 worms to the 8 30-gallon living soil pots in the 5x9. Before I added the worms that I ordered(from Buckeye Organics), I tried using avocados, cut in half and laid face down on the beds of soil in the 4x4. This worked surprisingly well! The worms are very attracted to the avocado and end up creating a “worm ball” where they rub up against each other, reproducing and creating even MORE baby worms. I did this several times, moving the worm “orgies” to a few of the 30-gallon pots, simply by transferring the avocados. This was my first time using “avocado tech,” and I have to say, it worked SO well.
Looking at upcoming Week 6, I’m hoping to see more growth from the 3 vigorous plants, and for the Vanilla Frosting that is a couple weeks behind, I’m hoping for her to begin filling out more. The goal is to flip to flower in the next 1-2 weeks, unless I decide we need to go longer. Full steam ahead!

Likes
202
Share


@CrazyHorse
Follow
Good afternoon everybody 😊
It's getting wild, really wild 😇 From last week everything start to be hmm... massive 🤔 😜
Update:
Day 38
Original Cinderella 108 cm
Bruce Banner 83 cm
Purple Lemonade 78 cm
Day 40
I have to provide a defoliation as girls start expanding wildly 😇
Original Cinderella 114 cm
Bruce Banner 86 cm
Purple Lemonade 79 cm
All the best, You Lovely Girls Growers 💪 💪 💪

Likes
19
Share


@Anxious_Passenger
Follow
Update: 29/07 - Thought I would include a short video which shows that I have quite a small space to work with and my setup. She’s looking good and seems happy, swelling away in her garden and is even starting to get purple tints! She’s living up to her name, the purple pheno is quite rare so I’m super chuffed.
Welcome to week 10!
As you can clearly see by the pictures, she’s doing well and covered in sugar! Pistils are still quite white although a few are starting to darken, trichomes are becoming increasingly cloudy with a few that are amber but still a small amount. I am going to harvest a bit later to grab a bit more CBN.
Buds are fattening up and she’s turned out to become a real stunner, for a first grow I’m sitting quite proud of myself.
Peace brothers and sisters ✌️

Likes
3
Share


@Ninjabuds
Follow
My Northern Lights #10 plant is a real beauty. I love the old-school look of the leaves and the way it's growing. It's stacking up so nicely and getting huge! It's definitely a standout in the garden.
Okay, This past week has been absolutely fantastic! The weather has been incredible, and I've been able to keep the windows open almost the entire time. My plants are thriving in the humidity, and the VPD has been perfect. Everything just feels so balanced and in check.

Likes
18
Share


@Grower_Of_Persia
Follow
my dry and cure style is this:
4 days of hanging upside down to get water activity lower to around 0.6 in 50% humidity and 26 C temp (i know its a little high but we are in a hot summer right now and i cant get it lower even with air conditioner) and then after 4 days of drying i remove leaves and stalks, trim buds and move them to jar for the rest of their life :D . and in the first 4 days of curing i open the jar door and let hem get some fresh air in the jar for about 5 minutes and close the jar door again, after 4 days of curing like that buds are smokable but they will get better as they getting cured about 1 month.
buds are one of the hardest as fucking rocks type of buds! very dense , compact , sticky , smelly , amazing at every aspect
growing stage was 56 days and flowering stage was 75 days total (harvested tops at day 64th)
the total weight of dry buds was : (plant #1 & #3 top buds 56 G + lower buds 22 G ) 78 G + (plant #2 top buds 47 G + lower buds 18 G ) 55 G + (plant #4 top buds 120 G + lower buds 67 G ) 187 G = 367 G

Likes
24
Share


@Spliffi
Follow
Germination 27 September 2023
Heya 🤙👍🤙🌱🌱🌱
Winter has come and gone. The sun is out after a heavy stormy weekend it's finally time to start Germination. I have been extremely lucky, privilege and blessed to be here right now in my life. Start of a new season have been itching deep in my bones since a week after my first harvest. Let's see what the hype on Fastbuds420 delivers.
In the heart of a humble garden, a miraculous journey is about to unfold. Beneath the soil's dark, nurturing embrace, a seed lies dormant, awaiting the precise moment to burst forth into life. It is a marvel of nature, a tiny capsule of potential, encoded with the blueprints of the plant it aspires to become.
As the heavens open, raindrops penetrate the earth, quenching the thirst of the soil and signaling to the seed that its time has come. The seed absorbs this life-giving moisture, swelling as it takes in water. It's as if the seed is awakening from a long slumber, stretching its embryonic limbs for the very first time.
Within this subterranean realm, the seed's outer coat softens, and a tiny rootlet begins to emerge. This is the radicle, the seed's first root, and it instinctively knows to journey downward, anchoring itself into the soil. It is the plant's lifeline, seeking out water and nutrients essential for growth.
Simultaneously, a delicate shoot, known as the plumule, makes its way upwards, drawn by an invisible force towards the sky. It is a daring expedition, fraught with obstacles, as it navigates through the soil. Yet, guided by an innate sense of direction, it perseveres.
Finally, breaking through the soil's surface, the shoot unfurls its first leaves, miniature versions of what they will one day become. These are the cotyledons, a pair of leaves that have been stored within the seed, packed with nutrients to sustain the young plant in its earliest days.
As the sun's rays touch these fledgling leaves, photosynthesis begins. It's a momentous occasion, the plant's first breath, as it converts sunlight into energy. The seedling, still fragile yet full of promise, has successfully embarked on the first chapter of its life. From here, it will face countless challenges and opportunities, but for now, it stands as a testament to the remarkable resilience and complexity of nature.
Thanks for reading!!🤙👍🤙🌱
Likes
132
Share


@Crashoverite
Follow
Hi all👨🌾👋
Welcome to my another week update
Hope everyone keeping well 🧑🌾
Week 4
Feb 23 - Feb 29
Very good week. Girls are growing nicely. Finally a bit of work around my babies. On Feb 24 applied LST, girls responded perfectly. Leaves tucking on daily basis. 2 watering with 1L each on Feb 24th (half nutrients dose) and second one on Feb 28 alongside with 2 foliar feedings(100ml water and fish mix). So far this grow is just a pure joy. Both girls are strong and healthy.
Wishing you all a wonderful week✨🍀
Much appreciate all your likes, follows and comments. 🙏💚❤️💜
Peace and love brothers and sisters 👨🌾✌️💚
Links
https://2fast4buds.com/seeds/TROPICANA-COOKIES-AUTO
https://www.biobizz.com/
https://fishheadfarms.com/
Likes
25
Share

@Grower_Of_Persia
Follow
week intel:
its time for second pruning they grew up too fast and need second pruning as below :
first i remove big fan leaves and only leaves then let them rest for 1 day then the second part of pruning will get done that is removing branches based on these conditions:
1-if the branch is very low and never can make it to the top ,
2- if branch is in shade even after pruning fan leaves ,
3- if there are too many branches at the small space then non of them will get resources so if there is no space for branch then , they must get remove.
everything is perfect!
stresses :
pruning big fan leaves and lower branches + a little E.C stress around 1.7 once a week
feeding:
i feed them 3 times this week with this order :
day 1 : i feed them heavy with silicate +base nutrients(calcium & micros + Bloom) about 884 ppm - 1.7 e.c to cause a little stress.
day 3 : i feed them low dose of Feeding Booster + Karbo Boost around 325 ppm - 0.6 e.c to let them recover a little but not fully recover still a little stress will caused.
day 5 : i feed them with low dose of Top-Max + B-52 around 213 ppm - 0.4 e.c to let them recover the stresses to get ready for another stress next week.
guide of the week :
no more stresses from now on till the end and from next week i'll reduce the amount of nitrogen and calcium to below half to the end.

Likes
19
Share


@Wenz004
Follow
Bissl fetter geworden, sieht man nur im Zeitraffer etwas. Ansonsten nix passiert.
Und...durch einen Düngerfehler die Spitzen etwas verbrannt👍
Likes
28
Share


@GanjaGecko
Follow
In der Woche wurde noch nicht viel getan außer nach Gefühl zu wässern und den Ladys beim wachsen zuzuschauen. Dazu gab es nur jeweils 1ml/L PowerRoots von Plagron. Schwer zu sagen was jede Lady bekommen hat. Es waren vielleicht alle zwei Tage ca 250-300ml. Ich hab nur auf das Topfgewicht geachtet.
Die erste kleine Hitzewelle haben die Ladys gut überstanden und wachsen prächtig. Die ersten Anzeichen der Seitentriebe machen sich auch so langsam startklar. Ich freue mich sehr auf die nächsten Wochen💚
Höhe:
StrawberryBanana 14.5cm
Gorilla
14.5cm
GorillaZkittlez
18 cm

