Likes
Comments
Share
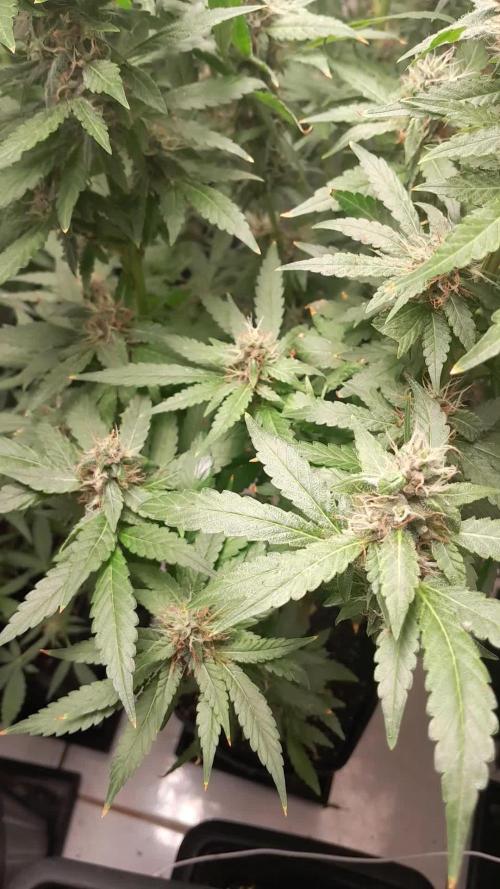
11-09-2021: Today is day one of my veg-stage. I hoped for 15 ladies but I only got 14. Maybe the not germinated Runtz will come up anyway so I put her in the system too. Everything is refreshed now and I will just be waiting to the point where I can top the ladies which I am planning to do at least once. 13-09-2021: The not germinated runtz didn't make it so I have replaced her with another Purple Haze. Great seeds from wietzaadjes.nl. Still hoping for the Runtz though. One of the purple haze looks a bit yellow :(
Likes
100
Share
@AsNoriu
Follow
Day 99. All 3 girls down. Wet trim . Can't wait to try them out. Scissors hash was so sweet ... 1.6 kg for wet plant is not bad too I think. Plant A should be biggest in this grow from all strains ... She has to beat 202 g. of AD. Happy Growing !!!
Processing
Likes
29
Share
================================================================================= CRIB NOTES - I'M USING A LIGHT CYCLE OF 6 ON 2 OFF THIS SHOULD KEEP THE LADIES FROM STRETCHING AND GROW VERY COMPACT. Many growers advocate the use of an 18/6 light schedule (18 hours on, 6 hours off) while plants are in Veg. However, this may not be the most beneficial light schedule. Switching to a series of 6/2 (6 hours on, 2 hours off) light patterns may increase plant growth while also potentially creating a more stable controlled environment. While this new schedule may sound risky, it actually comes with a number of benefits. Cannabis is a “short-day plant,” meaning that it will only flower when exposed to long periods of darkness and short periods of light. For cannabis to flower, there must be at least 12 hours of continuous darkness. This allows for the use of a series of shorter light schedules while the plant is in Veg – as long as the plant receives less than 12 hours of continuous darkness, it will stay in Veg. BENEFITS OF A 6/2 LIGHT SCHEDULE There is a lot of research that suggests that cannabis plants can only process a certain amount of light per day. After that level has been reached, the plant can no longer absorb more light, and any additional light is essentially wasted. By breaking the light cycle into multiple 6 hour periods, the plant is able to rest and process the light it has received. When the lights come back on 2 hours later, the plant will be ready to process additional light, allowing you to get the most plant growth out of every minute your lights are on. At a biological level, cannabis’s inability to grow more once it has received a certain amount of light can be attributed to the way the plant processes carbon dioxide (CO2). A majority of the mass accumulated in cannabis is associated with the amount of CO2 found inside plant cells. While under light, cannabis tries to prevent CO2 from leaving its cells by cutting off transpiration. However, this prevents new CO2 from entering into the cell, blocking new growth. When the lights are turned off, and no photosynthesis is occurring, the plant is able to absorb new CO2 into its cells. Additionally, when plants are exposed to 18 straight hours of intense light, they become stressed. Signs of stress – droopy or curled leaves – will usually appear towards the end of the light cycle. While some stress can be beneficial to plant growth, too much stress can cause harm to your plants and prevent them from reaching maximum growth potential. Giving plants 6 hours of intense light at a time not only puts less stress on the plants, it also spread out the load on your cooling system over a longer period of time. The cooling system works the hardest when lights are on. By turning off the lights for 2 hours at a time throughout the day, your cooling system will get a break between light cycles, allowing the room to be cooled to desired temperatures before the lights come back on. With a properly sized cooling system, this benefit will be minimized as the system will be designed to handle the heat load throughout the entire light cycle. While there are many approaches to Veg light cycles for cannabis, a 6/2 schedule allows for maximum plant growth. A 6/2 schedule allows plants to process more intense light, prevents plants from becoming stressed and puts less stress on your cooling system. It’s a win all around. Give your plants a break every 2 hours and you’ll be amazed at the results. ================================================================================= Day 1 October 1st - 2018 - The 3 Seeds are in germination at the present. The seeds were soaked in reverse osmosis water for 16 Hr. then transferred to a paper towel. DAY 2 October 2nd - 2018 - 2 out of the 3 seeds have germinated. the first 2 will be put into hydrofarm soilless seed starters using Revers Osmosis water and placed under 3 grolux flor 45 watt. Day 2 October 2nd - 2018 1:00 Pm. All 3 seeds planted into hydrofarm soilless seed starters using Revers Osmosis water and placed under 3 grolux flor 45 watt Day 3 October 3rd - 2018 - 9:00 Am. 2 ladies have popped out there little heads. Day 4 October 4th - 2018- 9:30 Am Seedlings are doing fine. All 3 seeds have germinated. Day 5 October 5th - 2018 ROW being installed. 2:30 Pm ROW installed. Day 5 October 5th - 2018 Seedlings are getting first set of single serrated leaves. Day 5 October 5th - 2018 The tent is setup and running R.O.W. Day 5 October 5th - 2018 Washed all Hydroton Clay Pellets in ROW. NO DETERGENTS. Rinse and Rinse again. Using R.O.W. so the medium has a practically no Ph. Day 6 October 6th - 2018 - Transferred the best 2 seedlings to tent under Veg. 1000 Watt L.E.D. Each bucket contains 19 liters of R.O.W. no nutrients added. This will continue for the next 2-3 weeks depending on growth. Day 6 October 6th - 2018 Seedlings put under Light Cycle of 6 On 2 Off Ect. Day 7 October 7th - 2018 - Seedlings looking good. Seems everything is fine on 6 on 2 off light cycle. Day 7 October 7th - 2018 - The 3rd seed germinated is looking very healthy. Transplanted it from the hydro seed starter to a 1 gallon planter with soil. Placed this in between the 2 main plants in the D.W.C. & used R.O.W.
Likes
2
Share
@KEVS_BEST
Follow
Woche 4 - Weiteres Wachstum und kräftigere Blätter In der vierten Woche setzte sich das beeindruckende Wachstum der Pflanzen fort. Die Nährstoffe blieben dieselben wie in der Vorwoche, mit der Zugabe von 30 ml Canna Terra pro 10 Liter Wasser. Das Licht wurde schrittweise weiter erhöht, bis es die maximale Leistung für die Vegetationsphase erreichte, mit einem PPFD-Wert von knapp 500. Die Pflanzen wuchsen immer kräftiger und gesünder, und die Blätter waren mittlerweile größer als meine Hände – und ich habe wirklich große Hände! 😄 Die Luftfeuchtigkeit und Temperatur blieben konstant und bewegten sich weiterhin im optimalen Bereich wie in der Vorwoche. Die Pflanzen zeigten eine merkbare Veränderung in ihrer Farbe: Sie wurden deutlich dunkler grün, ein Zeichen für eine optimale Versorgung mit Nährstoffen und ein gesundes Wachstum. Insgesamt war dies eine sehr erfolgreiche und erfreuliche Woche im Grow, mit weiterhin sichtbaren Fortschritten. ENGLISH Week 4 - Further Growth and Stronger Leaves In the fourth week, the plants’ impressive growth continued. The nutrients remained the same as the previous week, with 30 ml of Canna Terra added per 10 liters of water. The light was gradually increased until it reached the maximum intensity for the vegetative phase, with a PPFD value of around 500. The plants grew even stronger and healthier, and their leaves were now larger than my hands – and I have really big hands! 😄 Humidity and temperature remained stable, staying within the same optimal range as the previous week. The plants also showed a noticeable change in color, becoming significantly darker green, indicating an optimal nutrient supply and healthy development. Overall, it was a highly successful and satisfying week, with clear progress visible. Woche 4 - Weiteres Wachstum und kräftigere Blätter In der vierten Woche setzte sich das beeindruckende Wachstum der Pflanzen fort. Die Nährstoffe blieben dieselben wie in der Vorwoche, mit der Zugabe von 30 ml Canna Terra pro 10 Liter Wasser. Das Licht wurde schrittweise weiter erhöht, bis es die maximale Leistung für die Vegetationsphase erreichte, mit einem PPFD-Wert von knapp 500. Die Pflanzen wuchsen immer kräftiger und gesünder, und die Blätter waren mittlerweile größer als meine Hände – und ich habe wirklich große Hände! 😄 Die Luftfeuchtigkeit und Temperatur blieben konstant und bewegten sich weiterhin im optimalen Bereich wie in der Vorwoche. Die Pflanzen zeigten eine merkbare Veränderung in ihrer Farbe: Sie wurden deutlich dunkler grün, ein Zeichen für eine optimale Versorgung mit Nährstoffen und ein gesundes Wachstum. Insgesamt war dies eine sehr erfolgreiche und erfreuliche Woche im Grow, mit weiterhin sichtbaren Fortschritten. ENGLISH Week 4 - Further Growth and Stronger Leaves In the fourth week, the plants’ impressive growth continued. The nutrients remained the same as the previous week, with 30 ml of Canna Terra added per 10 liters of water. The light was gradually increased until it reached the maximum intensity for the vegetative phase, with a PPFD value of around 500. The plants grew even stronger and healthier, and their leaves were now larger than my hands – and I have really big hands! 😄 Humidity and temperature remained stable, staying within the same optimal range as the previous week. The plants also showed a noticeable change in color, becoming significantly darker green, indicating an optimal nutrient supply and healthy development. Overall, it was a highly successful and satisfying week, with clear progress visible.
Processing
Likes
2
Share
@Cannabot
Follow
Smells like blueberry for sure ,dense colas.shorter than most of my other plants.hopefully the bud more than makes up for the plant
Likes
2
Share
@dauntless
Follow
Week 8 started 5/22/2022 Ending week 7 strong. Last day was 5/21 -- I added some organic dry food *** from the local, PH'd water to 6.2 with some added Cal Mag Pro. Just going on instinct here, added some epsom salt on top and will water that in later. Water in the tray feeder thing (Auto Pot XL in manual mode) is 6.3 ish. Centered into the lights and measured with the LUX meter. As she starts vegging into the lights its gets stronger and stronger, from about 600 to about 1200+ (just a little less than full sun outside in my locale-- I measured). I am not sure exactly what this measurement means, I only use the sun as a reference. I have both lights on full blast. Still deciding if I can handle the heat of adding the 150W HPS, its HOT HOT HOT, but it makes the flowers huge. I am stopping the LST into week 8, nothing but clean water for a while into the veg, don't want to over feed. I am just doing regular maintenance, watching the grow, and I keep using Crop Control as a preventative measure, I don't care if I am wasting it-- not to be weird but it just smells like it will work LOL. Still tweaking air flow. Height at 9" is the table, there are some tips that are at 12".(I re-measured and changed this to more accurate #s) She has to grow to at least two feet up. I need to measure everything and may have to reposition my filter to accommodate the height. We'll see. I am cleaning up the grow area now, nothing left to do except clean and water. Auto Pot guys said my stuff is missing little rubber grommets from the factory, maybe I can fix the damn things and they will have auto water and we will see if that affects grow speed into flower. I am scared I am going to outgrow my tent this time. I wish I had an A/C Infinity 4x4, those look sick. Next day follow up: Measured: I have just enough room to pull this off. I will re-position filters and lights before switch to flower. I will have two charcoal filters and one A/C Infinity fan, with just the single Auto Pot XL, and it will be functioning since I found the parts to fix. I may get some custom aqua-ponics - bubble-ponics thing going in the tray I placed it in, I think with more oxygenated water and a higher level, more cooling and I may actually get more growth/flower -- we'll see, I am always scheming and I have parts! Still thinking it through as pre-flower time approaches soon. week 8 day 3 - minor surgery, f'd up a cola branch by super-cropping the shit out of it. Fixed, but lost time on that cola, added side light on that side to help fill in, just when I should be getting ready for pre-flower! oh well, that is part of the mainline manifold game. Gotta have grafting tape on hand and assess before it gets to be an unsolvable issue. check your plants and pay attention to what they say to you. ***Dry fert. stats: EB Stone vegetable fertilizer blended with humic acid and beneficial soil microbes including mycorrhizae. NPK: 4-5-3 Derived from: Blood Meal, Feather Meal, Bone Meal, Dried Chicken Manure, Bat Guano, Alfalfa Meal, Kelp Meal, and Potassium Sulfate.
Likes
3
Share
@halexxo
Follow
Led a potencia 75% 30cm desde las plantas
Likes
6
Share
Likes
30
Share
this little shogun that could has stretched to the max! She is actually a little big bush now. Too bad this season was not as ideal as it could have been. She has started to flower 7 to 8 weeks to go.
Likes
10
Share
@420pete
Follow
Chop day. Everything is looking and smelling incredible. The range of smells I've got so far are: floral, grape, blueberry, gas, burnt rubber, tangerine, funk. Everything appeared fully mature beside the Cambodian x Meat Breath and Pak Man so decided this was the best time to cut them down.
Likes
1
Share
Day 2; 48 hrs the Fat Bastard seed's root was long enough to go into soil today. I use Happy Frog soil for seedlings. The soil cup will stay on the heat mat insuring the temp is kept at 75°F. Day1; 24 hrs and the Fat Bastard seed has a visible tap root. I'll wait a little longer before putting it in soil. I like to see the root about a quarter inch before planting. Day 0; germination, paper towel method.
Likes
8
Share
Got these two that I’m am very excited about I have never grown either of these or any fastbuds so yeah let’s go!! Stay tuned!!
Likes
7
Share
She's developing a thick fat sticky main cola, very beautiful strain, short distance between nodes, compact very dense flowrs, and very strange smell to me, had never ever tried something so citric like this. It's a very orange sweet juice smell, very pleasant, I can't wait to dry and cure a little this flowers to be able to feel the ultimate flavor and power from this genetic, stay tuned guys!! ❤️💚💛
Likes
9
Share
@GYOweed
Follow
Foliar sprayed them with DIY uber hi-q by mixing fat soluble vitamin c with ro to protect terps from oxidation...supposedly. Trying to purp them with cold mornings and 10/14. Kush mints is frosty white, juicy c and bubba d similar because both share triangle kush, both smell so good. The jasmonate foliar is no joke i think it works and just like other anecdotes seems to increase limonene scents and bubba diagonal tastes light lemon n kushy sweet mmmmmm. Very potent even for me. Made me diagonal.
Likes
112
Share
@Dunk_Junk
Follow
So finally the harvest has started. Branches are harvested from the bottom pair upwards. Looking thru the pics again to write this, I remember feeling in awe of this plant. By node 4 they were very nice buds. Massive and dense. Node 6 and above is silly. Never seen anything like it. I had to take these pics because the 9" to 10" circumference on the buds, nobody would believe me 😅 Still got the main cola to do, got sidetracked doing other projects. But it will be done in the next couple of days, then to dry it all!!! Main cola trimmed and drying now...................... Sorry this update has been a while coming, i promise it's worth the wait. Dry weights in now starting from bottom node pairs and working up the plant: 29.72g 45.85g 54.91g 126.28g 82.51g 112.26g 75.24 Total = 526.77g !!!!!!!!! This plant is totally incredible. All lower buds apart from the main colas weighed 9oz... I was thinking another 2+oz main colas and nice buds. Well they was over 9oz too. Over 18oz from a single autoflower plant. Incredible, just incredible.
Likes
15
Share
@MrJones
Follow
Mr. Jones Fast Buds Moby Dick ╰⊰´🌿 ╰⊰´🌿 ╰⊰´🌿 ╰⊰´🌿 ╰⊰´🌿 ╰⊰´🌿 ╰⊰´🌿 🏡Indoor - 3"x4"x8" Custom Built Grow Closet 🌾This strain likes to stretch, so a heavy training regiment will be needed. 🗓️Germenation - Soaking in Water Strait into Amended Soil. ⚱️3-Gallon Pots 📊6.4 / 6.8 PH 💧 Feeding - Gaia Green Grow / Bloom 🕷️ IPM - We will be using Green Cleaner" 1 OZ per Gallon, and CannControl from Mammoth alternating between products each month for Integrated Pest Management. 🌿╰⊰´🌿╰⊰´🌿 PLANT UPDATES 🌿╰⊰´🌿╰⊰´🌿 🗓️Saturday - 11.11.23 So last week I did some training 1 plant was topped, 1 plant was LST, and the last one, the smallest one, was left alone, I am happy with the recovery as we head into week 4, this week that most FB strains begin to stretch into flower, today I started a compost tea, see recipe below, will be feeding tomorrow. Moved the plants into my stealth closet, under 2 Vipar Spectare XS 1500s. ╰⊰´🌿 ╰⊰´🌿 ╰⊰´🌿 ╰⊰´🌿 ╰⊰´🌿 ╰⊰´🌿 ╰⊰´🌿 📝 Notes - Original Moby Dick Auto is a world-renowned Sativa-dominant giant created from two of the most popular strains ever, the White Widow and Haze cannabis strains which are known for the huge delicious aroma, huge size and yields; It’s an extremely easy-to-grow variety highly recommended for growers of all levels seeking for maximum yields with minimum effort as this strain grows up to 150cm and yields up to 650 g/m2 in 10 weeks without extra maintenance. Thanks to its 23% THC, this marvelous hybrid is all about happiness as it will melt your worries away while boosting your mood, leaving you with a big fat smile on your face and ready to get things done as soon as you take the first hit, making it an excellent choice for social scenarios and busy workdays. The Sativa effect comes hand-in-hand with a mix of lemony, piney, and woody terpenes that translate into that classic aroma every stoner loves. ╰⊰´🌿 ╰⊰´🌿 ╰⊰´🌿 ╰⊰´🌿 ╰⊰´🌿 ╰⊰´🌿 ╰⊰´🌿 Compost Tea 3 Gallons Dechlorinated H20 3 Cups Malibu Compost 2T Molasses 2 T Alfalfa Meal (DTE) 2 T Kelp Meal (DTE) 1 T Bat Guano (DTE) 1 teaspoon Rootwise Bio Elixir 1)- I used a small paint strainer to hold my composts, placing an air stone right in the bag and zip-tie it nice and tight - this allows air bubbles to really agitate the micro matter off of the compost and into your tea 2)- I like to mix in the molasses (microbe food) and start my main air stone, the dry amendments and Rootwise can be just measured in the bubbles 3) - Keep the temp of the water warm to 75F/85F - too cool and the microbes reproduce too slowly and too hot will kill them. I do not delete my teas and let the plant pots dry out slightly before feeding.
Likes
37
Share
🌱 Week 1 Update: Terpyz Mutant Mentha de Croco Journey 🌱 Hey Grow Fam! The Mentha de Croco sprouts are officially a week in, and they’re already showing off their unique personality, each one growing at its own pace. They’re rocking some funky vibes and loving life inside the dome! Here’s a full update on their progress, care, and setup for Week 1. Living Environment: The Humidity Dome Setup The seedlings are living in a humidity dome, where we’re keeping the relative humidity (RH) close to 100%. This level of RH mimics a tropical environment, creating the ideal conditions for delicate young plants that need extra hydration support as they begin to develop roots and leaves. Why High Humidity? • Encourages Strong Root Development: At nearly 100% RH, plants focus on root growth while pulling in moisture directly from the air, helping them establish themselves early on. • Protects from Stress: The high humidity reduces transpiration (water loss through leaves), which prevents drying and keeps seedlings hydrated. • Promotes Healthy Leaf Growth: With constant access to moisture, the leaves expand smoothly, giving each plant a strong start in the vegetative phase. Growth Status & Observations 🌱 These little mutants are showing some funky characteristics and growing at their own unique pace—a perfect reminder that no two plants are the same! Each seedling has sprouted its initial set of leaves, and I’m seeing great promise in their vigor and resilience. Key Observations: • Color: The seedlings are a healthy green, with some displaying slight variances in shade—typical of unique genetics like Mentha de Croco. • Structure: Leaves are developing steadily, with short internodes (the space between sets of leaves) that hint at nice, compact growth patterns as they continue. • Energy: Each plant seems to be finding its rhythm, which is a beautiful thing to watch! Some are taking their time, while others are diving right into rapid growth. Nutrients & Supplements 💧 For this first week, I’m keeping it light on nutrients, letting the seedlings draw what they need from the Root Riots and the remaining seed stores. However, I’ve continued using Aptus Holland’s Regulator and Startbooster, both at 1ml/L, to support foundational growth. Why These Nutrients? • Aptus Regulator: Adds silicon to fortify cell walls, giving the seedlings extra strength to handle environmental changes. Even under the dome, this helps build resilience. • Aptus Startbooster: Supplies essential microbes and root stimulators, setting up these little ones for explosive root growth once they’re ready to venture outside the dome. Lighting: FOG LED & Environmental Control 💡 I’ve kept the Future of Grow (FOG) 600W LED dimmed to around 200 PPFD to avoid overwhelming these tender seedlings with too much light. They’re getting just enough energy to support healthy photosynthesis without stressing them in their early stages. Lighting Benefits at Low Intensity: • Prevents Stretching: With the lower PPFD, plants stay compact and focused on root and leaf development rather than reaching for the light. • Supports Early Photosynthesis: The FOG LED’s balanced spectrum provides all the wavelengths these seedlings need to kick off photosynthesis and grow with vitality. Controlled through the TrolMaster Tent X, the lighting schedule is consistent and stable. With this controller, I can manage humidity, lighting, and temperature settings all from one place, ensuring the environment stays perfect for these little ones. Reflection & Tips for Fellow Growers 💡 Week 1 is about creating a stress-free environment for seedlings to adjust and establish themselves. Here’s a bit of wisdom for anyone embarking on a similar grow: 💧 Humidity & Hydration: High humidity is a seedling’s best friend. Keep your dome or grow area humid for strong, happy plants. 💡 Light Management: Keep lighting low to encourage compact growth and let those roots dig in. Adjust lighting gradually as they grow to avoid any shock. 🌱 Patience with Genetics: Each plant has its own rhythm, especially with unique genetics like these. Let them show you what they’re made of without pushing too fast. Shout Outs & Community Love 💚 Much love to Terpyz Genetics for these incredible seeds, Aptus Holland for the nutrients, Future of Grow for the stellar LED, and TrolMaster for the environmental control. Big shout out to everyone following this journey—it’s always a blast sharing with you all. Let’s keep the positive energy flowing and watch these seedlings turn into something amazing together! Stay tuned for Week 2 updates—more growth, more funk, and more growers’ love! Genetics - Mentha De Croco https://terpyz.eu/products/menta-de-croco-fern-type?_pos=1&_sid=e9237cbcb&_ss=r DogDoctorOfficial Discount Codes @ terpyz.eu - DOCTOR 15% off Nutrition - @aptusholland https://aptus-holland.com/ Led Power @ F.O.G. Future Of Grow https://www.thefuturofgrow.com/en/online-store/BLACK-SERIES-600-p489093171 Controls @ TrolMaster https://www.trolmaster.eu/tent-x As always thank you all for stopping by, for the love and for it all , this journey of mine wold just not be the same without you guys, the love and support is very much appreciloved and i fell honored with you all in my life With true love comes happiness Always believe in your self and always do things expecting nothing and with an open heart , be a giver and the universe will give back to you in ways you could not even imagine so Growers Love To you All 💚
Likes
12
Share
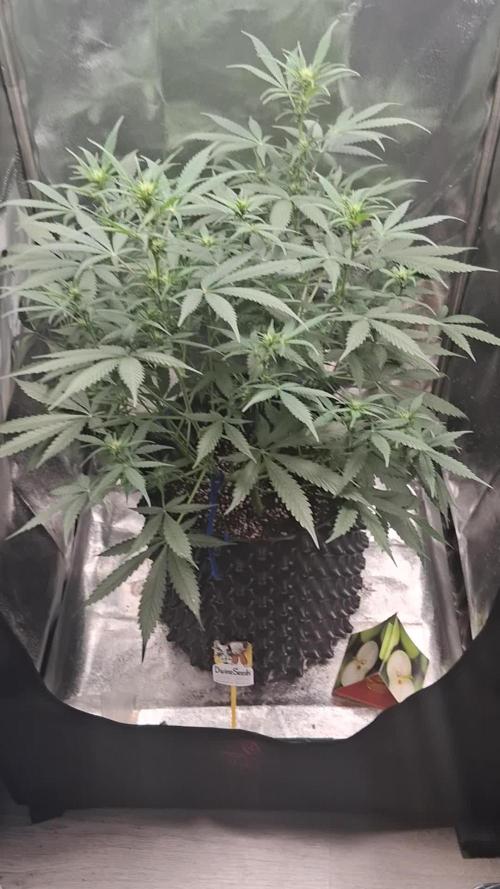
I think that during the next week she will start flowering 😁 i placed sulfur for any possible bugs (trips for example) 8th of August we put guanokalong nutrients on the soil which was a gift from a local grow shop, lets try and see how it works! 9th August water 10th August, again took the plant to my balcony, there was a loooot of wind and heat again, i also had another plant on my roof which died due to the heavy wind 😔 11th August water 12th August nothing 13th of august, today the plant is 21 days old, it should be starting to flower already! 14th of August nothing
Likes
5
Share
I'm cutting the nutes big time trying to get to 300ppm and I'll start flushing, main cola starting to show a purple reddish hue through the buds and sugar leaves, looks lovely just wondering should I be worried Update: reducing nutes still before flush, some buds going slightly purpley/reddish colour, still looks great just wondering what could be