
Likes
Comments
Share


Likes
5
Share


Likes
23
Share

@Chubbs
Follow
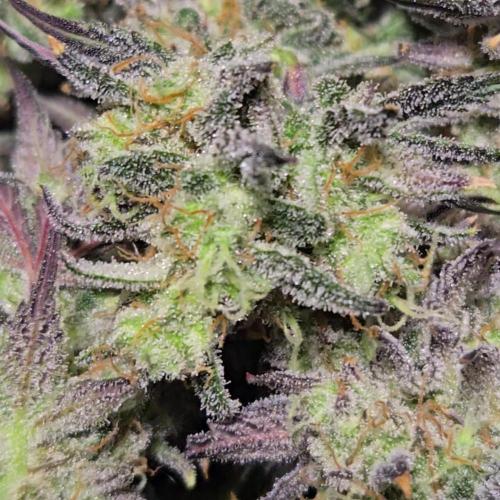
This strain is as always a joy to grow. This time dropping the temps in flower really felt like it boosted the trich production. The colors are stunning with the smell going from a sweet fruit to a dessert. I chopped and harvested two for some fresh frozen live rosin. Looking forward to washing and pressing it in the upcoming weeks.

Likes
Comments
Share


Likes
41
Share


@greenAF
Follow
Lights: Main: 8 397w, UVA 26w (So AC sending me out replacement for UVA so should have all 48w this time, running 26 until they arrive)
Feed Listed above then EC/PH adjusted
Controller Ports:
#1 Main lights
#2 Exhaust
#3 Intake
#4 UVA
D14 temps still high, but still going strong, supposed to be a little cooler this week 🤞
D15 Setup drainage and pump sys Girls are on a roll.
I want to be sure so it's been running way too hot and way too humid and I took one of the plants out yesterday to debate whether to call it this way it'll just be easier on the environment so I could get my control back.
I was pruning and checking it out, to debate whether I should just get rid of it, I was training it and I snapped the main stem right down the top seam lol. So that made the decision to cull it very easy lol. The plant was completely healthy and a great plan. It was just the smallest one and the only reason I was even debating it is because it was getting too hard to keep the environment dialed in where I needed it, shit happens, she was going strong until I ripped her in half lol. They're all doing amazing. Set up the first trellis,
D16 Holy shit 1 day in trellis this one girl just won't be held back, after I do some maintenance/pruning I'll snap some new pics.
D17 These girls are on 🔥
LETS GO ezzjaybruh
Likes
21
Share


@WEEDOOR
Follow
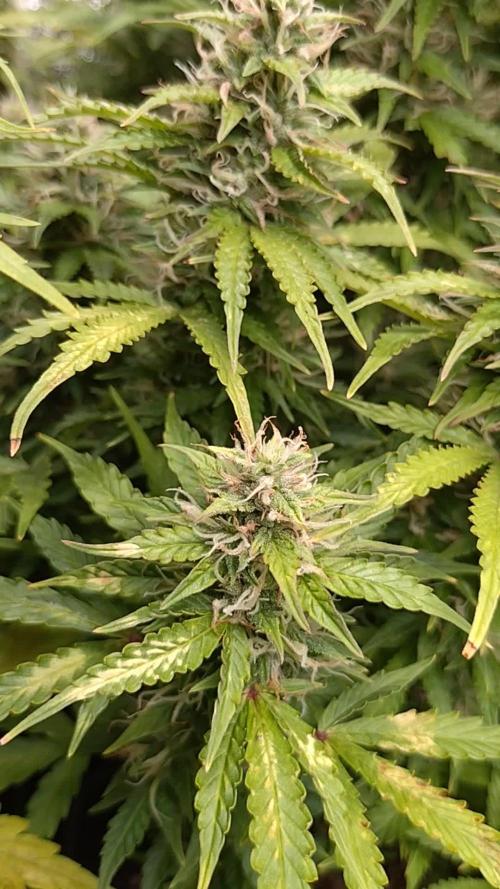
My girl is almost ready for flushing, darknees period and harvest.
The flowers look fantastic, frusty and full of tricoms.
After the flushing I'm gonna put her in an 2 day of darknes and then harvest.
In the final 2 week's I turned on my uva light at 20% power and total of 6 wats. For the first two days, the light work for between 1-3 hours and after that for 6 hours a day.


Likes
16
Share


@BudsBanditUK
Follow
What can i say. She is a stonker. Smells amazing looks mental. Fastbuds smashed this one again. I am excited about this one. I havent seen anyone grow this before.
Processing
Likes
15
Share


@ElegantBuds
Follow
Hello growers.
Bakers delight is doing it best. She has stopped growing and 100% energy in producing buds.
Small plant but very compact. Nice size of buds at the moment. Dna is living up to his name!
On the badside: ive had 2 herma’s in my tent, I hope I removed them on time!
See u next week

Likes
13
Share


@valiotoro
Follow
Hello everyone 😎
Week 2 of flower for the Amnesia HazzZE🤯
They seem’s to be super hungry 👻
For the nutrient 2ml/L terra bloom + 1ml/L power buds🔥
« Its a struggle Life’s a struggle.
A monday morning may be a struggle for a lot of you in a job that you despise,working for a boss that you despise…You’re a slave to money then you Die.God bless you »🖤
Likes
115
Share


@DogDoctorOfficial
Follow
Week 11 Blossoms: Cherry Cola's Resilience Shines Through
Dear fellow cultivators, my sincere apologies for the delayed report presentation. Nevertheless, let's delve into the remarkable journey of Week 11 in the realm of Cherry Cola. Amidst the delay, our green queen's resilience shines through, a testament to the unwavering spirit of growth and adaptation.
As Week 11 unfolds, Cherry Cola emerges as a beacon of floral splendor in the garden. Despite the challenges and the unforeseen delays, her blossoms continue to enchant, a testament to the beauty of resilience in adversity.
Apologies for the delayed glimpse into Cherry Cola's progress, but rest assured, the wait has been worth it. The buds have matured into luscious clusters, each a testament to the journey of patience and perseverance.
In a strategic move towards harvest, all feedings have been halted, and Cherry Cola is now receiving plain water with a TDS of 100 and a pH of approximately 6.8. This transition ensures a gradual flushing of nutrients, allowing for a smoother, more flavorful final product. It's a testament to our commitment to quality and taste.
I extend my heartfelt apologies for any interruption in the flow of updates. Your support and understanding are deeply appreciated as we navigate through the twists and turns of this horticultural journey.
Just as Cherry Cola's roots anchor her amidst the storms, may we too find strength in our resilience. Let her journey be a reminder that delays and setbacks are merely temporary detours on the path to success.
As we embrace Week 11 with grace and understanding, Cherry Cola's journey serves as a poignant reminder of the beauty found in resilience. Let us move forward with renewed vigor and optimism, ready to face whatever challenges lie ahead. Stay tuned for more updates as Cherry Cola's story unfolds. Thank you for your patience and unwavering support.
Nutrition: @aptusholland @aptus_world @aptus_
Love, Care, and Attention: @dogdoctorofficial
As always, thank you all for joining me on this journey, for your love, and for it all. My horticultural odyssey would never be the same without you. Your love and support are cherished, and I feel both honored and blessed to have you in my life
Friendly reminder all you see here is pure research and for educational purposes only
Growers Love To you All 💚 💚 💚


Likes
3
Share

@PhinolaGreen
Follow
11. Woche
Sie brauchen bestimmt noch 2-3 Wochen Zeit und die bekommt sie auch, kein Stress 🙂
Likes
24
Share


@DaddyPrime
Follow
I ran into a mold and bug problem around this week, so I started harvesting branches in an emergency to save what i could


Likes
19
Share


@Basementganja
Follow
Light was at 16" from days 1-7, which was way too close! The light was moved up to 32" and normal growth begun! The light is an SF4000 that's dimmed to 333watts while being cooled.
day 21-Defoliation begins! removed 1 fan leaf, and one node(on oposite side of 1st node) already!
Day 22, two more LST wires added, to expose the lowest node to equal light with the rest!
Likes
1
Share


@Marihuano
Follow
This week the grow 40x40x130 and A LED quantum board 150W arrived.
About the plant: The plant showed a deficiency as we can see in photo 1. With that I applied an NPK 10-10-10 watering and we can see the development in photos 2, 3 and 4.
