
Likes
Comments
Share


@RobsCoastalGrower4
Follow
Nice healthy growth. Starting to push up the nutrients slowly. First time using multi bottle system why not learn under pressure in a competition haha.

Likes
17
Share


@FlavoursUk
Follow
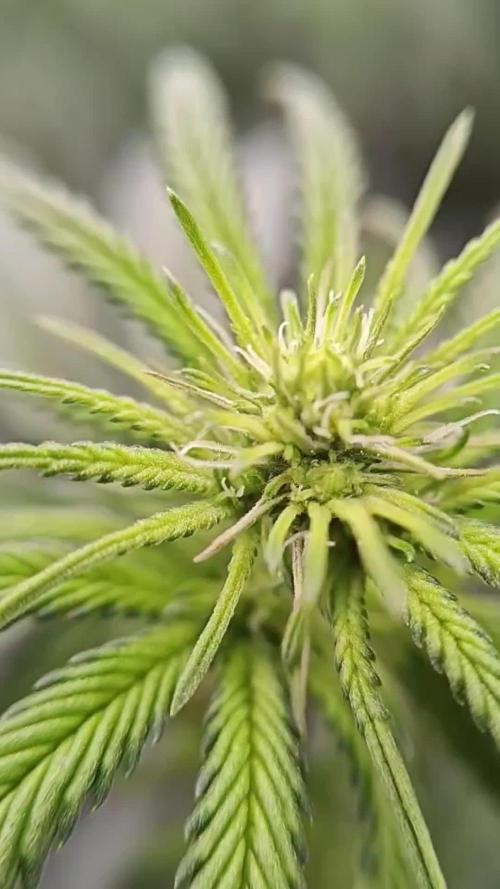
Day 9 for this girl and roots are touching the water, good growth so far and germinated in less than 24hrs. Pleased with this girl so far as she appears to be strong and stable from the start. Good sign. Can't wait to get her going.
Its been a good week, nice healthy growth.. rather vigorous but im not complaining. Might let her go natural this run with no training but we will see.
Stay tuned. FlavoursUK

Likes
209
Share


@Rock_n_Roll_Randy
Follow
Day 87 for the 54 plant grow. 42 different strains of photoperiods and 12 different autoflower strains in the:
8X8 GROW TENT WITH THE NEW FC-E6500, FC4800 AND TSW2000 AND THE NEW 5X5 GROW TENT WITH A TSW2000 👍and they are being fed GREEN BUZZ LIQUIDS all organic/vegan fertilizers🤘.
I only pinched the tops on 2 or 3 plants but I defoliated every plant ALOT. it slowed the vertical growth alot but it's exactly what I wanted. I can keep track of the plant sizes, how they grew, how healthy they were, how easy they were to grow and how good the final product is👍
ALL THE AUTOFLOWERS ARE CHOPPED.
The girls are loving their MARS MANSION and WITH THE 5X5 INLAW SUITE and everything is doing good and looking nice and getting bigger👍 lots of hairs clumping up now and they are all getting nice and frosty and starting to stink ALOT. MARS HYDRO ALWAYS GETS EM FROSTY👍.I AM NEVER DISAPPOINTED With how awesome these lights are🤘. KEEP KILLING IT MARS🤘👏👏
BREEDERS AND SEEDS:
DIVINE SEEDS:
MAZAR, OPIUM, WHITE WIDOW, OG KUSH, PABLO ESCOBAR, DIVINE INDICA.
AUTO WHITE WIDOW
AUTO PABLO ESCOBAR
AUTO WHITE RUSSIAN
AUTO FRACTAL
AUTO MONTREAL
AUTO OPIUM
AUTO KABUL
AUTO MAZAR.
WEEDSEED EXPRESS:
GREEN CRACK, GHOST TRAIN HAZE, LITHIUM OG, CHEESE.
DOCTORS CHOICE:
DC KUSH, AUTO NIAGARA, AUTO ROCK MACHINE.
EXOTIC SEEDS:
HIPPIE BERRY, MALASANA GELATO, EXOTIC ANIMAL.
GENE/MEME SEEDS:
BLACK HELL.
ORIGINAL SENSIBLE SEEDS:
PURPLE PUNCH COOKIES, WEDDING CAKE, PURE KUSH, GORILLA COOKIES.
SWEET SEEDS:
BLACK JACK, GORILLA GIRL, SWEET ZKITTLES.
EMERALD TRIANGLE SEEDS:
GORILLA GLUE, MASTODON KUSH.
SEEDSMAN SEEDS:
BLACK SUGAR, PEYOTE FORUM, PEYOTE WIFI, BADAZZ COOKIES OG, PURPLE GHOST CANDY, STRAWBERRY BANANA GRAPE, L.A. PEYOTE KUSH, PEYOTE WIFI CBD, FUEL DOG, CRITICAL PURPLE KUSH.
AMSTERDAM MARIJUANA SEEDS:
GIRL SCOUT COOKIES EXTREME, GREEN CRACK.
QUEBEC CANNABIS SEEDS:
BRUCE BANNER, GREEN CRACK, QUEBEC CBD 20:1.
I 💚 GROWING MARIJUANA:
SKYWALKER OG, BANANA KUSH, BLUEBERRY CBD.
FOR EVERYTHING MARS HYDRO VISIT:
www.mars-hydro.com
www.marshydroled.ca
PROMO CODE: rocknroll
VISIT THE ALIEXPRESS STORE:
@marshydro_aliexpress
Instagram: @marshydropenny
https://youtube.com/channel/UChU5ZWwNi-DvnO3oWVU3ceA
https://greenbuzzliquids.com/
#greenbuzzliquids
@GreenBuzzLiquids
https://greenbuzzliquids.com/en/shop/
PROMO CODE: rocknroll
https://www.youtube.com/watch?v=8hEqyS1jPpI
https://growdiaries.com/diaries/112437-grow-journal-by-rock-n-roll-randy/week/593118
Thanks for taking the time to read and check out my diary🤜🤛
FC-E6500 LED GROW LIGHT:
FC-E6500 grow light with 3978pcs OSRAM BridgeLux Diodes & Moso Driver, market-leading PPF 2.7 µmol/J, Max 2.5g yield/watt with 30% higher Average PPE, more cost-effective when compared to same style type lights. Only consumes 650W, perfectly cover 5x5ft (personal), 4x4ft (commercial) grow space. Innovative Precise Uniform Lighting-Built-in removable bars interval & dimmability enable the exact & dynamic PPFD control over each of the plant growing stages, FC-E6500 detachable bars deliverSuperior Heat Dissipation: Real Aluminum heatsink together with 6 slim profile passive cooled bars (THINNER & LARGER surface) and detachable Meanwell Driver, create less heat. save 50% hydro than other old grow lights! Driver can be mounted remotely on the side of a grow tent/rack or on an adjacent wall to remove heat from grow space. Full Spectrum UV IR LED: With Yield Max spectrum (660nm Osram enhanced Deep Red,2800k-5000k,730-740nm IR,380-410nm UV LEDs), Average PPFD the FC-E6500 LED grow lamp enables cultivators to produce BIG FAT Dense Buds, perfect for full-cycle hydroponic, soil, grow tent/grow room.
Dimmable Commercial Grow Light: Cost-efficient, easy dimming & daisy chain With a max up to 20 lights, IP65 Waterproof, master light easily controls the rest. Perfect for commercial & home horticulture.
FC4800 LED GROW LIGHT:
GET THE MAX FROM MARS👍: Welcome one of the newest members of the Mars Hydro family🤜🤛🤘. The Mars Hydro FC 4800 480W LED Grow Light can accommodate up to a 4' x 4' area for flowering. It has OVER 2000 LED chips consisting of the best selling Samsung LM301B diodes which has a Luminous Efficacy of: 220 lm/W
0.2 W, 3 V mid power,
Osram 660nm Diodes, Infrared light and UV LIGHT👍. It boasts the incredible efficiency of 2.8 µmol/J, maximum 2.5gram yield per watt with 30% higher Average PPFD. This High-intensity spectrum is beneficial for plants at all stages - from veg to bloom, and creates Big dense Buds👍. achieve 50% higher yields & quality compared with the old lights! Only consumes 480W for 4x4ft personal grows, and 3x3ft for commerical grow. It comes with a dimmer and daisy chain function with a maximum of up to 15 lights, the master light controls the rest👍. Wide 6-bar design offers even & wide canopy coverage and can maximizes your grow space. slim 180° FOLDABLE DESIGN... YES I SAID FOLDABLE🤘🤣 , making it compact and easy to install, it's IP65 WATERPROOF and will give you no worries while growing in a humid environment and makes it a flexible high performance commercial grow light for enormous SUPER FROSTY yields.😛😛😛. MARS GETS EM FROSTY BOYS👍
AWESOME HEAT DISSIPATION: The Low energy consumption FC4800 growing light has 6 passive-cooled bars and an aluminum heat-sink a removable driver you can upgrade later or have it outside your tent. with zero noise you can save up to 50% in your electricity bill compared to HID's or HPS lights!
It also has a removable driver so you can upgrade it in the future or have it outside your grow space for better heat control in your growroom👍
UPGRADED FULL SPECTRUM: Yield Max Spectrum with enhanced red (Top-Bin Samsung 3000k-5000knm, Osram 660nm Deep Red), speed up blooming & fruiting, perfectly suited for full-cycle growing. The FC4800 LED grow lamp was born for Big Buds, perfect for commercial, grow tent, grow room, hydroponics, and all soil grows.👍
THE BEST SAMSUNG DIODES: THE FC4800 has Top Bin genuine Samsung Osram Diodes, combined with remarkable 2.8 µmol/J Efficacy, 30% higher Average PPFD, 50% less energy consumption, to maximize your yields. They give you a TRUSTED 3 years warranty 100% Satisfactory guaranteed!!!
X2 TSW2000 LED GROW LIGHT:
INCREASE YIELD AND CROP QUALITY WITH MARS HYDRO LED GROW LIGHTS: NEWEST SMD LED technology provides the highest PAR/LUMEN output (1122umol@18") and can make you get 30% higher yield compared to OLD blurple led lights. Max 2.5g yield per wattage and achieve maximum quality and quantity, much better than traditional HPS grow systems
LOW ENERGY CONSUMPTION LED GROW LIGHT: Consuming only 300W true output with 684 LEDS! It saves up to 50% energy than other led grow lights. Perfect for 3.5x3.5ft bloom stage, 4x4ft veg stage. Over 90% light energy can be absorbed by plants, it will have higher intensity in a MARS HYDRO grow tent with diamond design mylar, or by crossing over using multiple TSW2000
HIGH EFFICIENCY FULL SPECTRUM INDOOR GROW: 3000K 5000K and IR 660nm 760nm RED, makes it close to natural light, highly engineered to provide improved growing performance for plants at all stages of growing, rapid plant response from seed to flower; Uniform and wide-beam light distribution for your plant's optimal growth
8x8 GROW TENT:
The MARS HYDRO 8x8 Grow Tent interior is made of a unique diamond design mylar which is highly reflective. (Other companies mylar and reflective rate is as low as 50%, and it won't provide efficient light. They use thick 1680D oxford canvas, and being double stitched, it is tear proof and perfect for locking in the light. Their grow tent keeps 100% of the light inside the tent and helps your plants absorb more light. EXTRA-THICK material means No light leaks or rips at all.👍
Strong Stable metal corner adapters and poles are the trustful supporters of the tent. It's very sturdy, neither rusting or paint flaking off. quick and easy tool-free setup. They use heavy-duty metal zippers, with double layer black lining, by far the best on the market which creates a light-proof seal.
5X5 GROW TENT AND TSW2000
TSW2000 LED GROW LIGHT:
INCREASE YIELD AND CROP QUALITY WITH MARS HYDRO LED GROW LIGHTS: NEWEST SMD LED technology provides the highest PAR/LUMEN output (1122umol@18") and can make you get 30% higher yield compared to OLD blurple led lights. Max 2.5g yield per wattage and achieve maximum quality and quantity, much better than traditional HPS grow systems
LOW ENERGY CONSUMPTION LED GROW LIGHT: Consuming only 300W true output with 684 LEDS! It saves up to 50% energy than other led grow lights. Perfect for 3.5x3.5ft bloom stage, 4x4ft veg stage. Over 90% light energy can be absorbed by plants, it will have higher intensity in a MARS HYDRO grow tent with diamond design mylar, or by crossing over using multiple TSW2000
HIGH EFFICIENCY FULL SPECTRUM INDOOR GROW: 3000K 5000K and IR 660nm 760nm RED, makes it close to natural light, highly engineered to provide improved growing performance for plants at all stages of growing, rapid plant response from seed to flower; Uniform and wide-beam light distribution for your plant's optimal growth
5x5 GROW TENT
LOCK ALL LIGHT INSIDE MARS HYDRO Indoor Grow Tent interior is made of diamond mylar which is highly reflective. (Other brand's mylar and reflective rate is as low as 50%, won't provide efficient light. )MARS HYDRO 1680D canvas, being double stitched, it is tear proof and has perfect light locking. Mars Hydro's grow tent keeps 100% lighting beams inside and helps your plant absorb more lights. EXTRA-THICK --No light leaks or rips at all
DURABILITY GROW TENT Stable metal corner adapters and poles are the trustful supporters of the tent, standing sturdy, neither rusting nor paint-falling, quick easy tool-free installation. Mars Hydro's heavy-duty metal zippers, with double layer black lining, are the best on the market which create a light-proof seal
EASY OBSERVATION FOR YOUR PLANTS. Special observation windows are made by double layers of cloth. Observe the growing conditions of your plants without opening the tent and avoid disturbing plants. The observation window also serves to dissipate heat and ventilate air
FOR EVERYTHING MARS HYDRO:
www.mars-hydro.com
www.marshydroled.ca
PROMO CODE: rocknroll
Instagram: @marshydropenny
VISIT THE MARS HYDRO STORE:
@marshydro_aliexpress2
https://growdiaries.com/grower/rock-n-roll-randy
https://greenbuzzliquids.com/
#greenbuzzliquids
@GreenBuzzLiquids
https://greenbuzzliquids.com/en/shop/
PROMO CODE: rocknroll
https://growdiaries.com/diaries/112437-grow-journal-by-rock-n-roll-randy/week/593118


Likes
2
Share

@psychonaut420
Follow
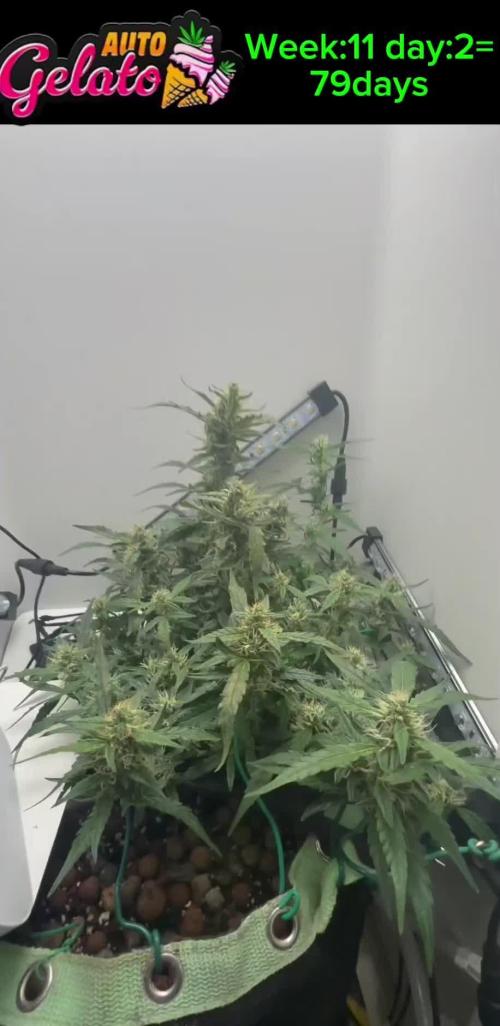
For fweek 11 she’s looking great with more and more ripening of the buds getting fatter every day and insane thrichome production she’s quite small build size because of the lowerlevel of scrog bit her width makes up for in height with the thriches and pistols starting to change colour getting fatter and fatter getting closer to flushing date

Processing
Likes
24
Share


@ElChicoDelaWeed
Follow
35 DÍAS DESDE EASY START.
Maceta RQS 10L.
-EASY BOST ORGANIC NUTRITION.(preparación del suelo con 50g en 10 litros de sustrato con perlita)
-EASY COMBO BOOSTER PACK.
En la 5ª semana estoy regando las 4 plantas con agua mezclada con la pastilla EASY GROW BOOSTER (dividida en 4 trozos para la semana 4,5,6 y 7). diluyendo en 1,5L. de agua la mezcla).
-Las 3 que están en vaso de plástico a principios de la semana pasada ya le añadí al vaso uno granos del EASY BOOST ORGANIC que no le mezclé cuando las planté).


Likes
53
Share


@Mastr
Follow
She start flowering day 22 quick one I think
Update day 24 I try again some lst training and I let her grow I'm so happy on her size for day 24 she definitely big girl
Day 27 I can see purple bud 💜 so happy hope she produce dark purple flowers 💜 but this strain never get tall usually around 60 to 80 cm
Likes
14
Share


@GoldenWeedGrower
Follow
D57/F13 - 27/05/23 - Added sunset and sunrise (only red lights for 1,5 hours at the start and 1,5 at the end)
D58/F14 - 28/05/23 - I set up my AFD (see picture). I find a way to feed her automaticly when I 'll be out, Every day I start the pump for 30 sec (about) to give her 2 liters of nutes with my AFS (Automatic Feeding System)
D59/F15 - 29/05/23 - Automatic feeding
D60/F16 - 30/05/23 - Automatic feeding
D61/F17 - 31/05/23 - Automatic feeding
D62/F18 - 01/06/23 - Automatic feeding
D63/F19 - 02/06/23 - I'm back, Nora looks ok, automatic feeding works. A little bit of problem with timelaps framing, but it's ok, I've got all info I need. EC 0.9 and pH 6.5
Likes
9
Share

@Chrisandweed
Follow
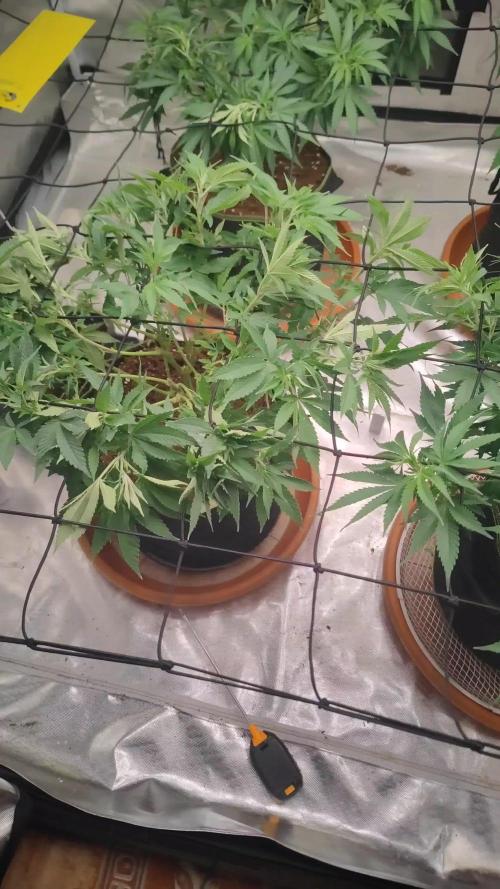
Cada vez mas cerca del objetivo, van flying que te cagas! Jajajajajaja están creciendo muuy bien, se expanden muuuy bien y los abonos se controlan. Hubo una ligera sobrefertilización al hacer el trasplante pero ya lo solucione, la planta mas afectada de las 4 fue la "Critical" normal, pero a esa le meti 10L de riego con flush para arrastrar todas las sales y demás. A las otras 3 les hice lo mismo pero con 5L. Ahora que ya están casi secas, han tardado 3 dias en secarse mas hoy el dia entero 4, están maravillosas, todas con sus hojas fuuuertes y mirando al techo, la critical es un poco la que aun le queda un poquito, pero con el proximo riego yo creo que ya se recupera. Luego, voy a ver si en breve planto alguna auto y la meto al indoor unas 2 o 3 semanas y me la saco al exterior... Ya veré sinceramente que en mi exterior tengo ciertos problemas dificiles de controlar, entre otros, vecinos que no saben lo que significa la palabra intimidad 😅.
Aaahh lo olvidaba!! Se ven hojas manchadas, eso es porque les metí ayer una limpieza guapa guapa foliar por delante y por detras a todas las plantas con un producto de estos tipicos de jabón potasico + aceite de neem, ya junto, en plan los 2 en 1. De entre las cosas que he ido aprendiendo con los cultivos, es que es muy importante hacer estas aplicaciones y ya no estas a modo preventivas, sino agua sola ayuda mucho, especialmente pulverizarla lo mas fuerte posible A LOS TALLOS, a la totalidad de los tallos/ramas de las plantas. Es verdad que los bichos suelen irse a las hojas a comer peeeeeeeeeero en mi experiencia, su base las hacen en los tallos y ramas, si, en la parte mas cercana a las hojas, peeero en las ramas! Por lo que minimo una vez a la semana procuro pegarle una buena pasada como si de una Karcher se tratara y si que el armario es nuevo y procuro tener cuidado, pero de momento todo bien respecto a plagas.
Likes
2
Share


@Green_Peace
Follow
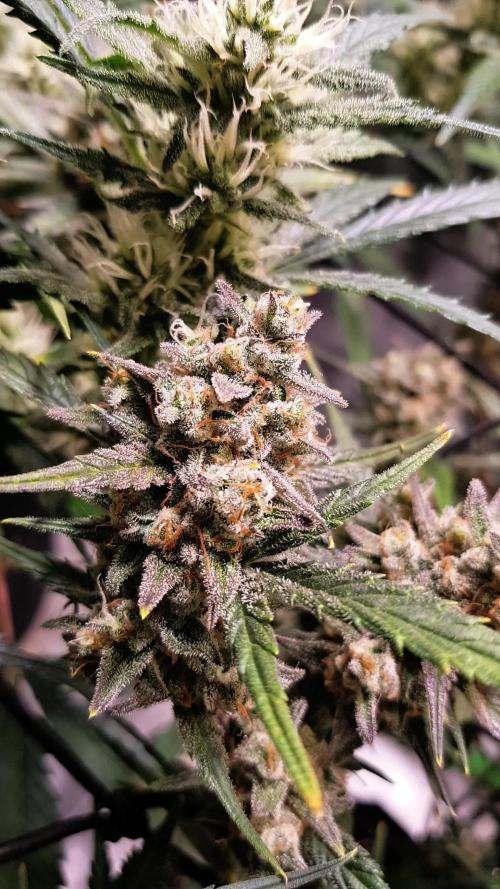
Reaching peak flower now so added PK into the mix for extra Potassium and Phosphorous over the next 10 days or so. Never had plants soak up this much nutrients without any burn (touch wood) so I'm really impressed with the Vitalink range. Theis plant is at the front right of the tent, and to the left of the screen in the timelapse.
Defoliated for the last time at the beginning of this week.
Likes
18
Share


@eldruida_lamota
Follow
Que pasa familia, vamos con la quinta semana de floración de estas Tropicana Cookies Fast Flowering, de FastBuds.
Los ejemplares tienen muy buen color han cedido muy uniformes y las flores están progresando a muy buen ritmo.
El ph se controla en 6.2 , la temperatura la tenemos entre 21/24 grados y la humedad ronda el 50%.
Van llenándose las flores de resina y van hinchando las flores, veremos estas próximas semanas como avanzan.
Mars hydro:
Code discount: EL420
https://www.mars-hydro.com/
Agrobeta:
https://www.agrobeta.com/agrobetatiendaonline/36-abonos-canamo
Hasta aquí todo, Buenos humos 💨💨💨


Likes
49
Share


@FoTwenny
Follow
🗓️ Week 17: 3/23 - 3/29
📆 Week 7 of 12/12
🌄 The plant is starting to go into senescence and presenting some beautiful colors as she begins to fade.
💡 Received new lighting courtesy of Growers Choice. They sent me the ROI-E420 with the Master Controller. First impression is amazing. Looks and feels like very high quality build. The spectrum seems more blue than the 3000k lm301H Kingbrite bars I have been using. The bars are thinner and packed with a lot of diodes, so they do run a little hotter than the KB at full power. I adjusted and now running them at 90%. For now the Kingbrite bars are being used as side lighting dimmed to about 30-35% depending on Grow room temps.

Likes
14
Share


@CampaCavallo
Follow
7ª Settimana di Fioritura 💐💐💐💐💐💐💐
Ma quanto sta diventando bella la nostra RUNTZ 💓😍?
Come si stanno gonfiando i suoi bei cimoni innevati🏔️💓

Likes
27
Share


@AsNoriu
Follow
Approximately day 72 since seed touched soil. Such a relief is this part of garden. All girls will be harvested next friday, only one weakest Trainwreck is about a month behind, but she was looking sad and weak all the time, catches up others, still underdeveloped and small buds. Other two Trainwrecks are very nice, one is forming huge top, fat, sparkling, did few photos of her even. Both cheeses run nice too, rainbow smells so sweet, should be lovely smoke. We had huge rains , almost like summons, no signs of bud rot, but bottom branches are covered in soil and sand, will have to wash them before hanging.
Sun was still raising, i was blinded by it, so quality of photos is very poor. They sparkle !!! and smell is around the forest, really sweet and i cant wait to try them out !!!
Last 10 days or so left till chop.
Happy Growing !!!!!

Likes
51
Share


@felixthegrower
Follow
Well, it was my first diary here, and I'm really happy to had found this amazing community that is so eager to help!
It gave me the opportunity to win the first giveaway in my life 😂 And it was from RQS! These seeds are in my new grow diary, and I really thankful for all the gift received! A special thank to Pol from the RQS staff!
A special thanks to everyone who watched me grow here, and I hope to contribute with the community more and more!
Processing
Likes
15
Share


@MG2009
Follow
06/02/2020
Gonna feed them today 1tbls of blood meal.
I snapped a branch on #2 (see video) her stems, I don't like break to easy so I will give some micro nutrients to help stems from breaking. Unless she is the HOLY GRAIL. I will cull her clone.
All others handed super cropping well. 🙏
#4 in hydro is in it's own diary called Small Batch Seed making some F1
#1 showed her sex today, clones well took cut on 05/20/2020 is rooting well outside in coco coir, in humidity dome just cut and scrape the stem,once rooted I cut off yellowing leaves i hope her smoke is as good as she looks.
5 days into week 10 and #2, and #4 are male so indoors they go for pollen collection. Will dust one bud of each female with each male and hunt for what I want. Also see what each passes on in the cross.
Likes
2
Share


Likes
16
Share

Likes
13
Share


@Skinnytalls420
Follow
Day 1- 08/04/22 14:30pm Germination Time!!!!! Here we have 21 wonderful seeds from the amazing fastbuds!!!! Placed in a glass of water for 18-20hours!!! So excited!!!!
-
Day 2-09/04/22 seeds have been placed on a wet paper towel!!!!!
-
Day 3-10/04/22 getting the pots filled with soil ready for planting tonight or tomorrow!!!!!
-
Day 4-11/04/22 most of the seeds had popped last night so I planted most of them and the rest I planted this morning!!! 1 seed out of the 21 didn’t pop so germinating another to make it back up to 21!!!! So there all in the tent except 1!!!!
-
Day 5-12/04/22 one has come through so far and should be planting the last seed tonight!!!! A few more should pop out by tomorrow!!!!
-
Day 6-13/04/22 14 out of the 21 have come out so far!!!!
-
Day 7-14/04/22. 19 of the 21 have come through!! I think one isn’t going to come through so I’m germinating another seed to replace it and if the other one doesn’t come through tomorrow I’ll germinating another one to replace that Aswell!!!.