
Likes
Comments
Share


@CHILLING_RACOONS
Follow
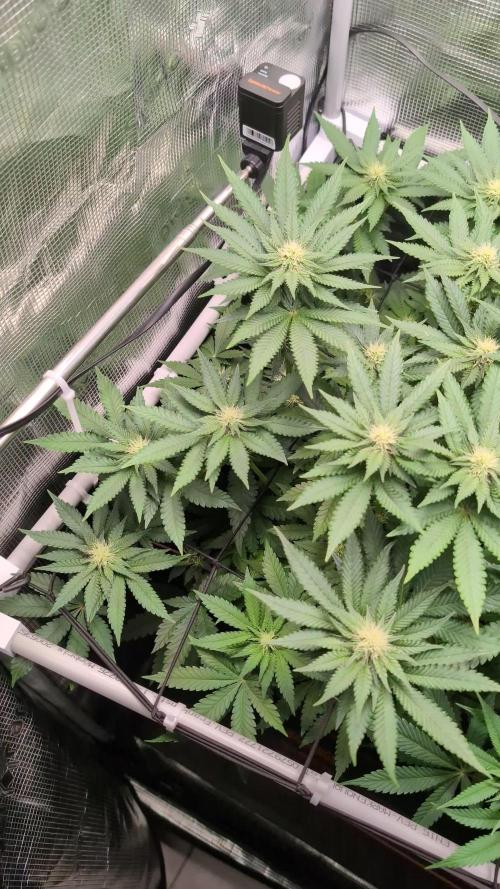
We are at the last week of this awesome strain. Now i flushed very well.
___________SOME DETAILS___________
***
this is another cycle with the amazing Vanilla Kush by Barney's Farm, one of the most famous strains in the '80 *.* <3
It is an amazing strain because it is one of the tastiest strain you can smoke, it is noob friendly, easy to grow with a normal flowering period (but it is a high yielding strain). The high is immediate and powerful, and it brings you to a deep state of relaxation.
____________________________________________________________
VANILLA KUSH™️? Cannabis Seeds Strain Specifications
Type: Feminised
Photoperiod: Normal
Genetics: Afghani Kush x Kashmir
Effect: Euphoria, Happy, Calm, Sleepy
Indoor Yield (g):up to 600 gr/m²
Flowering Time (days): 55 - 60
Feminised Outdoor Harvest Month: September
Feminised Outdoor Harvest Month Week: 3rd-4th week
Height (cm): 90/100cm
Height Indoor (cm): 90/100cm
Height Outdoor (cm): 100cm
Height: Medium
Indica %: 80%Sativa %: 20%
Indica/Sativa: Mostly Indica
Taste: Sweet Molasses, Vanilla, Sweet Lavender, Citrus, Earthy
Aroma: Vanilla, Molasses, Floral, Lavender
This is the link where you can buy this must have strain: https://www.barneysfarm.com/vanilla-kush-25
_____________WHAT I AM USING_____________
-LIGHTS:
Quantum board - 480w - 4x120w Boards by Zhoangshan Koray Opto-Electronic Ltd.
Samsung LM301B 288 led/board
+24led/board led Osram 660nm
Efficiency 2.6 umol/J 220 lm/w
Driver: Meanwell HLG-480H-36B
temperature: 3000k
Heat dissipator board: No
Noise: 0dB
Quantum board - 240w - 2x120w Boards by Shenzen Yuanhui Led Ltd.
Samsung LM301H 504 led
+24led/board led Osram 660nm
Efficiency 2.7 umol/J 220 lm/w
Driver: Meanwell HLG-240H-48B
temperature: 3500k
Heat dissipator board: YES 15MM
Noise: 0dB
-ESTRACTION FAN: Blauberg 125 Turbo Pro Series
Power: 42-50W
RPM: 1940-2620 minimum -1
Maximum air flow: 430-560 m³ / h
Sound pressure level at 3 m: 32-44 dBA
-FANS:
A)OSCILLATING FAN
Maximum consumption: 20 W
Minimum consumption: 17 W
Fan diameter: 15 cm
Housing diameter: 20 cm
Height with handle: 35 cm
2100 revolutions per minute
Two speeds
B) COMPUTER FAN Sunon DP200A - 230V
Nominal power: 22/21 Watt
Noise level: 44 / 49dB (A)
Rated speed: 2700/3100 RPM ± 10%
Air delivery: 95/115 CFM
C)Cornawall Electronics Multifan Turbo, three speeds, can be used both on support surfaces and mounted on the wall. High capacity, about 740 m3 / h, can be used in medium-sized rooms. High silence and reliability make it adaptable and versatile.
Technical details:
Rotation range of 90 degrees
Tilt adjustment
Three speeds of rotation
Suitable for wall and ceiling suspension
Power Consumption: 35 Watts
Air Flow: Approx. 740 mc / h
Operating noise: approx. 39 db
Diameter: 20 cm
Voltage: 220-240V
Frequency: 50Hz
Dimensions: L 28 x D 16 x H 28 cm
FERTILIZERS:
MAIN FERTILIZER BRAND: TOP CROP
I use these products:
-DEEPER UNDERGROUND: to stimulate roots system
-TOP VEG: for a excellent growth in the vegetative phase
-GREEN EXPLOSION: to promote creation of bud sites and to allow a faster growth
-MICRO VITA: bacterias for equilibrate the soil and to make the plant healty
-BIG ONE: to stimulate bud sites and to stimulate resin production
-TOP BLOOM: to achieve excellent big and hard buds
-TOP CANDY: to feed the buds with molasses for a tastier smoke and to gain weight
-TOP BUD: to enlarge buds and to gain weight
PLAGRON: PK 13-14 to have big and hard buds and to feed plants with lower effort
ADVANCED NUTRIENTS: Sensi Cal-Mag Extra-> for cal mag deficiency
GROTEK: cAL MAG for cal mag deficiency
HESI: PowerZyme to clean and balance the soil. It feeds the plant cleaning the soil.
GHE: - Final Part (ex Ripen) accelerate the final flowering phase, dissolves minerals in excess
- Flash Clean to flush the plant and to be sure that all excesses are out from plant and pot
These two products improve A LOT the smoke of our babies
____________________________________________________________________________________________
<3 Thank you for being here <3
Please leave a comment with your opinions, it is very important to us to have a comparison.
If you like our job, please, tap the weed button and follow us. It will be really appreciated.
Thank you again
Sweet hugs
CHILLING_RACOONS


Processing
Likes
6
Share


@CzAlmighty
Follow
Ahoooj 🍀
Další týden za mnou. Řekl bych ze bez nějakých vaznch problému.( Aspoň doufám )😅 jinak u předchozího modelu co tu mám “TheNew” . Mám nejaky (problémy) ,tak jestli mate čas. Napište mi k tomu jestlinse tím mate nějaký zkušenosti. A zda je to velký. Peoblem . Jsem linej to vše zase předělávat a lepit to u bodu kde je to rozlomene. 😅🤦♂️🏼
Problém : po zastrihnuti jsem naplnul hlavní tepny a po čase se mi roztomily trošičku na místech kde byly zastrihnute.
Příjemný den BRATŘI .🍀

Likes
18
Share


@Borberad
Follow
Hoffe nach den Überraschungen in der letzten Woche verlaüft diese wieder ruhiger. Habe den Leitwert des Drain bei beiden Pflanzen auf ph6 und 2000 microSiemens Ende letzter Wiche reduziert bekommen. Interessanter Weise waren die Leitwerte bei den Pflanzen trotz exakt gleicher Wasser/Düngergabe um den Faktor 2 auseinander. Der ph-wert lag bei beiden bei 4,8 [Warum auch immer]. Hab die Werte durch Spülen mit Leitungswasser und Osmosewassermix mit Leitwert 500 auf die oben beschrieben Werte gebracht und hoffe das die Damen es mir verzeihen und mich trotzdem in 3 Wochen mit reicher und vor allem leckerer Ernte belohnen werden. Gieße jetzt jeden 2Tag, so viel, dass genügend Drain entsteht um die Werte zu kontrollieren. Drain liegt bei Ph ca. 6,0 bei max 2,5mS andernfalls wird mit Osmose oder Leitungswasser (0,8mS und Ph7.2) gegegengehalten. Da sie in Stofftöpfen stehen, ist es hoffentlich nicht so dramatisch etwas zu viel Wasser zu bekommen.

Likes
7
Share

@GrowInBavaria
Follow
23.11.2025 – BT21
Das Lollipopping und das Entlauben haben sie soweit gut überstanden. Die Buds wachsen wie verrückt und der Geruch nimmt stetig zu!
Allerdings gibt es auch Probleme. Beim Gießen waren 3,5 L wohl doch zu wenig, sodass sich vermutlich Salze im Substrat angesammelt haben. Dadurch kam es zu einem Nährstoffbrand und einer Nährstoffblockade. Da ich bei der Clementine Slush bereits eine leichte Überdüngung an den Blattspitzen hatte, ist das Ganze natürlich besonders ärgerlich.
Beim Drain der Zoap Rose habe ich einen EC-Wert von 2,0–2,1 gemessen und bei der Apples & Oranges sogar 2,3–2,4, was selbstverständlich viel zu hoch ist. Beide Pflanzen wurden anschließend nur mit Wasser (pH 6,2) und einer Zugabe von Cal/Mag gegossen – die Zoap Rose einmal und die Apples & Oranges zweimal.

Likes
23
Share


@HideAndFly420
Follow
Day 71👋🌱
I started flushing some days befor. I think I’ve got 20 days left but this lady eat a lot of feeding this last weeks so I give some more flushing. Buds looks full of all
What they needs also if now they need to get fat and fat. :) let’s see what’s happen.
Giving ph controlled water at 6.2/6.5, I check TDS to water owerflowing from pot, bringing it to 50ppm from 400.
Now I’ll start checking trichomes every three days, I’d like a 60% white and 40% amber
Day 72👋🌱🌱
Hi all growers, how is going? 😊
I'm at my first real flush for this Orange, i gave 10 lt of ph controled water and was checking ppm from water coming out. i gave water unitl it reach 400 ppm, my water is 200 ppm, i hope i'll bring it to 50 ppm for next flush in 3 days.
i think bud are going to bloom nice this last days befgore harvest, i can feel it :D
Day 74👋🌱🌱🌱🌱
Soil is already quiet dry, smell is increasing rapidly. Today I’ll give another e 1 lt of water and Sunday I’ll do another flush. I think will go up to 90 days. Bud will get fatter and fatter🏆.
Maybe I could have fertilise two times more, but anyway I’d not a big problem, I’ve been feeding them a lot since the beginning so a more long flush won’t be a problem at all.
Can’t wait to the harvest.
Day 77 🌱🌱🌱🌱🌱🌱🌱
Just posting some trichome pictures, waiting to some changement before publishing some new pic of the lady.
Keep washing it with ph controleed water that looks always cleaner, i think i'll be cutting the most high bud some days before the rest of the plant.
Can't wait anymore
Let’se go! ❤️🌱
Any suggestion is really welcome :)😋🌱🌱
Likes
100
Share


@AsNoriu
Follow
Day 86 . I will chop first two today. Plant A and B, C stays for a week still, a bit airy and not mature , but she was in shade mostly ...
Spent almost 5 hours defoliating other plants and got too high and drunk a bit, so dry trim chosen for first two ;))))
Day 93. Last girl down ! Dry trim again !
@PurpleWorship just to prove my kilo idea I made a video for you ;))) this one was starved, she needed watering yesterday, so I could bump her to 1.5 easy .... Her sisters were heavier ;))) will do one more with monster Green Crack, can make a bet she will be above 2 kg easy ! ;)))
Made some bubble hash, got light brown and pinky colour at the end when dried. Lovely !
Happy Growing !!!

Likes
Comments
Share


@eldruida_lamota
Follow
Vamos familia, actualizamos la septimsemana de floración de esta Amaretto Tarmac de Seedstockers.
Empezamos abonando ya con varios productos de la gama Agrobeta para la floración.
Temperatura y humedad dentro de los rangos correctos, 12 horas luz, 12 oscuridad.
Una lástima que de todas solo aguanto una, y en concreto tiene un color espectacular aún así seguiremos con el diario hasta el final.
Agrobeta:
https://www.agrobeta.com/agrobetatiendaonline/36-abonos-canamo
Hasta aquí todo, Buenos humos 💨💨💨


Likes
11
Share

@All_our_small_plants
Follow
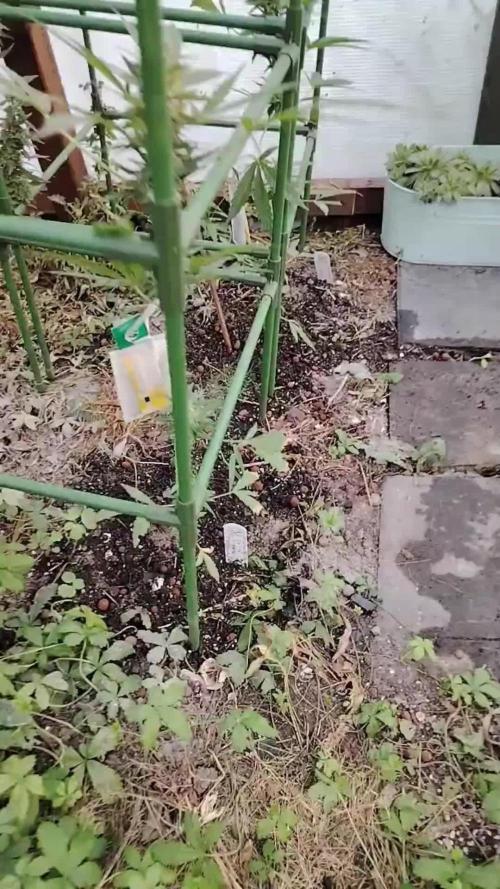
Bewässerung: 5000 ml jeden 3 Tag in der zwölften Woche
pH-Wert: 5,8
EC-Wert: 0,4 mS/cm
Temperatur: 20ºC
Luftfeuchtigkeit: 65%
Schädlingsbekämpfung: Diese Woche haben wir ihr Wasser mit Nematoden gegeben da sich doch vermehrt Trauermücken im Bereich aufhalten.
PPFD: Direktes Sonnenlicht
DLI: Direktes Sonnenlicht
-Tag 75 Heute haben wir sie mit Schachtelhalmjauche gegossen 😘

Likes
16
Share


@TheCannaProphet
Follow
Brand new here and my apologies as I'm actually on Week 5F at this time and have had to scour my journal, notes and photo's to catch this diary up to the present. Next run is 8 auto's( 2 FastBuds & 2 Seedsman) with 4 different strains so STAY TUNED! ...The babies are doing well with the exception that I had two Power Plant beans that failed to pop, third time was the charm which puts it roughly a week behind it's sista's. GSD is just hanging out desperately waiting for the little one's to catch up so she can flower as she's been vegging for 50 days already (I had her on a 19/4 light schedule with a Auto run that just finished). Temp's and RH good to go, daily light water right now with seaweed extract added @ 1tbs/gl.
Likes
22
Share


@Mr_Mister
Follow
Siguen creciendo bien pero están empezando a mostrar deficiencias de nutrientes. Estuvieron un par de días con las hojas muy decaída, he abierto las ventilaciones de la tienda para que no pasen tanto calor. La semana que viene la pondré en floración.
Likes
2
Share


@UrbanBoer
Follow
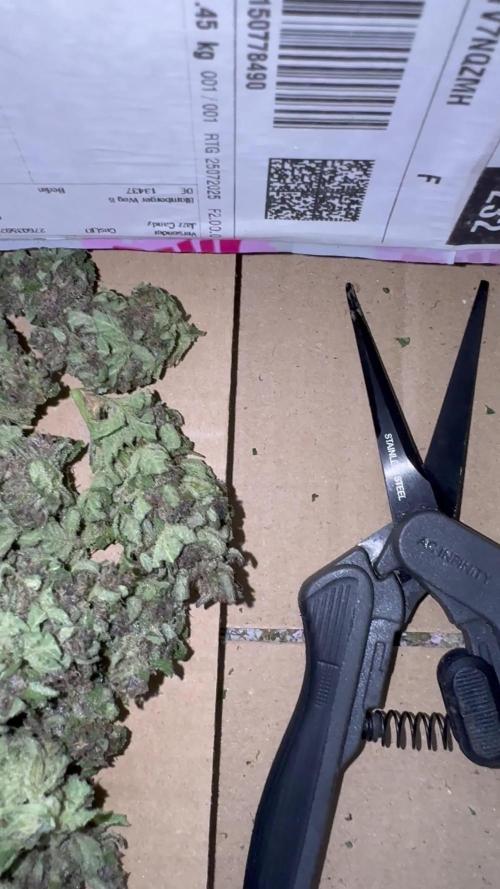
I am not happy with this strain, but I blame myself, I dried it to quick, allowed a lot of airflow in the dry closet when I should of kept the airflow as minimal as possible, slower you dry the bud, the better the result when it it comes to bud size, aesthetics, aroma, smoothness and when smoking it, the taste on your pallet will be fantastic. However I am hopeful when I bake this strain, I will be amazed 😇


Likes
15
Share


@HighOhioAn
Follow
Growing for FastBuds420 has truly been an honor their genetics are truly Best in the world in my book strange our name beautifully mimicking the smells and appearances of their names. Pineapple express is one . They nailed the name right on the head. This plant truly smells just like a pineapple and almost looks like a pineapple once the fade starts one of the biggest autos I’ve ever grown truly thankful for the opportunity to grow this plant
FastBuds420. 4 Life 🌿💨💯
Likes
41
Share


@KilgoreTrout
Follow
No complaints, no problems other than our current heat wave. Watering three times today's vs normal 2. Tricomes looking like they're getting real milky. I'd say two more weeks.
FYI growdiaries says im on week 9 but by my count I'm in week 8f - 56 days.
I'm thinking at least two more weeks based on tricomes. Starting to get milky buts nearly zero amber.
Likes
10
Share


@SkunkyDog420
Follow
Hallo zusammen 🤙.
Sie wächst sehr schön und macht keine Probleme.
Rabattcode für den BIOTABS-Webshop https://biotabs.nl/en/shop/ GDBT420, damit erhalten Sie 15 Prozent

Likes
2
Share

@SidekickGrowie
Follow
Im Großen und Ganzen bin ich sehr zufrieden mit dem Grow. Ist die erste erfolgreiche ohne Schimmel Outdoor Ernte. Für mal so nebenbei echt gut geworden! Ich freue mich schon auf das nächste Jahr!
Processing
Likes
2
Share


@MO_Gardens
Follow
Still trucking along. I had my light turned up a bit high for the first week, I turned them down a few days ago and all the plants seemed to enjoy it. Nothing else to report really.