
Likes
Comments
Share


@Frank_cultiva
Follow
Las hojas están con manchas, creo que fue a causa del último riego con nutrientes, no fui cuidadoso y llegó de esa agua a las hojas... A causa de eso también quiero prevenir una sobrefertilización y está semana he decidido no regar con nutrientes, sólo con Bio up para subir un poco el pH del agua... A pesar de las hojas con manchas creo que van bien con el crecimiento teniendo en cuenta que esta es sólo mi segunda experiencia cultivando.
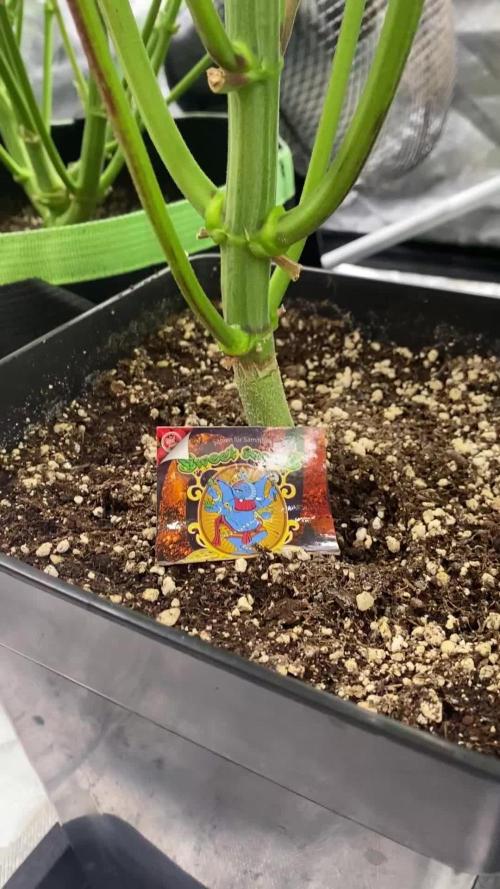
Se me olvidaba mencionar que las pasé a su nuevo hogar esperando un mejor desarrollo para ellas

Likes
1
Share


@spanish420pasiongrow
Follow
Muy caros los productos, efectivos pero me sigen pareciendo caros, probaré nuevas gamas! Un saludo

Likes
Comments
Share

@fridge
Follow
End of Week 3 flower | very slight light burn on some leafs | looking good | this one will probably go to the freezer and processed in winter | running this one on half the fertilizer amount 1
Likes
2
Share


@CuriosityWebster
Follow
Loving how these girls are growing
Fastbuds mystery #1 finally catching up, and may possibly in the end being a better producer than the RQS plant, which is surprising to me because of how badly I stunted this plant. Got me curious how good this plant could’ve been


Likes
7
Share


@gablmo
Follow
Another never ending vege week. I took clones and did more trellis work. The PH was up more than usual, they are still alive. I'm glad.

Likes
9
Share


@burnercorona
Follow
She's progressing nicely. So far just a little water each day is making her a happy plant.
Likes
3
Share
@MO_PureLeaf
Follow
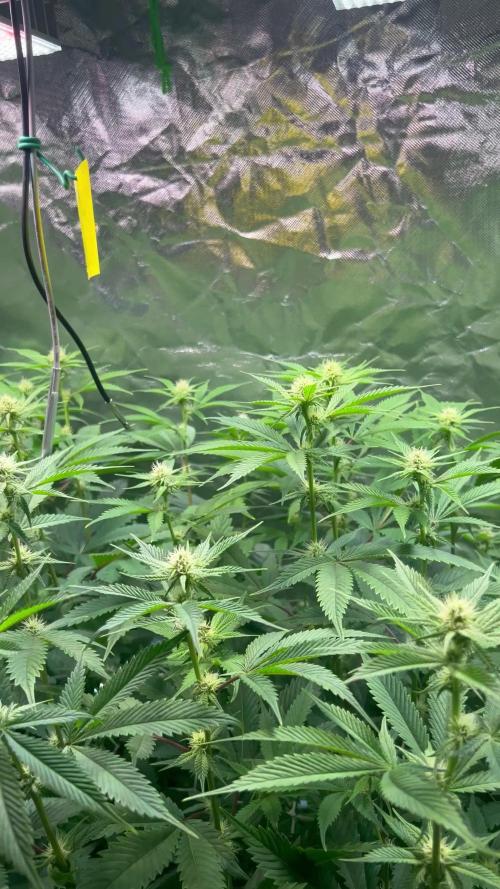
Blüte – Woche 4 | Wochenupdate
der Stretch ist abgeschlossen und die Buds entwickeln sich sichtbar von Tag zu Tag. Insgesamt sehr vitale Pflanzen, die F1-Genetik zeigt ordentlich Power.
An einzelnen älteren Fächerblättern sind leichte Aufhellungen zwischen den Blattadern sowie kleine rostige Punkte zu sehen. Das könnte auf ein leichtes Cal/Mag-Defizit unter LED in der Blüte hin. Ab dem nächsten Gießen wird Cal/Mag ergänzt und PK etwas reduziert, um die Nährstoffbalance zu stabilisieren.
Klima ist aktuell stabil, Licht läuft auf voller Leistung. Insgesamt sehr zufrieden mit dem bisherigen Verlauf und gespannt auf die kommenden Wochen

Likes
6
Share


@BioGrowBayer
Follow
Nach dem Umtopfen ging es direkt weiter mit einem ordentlichen Wachstumsschub – richtig schön anzusehen! Die Pflanzen haben den Wechsel super weggesteckt und legen jetzt ordentlich zu. Alles verläuft bisher nach Plan, ohne nennenswerte Komplikationen.
Die Symptome des Calciummangels sind komplett verschwunden – die neuen Blätter sehen gesund und kräftig aus. Offensichtlich zeigt die angepasste Düngung Wirkung.
Auch die Thripse scheinen erfolgreich bekämpft worden zu sein. Ich konnte bisher keine neuen Spuren entdecken – hoffentlich bleibt das so.
Heute stand noch ein wenig Entlaubung auf dem Programm, um Licht und Luft besser ins Innere der Pflanze zu bringen und die Schimmelgefahr weiter zu minimieren.

Likes
13
Share


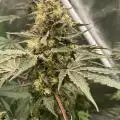
@DeepRootGrows
Follow
This lady has turned into an absolute beast, starting to be really frosty with trichomes and, believe it or not, I can actually smell the purple lemonade in it, this has became a really beautiful plant and I only expect it to go maybe another two weeks. The size of this thing is unbelievable though, so big for an auto. Can’t wait to get it into jars!
Likes
7
Share


@StickyFingah420
Follow
Semana de cosecha! Al fin el tan esperado momento momento se aproxima y no puede tener una mejor pinta! Realmente he quedado maravillado con la belleza de este fenotipo muy parecido al que promociona el banco en su portal, así que muy satisfecho por eso.
Solo esperar a que se seque bien el sustrato y estaremos cosechando estos bellos frutos 🤩😍
Likes
8
Share


@Growador
Follow
Shoot!!!! They’re beginning to thickening up, i’ve done some lst for 5 days and now they’re pretty good. I’m letting them grow and will begin to tie the other branches when they will be big enough!

Likes
22
Share


@Greenwolvesfarmer
Follow
Ha reaccionado bien a sus estímulos , agua , CO2 , luz y amor...
Esta semana le daré solo agüita para que descanse de los fertilizantes , de todas maneras , todo depende de la planta misma ...esperando no maissss
Likes
16
Share


@hydro78
Follow
This week it started to grow nicely, lots of blooming areas) the amount of irrigation also increases at the same time. Come on grow up girl!🤙


Likes
27
Share


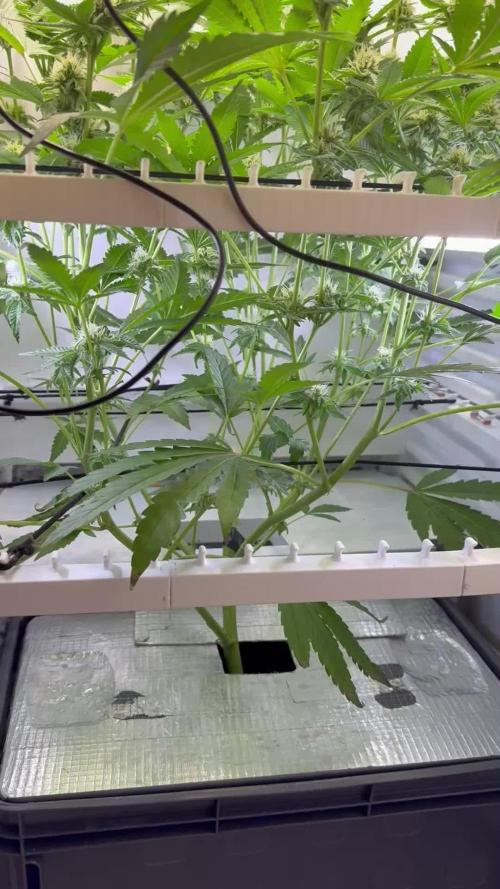
@RDWCGrowing
Follow
6/13/2023
Week 10- Day 1 of Flower (Day 131 overall) (Day 70 of Flower)
Auto Pilot Day 6.. Checked the Trichomes and the bud density and both are looking good.. Definitely needs a little more time for the Trichomes to be where I like, so based on my check I think we are still looking right around the end of the competition 22June to be done and ready for harvest. I do like that the fade is coming in the leaves nicely, so my chart I think is dropping off the Nitrogen exactly like it is supposed to.
6/14/2023
Week 10- Day 2 of Flower (Day 132 overall)
Auto Pilot Day 7.. Decided I would take some contrasting pics today with my light up to 100 and my light all the way on Dim. I hope you enjoy the pics.
6/15/2023
Week 10- Day 3 of Flower (Day 133 overall)
Auto Pilot Day 8.. Decided to take a look at the Trichome's today and Check to see where they are at and honestly if I might ho ahead and start my flush tomorrow and harvest on Sunday.
6/16/2023
Week 10- Day 4 of Flower (Day 134 overall) (Day 74 of Flower)
Today I pulled an Armageddon however instead of darkness they are going to get 48 hours of light. The reason why they are going to get light instead of dark is when I was taking out the netting a lot of the buds were so heavy they fell over and exposed some areas I really want to get some light to... so 48 hours of light at 40% while I watch what should be a beautiful final fade as the plant eats up the last Nutes. If anything goes wrong I can abort take the photos and cut so will pay really close attention to how it is looking over the next 48 hours.
Added 30 Gallons of PH only Water.
Reduced Lighting to 40% removed program time off. 48 hours of light.
6/17/2023
Week 10- Day 5 of Flower (Day 135 overall) (Day 75 of Flower)
I had someone tell me that a few growers had done as I did and Gone Armageddon on the plants. Filling it with PH only and said the plants did not respond well and they were taken out of the comp at the very end because they felt like the pictures just wouldn't come out right. Even though I did go Armageddon, The PPM is at 353PPM with the residue of what was left in the buckets after draining as well as what I am getting from the TAP so I think they are doing good but I am checking them every few hours to see how they seem to be doing and I think they are doing good still and are on track.
I also started prepping the area for the pics tomorrow
T-24 Hours until Chop
6/18/2023
Week 10- Day 6 of Flower (Day 136 overall) (Day 76 of Flower) (Harvest Day)
What a day.. what a day.. what a day.. as I was setting up and trying to figure out how I was going to get my pics #3 stems started breaking, it fell over and other stems broke.. So no really stunning competition photo for her, she had such a nice purple fade.. #2 stayed up in the Tent so that is the one I had to go with to submit for the contest. I wet trimmed them as they went into the tent and they took up three rows hanging in tent. I also decided I wanted to try some so I put a little in the freeze dryer for a 48 hour smoke test.. I will weigh it and add that to my total weight for the plants when it is all done.


Likes
2
Share


@51sGarden
Follow
Posting this as I’m on the last few days of the 3rd week from germination
Great progress, a lot of roots for such a short period but not too much plant growth, will start watering daily instead of watering every 2-3 days
Topped the girls today (Day 18 from germ) and starting to do mainline on all the Bubba kush.

Likes
9
Share


@Dabking
Follow
Day 58
Super fast flowering (albeit 2 are in 4-5 inch very small pots which shortened the flower time)
Regardless, this is one of the faster growing strains I've ever grown. Super pungent. Can't wait until they're done. They are such beasts for growing in such small pots.
I'm battling severe heat stress and high humidity so I'll be fighting it out the last month or so and super vigilant for any herms.

Likes
12
Share


@Brixx
Follow
Heading into week 4 of flower. The smell is ungodly good. Climate is holding optimal conditions for weeks now. Harvest day is sneaking up oh man my neck hurts already.
Likes
9
Share

@Limez
Follow
Gude, wir schreiben BT17 und der Stretch ist in vollem gange und die Blütenbildung beginnt schon. Ich sehe aber kein wirkliches Höhenwachstum mehr, ich denke das war es soweit.
Die 3 bekommen alle 2 Tage je 3.5L calmag korrigiertes Leitungswasser (105mg cal/ 50mg Mg).
Licht knallt in den Spitzen mit knapp 800PPFD drauf und ganz unten sind es ca 600PPFD. Die Seitenbeleuchtung läuft auf der maximalen Stufe, was insgesamt nochmal 40W extra sind.
Am Sonntag ist BT21, da wird entlaubt. Denke dadurch kommt das Licht von der Seite super an die unteren Buds und es wird richtig ordentlich.
Grüße
