


3M ••• ORGANIC SYNERGIES


Soil
Custom

Outdoor
Room Type
EARTH TO EARTH
weeks 1
Activated Carbon with MM
weeks 10
Pumpkin MMA
weeks 11
Lacto Fermented Fruits
weeks 12
Coconut Fiber Activated with MM
weeks 13
Ash water
weeks 14
Ormus
weeks 15
Pasture Fermented with MM 1/3
weeks 16
Pasture Fermented with MM 2/3
weeks 17
Pasture Fermented with MM 3/3
weeks 18
HBO and Cream with Shea
weeks 19
Solid Mountain Microorganisms
weeks 2
MMA - Activated Mountain Microorganisms
weeks 3
Water
weeks 4
Humato PK
weeks 5
Bocashi
weeks 6
Homemade Auxins
weeks 7
Waste management
weeks 8
Potassium soap
weeks 9
Start at Harvest
G
Germination5y ago






Nutrients 5
Materia orgánica seca
1000 mll
Hojas y ramas de Cannabis
400 mll
Virutas de madera
100 mll
deFharo Welcome, clandestine marijuana growers and also to those lucky enough not to be one! 🙋♂️👨🌾👍
Now with fewer crops in progress and more time available, I’m starting this diary with the intention of showing, weekly, the techniques and solutions that I have experimented with in high-yielding organic indoor marijuana grows. I will be compiling organic TIPS that I have been posting over the past two years on GD, many of them with updated conclusions due to the time of experimentation.
I hope it serves as inspiration for other growers... the key word is: Independence! 🙋♂️👨🌾
🙋♂️😁👍 MULCH, MULCH, MULCH...
In recent days, I have harvested several plants, I’ve gotten good buds, and smoking them without restraint will make me happy, but I also tend to harvest other elements from each grow that satisfy me just as much, and that are very important in my growing method. I’m going to talk about Mulch, how I use and reuse it! 🤷♂️🌿🍃🍂🍁
The coverage of the substrates has vital importance in my grows, fulfilling several functions, the main one being that this organic matter serves as food for the microbiology, simultaneously creating the ideal moisture conditions, favoring the creation of adventitious roots from the very first centimeter of substrate, and mainly creating, at the top of the pot, due to the greater presence of oxygen, a very efficient microbial ecosystem in the decomposition and mineralization of the organic matter from the mulch or the dry amendments that are added throughout the grow.
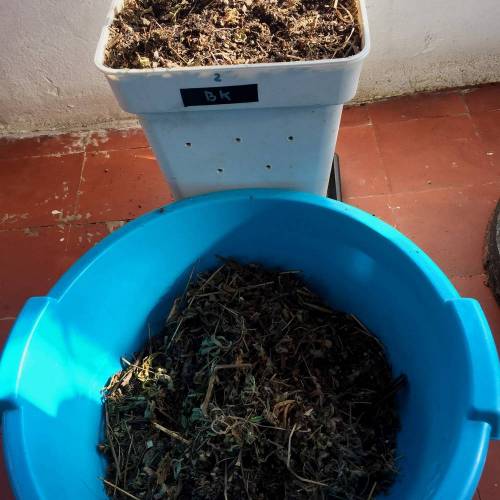
I systematically rescue the mulch from my harvested plants to continue using it in subsequent grows. I recover, from the first 3-4 cm of substrate, two types of materials: branches, stems, straw, and undecomposed chips, and organic matter converted into humus, which mostly comes from the dry marijuana leaves that I also use in all the coverings. These leaves completely decompose with each grow, due to the massive inoculation of Activated Mountain Microorganisms (MMA) that I systematically do throughout the grow.
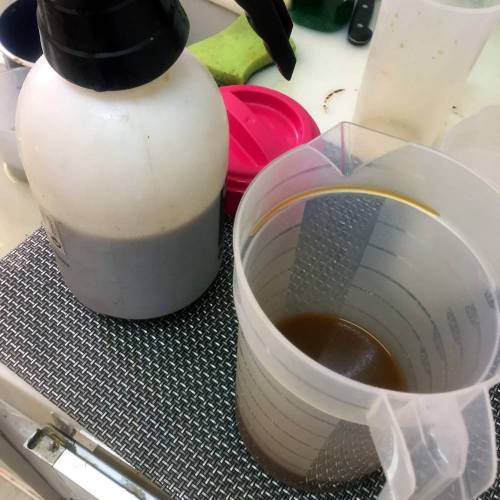
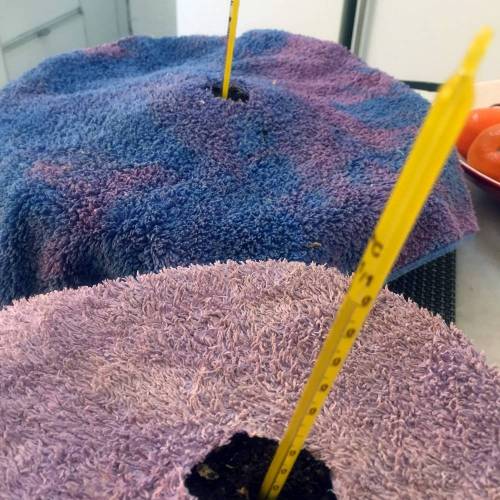
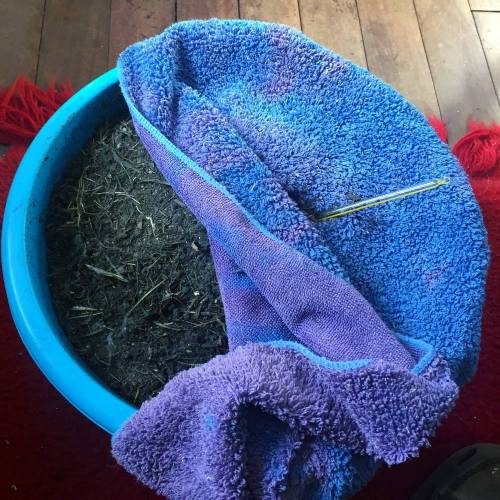
The harder materials are not totally decomposed; they continue their decomposition process in subsequent grows. There are chips and stems that have already accumulated 3-4 growing seasons. These materials come inoculated with Microbiology. The material converted into humus, after a sifting process, I also use to make bokashi or for dry amendment mixes. Above, you can see photographs of mulch rescue, materials, etc., and also of the collection of the remaining substrate from the pots; another day I will tell what I do with that substrate.
The selection of materials for the Mulch should be as varied as possible, so that the presence of minerals is also varied. I use dry marijuana leaves obtained from defoliations, as well as the small branches and stems that are left over after smoking the flowers. With this, I delve into the concepts of reuse and return, where some of the minerals that the plants took from the soil to grow are returned to the substrate for the next generations of crops.
PROBLEMS: I had some at the beginning, like fungus gnats, weeds, and mites. I brought these problems home by collecting dry material from the street and using it as is, mainly it was grass and dry straw. Additionally, blindly determined to recycle this material without sterilizing it, I transferred all the pathogens to 2 growing seasons.
SOLUTION: To try to sanitize this material, as I was not willing to lose it, for the new growing season, I began to implement two practices. All the recycled and partially contaminated mulch for immediate use went through the microwave for a few minutes—be careful as it can catch fire. Then, all the leaves obtained from defoliations and new mulch mixes have been subjected to a sterilization treatment for fungi and bacteria, with high concentrations of ozone in the air, using an empty and sealed grow tent and an Ozone generator. This season I have been completely free of fungus gnats, mites, and strange seeds, just a bit of powdery mildew on some plants due to the high relative humidity and low temperatures. It is true that the ozone treatment indiscriminately nullifies any fungus, virus, or bacteria; I’m referring to the inherent microbiology of this material, but I’m not worried, as I can activate it whenever I want by watering with any of my Bio ferments with Activated Mountain Microorganisms (MMA).
WATERING WITH MULCH
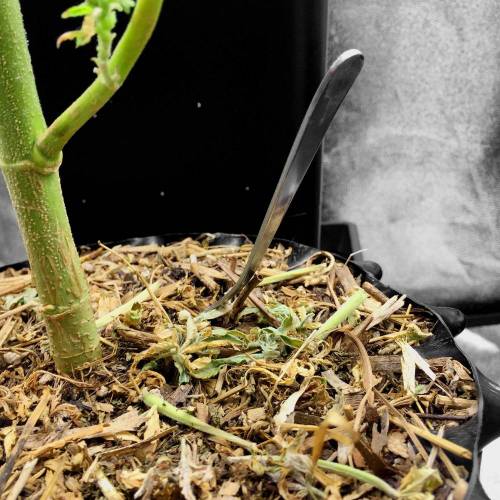
I have encountered some issues when watering using mulch; the thickness of my coverage layer is 1.5 to 2 cm. Using only one type of material, like only dry leaves or only straw, when it dries, tends to compact, delaying the entry of water into the substrate until the material hydrates again and allows water to pass. To solve this problem, the best thing is to mix various dry materials; this will make the texture of the mulch less uniform and allow for better air and water entry. However, to speed up watering and improve water entry, I’m using a practice that works very well and is very useful for air-pot pots. Before watering, I poke the mulch and substrate in several spots on the surface with a small fork, facilitating the de-compaction of the mulch and surface substrate, improving aeration and facilitating watering. The result is excellent.
Finally, I must say that I recommend using coverage always in pot grows, even when the growing method uses chemicals or chlorinated water. In this case, microbial life will cease to exist, and the mulch will only serve to retain moisture on the surface; the decomposition of the materials will be very slow as only moisture and oxygen will intervene as decomposition factors.
DREAM MULCH
Unfortunately for me, I have only experimented with these practices in indoor marijuana grows in pots. I dream of my own land; practices in soil would change in some aspects, enriching much more as there would be no limitations of a pot and, above all, that good organic practices would accumulate year after year in the substrate. There would be new actors: macro fauna, climate, helper plants, predators at our service, etc., etc... I feel that this year I’m going to start fulfilling this dream, this longed-for lifestyle, and surely I won’t be able to grow marijuana because it is prohibited in Spain, but I want to grow food; I already grow marijuana at home!! 🙋♂️👨🌾
CREATIVE MULCH
This spring, I plan to collect dry leaves from two autumns ago, as varied as possible, from nearby forests, to enrich the presence of minerals and nutrients in my mulch mixes. New colors, textures, and shapes to also enrich the visual aspect of the mulch. Recently, a fellow grower told me that he has added dry leaves from his rose bushes to the mulch. Fantastic and poetic at the same time!! 🌹🌹 Growing is also about playing, vibrating, laughing, crying, dreaming, creating... living!! 🙋♂️👨🌾
Until next week...
GREETINGS GROWERS!! 🙋♂️👨🌾💧💦🌞💡
INDEX - 3M ♲ ØЯGΛИIϾ SYИΣRGIΣS:
Week 1: Mulch and compost, repurposing
Week 2: Soil to soil
Week 3: MMS
Week 4: MMA
Week 5: Water
Week 6: Humate PK
Week 7: Bokashi
Week 8: Auxins
Week 9: Peels in the oven, Eggshell, Coffee, and holey pots.
Week 10: Potassium soap
Week 11: Activated charcoal with MM
Week 12: MMA with pumpkin, carrot, and chitosan
Week 13: Lacto ferment of fruits and minerals
Week 14: Coco fiber with MMA
Week 15: Ash water
Week 16: Ormus
Week 17: Fermented grass with MM 1/3
Week 18: Fermented grass with MM 2/3
Week 19: Fermented grass with MM 3/3
Week 20: HBO and Shea butter cream
=================================
🙄👇👌👍👉👉🙋♂️👨🌾👍👈👈👈👊👌🙏👇🤩🙋♂️🏻++
21 likes
14 comments
Share
Used method
Other
Germination Method
1
Week 1. Vegetation5y ago


1 cm
Height
19 hrs
Light Schedule
15 °C
Day Air Temp
5.0
pH
500 PPM
TDS
65 %
Air Humidity
14 °C
Substrate Temp
9 °C
Night Air Temp
Nutrients 4
Sustrato reutilizado
250 mll
Bosque virgen
250 mll
Agua de lluvia
250 mll
deFharo Welcome, clandestine marijuana growers and also to those lucky enough not to be one! 🙋♂️👨🌾👍
Taking advantage of having several bags of substrate from my last grows at home, I'm going to tell you what I do with it...
On December 18, 2020, I published the following:
😵 ORGANIC TIP - EARTH TO EARTH
I had accumulated second-generation organic soil that was taking up too much space at home, so I took it to the forest, the same forest from where some of the Mountain Microorganisms I use in my preparations came... an ideal place for the reunion and an act of returning to the forest what belongs to the forest. 😌
Carefully, I removed the last leaves of this autumn, deposited the soil, and covered it again with the same leaves, leaving no trace of my intervention. I feel sad for not keeping this soil, but pot growing doesn't allow me to do that; if I were growing in mother earth, this soil would accompany me forever in all my grows. Organic farming is cumulative; the soil enriches and improves year after year!! But even this technique would be valid for regenerating soil from crops that have used synthetic fertilizers; the winter and spring rains would wash away the remnants of salts, and the forest would establish its colonies of Microorganisms... earth to earth!!
I will keep an eye on the spot; in spring, I will observe the evolution again, and maybe I will do an experimental grow just with this soil.
And what do you do with the leftover soil? ✊
😵 February 9, 2022
Yesterday, I arrived at the forest clearing where I deposit my used substrates from each season, a forest with oaks, eucalyptus, rosemary, beeches, etc. I have to say that I do this practice for several reasons; the main ones are that I grow in pots, I don't have space to store substrate, and also because I tried to reuse it in new grows by mixing it 50%, and it was a failure. However, I consider these substrates sacred, and before throwing them in the trash, I chose to find a place in the forest for it to process them. The truth is that these substrates still contain a lot of minerals and organic matter to decompose, as well as a great presence of Microorganisms due to my growing practices.
The last substrates I left, about 6 months ago, where I didn't have time to break up the soil around the root ball, were there. Upon opening this soil, I saw the highest concentration of Microbiology so far; all the substrate deposited there is completely full of Microorganisms... and my mind started to race, thinking about what to do with such a treasure...
The truth is that I want to keep these substrates, and one day I will come back for them when I have land, but this spring I am going to take a bit of this super populated substrate with microbiology to make a seedbed and preserve all this life; later, I will make bio-fermented.
Until next week...
GREETINGS GROWERS!! 🙋♂️👨🌾💧💦🌞💡
=================================
🙄👇👌👍👉👉🙋♂️👍👈👈👈👊👌🙏👇🤩🙋♂️🏻
16 likes
6 comments
Share
Used techniques
EARTH TO EARTH
Technique
2
Week 2. Vegetation5y ago


1 cm
Height
24 hrs
Light Schedule
20 °C
Day Air Temp
6.0
pH
500 PPM
TDS
65 %
Air Humidity
20 °C
Substrate Temp
20 °C
Night Air Temp
Nutrients 5
Mantillo de bosque
200 mll
Melaza
100 mll
Salvado de arroz
400 mll
deFharo Welcome, clandestine marijuana growers and also to those lucky enough not to be one! 🙋♂️👨🌾👍
This week I'm going to talk about a product, Solid Mountain Microorganisms (MMS), which is, after processing, the base of all my Bio Ferments with Mountain Microorganisms (MM)... and a little more!
I started this practice at the beginning of 2020, I made about 7kg and with this amount, I've created a multitude of bio ferments, substrate mixes, activation with coconut fiber Microorganisms or Biochar, and finally, a couple of months ago, with the leftover (1kg) I made another 3kg that are currently in anaerobic fermentation. This reactivation of MMS has several advantages; one is that this way it's not necessary to go back to the forest to collect mulch with Microorganisms, the other is that I obtain second-generation Microorganisms, which in a way are getting "purified" (the best ones win!!). From the fourth reactivation, this product would be totally suitable for human consumption... everything will come.
Back then, on two occasions, I went to different forests in my region, some to the east and others to the west, to collect Mountain Microorganisms (MM). The more variety, the better. I made two different seedbeds, and I've been working with these two strains. In this year's reactivation, I used the MMS from each seedbed; now I have unified all the Microbiology from at least 15 different forests into a single product!!
The process is easy, and it's done on the same day as the collection of the forest mulch. It's also easy to identify the correct mulch; normally, by clearing away the fallen leaves from last autumn, you can clearly see mycelium of Microorganisms on decomposing leaves and branches. The color range of these mycelium is varied; just avoid the black ones. The places where the highest concentrations are found are shaded and humid areas, and always soil that hasn't been treated with agro-toxins.
🔨 Necessary materials and proportions:
Forest mulch 1kg
Rice bran 2kg
Molasses 400ml
Pure water 500ml
Rock powder 30g
Each of these materials serves a specific function in the preparation of this Microbiology seedbed.
The mulch brings the Microbiology,
The rice bran contains protein that will be the food and the home where the microorganisms will propagate.
The molasses will provide energy to all microbial life, and together with the little initial air trapped in the container, the miracle of propagation will happen. Once the microorganisms have consumed all the oxygen in the container, they release spores and enter a state of latency, a state that can later be activated in liquid form.
I add a bit of rock powder so that the microorganisms start to chelate the minerals; I'm using micronized Azomite, which contains over 60 minerals, most of which are trace elements but are indispensable for advanced crop evolution.
📋 Procedure:
- Mix the mulch well with the rice bran while moistening the mixture with the molasses dissolved in water.
- Once well mixed, put it in a hermetically sealed container; I like glass ones!
- It shouldn't be too wet. When you take a handful of the mixture and squeeze it, it shouldn't drip liquid.
- Press the mixture tightly in the container, compacting it as much as possible to leave no room for oxygen.
- Then cover it to prevent air from entering, and you must wait at least 30 days before using it. The longer it stays closed, the greater the concentration of microbiology.
- The final smell is very pleasant; it reminds me of a fruit cake or sweet bakery ferments.
🍯 Conservation and uses:
By keeping the container well sealed, preventing the mixture from drying out and constantly letting air in, this product can last for years in your organic pantry.
There are various uses for this product, ranging from the creation of Bio ferments, substrate mixes, inoculation of Microbiology in coconut fiber or biochar, animal feed, etc. I will be publishing formulas and procedures for Bio ferments and others.
This spring, I'm going to experiment with a new product that will complement today's; I'm going to ferment fresh grass, grasses, and legume leaves to reproduce all the enzymes from this green material, and above all, two bacteria that are very efficient in dissolving (chelating) minerals (lactobacillus) and another in capturing nitrogen (rhizobacter), unlike the Mountain Microorganisms, which are mainly composed of bacteria and fungi that decompose organic matter and mycorrhizae, among others.
Until next week...
GREETINGS GROWERS!! 🙋♂️👨🌾💧💦🌞💡
=================================
🙄👇👌👍👉👉🙋♂️👍👈👈👈🤜👌🙏👇🤩🙋♂️🏽
12 likes
9 comments
Share
Used techniques
Solid Mountain Microorganisms
Technique
3
Week 3. Vegetation5y ago


1 cm
Height
24 hrs
Light Schedule
20 °C
Day Air Temp
6.0
pH
500 PPM
TDS
65 %
Air Humidity
20 °C
Substrate Temp
20 °C
Night Air Temp
Nutrients 4
Melaza
170 mll
Agua pura
600 mll
Suero de leche
350 mll
deFharo Welcome, clandestine marijuana growers and also to those who are fortunate enough not to be! 🙋♂️👨🌾👍
This is a diary where I weekly explain some of my growing techniques and organic preparations, which I have been experimenting with for two years in indoor marijuana cultivation.
😎 Basic formula of Activated Mountain Microorganisms (MMA) in liquid form from Solid Mountain Microorganisms (MMS)
* You can check, in the week prior to this, how to make a seedling of Solid Mountain Microorganisms (MMS)
On this occasion, I have only activated Microorganisms without any other type of nutrient or mineral; I have used equal parts of my two strains of Solid Microorganisms, collected at the beginning of the year from various virgin forests in my area, and I have used natural sheep milk whey that a neighbor gifted me. At the end of the process, the mixture has a very acidic pH around 4/4.5.
In the end, this product serves for the mass inoculation of Mountain Microorganisms (MM) into the substrate; this basic formula provides me with the highest concentration of microbiology compared to other preparations that I will talk about later...
The MMA are not a nutrient, although 67% of the generations of deceased Microorganisms turn into dry matter (nitrogen), the MM help to solubilize the organic matter and minerals present in the substrate, thus causing the gradual assimilation of nutrients and minerals by the plant.
I use this preparation to quickly decompose organic matter and minerals present in the substrate and mulch; during the first weeks of growth, it accelerates the dissolution of the first nutrients contained in the substrate, without overwhelming the roots by forcing them to consume highly soluble nutrient preparations... the goal is to create a powerful root system in symbiosis with the Microbiology.
From this product, and with the same anaerobic fermentation techniques, I create a large amount of Bio ferments; what I explain this week would be the first step for the preparation of these soluble fertilizers. I take advantage of the MMA's ability to chelate minerals and decompose organic matter to create specific formulas; these formulas consist of accelerating the natural processes of decomposition and mineralization of soils... I will publish some formulas later.
- INGREDIENTS 😋
Pure water: 2L
Milk whey (protein, amino acids): 350ml (Can be replaced with 100ml of pure or pasteurized milk)
Molasses (Enzymes, yeasts, sugars): 170g
Solid Mountain Microorganisms (MMS): 250g.
- PROCEDURE:
Put the crumbled MMS in a cloth or mesh bag.
Dissolve the molasses with the water and whey, add to the container with the MMS bag.
Make sure the MMS are well soaked with the mixture.
Seal tightly with gas release (anaerobic fermentation) for at least 30 days. The longer it stays closed, the better the quality of the product.
The best time in my area for preparing ferments is summer due to the increase in temperatures. Now, with the cold of this season, I am helping the fermentation by applying heat with a tape (25°C).
- USES OF ACTIVATED MOUNTAIN MICROORGANISMS - MMA
- Mass inoculation of MM in substrates.
- Creation of biochar activated with MM.
- Inoculation of MM in coconut fiber for substrates.
- Preparation of Bio ferments from various raw materials (Guano, Animal meals, Rock powder, etc...)
- Acceleration of decomposition in compost preparation.
- Soil recovery.
Get excited!! Go to the forest to collect MM and make your own seedling... and then start playing!! 😋😍 You will know what organic cultivation, living soils, and independence from the industry are... without complexes!! 😈
Until next week...
GREETING GROWERS!! 🙋♂️👨🌾💧💦🌞💡
13 likes
19 comments
Share
Used techniques
MMA - Activated Mountain Microorganisms
Technique
4
Week 4. Vegetation5y ago


1 cm
Height
24 hrs
Light Schedule
20 °C
Day Air Temp
7.0
pH
135 PPM
TDS
65 %
Air Humidity
13 °C
Solution Temp
20 °C
Substrate Temp
20 °C
Night Air Temp
Nutrients 7
Agua de montaña
200 mll
Agua de lluvia
200 mll
Agua de río
50 mll
deFharo Welcome clandestine marijuana growers and also to those lucky enough not to be one! 🙋♂️👨🌾👍
This is a diary where I weekly explain some of my growing techniques and organic preparations, which I have been experimenting with for two years in indoor marijuana cultivation.
• There are two absolutely necessary components for any cultivation that cannot be overlooked: Light and water... today we’re talking about water, paying tribute to the water that the mountain and the sky gift me for my marijuana plants!! 💧💧💧
I have to say that so far, I have never used chlorinated water in my crops; my interest in pure spring water has been there for a while, as I consume it regularly myself. Chlorine is added to tap water to make it potable and eliminate possible bacteria or pathogens, but it doesn’t distinguish between good and bad. I have always believed that consuming pure water helps maintain the microbiota of our digestive system. I could talk about the tangible benefits, but I’ll skip the scatological comments.
In my cultivation method, where I base my entire technique on the maintenance and mass inoculation of Mountain Microorganisms (MM) in the substrate, using pure chlorine-free water is mandatory.
On July 3, 2020, I published the following:
GROWING TIP: Water!! Mineralized, alive, and structured.
The importance of water quality for cultivation is vital for me. I have traveled the springs, rivers, and streams in my area with an EC and pH meter to know the waters around me. I always collect rainwater from a neighbor's terrace whenever there’s an opportunity; I never run out of pure water and avoid watering with tap water. For me, currently, the best water mix I can offer my plants is 75% rainwater with another from a mountain spring of alkaline water (Calcium Carbonate pH: 9.2) and highly mineralized (EC: 0.85). I regularly consume this water myself, achieving a mix of pure water with an EC around 0.19, thus ensuring the supply of calcium and other minerals. In times when it doesn’t rain, I use pure water from springs and streams with an EC of 0.3.
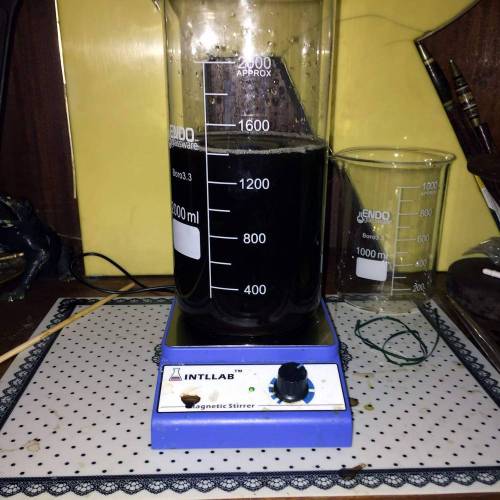
I filter and store this water in the dark at my home. The issue is that stagnant water loses oxygen and also disrupts its molecular structure, making it chaotic. To recover this structure and oxygenation, the water must be in motion like in nature. I use a magnetic stirrer to bring the water back to life; the stirrer creates an implosive vortex that in 10 minutes puts things in order and oxygenates our water. Once this process is done, I add the nutrients one by one and keep stirring until the end.
Water treated with this technique improves nutrient assimilation because it favors cation exchange and floods our substrate and roots with oxygen. This technique can also lower normal EC concentrations by 30% and achieve the same results; try it and see!!
------
Today I have some new comments about the different types of water I use and have used.
- River Water: I started collecting water from the two flowing rivers that cross my town, good water, there are no industries in its course, but unfortunately, sewage from the towns ends up in it. So, when in doubt, I discarded the use of this type of water.
- Rainwater: As I mentioned before, I collected rainwater from the drain of a neighbor's terrace (pH: 7, EC: 0.07), a lot of work, neighborhood exposure, and surreal explanations to passersby who asked me, like saying I was collecting water for my dog who couldn’t drink water with minerals due to a tendency to form stones in the bladder. At other times, I enthusiastically responded that it was the best water for cooking beans!! 🤷♂️😎 I definitely stopped collecting rainwater from that place, as the water I explain below already comes with the EC levels I’m looking for...
- Mountain Water: Permanent spring at 700m altitude, the pH varies according to the season; when in autumn, winter, and spring there’s more rain, the pH is at 7, and the EC is at 0.25. In summer, the pH rises to 8 and the EC to 0.5, this is due to the higher mineral load when there’s no rain. According to the geology of the area, mainly calcareous rocks, clays, and basalt, this mineral water contains enough minerals (Ca, Mg, Si, Al, Fe, K...) so I don’t need to use additives like CalMag. This is the water I use the most for watering.
- Alkaline Spring Water: Almost at sea level, highly mineralized, with less variation in pH and EC during rainy periods: pH between 8 and 9.2, EC between 0.5 and 0.9.
I use this water in several ways:
a) It’s the water I drink.
b) I make coffee and food with this water.
c) Due to its alkalinity, I use it for various anaerobic ferments, compensating for the extreme acidity of these preparations and providing already solubilized minerals.
d) This winter I used it for watering mixed with dehumidifier water at 50%, achieving water with an EC of 0.25.
e) On the rare occasions I water only with water, I use this one if the crop is doing well, and if I need to do a substrate wash due to over-fertilization, I use the dehumidifier water: pH: 7, EC: 0.09, which, not containing minerals, has a greater dissolving power.
- Dehumidifier Water: This winter due to low temperatures, high relative humidity, and the appearance of powdery mildew, I was forced to keep a dehumidifier running permanently, and to make a virtue out of necessity, I have been collecting this mineral-free water, mixing it at 50% with alkaline spring water, thus saving myself some trips to the mountain spring. Recently, I measured the consumption of this device, and I almost fell over when I saw it consumes 140w. I’ve had it on for more than 3 months, 24 hours a day, and at times I’ve had two dehumidifiers running! And I, mistakenly, thought they didn’t consume more than 50w... well, after the shock of knowing the wattage waste, I, who have worked hard in my last crops, hauling pots from indoors to outdoors to consume the minimum amount of electricity and which has resulted in somewhat low yields compared to what I was used to, now, in my new 4 crops, light will not be the obstacle, as the dehumidifiers are now stored, and I’m going to light these plants with everything I can fit in the tent. The average wattage per plant from my last growing season was 40w/plant; this season I’m going to reach 100w per plant... more light equals more floral mass!!🌲🌲🌲🌲
- Sea Water (for nerds): I haven’t dared to use it for watering, but with seawater, I prepare homemade Ormus with water from the Cantabrian Sea, where I separate the sodium and precipitate the minerals:
Published on July 10, 2020
a) Mainly a source of Magnesium, Sulfur, and calcium for the entire crop. Ormus contains 30 to 60% magnesium. I systematically use it in all my waterings, with doses ranging from 1% to 2%.
b) It contains over 70 minerals, most in monoatomic form, which improves cation exchange and nutrient assimilation.
c) Being an alkaline product, it can be used to raise the pH of the watering when needed. It increases the EC load very little.
d) It is part of my components in the aqueous solution I prepare for germination and seed establishment.
e) Stored in the dark, the product has no known expiration.
• Coconut Water (for nerds).
Natural product rich in sugars, vitamins, proteins, amino acids, cytokinins (Cell division, growth), gibberellic acid (Root stimulation), and minerals (Ca, Fe, P, Mg).
- The key moments of higher demand for cytokinins begin in the middle of the first stage of germination and seedling establishment, and at the beginning of the flowering/reproduction stage. In the last stage of the crops, it is unnecessary.
- The key moments for gibberellic acid also begin in the first half of the first stage of cultivation and the last weeks of vegetative growth; after these stages, the need for the acid declines until it becomes unnecessary in the last weeks of cultivation.
- I use coconut water, alternating it with other nutrients, only in the early stages of the plant and up to pre-flowering.
- The doses depend on the preferred EC load. As a minimum, I recommend a load in solution of EC 0.4 or PPM 200.
- Natural coconut water should be kept in the refrigerator, at most 4 days, as it ferments very easily.
And that’s all for today... I’m thirsty! 😁
Until next week...
GREETINGS GROWERS!! 🙋♂️👨🌾💧💦🌞💡
13 likes
7 comments
Share
Used techniques
Water
Technique
5
Week 5. Vegetation5y ago




1 cm
Height
24 hrs
Light Schedule
20 °C
Day Air Temp
7.0
pH
135 PPM
TDS
65 %
Air Humidity
13 °C
Solution Temp
20 °C
Substrate Temp
20 °C
Night Air Temp
Nutrients 5
Agua de lluvia
1000 mll
Leonardita
100 mll
Roca fosfórica
7 mll
deFharo Welcome, clandestine marijuana growers and also to those lucky enough not to be one! 🙋♂️👨🌾👍
This is a diary where I weekly explain some of my growing techniques and organic preparations, which I have been experimenting with for two years in indoor marijuana cultivation.
This week: POTASSIUM HYDROLYSATE FROM LEONARDITE WITH PHOSPHORUS (Humate PK).
I've been using this product in my grows from the beginning to the end of the flowering stage, and it's one of my essential formulas for fattening the buds. Leonardite is a mineraloid derived from lignite and is mostly composed of organic matter that is in the process of turning into coal; it is not soluble in water. Leonardite is the largest existing source of Humic and Fulvic Acids, improves soil structure making it more porous, stimulates oxygen supply to microorganisms, increases growth, cell division, and retention of water and nutrients, while the formula also provides solubilized phosphorus and potassium, resulting in a highly soluble PK fertilizer, with humic acid and liquid organic matter.
To make the leonardite soluble, I use a type of alkaline hydrolysis with Potassium Hydroxide; this time I've added Phosphate Rock (P) as a source of inorganic phosphorus and enriched it a bit with Azomite (Si, Mg, K, Fe... + traces of 70 minerals). As a source of phosphorus, I have also used organic phosphites extracted from the calcination of bones with rice husk or wood ash, but the original formula only includes leonardite and potassium hydroxide (Humate K).
The process is simple:
- MATERIAL FOR 1 LITER OF SOLUTION:
Pure water 1000ml. (In this preparation, I used alkaline spring water (PH: 9.2 EC: 0.85), this water is highly mineralized (Ca. Si, Fe, Mg, Mn...) which means it has hydrolyzed those minerals that are naturally added to the product.)
Leonardite: 100g (10%)
Potassium hydroxide: 30g (3%).
- EXTRA MINERALS 1%:
Phosphate rock: 7g,
Azomite: 3g
PROCEDURE:
1) Grind the leonardite and mix it with the phosphate rock and azomite.
2) Add the dissolved Potassium Hydroxide in 500ml of water.
3) Wait an hour and stir occasionally.
4) Add the rest of the water (500ml).
5) Keep in an open container to allow oxygen in for at least three days.
6) Stir or shake at least 2 times a day during these first 3 days. (The more or better you shake, the better the result of the hydrolysis will be.)
7) After 3 days, it can already be used... but I prefer to wait at least a week.
8) The product can be stored in the shade for years; the passage of time makes the hydrolysis of the components better.
APPROX. COST OF THE PREPARATION: €3.
MIXES FOR POT WATERING: UP TO 2%, OUTDOORS UP TO 3%.
==========================
USES:
- Dehydrated, I use it as an addition to substrate mixes or as a dry amendment.
- Being an alkaline product, in the watering mixes, I always use it together with some of my Bio fermented Mountain Activated Microorganisms (MMA) that have a very low PH; this way, I regulate the final PH of the mix. Additionally, I put the microorganisms and the liquid organic matter from the Humate in direct contact, to which I also add molasses to give energy to the microbiology. Ultimately, it's a perfect symbiosis for the soil: Solubilized organic matter, easily processed food for the Microbiology, and humic acids, which complete the magic that occurs in the substrate... the buds grow and fatten without brakes!!
Until next week...
GREETINGS GROWERS!! 🙋♂️👨🌾💧💦🌞💡
15 likes
10 comments
Share
Used techniques
Humato PK
Technique
6
Week 6. Vegetation5y ago






1 cm
Height
24 hrs
Light Schedule
20 °C
Day Air Temp
7.0
pH
135 PPM
TDS
65 %
Air Humidity
13 °C
Solution Temp
20 °C
Substrate Temp
20 °C
Night Air Temp
Nutrients 27
Humus de lombriz
1 mll
Algas en polvo x3
1 mll
Alfalfa en polvo
1 mll
deFharo Welcome, clandestine marijuana growers and also to those lucky enough not to be! 🙋♂️👨🌾👍
This is a diary where I explain some of my growing techniques and organic preparations weekly, which I have been experimenting with for two years in indoor marijuana cultivation.
This week: DRY GRASS BOCKASHI ENRICHED WITH NUTRIENTS AND MINERALS
Last summer (2020), I collected dry grass from field cuttings, accumulated over the years, and underneath the surface, it showed many microorganisms. I thought it could be a good substitute for the dry plant material used in bocashi, which traditionally uses rice husks.
Basically, a bocashi consists of 3 equal parts of dry matter, black soil, and well-dried ruminant manure. From this, you can add whatever you want. I've been really freaky about the composition of this because I've added over 30 components of all kinds, organic and mineral... everything I had at home!! 😲 When I started growing indoor marijuana, I fertilized exclusively with dry amendments, which is why I have a lot of variety in materials.
This practice is to encourage those who have the opportunity to get waste and want to use nutrients they have at home to make excellent fertilizer for any stage of the cultivation. To ensure safe use and avoid burning my plants, as has happened before, I let it cure for 3 months. Now I will mainly use it as a solid surface application. It has been fantastic to see the cake after three months and to check how the mixture has changed color to gray, with large white spots on the outside and inside of the cake demonstrating biological presence.
I create the mixture in layers, adding each component. I grouped the nutrients on one side and the minerals on the other to facilitate a homogeneous mixture of all components. Once the soil is well mixed, it is moistened, without excess, with a solution of molasses, fresh yeast, Activated Mountain Microorganisms (MMA), and Lactic Acid Bacteria (LAB). The yeast helps kickstart fermentation, the molasses gives energy to the MM to proliferate, and the addition of MMA and LAB increases the variety of MM in the bocashi and aids in the transformation process of all the organic matter.
I covered the mixture, and after 24 hours, it had a temperature of 52°C. I left it all covered for 3 months to ensure complete fermentation. Today, I do this procedure with burlap sacks, where I press the bocashi, and thanks to the airflow from the fabric of the sack, the preservation is perfect. As time goes by, the bocashi ages, becoming a reliable and excellent source of nutrients and microbiology for substrate mixtures or the addition of dry amendments.
Until next week...
CHEERS GROWERS!! 🙋♂️👨🌾💧💦🌞💡
11 likes
4 comments
Share
Used techniques
Bocashi
Technique
7
Week 7. Vegetation5y ago




1 cm
Height
24 hrs
Light Schedule
20 °C
Day Air Temp
Weak
Smell
65 %
Air Humidity
30 °C
Solution Temp
Nutrients 21
Guano de Aves
20 mll
Kelp
10 mll
Ormus
50 mll
deFharo Welcome clandestine marijuana growers and also to those lucky enough not to be one! 🖐️👨🌾👍
This is a weekly diary of cultivation techniques and homemade organic bio-preparations, which I have been experimenting with for two years in indoor marijuana cultivation.
This week is a two-in-one:
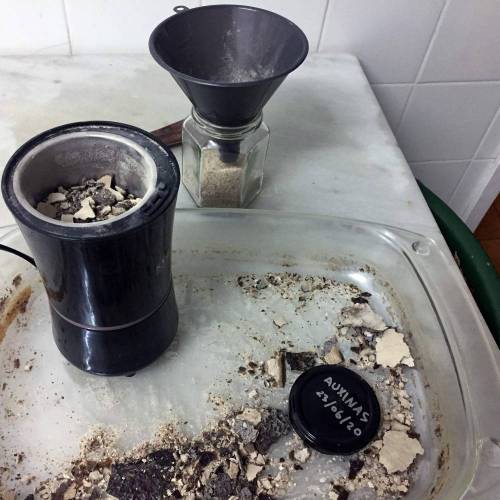
1) PREPARATION OF AUXINS IN POWDER EXTRACTED FROM GERMINATED BLACK BEANS.
The first time I made this preparation and published it on GD was in October 2019, I did it again in June 2020 and I have been using it for two years, it has cost me the price of 2kg of black beans.
INGREDIENTS:
- 1kg of black beans, because they are the seeds that contain the highest concentration of auxins, compared to lentils or any other type of legumes, corn grains can also be used.
Preferably, new beans grown near your area should be used.
- Pure water.
PROCEDURE:
- Cover the beans with water and let them soak overnight.
- The next day, separate the water. You can use this water for watering, as it contains various minerals.
- Keep the humidity in the bean container for a few days until they germinate. They can be covered with a damp cloth and compensate for the loss of moisture by spraying water. You should observe that most of the seeds have germinated.
- When most of the beans are germinated, add about two liters of pure water and blend everything.
- Now filter with mesh and drain the solid remains. (Reserve this material for a second wash)
- Let the liquid rest for two days until you see a buildup of material at the bottom.
- Remove as much clear water as possible.
- Leave it in the sun covered with mesh until the product is completely dehydrated.
- Grind and store in a dry, dark place; under these conditions, it can be effective for years.
-- To the solid residues recovered from the first filtration, I add water, blend them, and filter with double mesh, bottle it, and store it in the fridge (no more than 15 days, as it ferments), I use it for watering mixes. The final residues are utilized for those who have outdoor soil or make compost.
WHAT ARE AUXINS AND THEIR USES:
- Auxins are a group of natural plant hormones that regulate various aspects of plant development and growth, especially in marijuana during the vegetative growth period and at the beginning of flowering; after that, they are not needed.
- One of the most characteristic aspects is the effect they have on root development, primarily promoting the formation of secondary and adventitious roots due to the cellular stimulation caused by the hormones.
- Another aspect of auxins is that they distribute their energy mainly to the primary apex, suppressing the development of lateral branches, which causes apical dominance, but this is in the case of marijuana plants without apical cut and where a monstrous main bud is desired; their use can yield very good results in SOG cultivation... but what happens if we make an apical cut to promote the growth of lateral branches and therefore good buds on each of them? When an apical cut is made to the main apex, the hormones reorganize throughout the plant, now sending energy to all the branches and their apices, promoting growth!... it's a good time, after an apical cut, to apply auxins to enhance the process.
- Finally, I leave you a chart showing the action of auxins at different stages of cultivation; it also shows the important relationship with other hormones (Cytokinins or Gibberellic Acid) and the key nutrients that must not be missing to complete the entire hormonal process. Natural Cytokinins and Gibberellic acid are found in coconut water, and it's very interesting to know how they act; in the fifth week of this diary, I talk about the properties of coconut water.
Well, having said that, I use auxin powder in the following ways.
- As a mix for the substrate where I germinate the seeds and where I keep the seedlings until transplanting to the final pot, to enhance rooting.
- For the same reason, I sprinkle it on the root ball of the seedling at the time of transplanting to the final pot.
- I use it as a rooting agent for cuttings, coating the stem with powder before burying it.
- 10 days after making the product, I still had a liter of liquid auxins in the fridge, coming from the second wash of the ground beans... and then I thought it would be a good idea to incorporate it into a fermentation, and this is where this second part comes from...
2) LACTO FERMENT OF AUXINS ENRICHED WITH NUTRIENTS AND MINERALS
On this occasion, for anaerobic fermentation, I chose to do it with whey as a base of microorganisms (Lactic acid, Lactic Acid Bacteria LAB, and Lactobacillus) that will do the work of solubilizing nutrients and chelating minerals; it is a very efficient preparation for watering and foliar applications, in this case, I made it enriched by mixing various organic materials with other minerals. You can see the list above.
About this, I have to say that after two years of making different lacto ferments, I now make them more specific, without mixing so many nutrients; for example, if I want to solubilize guanos, bone meal, or algae, what I do is create a lacto ferment with each of them; in the case of lacto ferments with minerals, I continue preparing it by mixing several; this preparation is very efficient in chelating minerals, and especially in solubilizing phosphorus.
PROCEDURE:
Sometimes I get sheep whey from a neighbor who makes cheese, sometimes I make whey from raw cow's milk, and when I don't have any of these sources, I make whey from pasteurized milk, like in this case.
- I mix the whey (1l) with molasses and honey, heating it to about 30°C.
- I weigh the ingredients. As a general rule, in the case of organic components, use 8 to 10% at most, regarding the amount of liquid. In the case of minerals, 4 to 5%.
- I add the yeast to the whey with the molasses and honey.
- I add the dry components to the barrel.
- I add the whey with the molasses and yeast to the barrel and shake.
- I add the liter of liquid auxins and shake well.
- I seal it airtight with a gas valve.
- I store the barrel in the dark for at least 30 days, but the longer you keep it closed before opening it for the first time, the better the result will be.
The fermentation starts violently within a few minutes, lasts several days like that, and then slows down.
USES:
This is a preparation I use as a complement to the auxin powder; I use it for immediate availability watering or foliar applications.
- I make foliar applications on seedlings in the first weeks of life.
- I use it at the beginning of the vegetative growth stage together with coconut water.
- I water with this preparation after making apical cuts.
- I use it again for watering together with coconut water at the beginning of flowering, and this is the last time I use it in a cultivation.
An unmistakable sign of the action of the hormones is that the plants are more susceptible to phototropism; this translates into a greater response to light incidence, the plants, their leaves, and shoots lean and direct themselves toward the greatest source of light. I have seen this many times after applying auxins.
And that's all for today... 😅
Until next week...
THANK YOU FOR BEING THERE, GROWERS!! 🖐️👨🌾💧💦🌞💡
18 likes
8 comments
Share
Used techniques
Homemade Auxins
Technique
8
Week 8. Vegetation5y ago




1 cm
Height
24 hrs
Light Schedule
20 °C
Day Air Temp
Weak
Smell
65 %
Air Humidity
30 °C
Solution Temp
Nutrients 4
Pieles de frutas
100 mll
Pieles de verduras
100 mll
Cáscara de huevo
100 mll
deFharo Welcome, clandestine marijuana growers and also to those lucky enough not to be one! 🙋♂️👨🌾👍
This is a weekly diary of cultivation techniques and homemade organic bio-preparations, which I have been experimenting with for two years in indoor marijuana grows.
Hello, this week I want to delve into the concept of reuse...
• DEHYDRATED FRUIT AND VEGETABLE PEELS
Dehydrating fruit and vegetable peels is a good practice because it allows you to retain the minerals, nutrients, enzymes, vitamins, etc. from them and preserve the product for a long time. In this case, I dehydrated them in my home oven, which goes against the concept, but I don't have other options at the moment because I live in an apartment. However, I wanted to experiment because it's a good way to make use of waste quickly and cleanly. In reality, all the experience accumulated over two years of organic indoor marijuana cultivation, with my techniques, failures, and preparations, has been aimed from the very beginning at learning, to one day put it into practice on my own land, where I will create a self-sufficient garden... my way! 😏 The possibilities that field cultivation offers multiply the options for action, unlike pot cultivation.
In the case of dehydrated peels, the correct method is to keep the peels in the sun and collect the dry ones to grind and store them in the dark, while replenishing with new peels. In areas where temperatures drop below zero, dehydration works the same way. I know this type of waste is common in compost, but I don't have the means to do it, and for now, it's not one of my preferred materials, mainly because I don't like the sight of decomposition, and also, good compost takes at least a year to form. I hope one day, not too far away, to share my self-sufficient garden.
It's useful to inform yourself about the nutrients and minerals that each fruit or vegetable has, so you know when and how to use it; the peels contain the highest amount of minerals and dry matter.
USES:
- Substrate mixes.
- Dry amendments.
- The peels can be solubilized for soil and foliar watering. Mix at a ratio of 100g of product with 1g of Potassium Hydroxide, shake, and wait 24 hours before applying.
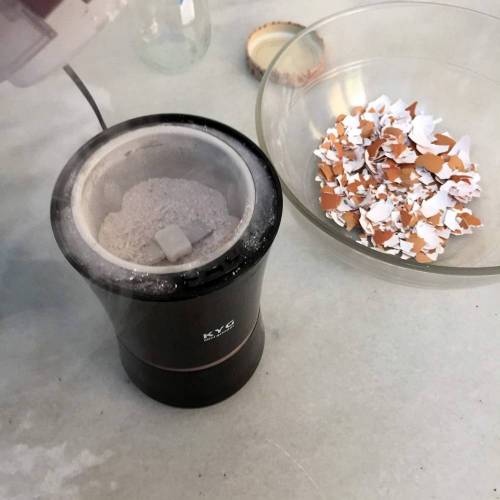
• GROUND EGG SHELLS
A very common waste in any household. An important source of slow-release Calcium in the form of calcium carbonate (CaCO3), it also contains some phosphorus and magnesium and traces of other minerals.
Procedure:
Wash the shells with water to remove any soft remnants.
Put them out to dry in the sun.
Grind them to facilitate solubilization in the substrate and store them in the dark.
Uses:
Substrate mix.
Dry amendments.
• COFFEE GROUNDS
Coffee grounds retain various nutrients and minerals. It's not bad as a substrate mix; I add 1g per liter of potting soil and mix it very well. Outdoors, the proportion can be higher. It needs to be well dried before storing. Avoid using it pure as a dry amendment on the surface; it tends to clump together. Some people soak it in water for 24 hours, filter it, and use the water for watering.
• OLD-SCHOOL POT AERATION
I started growing indoor marijuana with old-school square pots, then I learned about fabric pots and air-pots, each with its advantages and disadvantages. Initially, when I tried the fabric and air-pots, I liked them for the root development shown by the plants, due to the great aeration of both models and greater water mobility, reflected in consumption, unlike the old-school pots, which are more closed, with less water consumption, but more comfortable than the previous ones for transporting and moving, as well as for better utilizing the area of the grow tent. At that time, I had many old-school pots of various sizes at home that I didn't want to give up. The key was to add aeration through the sides of the pot, similar to the air-pot or fabric pots. I made a pattern to guide me and with a drill, at medium speed, I made the holes; the drill speed is important so that a small plastic tube remains around the hole, preventing water from escaping through those holes during watering. The first pots I made by cutting this "tube," and the water easily escaped. Well, for me, the concept of substrate aeration is very important because a well-aerated substrate facilitates the propagation of aerobic microorganisms that will help me throughout the cultivation. In fact, when I finish a grow, I see large concentrations of microbiology around each hole due to the greater presence of oxygen. Ultimately, these pots perform much better than before in terms of water consumption and root formation.
Until next week...
THANK YOU FOR BEING THERE, GROWERS!! 🙋♂️👨🌾💧💦🌞💡
16 likes
11 comments
Share
Used techniques
Waste management
Technique
9
Week 9. Vegetation5y ago




1 cm
Height
24 hrs
Light Schedule
20 °C
Day Air Temp
Weak
Smell
65 %
Air Humidity
30 °C
Solution Temp
Nutrients 3
Aceite de oliva
240 mll
Agua pura
40 mll
Hidróxido de potasio
40 mll
deFharo Welcome clandestine marijuana growers and also to those lucky enough not to be one!✋👨🌾👍
This is a weekly account of techniques, growing experiences, and homemade organic bio-preparations that I've been experimenting with for two years in indoor marijuana cultivation.
Hello everyone, I've been smoking sativa all day for a week now, two months after harvest, all the strains are at their peak... so today I'm feeling pumped and ready to have a good time talking about my experience with spider mites, these pests wrecked more than one plant for me, and I couldn't get rid of them for several growing seasons... today they're history.😁👍 And to delve into the story, I've compiled, in order of appearance, the memes I posted during those tragic months 😡 of uncontrolled bugs, leaf eaters, and mortal enemies of my crops... little bastards!!😳🤷♂️
In the end, I'll publish the formula for POTASSIC SOAP, an essential product alongside natural Pyrethrins to eliminate the plague.
When on a tragic winter night, for the first time and thanks to a magnifying glass, I discovered this plague in my crops, the webs were already starting to surround some beautiful buds from a great strain that I promised to repeat, 3M • Purple Shot, the crop was invaded by a kind of tiny spiders moving everywhere, weaving and eating. Even though it was very late, I rolled a joint and went online to search... red spider!... I had nothing at home to attack them with, and I refuse to use pesticides or chemical poisons. After reading for a while about these mites, and knowing they don't like humidity and cold, I went to the fridge for cold water and sprayed the entire plant. Immediately, I took the plant out of the grow tent and put it on the balcony for two days, continued spraying water, but the plant started to decline rapidly. Meanwhile, I began to check the other crops and stopped at leaves that I had been seeing for a while with small white spots, increasingly more, which I attributed to too much light; it was a time of excessive lighting 😁 and a lot of ignorance on my part.
In short, there were spiders in all of them, but fewer than in the first one, although still many... I kept searching for information and read about diatomaceous earth and its effectiveness against crawling insects. I learned that it destroys the shells and stomachs of insects. Perfect!! 😈 I had diatomaceous earth at home; I used it in substrate mixes, mainly as a source of silicon. Said and done, without further reflection, I dissolved the diatomaceous earth in water and prepared to spray the rest of the plants, all of which were in advanced flowering, and I sprayed them generously and with killer instinct, from top to bottom... ERROR, ERROR, ERROR! To avoid boring you, the mites decreased but didn't disappear, and I harvested these plants shortly after; they were unsmokable, a lot of coughing, a lot! The silicon from the diatomaceous earth soaked the flowers and is very bad for the lungs; it reminded me of silicosis in miners... LESSON: never use diatomaceous earth in flowering.
After a while, I had more plants in vegetative growth in another room. I looked at them closely, and there was no trace. I cleaned all the grow tents, made sure to separate tasks with the infected plants and the ones that weren't, increased the relative humidity, and soon harvested all the ones with mites. I cleaned and disinfected all the grow tents and thought I was safe. A few days later, the typical marks started to appear; I already knew them 😡... I kept searching for information and discovered potassic soap, and what it can do to spiders. It works by contact and helps dissolve the wax that covers certain insects, thus suffocating them, but it has no effect on the eggs. Well, I had everything I needed at home: vegetable oil, Potassium Hydroxide, and pure water. I decided to make periodic applications every 3 days to eliminate the successive generations of mites so they couldn't reproduce. The plague decreases but doesn't disappear; I decided to increase the dose of potassic soap on the most affected plant, I sprayed and sprayed... I completely burned the plant!!😢
I continued like this until I harvested all the crops, disinfected the tents again, sterilized all the mulch material, started a new season, and two weeks later saw a couple of spiders on one of the seedlings; the desperation was total... I kept looking for solutions, and in an agriculture forum, I read that potassic soap serves to wash the leaves, but since it doesn't eliminate the eggs, by itself, it's not entirely efficient. However, if two hours after a wash with 1% potassic soap, natural Pyrethrin extract is applied, it eliminates the eggs. I got the natural Pyrethrins (Not Pyrethroids), applied it every two days for a week, and until today, I have no more trace of red spider, and it's been two seasons!!
HOW TO MAKE POTASSIC SOAP
Ingredients:
Olive oil or any other vegetable oil: 240ml.
Pure water: 40ml.
Potassium Hydroxide (KOH): 40g.
Procedure:
Dissolve the hydroxide until the water is clear.
Heat the oil in a double boiler. Do not exceed 60°C.
Mix continuously, ensuring the mixture doesn't curdle.
Keep stirring the mixture until it's homogeneous. You can use a kitchen blender.
Let it rest for an hour and stir the mixture again for 5-10 minutes. You can use a kitchen blender.
It's non-toxic and acts mechanically by destroying the protective layer of the insect, causing suffocation.
The product is easily degradable, leaving no residues and ultimately providing potash to the crop.
REGARDS TO ALL GROWERS... DEATH TO THE SPIDERS!! 😈
12 likes
2 comments
Share
Used techniques
Potassium soap
Technique
10
Week 10. Vegetation4y ago







1 cm
Height
24 hrs
Light Schedule
20 °C
Day Air Temp
Weak
Smell
65 %
Air Humidity
30 °C
Solution Temp
Nutrients 5
Agua de montaña
500 mll
Melaza
80 mll
Carbón vegetal
740 mll
deFharo Welcome, clandestine marijuana growers and also to those lucky enough not to be one! 🙋♂️👨🌾👍
This is a weekly account of techniques, growing experiences, and homemade organic bio-preparations, which I've been experimenting with for two years in indoor marijuana cultivation.
This week I'm going to write about: ACTIVATED CHARCOAL WITH MOUNTAIN MICROORGANISMS. This is an advanced practice as it requires at least having the solid inoculum of Mountain Microorganisms (MMS), although in the end, I will try to provide other options for those who do not have MMS. You can check week 3 for how to make Solid Mountain Microorganisms (MMS): https://growdiaries.com/diaries/134104-grow-journal-by-defharo/week/725879
Activated charcoal is an excellent component for all kinds of substrate mixes, it has several very interesting properties, helps with soil structuring and humus creation, acts as a thermal regulator in cold places, promotes root expansion, and its micropore structure enhances moisture and nutrient retention. It is said that 1 cubic centimeter of charcoal can contain 8 to 30 million microorganisms. And it is precisely the property of moisture and nutrient retention that this practice takes advantage of.
The charcoal called "activated" that is used in water or air filters has a bad reputation among aquarium enthusiasts because it is said to rob nutrients, mainly Nitrogen. There is an explanation for this, and it is not a problem for pot cultivation. Dry charcoal tends to absorb moisture and nutrients found in the substrate or in the waterings because it is very porous, and suddenly, it has to saturate all its micropores, but this will hardly have an impact on a crop.
In my case, what I do is mix the charcoal with the Solid Microorganisms and then moisten it with water and molasses to activate the microbiology of the inoculum, giving it the necessary energy. This way, I have inoculated charcoal with Mountain Microorganisms, and once in the substrate, with moisture, these MM will propagate. In this case, the charcoal, for the moment, does not capture nutrients because it is saturated, but after a few waterings, it will be the perfect home where the Microorganisms and nutrients coexist, providing an extra source of nutrients for the roots to feed on during periods of food or moisture scarcity.
I suppose that those who have commercial bacterial inoculums could use this practice to multiply them.
BASIC INGREDIENTS:
Pure water: 500ml
Charcoal, for use in pots it is advisable that the pieces of charcoal are not large. 750 grams.
Molasses: 75g
Solid Mountain Microorganisms (MMS): 225g
PROCEDURE:
Mix the charcoal and the solid Microorganisms.
Dissolve the molasses in the water.
Slowly moisten the charcoal, mixing it well, because activated charcoal can store a lot of moisture and needs time to saturate.
Store in the dark for a month in a closed container.
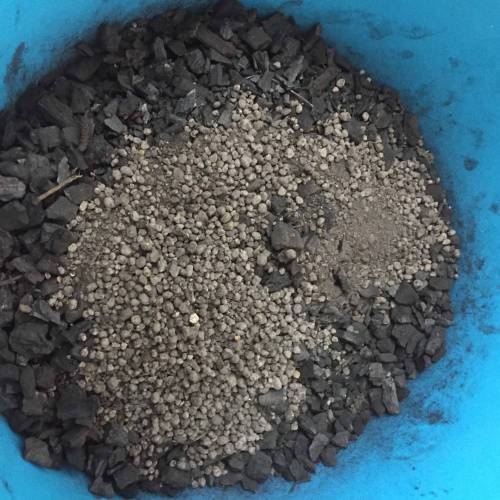
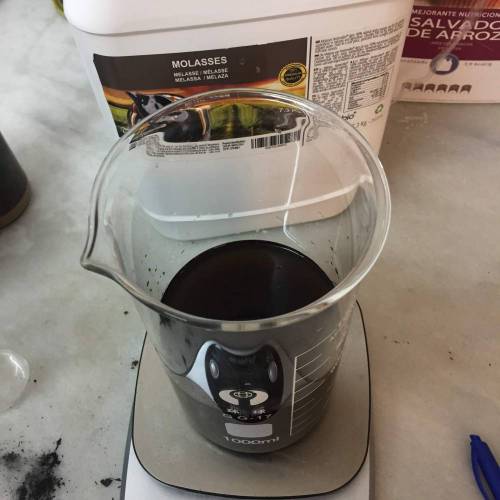
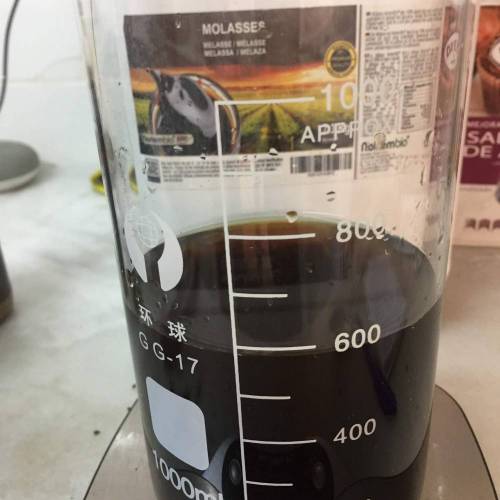
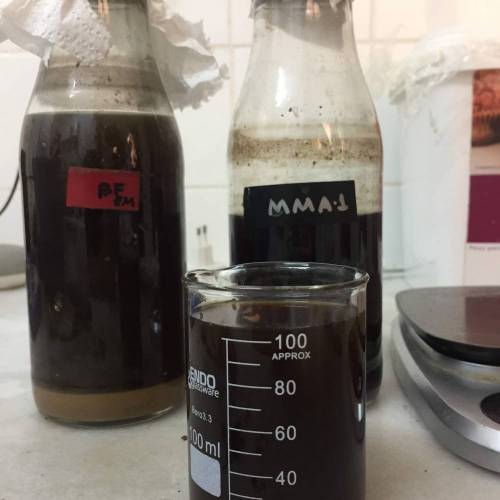
So far the basic formula, I make some additions, as can be seen in the photos.
I add 260g of Leonardite, which is a type of charcoal that is millions of years old and in the process of becoming a mineral, although it is not yet, it is also the largest source of humic acids and shares the properties of charcoal.
I add Activated Mountain Microorganisms (MMA) in liquid form to increase the inoculation of microbiology, also a fruit lacto-ferment that provides many vitamins, nutrients, and enzymes... in the last photo, you can see the container after a month.
Following the principle of pre-saturation of the charcoal's pores, for substrate mixes, and without having access to microbiology, one could, for example, saturate the charcoal with some nitrogenous mix for the start of the crop. After that, the charcoal will continue to fulfill its functions of soil structuring, humus creation, and moisture and nutrient retention.
Until next time...
REGARDS TO ALL GROWERS... 🙋♂️👨🌾
9 likes
1 comment
Share
Used techniques
Activated Carbon with MM
Technique
11
Week 11. Vegetation4y ago


1 cm
Height
24 hrs
Light Schedule
20 °C
Day Air Temp
Weak
Smell
65 %
Air Humidity
30 °C
Solution Temp
Nutrients 8
Agua de montaña
2500 mll
Melaza
120 mll
Microorganismos sólidos MMS
400 mll
deFharo Welcome clandestine marijuana growers and also to those lucky enough not to be one! 🙋♂️👨🌾👍
This diary is a weekly account of techniques, growing experiences, and homemade organic bio-preparations that I've been experimenting with for two years in indoor marijuana cultivation.
• Activation of Mountain Microorganisms with Pumpkin, carrot, minerals, and chitosan to strengthen the plant's defenses against pathogens.
- Published on 😋 02/22/21
After 45 days of anaerobic fermentation, I've opened what I hope will be a great fertilizer to use from the vegetative growth stage to pre-flower and the first weeks of flowering... after using it for a year in all my crops, I can say it’s excellent.
Pumpkin and carrot contain a multitude of minerals and vitamins that help strengthen the crop and aid in root expansion. This preparation is functionally comparable to seaweed extracts, although much more complete. This vegetable is rich in antioxidants. Its carotene content stands out, which is responsible for the characteristic color of the pumpkin. Could this influence the colors of the strains?... under observation!!
Thanks to anaerobic fermentation with Mountain Microorganisms, the nutrients, vitamins, and minerals are chelated by the action of the MM, thus achieving a top-notch nutrient broth that the plants assimilate immediately.
BASIC FORMULA INGREDIENTS:
Alkaline spring water: 2.5L
Whey: 1L
Solid Mountain Microorganisms (various strains): 400g
Organic molasses: 120g.
Fresh beer yeast: 10g.
Fresh pumpkin and carrot: 475g.
Dehydrated and ground shrimp shell (Chitosan): 6.5g
• Extra Minerals:
10g of Phosphate Rock: P
7g of Azomite: Ca, Fu, Fe, K, Si, B, and traces of the rest of the minerals from the periodic table.
8g of Palm Ash: Ca and K.
5g of Pumice Stone: Si, Al, Fe, Ca, K.
8g of Kaolin with Illite: Fe, Si.
5g of Epsom Salt: Mg.
• Elements contained in pumpkin and carrot:
Amino acids: alanine, arginine, cucurbitacin, cystine, glycine, histidine, isoleucine, lysine.
Acids: linoleic, aspartic, oleic, palmitic, salicylic, and folic.
Vitamins: Vitamins A, B1, B2, B3, B6, B9, E, A, C, K
Minerals: calcium, cobalt, boron, magnesium, zinc, potassium, iron.
Sugars: sucrose
PROCEDURE
In this bio-preparation, I performed a pre-hydrolysis of the pumpkin and carrot, cooking them for an hour with molasses to later improve the dissolution of all their elements during fermentation. I also did a pre-hydrolysis with the shrimp shell, this time I performed an alkaline hydrolysis with KOH, which after two hours I add to the final mixture, in addition, I diluted all the minerals as much as possible through vigorous agitation.
I dissolve all the elements and add fresh beer yeast to start fermentation. I place the Solid Mountain Microorganisms from my two seedbeds in a mesh bag, where I gather the Microorganisms (Bacteria from the Actinomycetes family, Yeasts, and Fungi (Mycorrhizae), Microalgae, and Protozoa) from six virgin forests in my area.
I seal the container hermetically with a gas escape valve; since it’s January and it’s cold, I wrapped a heat tape around the container to maintain a constant temperature of approximately 36°C, so the preparation can be ready in just 30 days. If left at room temperature, the preparation would take an additional 2 months to be available for use. Fermentation began at 60 minutes and has lasted for 25 days without interruption.
I opened the container at 45 days; the fermented smell is very pleasant, the color fantastic, and some Microorganisms can be seen thriving on the surface. I separate half a liter to start using it and close the container again.
I have several budding crops where I will apply this fertilizer and observe its effects.
Until next week...
REGARDS, HEALTH, AND GREAT HARVESTS TO ALL!! 😄👨🌾💧💦🌞💡
=================================
🙄👇👌👍👉👉🙋♂️👍👈👈👈✊👌🙏👇🤩🙋♂️🏽
15 likes
12 comments
Share
Used techniques
Pumpkin MMA
Technique
12
Week 12. Vegetation4y ago


1 cm
Height
24 hrs
Light Schedule
20 °C
Day Air Temp
Weak
Smell
65 %
Air Humidity
30 °C
Solution Temp
Nutrients 5
Agua de montaña
800 mll
Melaza
120 mll
Suero de leche
1000 mll
deFharo Welcome, underground marijuana growers, and also to those lucky enough not to be! 🙋♂️👨🌾👍
This diary is a weekly account of techniques, growing experiences, and homemade organic bio-preparations, which I've been experimenting with for two years in indoor marijuana cultivation.
This week, FRUIT AND MINERAL LACTO FERMENTS...
I carried out this practice on July 2, 2020, preparing 10 liters in two different formulas. In one, I focused on nitrogen (vegetative growth), and in the other on phosphorus and potassium (flowering). I did this by selecting fruits or organic components with a higher concentration of the macronutrients I wanted for each preparation. Still, both formulas contain all the properties (vitamins, enzymes, minerals, nutrients...) found in each of the fruits I used. I've been applying these preparations since then; they yield excellent results in watering, but especially in foliar applications, as they actually act as a bio-stimulant for crops.
Although I used other ingredients in these formulas, such as guanos, dried blood, fish meal, and various minerals, when I repeat them, I will use exclusively fruits because I already make specialized lacto ferments from guanos, meals, or minerals. This way, I also promote fermentation.
Anaerobic lacto ferments are the most accessible and easiest preparations to make; they rely on the power of lactic acid and the lactic acid bacteria contained in whey to dissolve nutrients or chelate minerals. They are particularly efficient in dissolving phosphorus.
INGREDIENTS:
Pure water 1000ml
Whey 1000ml (you can use more, or even substitute water with whey.)
Molasses: 125g
Fresh yeast: 12g.
FRUITS AND VEGETABLES (up to 20% of the liquid volume)
Peach, Avocado, Garlic, Apricot, Kiwi, Peach, Melon, Papaya, Pineapple, Banana, Mango, Mandarin, Carrot, Pumpkin, Onion, Orange, Apple.
- Highlighting kiwi, pineapple, and papaya for their enzyme content (actinidin, papain, bromelain); these enzymes have the power to break down protein and convert it into amino acids. I prepare a specific formula to make this conversion through Enzymatic Hydrolysis of proteins. I'll talk about that technique another day; it's one of the most challenging for me, but today, those amino acids are fundamental in my crops.
- Also highlighting banana and avocado for their high potassium content.
- Pumpkin and carrot provide various types of vitamins (C, E, B6, B3, B2, B1, A (beta-carotene), B9, and folic acid).
- And in all fruits, there are various amounts of other macro and micronutrients (Ca, Mg, P, Fe, etc.)
Additionally, the high content of natural sugars in all the fruits caused the fermentation of the preparation to be very vigorous and lasted over 30 days.
PROCEDURE:
Dissolve the molasses in the whey.
I crush the fruits and vegetables for better dissolution.
I add fresh yeast to the whey and molasses mixture, heat to 30°, and wait half an hour.
I add the crushed fruits to the barrel, mix it with the whey, and add water to fill it up.
I seal the barrel hermetically with a gas valve.
I wait at least 30 days before using it.
I use it at 1 to 3% in watering and foliar applications during the vegetative growth stage.
Until next week...
REGARDS, HEALTH, AND GREAT HARVESTS TO ALL!! 😄👨🌾💧💦🌞💡
=================================
🙄👇👌👍👉👉🙋♂️👨🌾👍👈👈👈✊👌🙏👇🤩🙋♂️🏼
8 likes
3 comments
Share
Used techniques
Lacto Fermented Fruits
Technique
13
Week 13. Vegetation4y ago


1 cm
Height
24 hrs
Light Schedule
20 °C
Day Air Temp
Weak
Smell
65 %
Air Humidity
30 °C
Solution Temp
Nutrients 2
Agua de montaña
800 mll
Microbiología
200 mll
deFharo Welcome, clandestine marijuana growers and also to those lucky enough not to be one! 🙋♂️👨🌾👍
This diary is a weekly account of techniques, growing experiences, and homemade organic bio-preparations, which I have been experimenting with for over two years in indoor marijuana cultivation.
This week: INOCULATION OF MICROBIOLOGY IN COCONUT FIBER FOR SUBSTRATE MIXTURE.
I like coconut fiber as part of my substrate mixes, I usually use it in a proportion of 10% to 15%. Coconut fiber is an inert material with very good moisture retention and recovery, unlike peat, which struggles to regain moisture when it dries out. Additionally, coconut fiber promotes substrate aeration.
Since the fiber needs to be hydrated beforehand to be used, as it is normally sold compressed, I thought at the end of 2020 that it could be a good idea to inoculate microbiology into the coconut fiber a few days before making the substrate mix. This way, I could delve into the concept of creating substrates with microbiology that are very efficient in decomposing organic matter and solubilizing minerals in the substrate, thus favoring nutrient assimilation and root development. In the case of mycorrhizae, it also protects the roots against pathogenic fungi due to their extreme voracity and territoriality.
To ensure good inoculation, I hydrated the coconut fiber with my Activated Mountain Microorganisms (MMA), covered it to maintain moisture for three days, and then mixed it with the rest of the substrate components. I usually use this technique with very good results.
For those using commercial microorganism spores, it could be a good practice to activate those spores so that the microbiology spreads evenly throughout the substrate. I also believe that these commercial spores will need more than 3 days in the coconut before using them, unlike my Activated Mountain Microorganisms (MMA) in liquid form, where I have confirmed that propagation begins after 48 hours.
Until next week...
CHEERS, HEALTH, AND GREAT HARVESTS TO ALL!! 😁👨🌾💧💦🌞💡
=================================
🙄👇👌👍👉👉🙋♂️👍👈👈👈🤜👌🙏👇🤩🙋♂️🏻
10 likes
2 comments
Share
Used techniques
Coconut Fiber Activated with MM
Technique
14
Week 14. Vegetation4y ago


1 cm
Height
24 hrs
Light Schedule
20 °C
Day Air Temp
12.0
pH
Weak
Smell
65 %
Air Humidity
30 °C
Solution Temp
Nutrients 2
Agua de montaña
1000 mll
Ceniza de madera
80 mll
deFharo Welcome clandestine marijuana growers and also to those lucky enough not to be one! 🙋♂️👨🌾👍
This diary is a weekly account of techniques, growing experiences, and homemade organic bio-preparations that I have been experimenting with for over two years in indoor marijuana cultivation.
This week ASH WATER, an easy and clean technique to obtain a product that, in my case, I use to regulate the pH of my watering mixes, since all my Bio and Lacto ferments are very acidic. I limit its use to the flowering stage because the resulting water is rich, mainly, in Calcium and Potassium. During the vegetative growth stage, I use homemade Ormus (Ca, Mg, S...). Today I was at the beach and collected seawater; next week I will publish the process of creating Ormus and its applications.
But first, let me say something about the ash. This time, a neighbor who burns good wood gave me a bag when she cleaned her chimney after winter. The best ash is the one that is more calcined, the one that stays at the base of the fire, the whitest and finest like flour! First, I sift the ash to remove large pieces and other materials, then I store it for use in dry amendment mixes and substrates, and also as an essential part of my Bio and Lacto ferments with minerals. But the ash has to be of good quality, only wood, and the harder it is, the better. In the case of my neighbor's ash, there were remnants of paper and other strange materials; apparently, after sifting, the ash seemed suitable, but when mixed with water, it revealed the dark color of paper ash. Well, the ash is valid, but I want something better. In fact, I have very calcined palm ash that gives me a pH of 14; I keep it like a treasure and use it in very special cases!!
PROCEDURE:
To obtain the ash water, I use a basic immersion hydrolysis with pure water and 10% ash, keeping it for a week, shaking it daily. Then I filter it and store it; it lasts for years!! In the end, this ash water has a pH of 12 and 8490 ppm!
USES:
- This water can also be used for watering; it is an important source of potassium because it is the most soluble nutrient, also calcium and silicon. It also helps correct acidic substrates, but attention must be paid not to alkalinize the substrate.
- The ash as a dry amendment provides certain soluble minerals for plants such as phosphorus (P), potassium (K), magnesium (Mg), calcium (Ca), copper (Cu), iron (Fe), manganese (Mn), and zinc (Zn). It should be mixed well with the substrate and care should be taken with the amounts.
- From ash and potassium soap, a very efficient and widely used fungicide is obtained. A classic!
- Regulator of acidic and clayey soils and mineral contribution to substrates.
- As a component for compost, Bokashi, or Bio ferments.
- With a much higher concentration of ash and filtering water through it, you get ash lye, practically natural potassium hydroxide, for making alkaline hydrolysis, potassium soaps, and for use in cleaning clothes and home.
- In short, ash is a first-rate nutrient, a 100% usable waste, especially for those lucky enough to have gardens or outdoor crops and mother earth to feed.
- There is an ancient practice I want to do by mixing ash and urine to obtain a very efficient fertilizer with NPK; I've been meaning to do it for a couple of years, and when I do it and try it, I will publish it...
"By the sweat of your brow, you shall eat bread until you return to the ground, for out of it you were taken; for dust you are, and to dust you shall return." G 3-19
Until next week...
REGARDS, HEALTH, AND GREAT HARVESTS TO ALL!! 😁👨🌾💧💦🌞💡
=================================
🙄👇👌👍👉👉🙋♂️👍👈👈👈✊👌🙏👇🤩🙋♂️🏽
9 likes
3 comments
Share
Used techniques
Ash water
Technique
15
Week 15. Vegetation4y ago




1 cm
Height
24 hrs
Light Schedule
20 °C
Day Air Temp
7.7
pH
Weak
Smell
65 %
Air Humidity
30 °C
Solution Temp
Nutrients 2
Agua de mar
1000 mll
Hidróxido de Sodio
5 mll
deFharo Welcome, clandestine marijuana growers and also to those lucky enough not to be one! 🙋♂️👨🌾👍
This diary is a weekly account of techniques, growing experiences, and homemade organic bio-preparations, which I've been experimenting with for over two years in indoor marijuana cultivation.
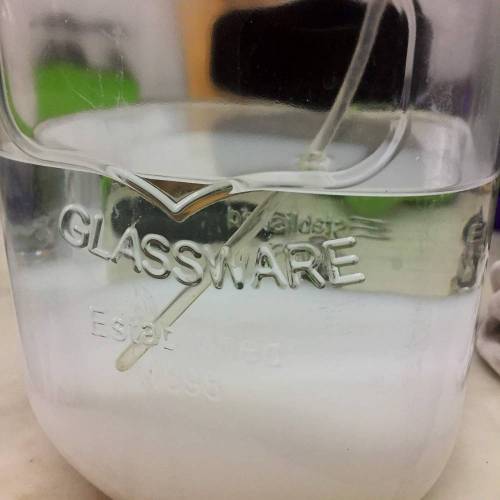
This week, taking advantage of a sunny day, I went to the beach with my dog, took a bath, and collected 5 liters of seawater to make ORMUS, as my supplies were running low. I had been meaning to publish this technique, but I had never taken photos of the process...
ORMUS (Orbitally Re-arranged Monoatomic Element)
There is a lot of "literature" around this product; my interest is exclusive, I only use it in my marijuana crops, as a multi-mineral complex, rich mainly in Magnesium (40-70%), it also contains Ca and Sulfur and traces of several minerals. Being an alkaline solution, it works perfectly to raise the pH of my irrigation mixes with bio-ferments, which are very acidic... It's biological and it's free!! 💪😁
ORMUS is extracted from seawater; one liter of seawater contains 37 grams of salt, of which 2% is ORMUS. With the extraction technique I will explain, we manage to separate Sodium from the minerals, which will precipitate and form ORMUS, while the supernatant water will contain the salt.
PROCEDURE:
Materials: Seawater, Sodium Hydroxide, chlorine-free freshwater, glass container, and pH meter.
- Filter the seawater (5l) to remove sand, etc.
- Completely dissolve one tablespoon of Sodium Hydroxide in 500ml of pure or distilled water.
- The pH of seawater is 7.7.
- Gradually add the Sodium Hydroxide solution to the seawater, stir the mixture, and measure the pH until you reach a value as close as possible to pH: 10.78.
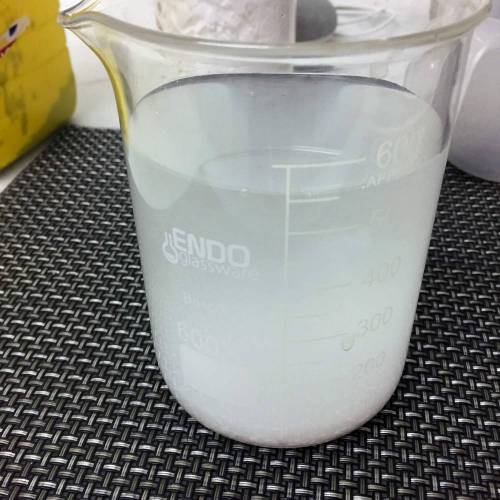
- You can immediately see how ORMUS forms; it looks like milk, some call it the Semen of the Sea!
- Protect from light and wait overnight; the next day, you will clearly see the separation of ORMUS and the water.
- Now, to remove the sodium in the supernatant water, you need to extract this salty water and replace it with fresh water, stir and wait a few hours, repeat the operation at least 4 times until the water is sweet; I do 6 washes.
- In the end, leave a small layer of water and store it in the dark in glass containers; it has no expiration date.
USES:
- ORMUS can be dehydrated; you get about 0.75g of dry residue per liter of seawater, it could be used as a dry amendment, but I've never done that. I use it liquid and obtain 100 to 150ml of ORMUS per liter of water.
- For the washing process with freshwater, I use mineral water rich in Ca and others, which increases the Ca levels of the ORMUS, giving me a natural CalMag.
- I use it to raise the pH in acidic irrigation mixes, mainly during the vegetative growth stage, due to its calcium and magnesium content; during flowering, to raise the pH, I use ash water for its P and K content.
- When I germinate seeds, I always do it directly in the substrate, moistening the soil with a mix of Honey, ORMUS, and liquid Auxins.
- Practically all the waterings I do in the seedling stage include ORMUS because of its Mg content.
- The minerals contained in ORMUS are completely assimilable by the plants, as there is a biological process of the minerals throughout their journey to the sea and their permanence in this salty medium.
In short, it's biological and it's free!!
Until next week...
REGARDS, HEALTH, AND GREAT HARVESTS TO ALL!! 😁👨🌾💧💦🌞💡
=================================
🙄👇👌👍👉👉🙋♂️👨🌾👍👈👈👈🤜👌🙏👇🤩🙋♂️🏼
10 likes
comments
Share
Used techniques
Ormus
Technique
16
Week 16. Vegetation4y ago


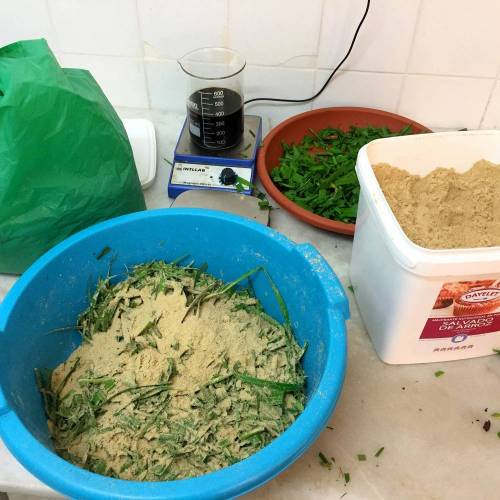


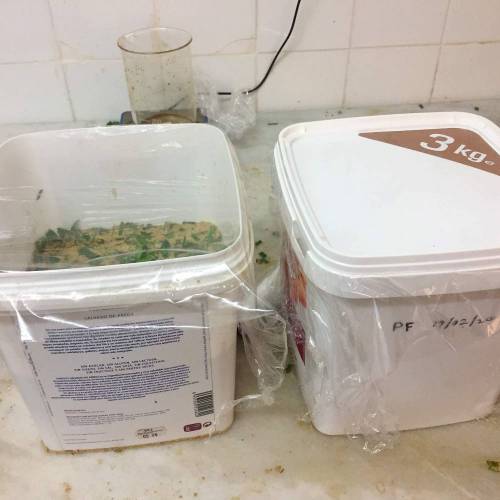


1 cm
Height
24 hrs
Light Schedule
20 °C
Day Air Temp
7.7
pH
Weak
Smell
65 %
Air Humidity
30 °C
Solution Temp
Nutrients 6
Agua sin cloro
100 mll
Melaza
25 mll
Pasto fresco
1000 mll
deFharo Welcome, clandestine marijuana growers and also to those who are fortunate enough not to be! 🙋♂️👨🌾👍
This diary is a weekly account of techniques, growing experiences, and homemade organic bio-preparations, which I have been experimenting with for over two years in indoor marijuana cultivation. I, based on a theoretical framework, ask myself all the questions and develop these techniques, formulas, etc., and test them in my own grows—pure empirical experimentation! You can trust it!
This week I'm starting a 3-part tutorial, where I will first explain the process of creating a solid inoculum of microorganisms based on FERMENTED FRESH GRASS AND MOUNTAIN MICROORGANISMS. This preparation will be the basis for the subsequent creation of specific Bio Fertilizers. I started this practice on February 20, 2022.
- This is an advanced process, as you need to have the following materials beforehand (Check weeks 2-3 of this diary for the process):
- PREVIOUS MATERIALS:
Solid Mountain Microorganisms (MMS): https://growdiaries.com/diaries/134104-grow-journal-by-defharo/week/725879
Activated Mountain Microorganisms (MMA) in liquid form: https://growdiaries.com/diaries/134104-grow-journal-by-defharo/week/730304
• Introduction:
Fermented grass is a viable alternative for those organic growers who do not have access to fresh cow manure to create Bio Fertilizers.
Fresh grass contains Lactobacillus and a multitude of enzymes, and in conjunction with the Mountain Microorganisms, I create a Bio ferment with a high population of very efficient Microorganisms in: decomposing organic matter, chelating minerals, and reducing the incidence of pests and diseases in crops, as this type of ferment has antagonistic relationships and competition with different phytopathogenic microorganisms.
• Materials to obtain 5kg of fermented grass:
- 1Kg of fresh grass from any grass species; it's better to collect grass from different species and locations, observe in the field, and collect the most vigorous grass shoots. The grass should be collected on the same day that the final product will be made, to avoid moisture loss and the disappearance of some Microorganisms and enzymes.
- 3Kg of rice bran. This flour greatly favors fermentation, providing a lot of energy to the Microorganisms for their propagation, thanks to its caloric content and presence of vitamins.
- 200g of molasses. Cane molasses contains essential components that promote the growth of bacteria, rapidly increasing the proliferation of microorganisms.
- 200g of Solid Mountain Microorganisms (MMS). Inoculum of Mountain Microorganisms, collected in the same region as the crops.
- 200ml of Activated Mountain Microorganisms (MMA) in liquid form.
- 100ml of chlorine-free water.
• Procedure:
- Finely chop the fresh grass.
- Mix the grass, rice bran, and MMS.
- Dissolve the molasses with the Activated Mountain Microorganisms (MMA) and the water.
- Evenly moisten the entire mixture.
- Store and tightly pack the entire mixture in a container, to leave as little oxygen as possible.
- Seal tightly and store in the shade for at least a month; the longer it stays closed, the better. Fermentation decreases after a month but continues slowly. I have made two separate containers, one to use after a month, the other will stay closed until I need it, which will likely be more than a year. This Bio ferment lasts for years under these conditions.
- When opened, it should have a good smell.
• Uses:
As a base for creating Bio Fertilizers.
As a mix for any type of substrate or as a dry amendment wherever a massive inoculation of Microbiology is desired.
See you next week! Where I will continue with the second part of this practice, the final goal is to create, for now, 3 types of specific Biofertilizers, one rich in Silica, another in Calcium and Magnesium, and the third in Phosphorus and Potassium for flowering...
CHEERS, HEALTH, AND GREAT HARVESTS TO ALL!! 😁👨🌾💧💦🌞💡
=================================
🙄👇👌👍👉👉🙋♂️👨🌾👍👈👈👈✊👌🙏👇🤩🙋♂️🏽
9 likes
6 comments
Share
Used techniques
Pasture Fermented with MM 1/3
Technique
17
Week 17. Vegetation4y ago


1 cm
Height
24 hrs
Light Schedule
20 °C
Day Air Temp
7.7
pH
Weak
Smell
65 %
Air Humidity
30 °C
Solution Temp
Nutrients 7
Agua sin cloro
300 mll
Melaza
25 mll
MMA
200 mll
deFharo Welcome, clandestine marijuana growers and also those lucky enough not to be! 🙋♂️👨🌾👍
This diary is a weekly account of techniques, growing experiences, and homemade organic bio-preparations that I've been experimenting with for over two years in indoor marijuana cultivation. I, based on a theoretical framework, ask myself all the questions and develop these techniques, formulas, etc., and test them in my own grows, pure empirical experimentation! You can trust it!
This week I continue with the second part, of three, of this technique, this time through the anaerobic fermentation of the solid inoculum of microorganisms created from fresh grass, which I explained last week, and Mountain Microorganisms (MM). I've had this grass inoculum fermenting for a month and a half; first, I perform a Liquid Microorganism Pre-Activation for 4-7 days depending on the ambient temperature. Four days are enough if the ambient temperature exceeds 25°C; at lower temperatures, leave it for a maximum of 7 days to achieve the highest reproduction of the Microorganisms. They will be responsible, in the third part of this guide, for mineralizing the organic matter or chelating the minerals that I will add after this period.
- The final idea is to create a range of specific and compatible Bio fertilizers; for now, I am already using two of them, one based on Silica, chelated from a selection of minerals rich in this component: Rhassoul Clay, micronized Zeolite, powdered Pumice, red Illite, and Diatomite. (Bio Si EM). In this formula, I have tried adding Lactic Acid Bacteria to increase the microbiology in the process and also take advantage of the chelating power of the minerals from these bacteria, of which I have a seed stock from two years ago, but I don't have photos of the creation process and uses... I will explain it another time.
- And the other based on Calcium and Magnesium, chelated from Dolomite and Epsom Salts. (Bio CalMag EM)
• I have two more in progress:
- A new Bio Fertilizer for flowering based on Phosphorus, Potassium, and Sulfur (Bio PKS) and another, for which I have high hopes of it being an exceptional Bio Fertilizer, I intend to capture and solubilize the fantastic properties present in natural Coconut Water (minerals, vitamins, enzymes, hormones...). I use coconut water; I have explained before how, the problem with this material is that once the water is extracted from the coconut, it lasts only 3-4 days before it starts to spoil, even if stored cold.
• And in the future, I plan to do the same with other materials, such as bat and bird guanos, Mealfrass, Algae, Azomite, etc.
- This is an advanced process, as you must have the following materials beforehand (See weeks 2-3-16 of this diary to learn about the processes):
- PRIOR MATERIALS:
Solid Mountain Microorganisms (MMS): https://growdiaries.com/diaries/134104-grow-journal-by-defharo/week/725879
Activated Mountain Microorganisms (MMA) in liquid form: https://growdiaries.com/diaries/134104-grow-journal-by-defharo/week/730304
Fermented Grass Inoculum: https://growdiaries.com/diaries/134104-grow-journal-by-defharo
• Materials to activate and reproduce the mountain microorganisms and those present in the fermented grass in 1 liter of solution.
- Fermented grass: 25g
- Solid Mountain Microorganisms (MMS): 10g
- Activated Mountain Microorganisms (MMA) in liquid form: 200ml
- Pasteurized milk: 25ml
- Molasses: 25g
- Chlorine-free water: 800ml.
- Fresh yeast: 5g.
• Procedure:
- Dissolve the molasses with the milk, MMA, and fresh yeast.
- Add the fermented grass and MMS to the container, preferably in a mesh bag.
- Incorporate the mixture of MMA, molasses, milk, and yeast... shake very well to ensure the bag is soaked with the grass and MMS.
- Fill the container with pure water and mix everything.
- Seal the container tightly with a gas valve; fermentation begins within a few hours.
- Wait between 4 to 7 days to achieve the highest concentration of Microbiology...
- Then open and add the material we want to solubilize... but I will explain this next week.
Until next week! where I will continue with the final part of this practice...
REGARDS, HEALTH, AND GREAT HARVESTS TO ALL!! 😁👨🌾💧💦🌞💡
=================================
🙄👇👌👍👉👉🙋♂️👍👈👈👈🤜👌🙏👇🤩🙋♂️🏽
9 likes
21 comments
Share
Used techniques
Pasture Fermented with MM 2/3
Technique
18
Week 18. Vegetation4y ago


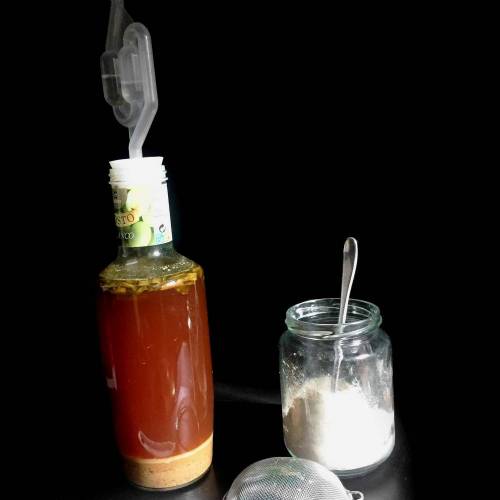

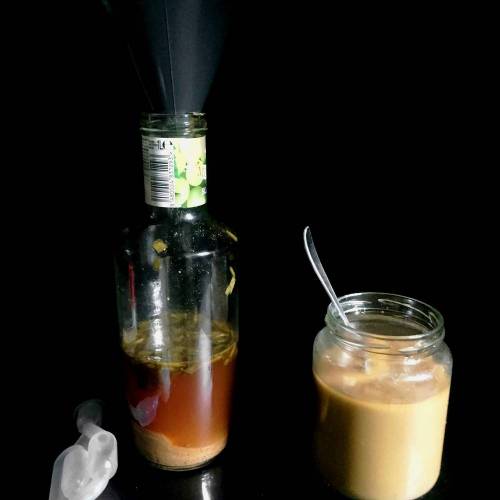


1 cm
Height
24 hrs
Light Schedule
20 °C
Day Air Temp
7.7
pH
Weak
Smell
65 %
Air Humidity
30 °C
Solution Temp
Nutrients 11
MMA
1000 mll
Agua de coco
400 mll
Mealfrass
75 mll
deFharo Welcome, clandestine marijuana growers and also to those lucky enough not to be! 🙋♂️👨🌾👍
This diary is a weekly account of techniques, cultivation experiences, and homemade organic bio-preparations, which I have been experimenting with for over two years in indoor marijuana grows. I, based on a theoretical framework, ask myself all the questions and develop these techniques, formulas, etc., and test them in my own grows, pure empirical experimentation! You can trust it!
This week is the last part 3/3 of creating different specific bio-fertilizers.
- This is an advanced process, as you need to do what was explained in the previous two weeks of this diary first.
Through this procedure, I have created, so far, four types of bio-fertilizer.
After having the fermented grass solution and mountain microorganisms fermenting for at least 4 days, I open the containers and add the minerals I want to chelate or the organic matter that the microorganisms will mineralize for each formula; in both cases, the result is a bio-fertilizer that is fully assimilable by the plants.
Formula 1: Bio-fertilizer with a predominance of Silicon, it also contains smaller amounts of other minerals. I have chosen 5 micronized minerals where the main component is silicon, the total percentage of minerals per liter of solution is 5%, in this case, 50g divided equally between: Rhassoul Clay, micronized Zeolite, Pumice powder, Red Illite (Fe), and Diatomite.
I am already using this preparation in my grows, once a week.
Formula 2: Bio-fertilizer with a predominance of Calcium and Magnesium; for this, I have chosen Dolomite, which has a high content of Calcium and slightly less Magnesium. In this formula, I have compensated for the Magnesium with Epsom Salt, which also contains Sulfur. In this case, I used 4% of mineral per liter of solution. Dolomite: 25g, Epsom Salt: 5g, and Azomite 10g; this last mineral provides a multitude of trace elements from many other minerals on the periodic table.
I am already using this preparation in my grows, once a week.
Formula 3: Bio-fertilizer based on the dissolution of Guano Mealfrass and its properties; I add 75g of guano from three different manufacturers, as this guano comes from the mealworm (Tenebrio Molitor), and depending on the food given to the worm, the guano has more or less of different macro and micronutrients. Moreover, this guano is an excellent product for promoting microbial life. For now, it will be in anaerobic fermentation until the end of summer.
Formula 4: Bio-fertilizer from Young Coconut Water; in this case, I used the water from 3 coconuts (800ml) and 650ml of MMA. Mature coconuts have much less water, look for green or young coconuts.
For now, it will be in anaerobic fermentation until the end of summer, as high temperatures improve fermentation processes.
• Coconut water (for nerds).
Natural product rich in sugars, minerals (Ca, Mg, Fe, P...), vitamins A, C, D, E, K, proteins and amino acids, cytokinins enzymes (Cell division, growth) and gibberellic acid (Root stimulation).
I am developing this formula to preserve the fantastic properties of coconut water, as it degrades rapidly in its natural state in the presence of oxygen.
The coconut is a seed that contains enough energy and minerals to grow a tree; it is in the seeds where the greatest diversity of minerals is found. I trust that this preparation will become a great bio-stimulant for my grows, from seed germination to the entire vegetative growth period.
BIO COCONUT FORMULA for 4l
Fermented Grass 128g
MMA 650ml
MMS 56g
Molasses 100g
Milk 100ml or 1L of whey
Pure water 2500ml
Fresh yeast 8g
A little bit of natural Honey (enzymes, minerals, vitamins)
Close with a gas valve and wait 3-4 days for the MM to propagate...
- After 3 days, I open it and add green coconut water 800ml, close it again with a valve, and let it ferment for as long as possible.
Until next time...
CHEERS, HEALTH, AND GREAT HARVESTS TO EVERYONE!! 😁👨🌾💧💦🌞💡
11 likes
1 comment
Share
Used techniques
Pasture Fermented with MM 3/3
Technique
19
Week 19. Flowering4y ago


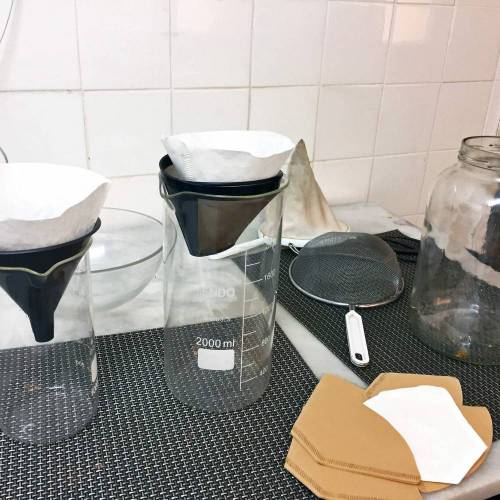


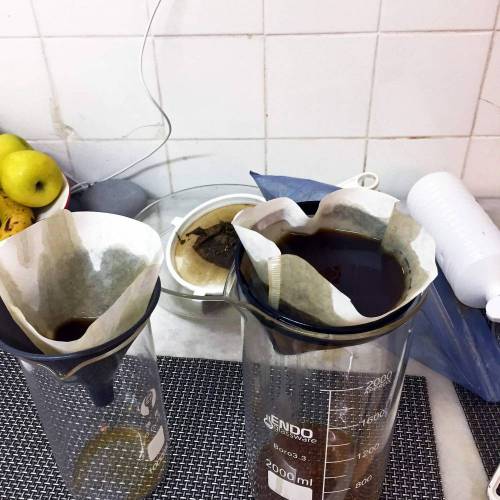


1 cm
Height
24 hrs
Light Schedule
20 °C
Day Air Temp
7.7
pH
Weak
Smell
65 %
Air Humidity
30 °C
Solution Temp
Nutrients 3
Marihuana
200 mll
Alcohol isopropílico (QWISO)
1500 mll
Karité
40 mll
deFharo Welcome, clandestine marijuana growers and also to those lucky enough not to be one! 🙋♂️👨🌾👍
This diary is a weekly account of techniques, growing experiences, and homemade organic bio-preparations, which I have been experimenting with for over two years in indoor marijuana cultivation. I, based on a theoretical framework, ask myself all the questions and develop these techniques, formulas, etc., and test them in my own grows, pure empirical experimentation! You can trust it!
While I finalize a last compilation of formulas and techniques, some of which have failed, this week I explain how I extract cannabis oil (HBO) with isopropyl alcohol (QWISO), and then, a practice to make a shea butter-based moisturizer with the HBO.
▲ With 200g of aged marijuana, stored for over two years, with no trace of chlorophyll and slightly past its prime, I decided to make a cannabis oil extract, which I will then use as a base for other preparations that I will be publishing here. Initially, I’m going to use it to make a topical cream by mixing the HBO with unrefined shea butter; this butter is fantastic as a moisturizer and tissue regenerator.
The truth is that this oil can dissolve in alcohols and fats, which gives it a multitude of uses, including as a sophisticated cooking ingredient...
😷 PROCEDURE
Ingredients: 200g of well-dried and ground buds. 1.5L of isopropyl alcohol.
1) I grind all the herb so that the alcohol soaks it quickly and well.
2) I put the alcohol and the herb in the freezer for a few hours.
3) I prepare several containers with coffee filters.
4) I take the herb and alcohol out of the freezer and mix them, shaking for 1 minute to dissolve only the THC and avoid dissolving other substances like waxes, chlorophyll residues, etc.
5) With a coffee cloth strainer, I do the first coarse filtering and then put it in the coffee filters; I use several containers to speed up this process, which can take 2 hours.
6) I pour the filtered liquid into a wide glass baking dish because it is less sticky, and let the alcohol evaporate naturally to avoid losing anything along the way with heat. I leave the container in the shade where air can circulate.
7) After 48 hours, the alcohol has evaporated, and I have collected the result, 58g of HBO of the best quality. I smoked it, and it’s very potent; when burning it, the aromas of the marijuana come alive again!!...
SECOND PART:
Topical cream with unrefined shea butter and HBO extract.
I was eager to make this cream; I have been using unrefined shea butter for years as a fantastic moisturizer and effective tissue restorer. I discovered it on a trip I took to Senegal in the '90s. Well, taking advantage of the fact that I have a very strong HBO extract, I made a mixture to see what happens 😋... the truth is, I don’t know what to expect 😂
I was clear that the HBO would dissolve in the fat of the shea butter, and it has.
The process I followed is as follows:
- Dissolve with heat the shea butter, never exceeding 40°C, dilute the HBO, and let cool in the fridge.
- Use only topically, although shea butter is also used in Africa as a vegetable fat for cooking.
Until next time...
REGARDS, HEALTH, AND GREAT HARVESTS TO ALL!! 😄👨🌾💧💦🌞💡
9 likes
2 comments
Share
Used techniques
HBO and Cream with Shea
Technique
20
Week 20. Harvest4y ago
Happy Harvest Day!

Spent 135 days
Ger Veg Flo Har
500 g
Bud wet weight per plant
2
Plants
Normal
Difficulty
Height
Day air temperature
Air humidity
PPM
PH
Light schedule
Solution temperature
Night air temperature
Substrate temperature





deFharo Welcome, clandestine marijuana growers and also to those lucky enough not to be! 🖐️👨🌾💧💦🌞💡
This diary is a weekly account of techniques, growing experiences, and homemade organic bio-preparations that I've been experimenting with for over two years in indoor marijuana cultivation.
From a theoretical framework, I ask all the questions and develop these techniques, formulas, etc., and test them in my own grows, pure empirical experimentation!, which you can trust!
I will close this diary with a compilation of techniques and formulas, some of which failed, that I still needed to explain.
I believe that for all those interested in a self-sufficient organic growing method, without brands or labels, in the chapters of this diary you will find the foundation to create and experiment. Create to understand!!
1) SHEEP WOOL (DOES NOT WORK) 🐑🤷😁
I had an old pillow filled with sheep wool at home, I tried to use it at the base of the pots, mixed in the substrate and in the mulch: ERROR!!
Sheep wool has two main problems for use in pots, it takes a long time to decompose, which means it doesn't make the organic nitrogen I was interested in available to the plant.
The second problem, the more important one, is that it retains a lot of moisture; within a few weeks of starting to use it, I had to remove all the wool from the base of the pot as best I could, the plant began to show signs of excess moisture.
SOLUTION TO DISSOLVE SHEEP WOOL, through alkaline hydrolysis with Potassium Hydroxide (KOH), with this we manage to dissolve the sheep wool and capture all the nitrogen, obtaining an NK hydrolate. In the same way, and for the same reason as the wool, ground antlers and hooves can be used.
Ingredients:
1 liter of pure water.
5% Potassium Hydroxide (50g)
50g of sheep wool or 50g of antlers and hooves.
PROCEDURE:
Dissolve the Potassium Hydroxide in half of the water (500ml).
Mix with the wool and let it act for a day.
The next day, add the rest of the water.
Cover and store in the shade.
In the end, the wool ends up completely dissolved.
USES:
Organic nitrogen and potassium assimilable by the plants.
I can add it to compost.
I can do watering with this formula, adding some component that has phosphorus.
I can accelerate the decomposition of wood chips by adding this product.
I can convert nitrogen into amino acids through...
2) ENZYMATIC HYDROLYSIS OF PROTEINS 💪😋
I don't have photos of the process I went through to convert protein from various sources (Dried blood, Fish meal, Dog food, etc.) into amino acids.
The first formula I made took me more than 3 months and many complex operations to obtain the amino acids; I have repeated this formula with protein-rich algae (kelp, spirulina, and chorella) and another with protein seeds (Chia, Sesame, Quinoa, and hemp).
The enzymes we need for the conversion to amino acids are called proteolytic enzymes: Papain and Bromelain; these enzymes break the peptide bonds of the protein, converting it into amino acids.
At first, I bought capsules that contained the enzymes; I found them in a herbal store, they are sold for weight loss because they burn protein.
They work but very slowly; I also had to perform complex operations, like shaking the solution for hours at 50°C, and repeating this operation several times for the enzymes to start acting.
Now, I have found a much faster, easier, and more affordable method.
In nature, we find the enzyme Papain in papayas, the greener the better.
The enzyme Bromelain is found in pineapples, the riper the better.
Procedure:
From the protein source (Dried blood, Meals, algae, etc..). 8-10% of the volume of water.
Boil water with the protein source for 20 minutes to start the dissolution.
After 10 minutes of boiling, add 10g per liter of natural honey or molasses.
Then, add crushed papaya and pineapple, at a rate of 3% of the volume of water; for one liter: 30g of green papaya and 30g of ripe pineapple.
Cover and keep in the shade for at least 15 days; the longer you have it, the more amino acids you will obtain; you can observe during the process the peculiar smell, not unpleasant, produced by the hydrolysis.
3) SEEDLING ENCAPSULATION 💪😁
A good practice that I always do is the encapsulation of the pot where I germinate the seeds; I keep the upper encapsulation until the sprout sheds the seed shell, and I keep the lower encapsulation until transplanting, thus promoting the creation of vertical roots that emerge from the base of the pot due to moisture and guided by gravity.
4) MULCH WITH PINE BARK (DID NOT WORK) 🤷♂️
At first, I used this material to cover the top of the pots; all I achieved was to maintain more moisture at the top of the substrate, but it doesn't serve as food for microorganisms, as they are very hard pieces that would break the microorganisms' teeth and take years to decompose.
In short, this material is barely decorative.
5) UVA-B BULBS (DID NOT WORK) 💡🤷♂️
I used a couple of these bulbs with 10w each in previous grows; I didn't notice anything, and I eventually replaced these bulbs with sunlight, whenever the weather allows.
6) IR 735nm BULB (DID NOT WORK) 💡🤷♂️
I have used this bulb in several grows, trying to induce flowering in the plants with a 14/10h schedule; it did not work, the transition to flowering extended up to 5 weeks.
There is a theory with this type of light; it is turned on 30 minutes before turning off the lights in the grow tent and turned off 30 minutes after. It is said that with this light, you trick the plant into feeling like it has slept 2 hours more 14/12h, etc. Currently, new LED panels include IR lights.
7) REUSED SOIL 🤷♂️
I had many problems with the plants when I insisted on using soil from previous grows, too much organic matter since my unused bio-fertilizers accumulated as organic matter; the plants showed signs of over-fertilization, root development issues, and excess moisture. It is also true that it was a time when I included many nutrients in the soil mixes, like guanos, meals, etc. Today my soil mixes are simpler, and I focus more on good drainage and the addition of micronized minerals, reserving dry amendments on the surface, like guanos, algae, meals, etc.
8) LIGHTS, ACTION! 💡💡💡😁
Currently, due to the time of year, I grow in mixed mode, indoor/outdoor; in the winter season, I used 3 grow tents and tried to save electricity consumption in each one, using timers that sequentially turned on lights and very calculated low consumption, averaging 35w per plant. I was not satisfied with the results; the buds, in general, did not gain density, and the harvests were very tight.
In the last two seasons, I changed the method; I set up a larger tent than I had and dismantled all the others, gathering my best lights in it, without worrying about consumption, which is still lower than when I was growing with 3 tents; the results of the winter/spring season have been noticeable, good harvests and buds as hard as rocks.
9) HOMEMADE CO2 GENERATOR 🖐️
I prepared three bottles with a solution of yeast, sugar, and gelatin; I kept them in a tent of 70x70x160cm, and I put a CO2 meter in the tent, which never exceeded 500ppm; for me, it was not effective. Maybe with another method where CO2 generation is much higher combined with the airtight closure of the tent could yield different results; I opt for good ventilation.
10) OZONE GENERATOR 💪😁
I have used it quite a bit for various things.
When the grow tent is empty, I use it, especially during times when there was a risk of mites or fungi appearing.
At the same time, I would put my mulch reserves in the tent to sterilize them.
Ozone is an excellent solution for calming strong odors.
11) THIS, DOES WORK... 💪😁👍
All the organic techniques I have explained in this diary, including those I have forgotten, are only possible if you have the last two components: Consistency and concentration!
INDEX - 3M ♲ ØЯGΛИIϾ SYИΣRGIΣS:
Week 1: Mulch and compost, repurposing
Week 2: Soil to soil
Week 3: MMS
Week 4: MMA
Week 5: Water
Week 6: Humate PK
Week 7: Bokashi
Week 8: Auxins
Week 9: Peels in the oven, Eggshell, Coffee, and perforated pots.
Week 10: Potassium soap
Week 11: Activated charcoal with MM
Week 12: MMA with pumpkin, carrot, and chitosan
Week 13: Lacto-fermented fruits and minerals
Week 14: Coconut fiber with MMA
Week 15: Ash water
Week 16: Ormus
Week 17: Fermented grass with MM 1/3
Week 18: Fermented grass with MM 2/3
Week 19: Fermented grass with MM 3/3
Week 20: HBO and Cream with Shea
SEE YOU LATER, MARIJUANA GROWING COMPANIONS... 😍🖐️
The key word is: Independence!! 😈🌲
=================================
🙄👇👌👍👉👉🖐️👨🌾👍👈👈👈🤜👌🙏👇🤩🖐️🏻
13 likes
15 comments
Share
156 comments
Sort by
popularity
popularity
newest
oldest

wrongleverkronk commentedweek 15y ago
This is very cool and I love to see it. Practices like this are things I think the majority of growers could stand to learn from - myself included - I've absolutely fallen in to the trap of commercial substrates and bottled commercial feeds even if I try to use organic certified products. I have many excuses why I'm still sticking with the techniques I've been using instead of learning new techniques, none of them are really good enough...
likes 6

deFharo commented5y ago
@wrongleverkronk, I understand the difficulty of moving from the "comfort" of predetermined fertilization tables from commercial nutrients to purely organic practices. Organic farming requires focus, discipline, hard work, and very little money; in return, you gain knowledge, independence, and a product with no buts! 🙋♂️👨🌾
likes 10

Kynareth commentedweek 05y ago
nice looking plants
likes 6
deFharo commented5y ago
@Kynareth, yes, they are dead!
likes 13

1Right_Angle commentedweek 05y ago
take it “From the Top” would you please!
I’ll take part in this piece of science and sharing. Thanks for taking the lead on this one DeFharo
likes 6
deFharo commented5y ago
@1Right_Angle, yes, I'm going to continue this grow diary, I don't know how many weeks it will last before the harvest, I hope many! 😁🖐️👨🌾
likes 10

homerjgangia commentedweek 05y ago
Good luck with your grow mate!💪💪
likes 6
deFharo commented5y ago
@homerjgangia, Guru, at least you could read the content!😎
likes 13

love_2_grow commentedweek 05y ago
Best of luck with your grow, buddy! 🌱🌱🌱
Your diary reminds me that I need to step up my mulch game as I only have cover crops so far.
likes 5
deFharo commented5y ago
@love_2_grow, thank you and welcome!✋👨🌾
likes 8

Mrs_Larimar commentedweek 05y ago
Thank you for this Lesson and bringing it " renewed" to us.
using Mulch is one of the oldest cutltivation methods for several uses.
many People dont know it
thank you and happy growing
likes 5

Northern_Ent commentedweek 204y ago
Nice work. Have you ever tried using malted barley as an enzyme source for flowering? The idea is from Clackamas Coot who was making sprouted seed tea from barley when a friend of his said ‘why not just use malt that you can buy at the brew shop?’ Malt is just dried sprouted barley which is a great nutrient source but also full of various enzymes including phosphatase which promotes the use of phosphate. I’ve been adding malt as a top dressing along with Gaia Green Power Bloom. Very easy to do and seems to be effective.
likes 4
deFharo commented4y ago
@Northern_Ent, I understand, do you grind the seeds before adding them to the soil? I was thinking about capturing those enzymes you mentioned, next time I make Solid Mountain Microorganisms, I'm going to add malted barley flour, it might work! I've been reading today about the enzymes present in barley and they're similar to those in natural honey, I often use it during the vegetative growth stage, the variety of enzymes and minerals is greater.
like 1
Northern_Ent commented4y ago
@deFharo, Clackamas Coot is/was an organic grower in Oregon I believe and you can find some discussions online. He’s quite a genius I think and he points out brewers are only concerned with amylase (?) but there are many other enzymes present. He claims shorter flowering time on the clones he’s been running for decades, and it’s super cheap and easy.
As for use, literally just a handful of grain which will break down on the topsoil allowing gradual release. If you use a high surface area malt flour it might be too much at once. One of the best parts is how easy it is to use.
likes 2
deFharo commented4y ago
@Northern_Ent, Yes, I'm going to get the malt and for now I'm going to incorporate it into the dry amendments I'm brewing with Microorganisms. I've used diluted brewer's yeast in water during flowering; people speak well of this mix, but I haven't been able to verify it because I've only used it occasionally.
Preparations with germinated seeds are always good for rooting seedlings and clones because they contain hormones, enzymes, and minerals. I extract auxins from germinated black beans; I've been doing this for years and it never fails. I use it together with honey to root clones and in a watering mix to promote the rooting of seedlings.
likes 4
Show More (2)

Jef79 commentedweek 144y ago
🥇👍.. Excellent tutorial again mate!..very informative and useful.. The science of nature is fascinating!.. Im sure their was a product out many years ago that u could drink the flavoured juice and use your urine as a feed!.. If i remember correctly they had it in 2 or 3 different bottles for different stages of growth,i never tried it though 🤣.. As always buddy, stay safe, keep free and best wishes for all your grows mate.. 😁👍🍀
likes 4
deFharo commented4y ago
@Jef79, thanks buddy... all for the cause!! There are some really interesting stories about using ash and urine as fertilizer or disinfectant, I even read that in ancient Rome they put a tax on urine 😜...
likes 7
Jef79 commented4y ago
@deFharo,-🤣👍
like 1

HirdoWeirdo commentedweek 164y ago
Love all this amazing knowledge 🔥
likes 4
deFharo commented4y ago
@HirdoWeirdo, thanks mate! Enjoy it!!🙋♂️👨🌾
likes 7

SPRAMOAH commentedweek 173y ago
@defharo As usually need your help, mate 🙌
I am going to make STEP TWO in pasture fermented with MM and would like to check some substitution before making it
Your original recipe is growdiaries.com/diaries/134104-grow-journal-by-defharo/week/786112:
- Fermented grass: 25g
- Solid Mountain Microorganisms (MMS): 10g
- Activated Mountain Microorganisms (MMA) in liquid form: 200ml
- Pasteurized milk: 25ml
- Molasses: 25g
- Chlorine-free water: 800ml.
- Fresh yeast: 5g.
I am going to substitute Chlorine-free water and Pasteurized milk with WHEY! I think its a good idea BUT better to check with you! Will document everything in my diary later!
THANK YOU for your help! 🙏
likes 3
SPRAMOAH commented3y ago
@deFharo, I have dried blood 12-0-0, bone meal 3-18-0, seaweed meal 2-0-3, Orgabic K booster 0-0-20 with some trace elements, azomite, volcanic rock dust.
Also, I will make BIO COCONUT
likes 3
deFharo commented3y ago
@@SPRAMOAH, you can make one with dried blood for vegetative growth; the fermentation process will convert the nitrogen into amino acids. With bone meal, you'll get a phosphorus-rich bio fertilizer, and if you add organic K booster to it, you'll have a magnificent PK bio fertilizer. With seaweed, you can make another bio fertilizer that will serve you throughout the entire grow, mainly at the beginning. And I always add a bit of ash or rock dust to all my bio preparations.
likes 4
SPRAMOAH commented3y ago
@deFharo, Thanks, 🙏. Will document everything in next few days.
likes 3
Show More (5)

sativaman commentedweek 95y ago
What an adventure! Nice update mate! I've learned the hard way about spider mites too! When I had my first small apartment, I went in the forest to cut myself a Christmas tree. Within a few days, I had them all over place! Thanks for sharing, and good to know not to use Diamatoceus earth in bloom. Cheers =)
likes 3

cheetah844 commented4y ago
Thanks I didn't see the other messages.
I should clarify I only mix Diatomaceous Earth on top of the dry surface soil. I've never sprayed it - that's very helpful for the future - thank you so much!
likes 2
deFharo commented4y ago
@cheetah844, I used diatomaceous earth by spraying it on the leaves during the flowering stage, it was really harsh to smoke that weed infused with the silica from the diatomaceous earth... I coughed a lot.
likes 7
sativaman commented4y ago
@cheetah844, Defharo explained 2 weeks ago about the DE effects on your lung
likes 3
Show More (1)
Northern_Ent commentedweek 174y ago
Cool. I used LAB last year as a foliar spray and some of it onto soil. My soil had too much K and not enough Ca/Mg, and the water had way too much sodium. The effect of this strong monovalent cation imbalance and LAB is whatever soil structure that was present in soil completely collapsed and the soil is NFG for the second season. All structure was shredded by the LAB and the runoff pH is over 9. So a complete disaster on the two most important soil properties; structure and pH. I didn’t know that cation exchange could actually result in such a large change in pH. And you should also try making FPJ with cannabis tops as that seems to be a great growth stimulant. Good luck.
likes 2
deFharo commented4y ago
@Northern_Ent, I live in Spain and write in Spanish, I lived for 3 years in Goiania, near Brasilia, until '99, I speak Portuguese and my wife is Brazilian. 🙋♂️😄👍
likes 8
Northern_Ent commented4y ago
@deFharo, I see that now in a diary you are in Spain. 😎 You say Leonardite is not soluble in water, but I find Humalite crushes easily into a fine powder that seems to dissolve readily. At least into a colloidal suspension which should be good. Is there another, plant availability sort of reason that you use NaOH? Mrs. Larimar had mentioned Humic acids and molasses so I’ve tried that a few times now and it seems really good and is very easy.
likes 3
deFharo commented4y ago
@Northern_Ent, what is not soluble in water are humic acids, there is organic matter in leonardite that does dissolve in water, it's also a mineral that easily turns to powder, humic acids can only be solubilized with an alkaline hydrolysis process, however, fulvic acids are easier to solubilize. I always include molasses in my watering to give energy to the substrate's microbiology so they can spread and work more, mixing molasses with any organic component for watering is always a good idea because you’re supposed to have microbiology in the substrate and they’ll be happy with a sweetened substrate 🖐️😁 I only use NaOH for creating Ormus, then I get rid of the sodium by washing the Ormus with fresh water. To make leonardite humate, I use Potassium Hydroxide, which once the hydrolysis process of the leonardite is finished, remains as potassium that is directly assimilable by the plants.
likes 7
Show More (10)

XII_XII_MrGreen commentedweek 204y ago
You are a LEGEND my friend 🌞🌞🌞🌞, thank you for this guide to organic greatness 🙌🏻😎😃😃
likes 3
deFharo commented4y ago
@XII_XII_MrGreen... thank you very much mate!.. let the game continue! 💪👨🌾
likes 3

Fayah_Burn commentedweek 164y ago
Very impressive! 👍👊
I am reading all of your posts and I am a fan of your techniques! There should be a reward on GD for people like you that make everything from scratch.
What are you putting more time into, growing or preparing your fertilizers, amendments, etc.? Maybe you should consider selling small batches to interested people in your area so you get more reward for the hard work.
I have a question, do you use Aloe Vera or kelp/seaweed in one of your recipes? I have lots of aloe but I'm not sure about quantities and the best way to process..
Cheers and have a good week! ✌️
likes 3
deFharo commented4y ago
@Fayah_Burn, thank you so much for your interest, buddy! I do all this to understand; there are many rewards in it, the experience, the knowledge, the weed I grow, but above all, the feeling of independence and freedom from the industry, and also to prove that I can grow marijuana my way. There's barely any impact on GD and no discussions about these techniques and growing methods, but since I believe in the socialization of knowledge, I'm writing it here and organizing myself in the process. GD has helped me a lot to structure my experience and has motivated me to move forward, although in reality, the ultimate goal is to train and acquire knowledge for the moment I have my own land... to cultivate my dreamed self-sufficient and rebellious garden!
The most time-consuming and effortful part of these grows is dealing with the pots, first with the substrate mixes, then I move them, turn them, transport them, and weigh them daily to know exactly the water consumption; I keep all the control on an Excel sheet, this is daily. Creating bio-fertilizers or dry amendments is much less labor-intensive and more enjoyable because one day you think of a new recipe, you make it, and you just have to wait the necessary time to try it, and then come other very interesting moments, which are the mixes for watering. All my organic formulas are compatible with each other, and since I believe in biodiversity, I make varied mixes with each watering.
I have several formulas with seaweed; it has been one of the materials that has been hardest for me to solubilize. At first, I tried with alkaline hydrolysis (FAIL), then with enzymatic hydrolysis (somewhat better), next I made lacto-ferments, and it improved. Today I solubilize the seaweed with Mountain Microorganisms in anaerobic fermentation; I use it as a bio-stimulant and microbiology inoculant, and I use it often. I've never used aloe vera, but if I did, I would do it the same way; in the end, it's about making the properties, vitamins, enzymes, hormones, minerals, etc., of a material assimilable for the plants, and through the bio-ferments, especially with the one I'm currently experimenting with fermented grass, where the large amount of enzymes from the grass makes the hydrolysis through fermentation more complete. I'm going to look for information I have stored about aloe vera in agriculture and I'll let you know.
Currently, I manage more than 30 different formulas of solubilized bio-fertilizers; I must have enough to nourish several hectares. It's not my intention to sell any of this because it's a hobby, and I already sell other things, but any GD grower who wants to spend a few days here, I can supply them for free, and in the process, we can smoke a bunch of organic joints... all for the cause!!✋👨🌾
likes 9
Mrs_Larimar commentedweek 134y ago
thank you again for another lesson!
likes 3
deFharo commented4y ago
@Mrs_Larimar, thank you. All for the cause!
likes 6
Mrs_Larimar commentedweek 114y ago
fantastic and educational stuff
likes 3
deFharo commented4y ago
@Mrs_Larimar, Thanks mate! 🙋♂️👨🌾
likes 6

Afrogerweed commentedweek 114y ago
With so much care it is normal that you have such beautiful and healthy plants 👌🏽.
HG✌️🏽
likes 3
deFharo commented4y ago
@Afrogerweed, the best for my girls!!
likes 5

CrazyHorse commentedweek 45y ago
Mate 😁 Dr. Strangelove wining competitions 😅 🙏 😇
likes 3
deFharo commented5y ago
@CrazyHorse, yes!, he's a beloved character, very logical!! 😁😁😁
likes 8
sativaman commentedweek 85y ago
An other good reading! Thank you Defharo! Fruits skins and peel is usually the part that contains the highest % of nutrients, and it is also the part that human don't like. Great idea!
likes 3
deFharo commented5y ago
@sativaman, thanks mate!🙋♂️👨🌾
likes 7
1Right_Angle commentedweek 75y ago
You know you have all the makings for a Book here.
Nobody has ever spelled these steps-out so … reasonably
Cheers dF
likes 3
deFharo commented5y ago
@1Right_Angle, thanks mate for being there! This organic practices diary is going to extend a lot, a lot. For now, I've only published basic things that can be done without too much difficulty, to gradually get into advanced practices. The truth is that it works really well for me to organize my notes, photos, and processes. 🙋♂️👨🌾
likes 7

the end.
Enjoying this diary? Follow for more updates!

Prefer the old Diary view?
Go back to the old Diary view