
White Widow Extrm Auto


Indoor
Room Type
Defoliation
weeks 5, 7
11 l
Pot Size
0.61 l
Watering
Start at Harvest
G
Germination4y ago

Apothecarian For Germination, I put them into a glass of water (24hrs), then into paper towel, then into Peat Plug
Sun Aug 7 - soaked seeds in water for 24 hours
- heat mat @ 25°C, tent heater at 25°C, humidifier at 65%
Mon Aug 8 - put seeds onto paper towel, in baggie, on plate, on heat mat
- I noticed a couple of seeds had their taproot slightly showing while in the water
Tue Aug 9 - all of the seeds have sprouted their taproots and will need to be planted into the plugs
- I ph'ed the water and put 20 plugs into the water
- About 4.5 hours later, every seeds taproot was out, with most being longer than 1/4 inch
- I got the plugs out of the water and into the tray. I used a drill to make the holes more accessible
- next time I will try to drill the holes while the plug is dry
- I put the seeds into the holes with the taproot facing down and used small bits of the plug to cover the hole
- I put the tray onto the heating mat, put the sensor beside a plug to ensure proper temperatures
- I sprayed the inside of the propagator with water and gave a final spray onto the plugs
- I adjusted the light to be on for 18 hours on and 6 off as this stage does require lights
Wed Aug 10 - almost every seedling has popped from the plug. A few have not
- I noticed that a good number of the seedlings had the husks still attached so I removed them with tweezers
- A couple of the seedlings had their cotyledons closed. Tomorrow, if they are not yet open, I will carefully open them with tweezers
Thu Aug 11 - I used tweezers to help open up the cotyledons on a couple of the seedlings that had not opened up yet
- I noticed that one seedling has an extremely short root, so I assume it may not make it
- I noticed that one seedlings root has significantly sprouted out of the plug
- after dealing with the cotyledons, I came back a few hours later and found that the seedlings that I helped seems to be doing good
- So far everything looks good. Their may be a couple of seedling that won't make it, but worst case scenario, should only be a couple
Fri Aug 12 - Every seedling is looking pretty good, just not the one with the extremely short root, but I'm still holding out hope
- I pulled a couple of plugs out and both were already showing roots coming out of the plug, I assume the rest are the same
1 like
comments
Share
Used method
Glass Of Water
Germination Method
2
Week 2. Vegetation4y ago

7.62 cm
Height
18 hrs
Light Schedule
25 °C
Day Air Temp
6.5
pH
No Smell
Smell
70 %
Air Humidity
22 °C
Night Air Temp
11.36 l
Pot Size
0.95 l
Watering Volume
60.96 cm
Lamp Distance
Apothecarian Wed Aug 17 - seedlings are looking good. The stunted one looks like it's trying
- a couple of the leaves are looking a tad yellow…just a tiny bit
- I feel that I should plant them into their grow pots on Aug 18th or 19th
- I would like to give the stunted one a bit more time to see how it turns out
- because of the plug, it should be okay to plant in soil, as the plug will help to keep it sturdy
Fri Aug 19 - transplanted seedlings and their plugs into square grow bags
- watered with Ph'd water
- the stunted one didn't have a long enough root, so I did not plant that one.
- all of the other seedlings looked good. About 3 of them had extremely long roots
- I will keep my eye on the seedlings with slight yellowing to see if they are now getting nutrients from the soil
Sat Aug 20 - The seedlings looked mostly unchanged after planting them, but it's been less than 24 hours
- because there are 19 plants, it's hard to tell if they are growing or not just by looking at them
- It feels very humid in there; which I think is in large part due to there being 19 plants
- The humidity is staying in the low 70's and the heat is steady at 25°
- The Inkbird sensor is slightly above the lights so there humidity might be reading higher since steam rises
- I can see that the fans are able to reach the seedlings, I can see a couple of them shimmering
- I feel as though the growth rate was really strong, then it slowed down a few days before I transplanted them
- They may have needed to be transplanted a few days earlier
Sun Aug 21 - almost all of the seedlings have a small amount of yellow on it.
- one some plants, it looks like ph fluctuation issues and on others it looks like nutrient burn
- I new there was a chance that the FFOF could be too nutrient rich for autoflowers
- it's about 50/50 for people saying that FFOF is too hot or no problems at all
- because the yellowing is not consistent on each seedling, it's hard to determine what the problem is
- it could also be remnants from when the seedlings were in the propagator
- I may try to adjust the soil since they were only just planted 48 hours ago
Mon Aug 22 - I bought 2 bags of FFHF to maybe adjust the soil
- too many things came up tonight so I didn't get around to adjusting the soil
- no matter what the problem is, the plants are still growing. I can see new leaves growing. It's not stopping the plants
Tue Aug 23 - I have to water the plants tonight but I also must decide if I'm going to start adjusting all of the soils
- I have decided not to adjust the soils and just water the plants, then check on the plants after a while from the watering
- I feel that if the problem persists or gets worse, I'll adjust the soil
- after a few hours from feeding the plants, the seedlings all look good, they are standing nice and tall
- just to note, when you water the plants at whatever stage, they immediately start to droop for a few hours
- If I don't end up adjusting the soil on these plants, I'll use the FFHF for the AK-47 seeds, that I'll be planting in a couple of months
1 like
comments
Share
3
Week 3. Vegetation4y ago


20.32 cm
Height
18 hrs
Light Schedule
25 °C
Day Air Temp
6.5
pH
No Smell
Smell
70 %
Air Humidity
22 °C
Night Air Temp
11.36 l
Pot Size
0.61 l
Watering Volume
60.96 cm
Lamp Distance
Apothecarian Wed Aug 24 - The seedlings are looking good. I can already tell that the plants are looking a tad taller, new leaves are forming
Fri Aug 26 - The seedlings look great. Everyday they are growing
- the soil is starting to dry out, but not as fast as I'd like. I feel that I'll be watering these plants every 5th or 6th day
- I felt that some plants aren't getting as much fan access as the soil is not drying out evenly, so I slightly lowered the fans
- the seedlings are not growing evenly, that that's to be expected with 19 plants on the go
- but even the slightly shorter ones are looking healthy and producing new leaves every day
Sat Aug 27 - normally, I would water the plants on the 4th day, but I think the soil needs to dry out a bit more. I'll see if moving the fans helped
- I churned the soil on the plants where the soil still looked wet
- some plants look dry and the grow bag feels light and some look wet still and are heavier than the dry ones.
- the ones that are still wet are not necessarily the ones that are 'land-locked'. Some are and some are on the outer edges
- It looks like churning the soil helped a bit
Sun Aug 28 - The plants seems to be drying out. I moved the dryer ones to where the wetter ones were and vise-versa to see if there areas
with low air flow
- I will say, I don't recall having this problem with the previous grow of photoperiod, however, the differences are that when I
transplant the photoperiod seedlings into their grow bags, they are 2 weeks old. Autoflowers are known to require less
water then photoperiods. I used to water the photoperiods once every 4 days. I think it may be every 6 days for autoflowers
- I noticed that the signals that I thought were nutrient burn or ph fluctuations are only on the leaves that were there when they were
first transplanted, but there are no signs of trauma on any subsequent leaves. No signals of deficiencies.
Mon Aug 29 - watered the plants.
- the soil did the same thing as the first time when using the large measuring cup and not the water can.
- the soil rises up and then settles, but does not get wet?!?
- I watered half of the plants with the measuring cup and the other half with the watering jug.
- I'll see which plants look better afterward…
- part of me thinks it's better to get all of the soil wet using the watering can
- part of me thinks it's better to let some of the soil stay dry so that nutrients don't get needlessly washed away
- it's hard to know which is better
- I did notice that the FFOF soil is different from the last 2 times I used it. There are more wood chips, more large pieces of wood that
had to be removed and there are pieces of something… it almost looks like small chunks of plywood…
- all in all, the plants are looking good…they are noticeably taller every day. I think just two plants are a tad smaller than the rest, but
they still look good though.
2 likes
4 comments
Share
4
Week 4. Vegetation4y ago


38.1 cm
Height
18 hrs
Light Schedule
25 °C
Day Air Temp
6.5
pH
Weak
Smell
72 %
Air Humidity
22 °C
Night Air Temp
11.36 l
Pot Size
0.61 l
Watering Volume
53.34 cm
Lamp Distance
79 PPM
CO₂ Level
Apothecarian Thu Sept 1 - I churned the soil in all of the pots. The side of the tent where I used the watering can, the soil was more wet than the other side,
but not to any extreme degree.
- The plants are growing fast. The leaves are all looking healthy.
- I'm expecting to not have to use nutrients or at least not much since they are autos and are in Fox Farm Ocean Forest soil.
- So far, I'm not seeing any nutrient burn from the FFOF which has happened to other people.
- I expect I may have to use CalMag at some point, and maybe nutrients when getting closer to the end, but we'll see.
- I normally flush the plants when there's 2 weeks left and then just use water from that point forward.
- the 2 weeks is determined when 50% of the trichomes are clear and 50% are milky, that way, in 2 weeks time, all of the
trichomes will be milky. I've read that when all trichome are milky, that is the peak strength.
- for a more couch-lock high or to be able to sleep, let the trichomes go til they are amber.
Sat Sept 3 - I've decided to put the taller plants on one side and the shorter ones on the other so that the grow lights will the at the most appropriate
height for the tall ones and the shorter ones.
- the tallest plant is 7 inches high and the shortest plant is 4.5 inches high. All plants are looking great! Even the shorter ones have great
leaves and are nice and full.
- I also noticed that it didn't seem to matter about watering the plants with a 1 Litre measuring cup or a watering can. Both sides of the tent
had an equal number of tall and short plants. The style of watering didn't make a difference. (Mon Aug 29)
- I will probably just use the 1 Litre measuring cup, it's faster and make less of a mess.
- my grow lights have a dimmer on it, so I increased the light intensity as is common to do as the grow progresses
Mon Sept 5 - I watered the plants with ph'ed water.
- all of the plants are looking great. No signals of deficiencies.
- the tallest plant is 12 inches and the shortest plant is 6 inches.
- as mentioned before, I separated the tent making one half the tallest plants and the other half the shortest plants.
- don't really know why half grew tall and the other half stayed short.
- but the good thing is even the shorter plants look great.
- it's my first time growing autoflowers so it's exciting. I assume in about 1 weeks time I'll be seeing the white pistils forming
Tue Sept 6 - Today is the end of the 4th week and the beginning of the 5th week.
- I could smell a faint but noticeable aroma when I came home
- I'm not sure, but I think I can see the very beginning of the white hairs of the pistils
- I noticed the plants had the tips of the leaves pointing down, do "the claw"…just the new growth, not the older growth
- The reason for the tip of a leaf doing "the claw" is nitrogen toxicity
- I feel this is happening due to the fact that the plant is leaving the vegetative phase and is now requiring less Nitrogen
but the plants haven't used it all up in the soil, so it's maybe causing some issues
- I feel that I may need to flush the soil, but I also don't want to do that as I'd also flush away phosphorus and potassium
- I think I may need to water using the watering can. As mentioned back on Aug 29th, I did half of the plants with the
watering can and the other half with the 1 Litre measuring cup. I have noticed that the plants that were
watered with the watering can have less of a claw effect, some plants don't have the claw happening.
Where as the other side, all of the plants have doing the claw.
- what I noticed when using the watering can, is that the soil gets more saturated and it is probably doing a very slow flush
- Plants start off needing more nitrogen, less phosphorus and less potassium, as the plant processes through its
living phases, it will need less nitrogen, then more phosphorus, then slightly more potassium, then it will need
even less nitrogen, less phosphorus and more potassium
- the only unfortunate part is that the plants are not scheduled for another watering until Sunday. I'm going to churn the soil in the
plants to hopefully dry out the soil faster. I'm not 100% sure, but I've read that plants cannot absorb as much nutrients when the soil is dry
Wed Sept 7 - The churning worked! The plants are going back to normal. The claw is now way less prominent and some plants don't have it any more at all.
- I'm not out of the woods yet though. All I did was stop the plants from absorbing too much more…but the nitrogen is still in the soil.
- I'll be watering on Sunday using the watering can and hopefully flush away more of the nitrogen.
- I also noticed today that the plants were looking a little crowed as they are growing slightly beyond the growbags. So I added more flood trays
and separated the plants as best I could.
- I know that the window of opportunity to do the defoliation is any time now. So, once I do the defoliation, I will probably be able put them back
into close quarters with each other.
- I may also use a trellis net once the defoliation is done
1 like
comments
Share
5
Week 5. Flowering4y ago


53.34 cm
Height
18 hrs
Light Schedule
25 °C
Day Air Temp
6.5
pH
Normal
Smell
60 %
Air Humidity
23 °C
Solution Temp
23 °C
Substrate Temp
10 °C
Night Air Temp
11.36 l
Pot Size
0.61 l
Watering Volume
53.34 cm
Lamp Distance
79 PPM
CO₂ Level
Apothecarian Sat Sept 10 - Defoliated the plants. I always get anxious when doing this
- Because this is my 1st time growing autoflowers, I wasn't sure exactly when to do it. Photoperiods, you control when it goes into flowering.
so you're not guess when it's going into flowering.
- Also, in my past grows, I had a tendency to do two defoliations…the first one I would always hold back and be overtly conservative in my decisions
on what to trim and what to leave. The second trim, I would trim a lot more and actually get it to where I wanted it in the first place
- Also, when you defoliate, the plants go into shock for about a week, so it'll be a week of waiting to see if I over defoliated or not
- I totally feel that I did over defoliate, but my last grow, I defoliated the same way and it was the best results I have had
- I'm aware that it was at the extremely early part of flowering. The pistils just showed up, but I chose to do the defoliation now since autoflowers
are on a much faster schedule
- It was scheduled to water the plants tomorrow, but I felt it was best tonight… I always water the plants after defoliating...Don't know if it helps
with the plant shock or not, also, a couple of the plants had a leaf or two that was showing signs of needing water
Tue Sept 13 - The plants never seemed to have gone into shock as is common with photoperiods. Photoperiods usually spend a week in a state of shock.
- these autoflowers seemed to still be stretching and growing even after 1 day from defoliating.
- underneath the white pistils, the plants are now forming the beginning of buds
- I feel I may have to do one more very light defoliation. Fan leaves that I left on the plant have already grown and are now interfering with bud sites
- If I do decide to defoliate again, it'll be just a few leaves here and there… nothing as extreme as last time
- I may add nutrients to the next feeding. But if I do, it'll be an extremely light amount of each one… just to see how the plants takes it.
- I think I may have noticed a slight magnesium deficiency, but I'm not sure. It's amazing how thus far there haven't been any outwardly
obvious signs of a deficiency...nothing glaring
- I'm hoping that a very small amount of nutrients won't cause any undue harm.
- I can't stress enough how light I will go on the nutrients
- the tallest plant is 27 inches. It is about 6 inches above the next tallest ones. I wish it wasn't as tall…I feel I may experience some light burn.
- If I accommodate this plant by raising the lights, the other plants will be a bit out of my ideal range from the light. I'll keep an eye on it.
Wed Sept 14 - I decreased the humidity as you normally would as the grow progresses into flowering. However, I noticed that the humidity level was still hig
- I noticed that the cover on the carbon filter looked a little off-white, so I took it off and swapped it with a clean one.
- the cloth cover was so sticky!
- a little while late when I went to check on things, the humidity lever was sitting right where I wanted it.
- I'll have to be sure to keep an eye on the cover to ensure it gets changed when it gets clogged.
likes
comments
Share
Used techniques
Defoliation
Technique
6
Week 6. Flowering4y ago


71.12 cm
Height
18 hrs
Light Schedule
25 °C
Day Air Temp
6.5
pH
Normal
Smell
58 %
Air Humidity
23 °C
Solution Temp
23 °C
Substrate Temp
10 °C
Night Air Temp
11.36 l
Pot Size
0.61 l
Watering Volume
53.34 cm
Lamp Distance
79 PPM
CO₂ Level
Apothecarian Fri Sept 16 - watered the plants with a very low dose of nutrients. I've ready that autoflowers don't need many nutrients especially if you're using nutrient rich soil
- I will definitely have to do another defoliation. The plants have really filled out again. There already new fan leaves that are now blocking bud sites.
- But I will wait until the buds form a bit more… so probably next week.
Sat Sept 17 - I took a look at the plants this morning and a couple of the plants, oddly…the taller ones, were drooping.
- I thought at first that it may have been nitrogen toxicity. Another option was the normal drooping that happens when I first water the plants.
but since that as about 10 hours earlier, I didn't think it could still be drooping from that.
- about 12 hours later, I checked on them again and none of the plants were drooping.
Mon Sept 19 - I will lower the fans down as I don't think there is enough air movement at the plant level
- I think I will continue to use nutrients for the plants in the hopes that it will increase the yield.
- It would have been nice to know if FFOF could have carried the plants through the entire grow, but the real goal is to get the most from
each plant, so if the plants are accepting the nutrients, then it will probably increase the yield
- I will probably do another defoliation as new fan leaves have sprouted and are now blocking bud sites. But I shouldn't have to defoliate too much
just the odd fan leaf or so per plant.
likes
comments
Share
7
Week 7. Flowering4y ago


71.12 cm
Height
18 hrs
Light Schedule
25 °C
Day Air Temp
6.5
pH
Normal
Smell
58 %
Air Humidity
23 °C
Solution Temp
23 °C
Substrate Temp
10 °C
Night Air Temp
11.36 l
Pot Size
0.61 l
Watering Volume
53.34 cm
Lamp Distance
79 PPM
CO₂ Level
Nutrients 4

TriPart Micro
1.189 mll

TriPart Grow
1.189 mll

TriPart Bloom
1.717 mll
Apothecarian Fri Sept 23 - I watered the plants with nutrients. I had originally planned to do it the day before but got too busy. I noticed that a few of the plants had leaves that
were drooping… the underwatering droop. I should have watered them yesterday as planned.
- I had a feeling that I needed to water the plants 1 day earlier than what I was doing. Now that the plants are fully grown and flowering.
- for my photoperiods, I usually water every 4 days. I was originally doing every 6 days for these autoflowers.
- I have it planned to water them on Wed Sept 28, but if they need it on Tue, then I'll water it then.
Sat Sept 24 - I defoliated the plants again. I know, they look like I hacked them all to pieces… Every time I defoliate, I feel like I screwed up all of the plants.
But that's just the perspective you get when you go from lots of foliage to way less.
- I do think that it is a definite possibility that I'll need to water the plants by Tue Sept 27. While I was defoliating, I noticed that the soil was a lot
dryer than before only one day after watering.
Mon Sept 26 - Plants look good. They look slightly fuller since the send defoliation on Sat Sept 24th.
- The plant soil looks and feels completely dry now. I'll water them tomorrow
Tue Sept 27 - I watered the plants with PH'ed water only. Some of the plants looks like they didn't want any nutrients for a while. There were signs that were
very subtle that they didn't need nutrients.
- One plant was drooping…the nitrogen overload droop. And a couple other plants had leaves that were getting a little thin and darker green,
which is a sign of nutrient overload.
- So I figured a feeding or two with just PH'ed water would be good.
1 like
1 comment
Share
Used techniques
Defoliation
Technique
8
Week 8. Flowering4y ago


91.44 cm
Height
18 hrs
Light Schedule
25 °C
Day Air Temp
6.5
pH
Normal
Smell
58 %
Air Humidity
23 °C
Solution Temp
23 °C
Substrate Temp
10 °C
Night Air Temp
11.36 l
Pot Size
0.61 l
Watering Volume
53.34 cm
Lamp Distance
79 PPM
CO₂ Level
Nutrients 4
TriPart Micro
0.925 mll
TriPart Grow
0.925 mll
TriPart Bloom
1.057 mll
Apothecarian Wed Sept 28 - Plants are looking good. The plant that was doing the nitrogen overload droop is now almost fully healed
- I will probably feed the plants with just water again… I'll decide if I will feed with nutrients in the future or not for this grow
Thu Sept 29 - Plants look great…they almost look greener somehow!
- Soil looks pretty dry, I may water the plants tomorrow instead of Saturday, Oct 1 as planned
- I'll feel the soil and pick up the grow backs and see if they are devoid of moister.
- the flowers look to be growing. The nuggets are getting larger and soon, they will start to bulk up.
Fri Sept 30 - plants are looking great. Decided to water the plants tomorrow as scheduled.
Sat Oct 1 - watered the plants the just PH'ed water. Plants are look fantastic!
Sun Oct 2 - took a look at the plants… the little buds are starting to clump up… some of the taller plants the buds are still far apart, but they will clump up eventually
- I've noticed that the shorter plants, the pistil hairs have already started to thin out and turn brown. The taller plants are a little behind for some reason.
- On the 2 tallest plants, there was the slightest signal of heat burn… so I increased the distance between the lights, but It's not possible to go too high
as other plants around them that are shorter could end up not getting enough light. But as mentioned, the heat burn was very minimal. I will keep a
close watch on it though.
Tue Oct 4 - I watered the plants with nutrients. I made that decision based on seeing 3 leaves on 3 different plants signs of nutrient deficiencies
- The one thing that I noticed about the leaves/plants shows those signs… they were all on the tallest plants. I assume the taller plants use up more
nutrients due to their height.
- I also gave nutrients to the shorter half of the tent…it's possible that I maybe could have just given that half PH'ed water, so I'll see how those plants
do. Maybe next time I'll give nutrients just to the taller plants and PH'ed water only to the shorter plants.
likes
comments
Share
9
Week 9. Flowering4y ago


91.44 cm
Height
18 hrs
Light Schedule
25 °C
Day Air Temp
6.5
pH
Normal
Smell
50 %
Air Humidity
23 °C
Solution Temp
23 °C
Substrate Temp
10 °C
Night Air Temp
11.36 l
Pot Size
0.61 l
Watering Volume
53.34 cm
Lamp Distance
79 PPM
CO₂ Level
Nutrients 4
TriPart Micro
1.585 mll
TriPart Grow
1.585 mll
TriPart Bloom
2.378 mll
Apothecarian Wed Day 57 - The plants are all looking good.
- the tallest plant has leaves that are not as green as the others. Other than that, there is just a random leaf or two that are not green.
- Given where we are in the grow, I assume it's a potassium deficiency as opposed to a nitrogen or phosphorus.
- The seeds are estimated to be 80 days from germination to harvest. And today is day 57, leaving an estimated 23 days.
- I know not to base everything on a numbers of days, it's just a good estimate schedule.
- So, probably next feeding, I probably increase the potassium amount. I don't think I'll increase the other nutrients…. Just potassium
Sat Day 60 - Watered the plants with nutrients.
- I followed the medium feeding amounts but for the Bloom, I did the aggressive amount. As always, I added CalMag as well
- We'll see tomorrow or the day after if that was a mistake or not
- Some plants are further along than others. In the next few weeks, I may have to harvest the early ones and keep letting the others catch up
- about half of the plants, the pistils have turned brown and are thin, while others the pistils are still white and thick.
- Also, the plants that are further along, the buds and clumping nicely together, where the others are not at that stage yet
- I'm not sure if there is a way to make the other plants catch up faster.
- could you get rid on smaller bud sites that will not grow into much?
- could you feed more potassium?
- could you increase the light cycle?
- Today was the first day that I really noticed the clumping of the buds on the plants that are further along
- I still have an estimated 3 weeks… some plants may need a couple of more weeks.
Tue Day 63 - Fed the plants with nutrients. I used the aggressive quantity based on General Hydroponics feeding chart
- I will start to feed the plants every 3 days as I noticed that a couple of the plants were showing signs of underwatering even though that sign was
not there yesterday
- If going by the 80 days from germination to harvest, there would be about 17 days left. But when accounting for the slow-downs caused by
transplanting and the 2 defoliations, I feel that those events add another 2 to 3 weeks.
- I'm really hoping the buds start to bulk up even more. This is the first time growing autoflowers.
- It's too late now, but next grow I'll be adding nutrient supplements to the grow such as Koolbloom and Diamond Nectar
1 like
comments
Share
10
Week 10. Flowering4y ago


91.44 cm
Height
18 hrs
Light Schedule
25 °C
Day Air Temp
6.5
pH
Normal
Smell
50 %
Air Humidity
23 °C
Solution Temp
23 °C
Substrate Temp
10 °C
Night Air Temp
11.36 l
Pot Size
0.61 l
Watering Volume
53.34 cm
Lamp Distance
79 PPM
CO₂ Level
Nutrients 4
TriPart Micro
4.227 mll
TriPart Grow
4.227 mll
TriPart Bloom
6.34 mll
Apothecarian Sat Day 67 - Fed the plants with nutrients. Used the aggressive feeding schedule.
- I noticed a few days ago even after feeding the plants the aggressive nutrients last feeding that the plants were showing some signs of nutrient deficiencies
- If I still see signs of deficiencies after this feeding, I'll increase the aggressive feeding my 1 and a half times.
- My last harvest was photoperiods and at one point I was giving the plants double the aggressive feeding.
- I am seeing the colas bulking up which is nice… I feel that I've got a few weeks remaining so I'm looking forward
Sun Day 68 - Plants look good…no signs of nutrient toxicity. Next feeding I'm planning on increasing the nutrients to 1.5 the amount if I don’t see any toxicity
between now and then.
Tue Day 70 - Fed the plants double the amount of nutrients suggested on the aggressive feeding chart. I know that sounds like a lot, but my last grow, I literally
had to do that so the plants would stop showing deficiencies! They were producing buds like crazy and loving all of the nutrients.
- I decided to do this because my plants are showing various signs of nutrient deficiencies, even after aggressive feeding chart levels of nutrients.
- I will keep an eye out for any signs of nutrient toxicity.
- there are a couple of plants that still have white pistils and have barely begun to turn brown, where other ones probably need to be flushed.
- in the next few days, I will start to look at the trichomes of each plant and decide if I'm going to flush some and keep feeding others andif I'm
going to hag dry some and keep growing others..
- would have been nice if every plant grow the same way.
- I wasn't using grow diaries last harvest so I have no photos to compare the plants at the time I flushed them to what these plants look like.
But I still took notes just like these.
likes
comments
Share
11
Week 11. Flowering4y ago


91.44 cm
Height
18 hrs
Light Schedule
25 °C
Day Air Temp
6.5
pH
Normal
Smell
50 %
Air Humidity
23 °C
Solution Temp
23 °C
Substrate Temp
10 °C
Night Air Temp
11.36 l
Pot Size
0.61 l
Watering Volume
53.34 cm
Lamp Distance
79 PPM
CO₂ Level
Nutrients 1

pH Balance Down
0.317 mll
Apothecarian Day 71 - The plants look good. No signs of nutrient burn. It's probably early, so I'll keep checking on it.
- I just check the trichomes and I saw that a couple of them are amber! I usually like to flush the plants when 50% are clear and 50% are cloudy
- I will flush the plants tomorrow, then a PH'ed watering in 3 or 4 days, then a couple days after that, they will be chopped down and hung dry
Day 72 - I flushed the plants with a whole lot of water. I literally put the plants into the laundry tub, and let the water pour over the soil and drain the
traces of nutrients.
- I'm conflicted over the square grow bags. When flushing the plants, I noticed that ever after a ton of water was poured over the soil, a lot of soil
in the corners below the surface was still dry. I find that very perplexing! I didn't notice that happening with the circular grow bags
- Another thing that happened while do the flush, was the plants started to lean over. This is due to the plug that the seeds were germinated in.
- I do like germinating seeds in the propagator as it is easier to keep them warm and humid.
- I feel that next time when I plant the seedlings with their grow bags, I'll need to bury the seedlings and plugs deeper into the soil. Maybe were
the plug is below the soil top.
- Another thing I need to get is bamboo plant stakes. I never needed them before with the photoperiods and now that it's winter, they are not easy
to get a hold of.
Day 76 - watered the plants with PH'ed water. I'd say about half of the plants had soil that still looked damp from the soaking I gave them during the flush
but I watered them anyways.
- I gave each plant twice the amount of water I normally give to ensure a flush of the nutrients as this will be the last watering before I cut them down
Day 77 - Plants are looking good. They are totally unchanged since just before the flush.
- I'll be chopping down the plants in two days, then hanging dry.
4 likes
comments
Share
12
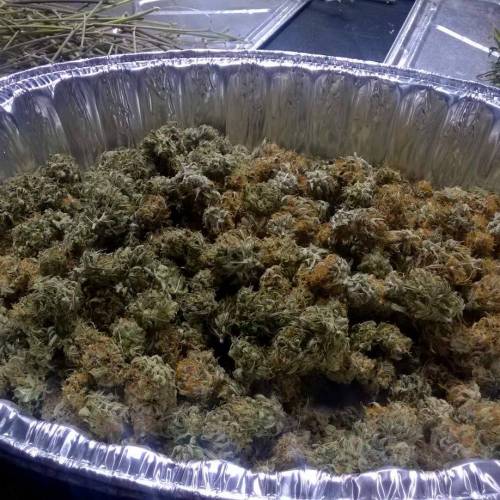
Week 12. Harvest4y ago
Happy Harvest Day!


10/10
Rated
the plant finished up even faster than expected. I love this plant and I love the body high you get when you make edibles out of it.
Show more
Translate
Spent 72 days
Ger Veg Flo Har
99.4 g
Bud wet weight per plant
24.85 g
Bud dry weight per plant
19
Plants
9.75 m²
Grow Room size
Easy
Difficulty

Creative, Euphoric, Happy
Positive effects

Dry mouth
Negative effects

Depression, Pain, Stress
Medical effects

Earthy, Pungent, Woody
Taste
Height
Day air temperature
Air humidity
PH
CO2
Light schedule
Solution temperature
Night air temperature
Substrate temperature
Pot size
Lamp distance


Apothecarian Thu Oct 27 - Chopped down the plants. Hung them up in the tent to dry.
- I adjusted the heat to 21°C and the humidity level to 62%
- I'm planning on leaving them like this for 1 week to 10 days
- One thing I noticed with these autoflowers, the taller plants appears to have less buds
- when I process the plants, I'll be measuring the length and then tracking the amount of buds per plants so I'll be able to analyze the if the shorter
plants had more buds than the taller ones or not. I will post the results
Fri Oct 28 - I emptied the soil from the grow bags and dumped it on my front lawn. I have a low spot at my house were water will trickle towards my house
instead of away from the house so I thought it would be a great opportunity to try to add soil to that spot to raise the ground
Sun Oct 30 - I rinsed off the white trays as they were not looking so white after this grow. I would like the trays be back to white before the next grow in order
to ensure the maximum light reflection from the floor.
Mon Oct 31 - buds don't feel dry. I know it's early. I feel that it will take at least 2 weeks to reach the right level of dryness before being ready for processing
Fri Nov 4 - the buds started to feel more dry.
Tue Nov 15 - The buds are smelling great! The turpenes are really developing nicely and the aroma coming off the buds in fantastic.
- I'll be processing the plants tomorrow. I'll weight the final product and get it into the curing buckets.
- I know that I let the plants hang dry for 3 weeks which seems long… it was partly because I got sick for a week and also, the longer
the plants stay in this state, the more the turpenes develop. Plus, the humidity and temperature I keep the plants drying in are the same that
I keep the plants curing in. So it really is no different.
Wed Nov 16 - I processed 7 of the plants. It took hours. I still have 12 more plants to go. I decided to order myself one of those bud trimming bowls.
- the bowl arrived a few days later. I did notice that all of the videos online of people using them, their weeds was always before drying.
- Although the bowl came with blades meant for dried bud as well, I do feel that it'll do better when the weed is freshly chopped.
- I tried one plant in the bowl. I cut the bud from the stems. I weighted it first, it came to 26 grams. After using the bowl, the weight was 17.5 grams
- when the first 7 plants were processed, I got 28 grams of shake from them after trimming by hand. Which averages to 4 grams per plant, but the bowl
took about 8.5 grams of shake. I do feel that the bud were kind of on the brittle, crumbly side and noticed that the shake at the bottom of the bowl looks like a
few of the buds had gotten mulched.
- I wasn't surprised, but I'm not dissapointed, because I have seen how good the bowl does with freshly harvested bud.
- I will finish the plants. I'n not worried about some of the buds being crumbly as they will tighten up once they're in the curring buckets
- So for the next harvest, I've decided to process the buds the same day that I chop down the plants. So, I bought a netted drying basktet with 4 tiers.
- I do believe that this will save me literal days of bud trimming by hand.
Tue Nov 22 - I harvested the rest of the plants. Now I will give you the analysis on the plants height and weight of buds.
- I had 19 plants. The shortest one was 10.25 inches and the tallest one was 32.25 inches the average height was 22.5 inches
- The total dry weight of all the bud was 472.13 grams, a little over 1 pound.
- the shorter plants had a better gram to height ratio than the taller plants. However, the taller plants produced more buds than the shorter plants.
- I also got 79.96 grams of shake from this harvest. This will make some incredible bud-butter.
- I did an analysis of my cost per gram.
- soil - 125 (6.58 per plant)
- nutrients - 14.75 (0.78 per plant)
- seeds - 162.14 (8.53 per plant)
Total Cost 301.92
Cost per Plant 15.46
Total Cost per Gram $0.64
- after processing, I put the buds into my curing buckets. I created an auto-curing system using buckets. The bottom of the bucket has and intake valve
and the top of the bucket has an exhaust valve.
- I have an air-compressor and it turns on automatically twice per day for 5 min 12 hours apart and it fills the buckets with air and when the bucket
get pressurized, the air will exhaust out the top thus exchanging the air.
- There is a hope filled with holes at the bottom of the bucket so when the air-compressor comes on, the air goes up through all of the bud.
- the lids have o-rings and they create a nice seal so air doesn't leak out except out the exhaust valve.
- here is a link to the instructions I followed to create my own auto-curing system.
Curing Bucket Guide - 2020 - Final.pdf (hubspotusercontent00.net)
- it is truly a great system. No dealing with glass jars and having to open them and shaking it around. I have bud from a previous grow that has been in
the curing buckets for 6 months and it's as good as the first day!
7 likes
2 comments
Share
Equipment Reviews


7 comments
Sort by
popularity
popularity
newest
oldest

Polygus commentedweek 34y ago
All the best to your girls on thier journey to frostines 🌱💚🍅
like 1

amsterdammarijuanaseeds  commentedweek 34y ago
Happy growing!!! You're gonna love this White Widow!! 🙌🚀
likes

Apothecarian commented4y ago
@amsterdammarijuanaseeds,
This is my 3rd grow. Every seed I've purchased has been from AMS. Your prices, selection, payment options and delivery are the best!
I already have 2 more grows planned immediately following this grow and I've already ordered the seeds.
Thank for being the best seed bank!
The Apothecarian
like 1
amsterdammarijuanaseeds commented4y ago
@Apothecarian, Thanks so much for the kind word!! 🤗🤗
likes

Majeranek86 commentedweek 124y ago
Well done keep it up 🤩💪
likes

NONSENSE commentedweek 124y ago
Congratulations!
Nice result with so good strain from AMS😇
likes

Ibanhead commentedweek 74y ago
Goodluck with your grow bro! 💪
likes

the end.
Enjoying this diary? Follow for more updates!


Prefer the old Diary view?
Go back to the old Diary view