
Sour Jealousy - First coco grow


Tent
Grow Tent 120x60x150
Higarden

Fan
TD 160/100 N SILENT

Filt
K1600 Industry Line

Indoor
Room Type
LST
weeks 3-6
9 l
Pot Size
Start at 7 Week
G
Germination1mo ago
Nutrients 1
Calmag
1 mll
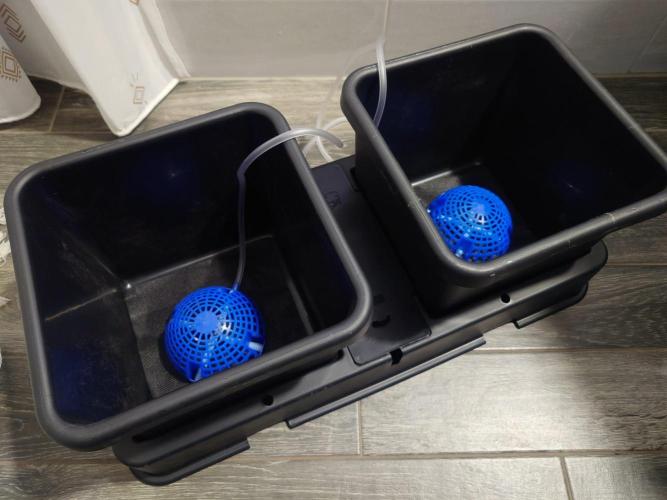
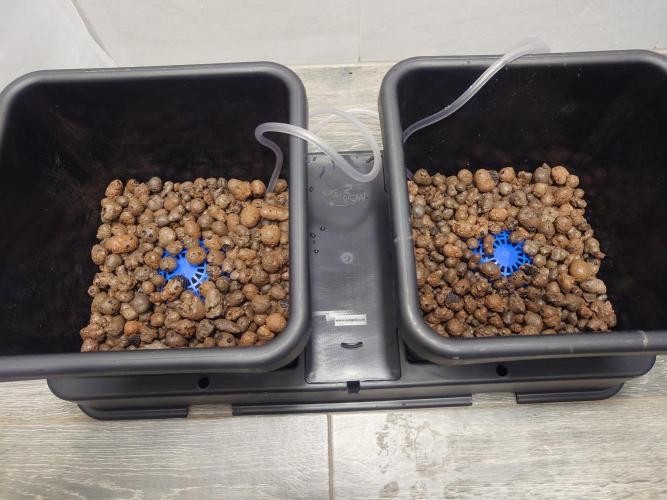
macejjr People recommended using AutoPot to eliminate watering issues, so I want to give it a try. I bought 2 x 8.5l pot kit, but I intend to use only one. I wanted 2 originally, but It would be hard to manage two plants in small 60x60 cm tent. So I bought also spare bottom for single AutoPot.
2 likes
comments
Share
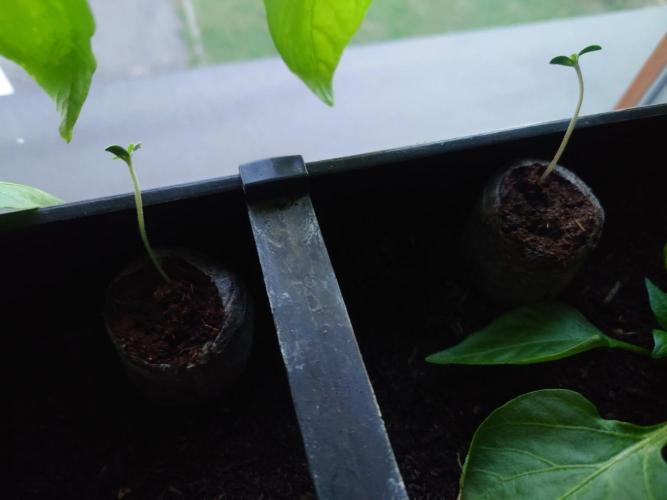
Used method
Peat Pellet
Germination Method
1
Week 1. Vegetation1mo ago
10 cm
Height
18 hrs
Light Schedule
24 °C
Day Air Temp
5.8
pH
350 PPM
TDS
80 %
Air Humidity
23 °C
Substrate Temp
22 °C
Night Air Temp
8.5 l
Pot Size
0.5 l
Watering Volume
50 cm
Lamp Distance
Nutrients 1
Calmag
1 mll
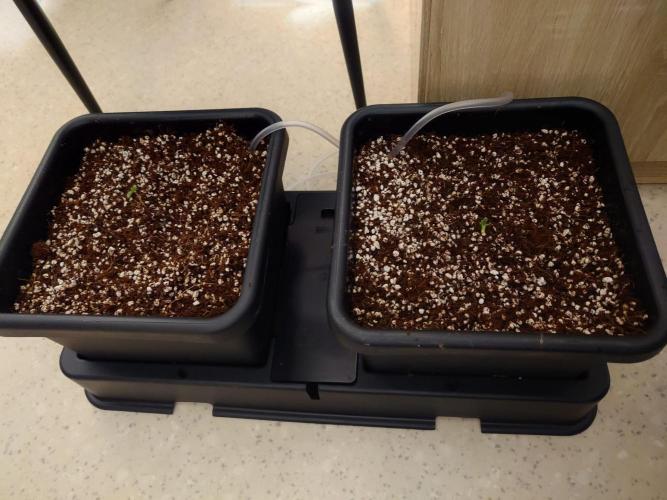
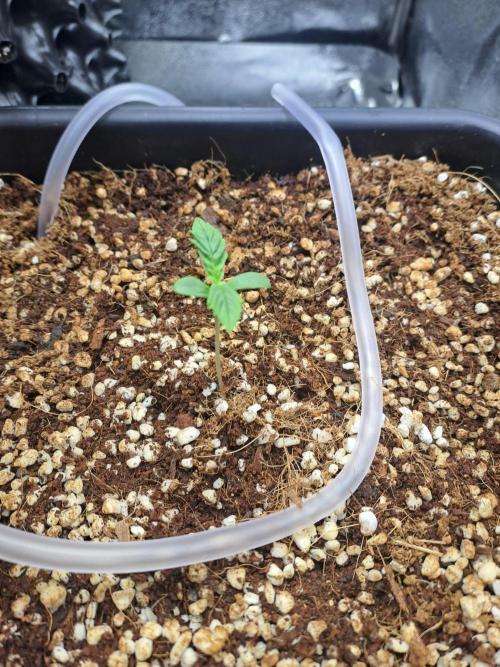
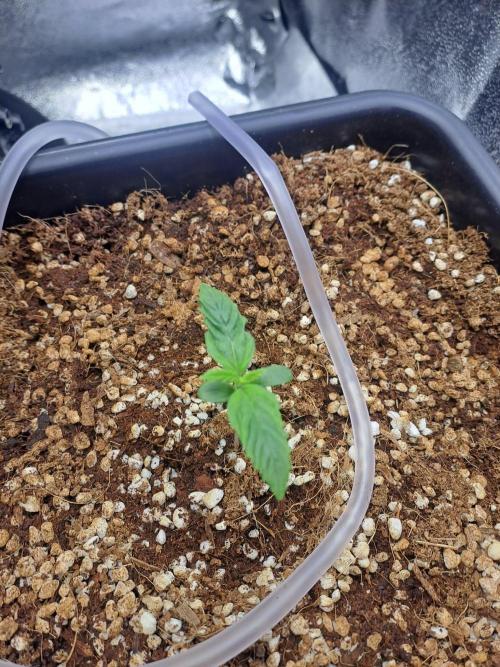
macejjr It's growing quite fast. Light is dimmed at 60% and is about 50 cm from the top as I still grow previous run in the same tent.
2 likes
comments
Share
2
Week 2. Vegetation1mo ago
10 cm
Height
18 hrs
Light Schedule
24 °C
Day Air Temp
5.8
pH
350 PPM
TDS
80 %
Air Humidity
23 °C
Substrate Temp
22 °C
Night Air Temp
8.5 l
Pot Size
0.5 l
Watering Volume
50 cm
Lamp Distance
Nutrients 8
Calmag
0.5 mll
Silicone
1 mll

Coco Forte A
0.3 mll
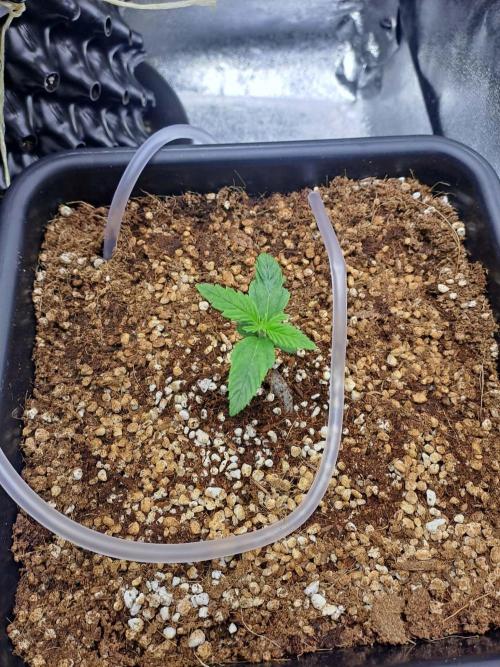
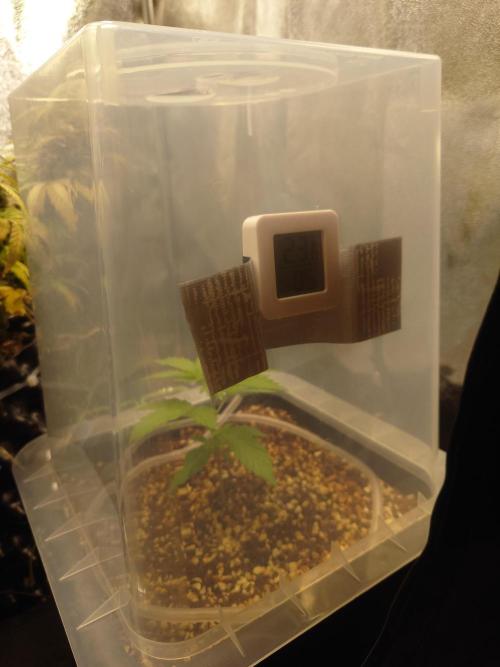
macejjr I bought cover for autopot to keep high humidity inside. Looks like plant likes it and it sped up the growth significantly.
Feeding using coco chart from BioNova at the 25% of the strength - I rewrote the chart it into excel chart so I don't have to calculate everything every watering. Coco forte A + B and 25% strength, simulators at the full strength.
4 likes
1 comment
Share
3
Week 3. Vegetation1mo ago
30 cm
Height
18 hrs
Light Schedule
24 °C
Day Air Temp
5.8
pH
No Smell
Smell
500 PPM
TDS
50 %
Air Humidity
24 °C
Solution Temp
24 °C
Substrate Temp
22 °C
Night Air Temp
8.5 l
Pot Size
0.5 l
Watering Volume
31 cm
Lamp Distance
Nutrients 8
Calmag
0.5 mll
Silicone
1 mll
Coco Forte A
0.3 mll
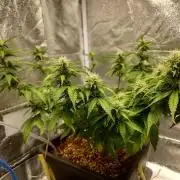
macejjr After finishing this week, AutoPot cover is already quite small for the plant, therefore I removed it and started training the plant - bent the stem.
Still feeding with weak nutes every 2 days top fed - I will switch to reservoir feeding in upcoming days. I've also bought new tent - 120x60x150 cm. The height is quite small, but it's enough for my microgrows + we will be able to put more seedlings for our garden next year + it was pretty cheap. There is still no fan inside as carbon filter stayed in the previous tent, which is now used for drying my first grow.
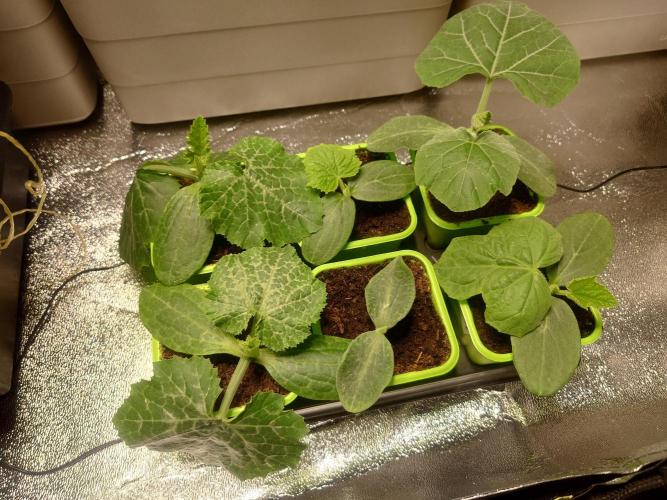
I've also put cucumbers, zucchini and pumpkin seedlings inside before I put them outside.
3 likes
1 comment
Share
Used techniques
LST
Technique
4
Week 4. Vegetation25d ago
30 cm
Height
18 hrs
Light Schedule
24 °C
Day Air Temp
5.8
pH
No Smell
Smell
550 PPM
TDS
50 %
Air Humidity
24 °C
Solution Temp
24 °C
Substrate Temp
22 °C
Night Air Temp
8.5 l
Pot Size
35 cm
Lamp Distance
Nutrients 5
Silicone
1 mll

SHOGUN CalMag
1 mll

Ph- Bloom
0.1 mll
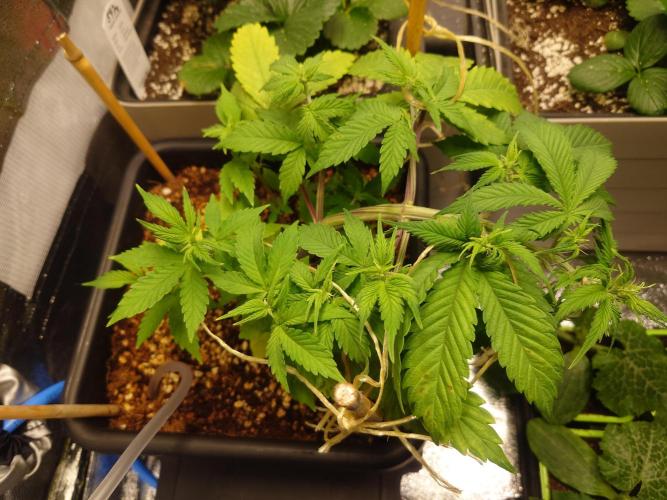
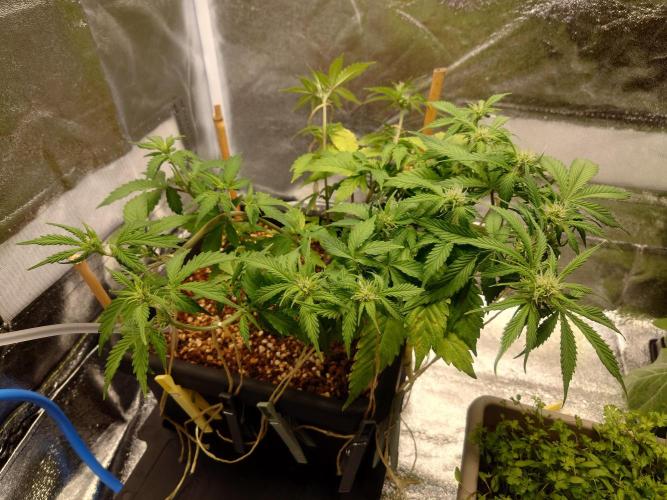
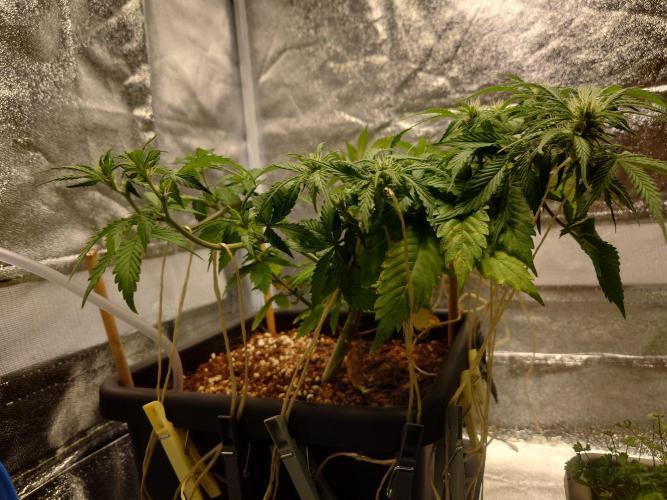
macejjr So last week I started using an autopot reservoir and an airdome.
I had a lot of problems from the start, pH was drifting a lot in the reseroir. I mixed nutrient mix on the evening and until morning it drifted from 5.8 to 6.3 and up to 7.5 in the autopot tray. I was trying to find out what could be the reason, first I thought that contamination did occur somehow (I used wooden spoon to mix nutrients), so I mixed new batch and used a plastic spoon, but result was the same. As it turned out, using citric acid as a pH down for autopot is a terrible idea, I used AI to consult my setup and everything and yeah, Claude pointed that citric acid can't hold pH stable in the reservoir. I went to the growshop and bought Advanced Hydroponics pH-. Since then all good.
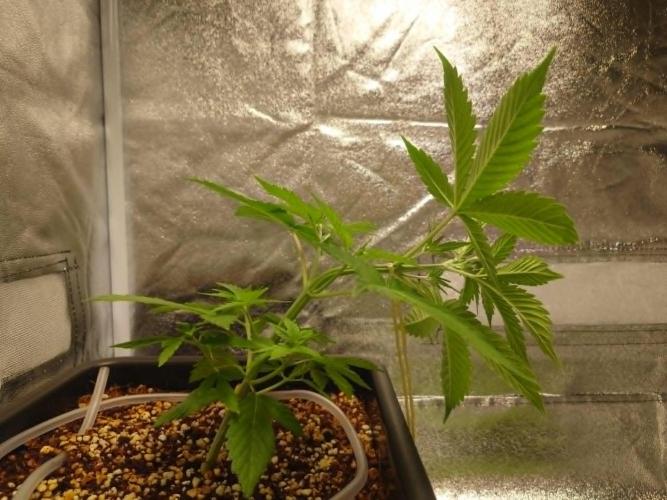
You can see the leaves going from light green to dark green from left to right. As soon as the pH became stable, the plant looks much better with healthy dark green color instead of pale leaves.
There are some brown spots on it, probably due to CalMag deficiency (I didn't add calmag as I read that it's already included in the Coco Forte A, but it isn't enough apparently (we got soft water here). So I started supplying mineral calmag from Shogun and new leaves look also much better without the spots. Let's hope it will last like this. Feeding using BioNova feeding schedule for coco using 50% strength. Seems like it's enough for now.
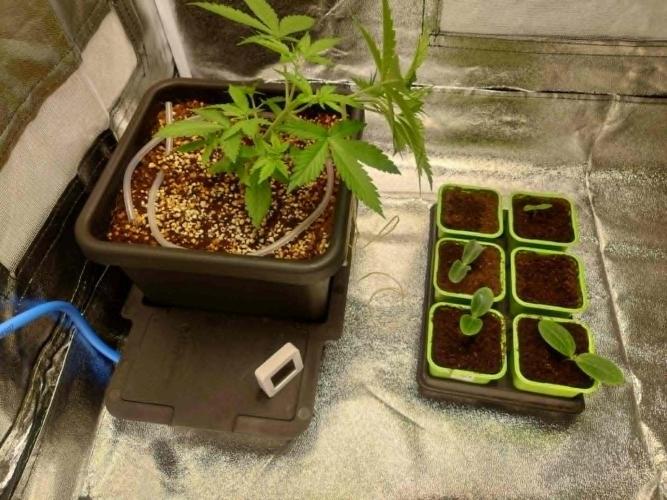
Started LSTing, gotta print some Autopot LST pot clips on the 3D printer as it's impossible to tie anything to autopot, there are no holes or anything and I don't want to drill holes into it. Moved from 60x60x160 cm tent to 120x60x150 cm tent. Also moved exhaust fan and everything from the old tent, there is much more space. I plan to split the growing tent into half using mylar reflective foil for better light reflections and adjust it according to plant needs. Also thanks to more space, I was able to add PhonicTrap ducting, which made my exhaust fan super quiet. Let's hope there won't be leaks.
Very proud of cucumbers, zucchini and pumpkin seeds seedlings. There are also strawberries inside as we had significant temperature drop outside in last few days, so they are on the "vacation" in the tent temporarily.
2 likes
1 comment
Share
Used techniques
LST
Technique
5
Week 5. Flowering17d ago
30 cm
Height
18 hrs
Light Schedule
24 °C
Day Air Temp
5.8
pH
Weak
Smell
600 PPM
TDS
50 %
Air Humidity
24 °C
Solution Temp
24 °C
Substrate Temp
22 °C
Night Air Temp
8.5 l
Pot Size
35 cm
Lamp Distance
Nutrients 6

ATA Clean
0.1 mll
Silicone
1 mll
SHOGUN CalMag
1 mll
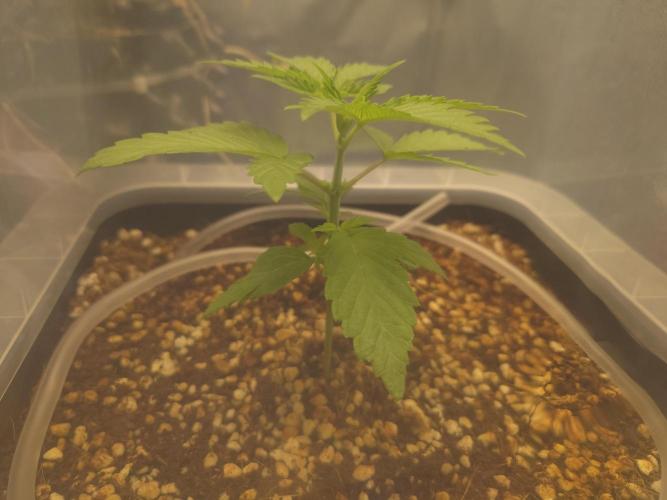
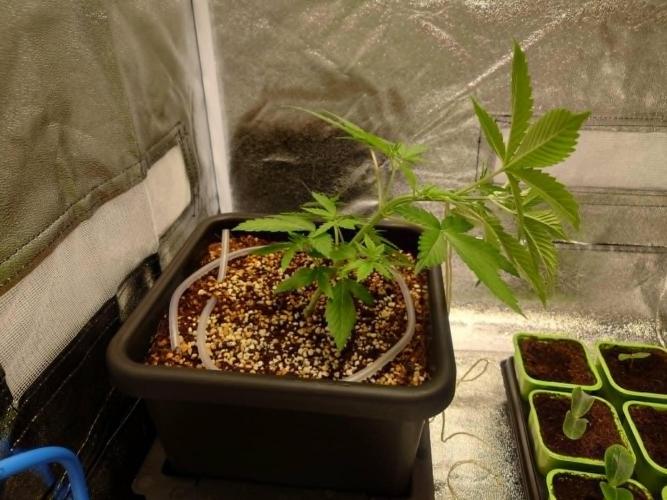
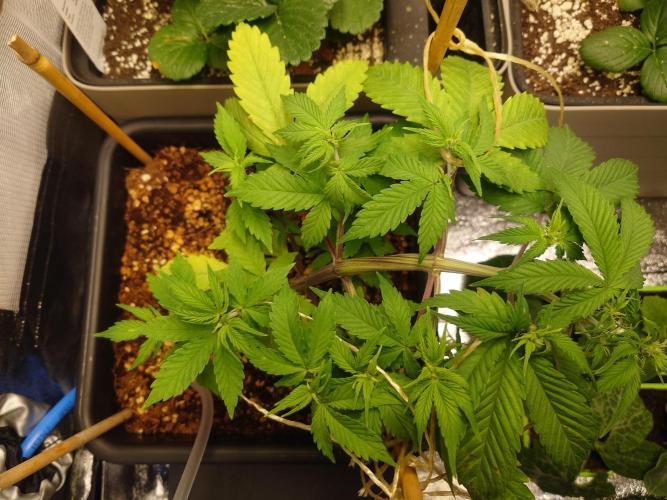
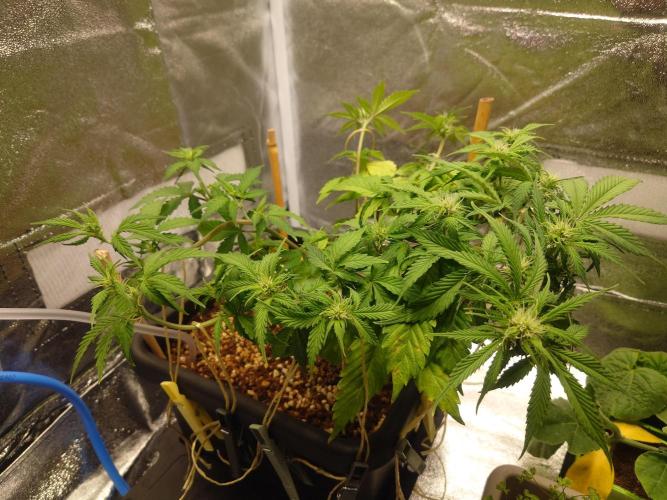
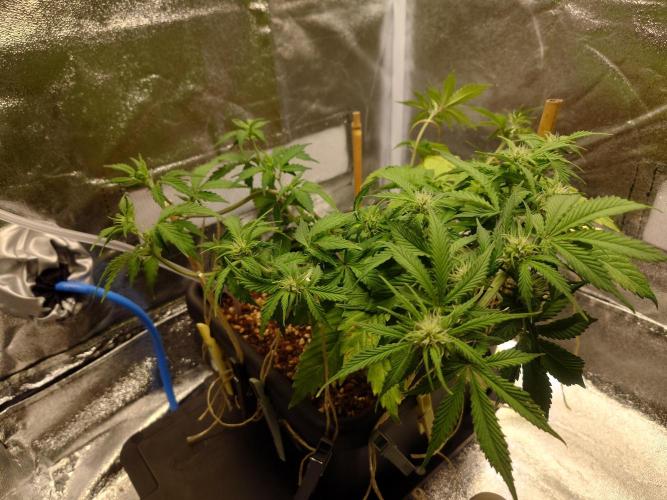
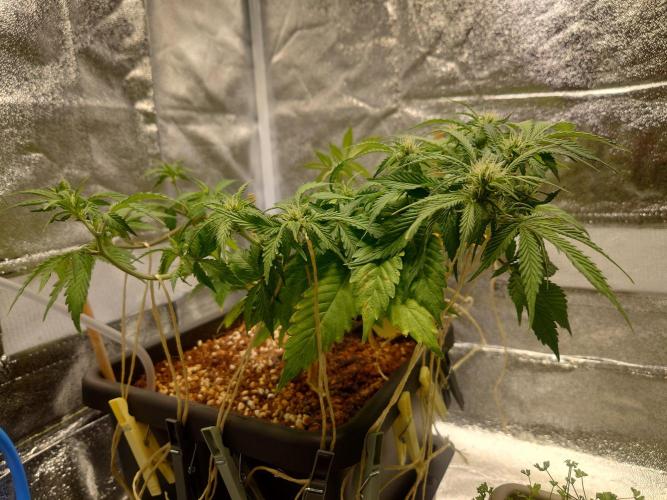
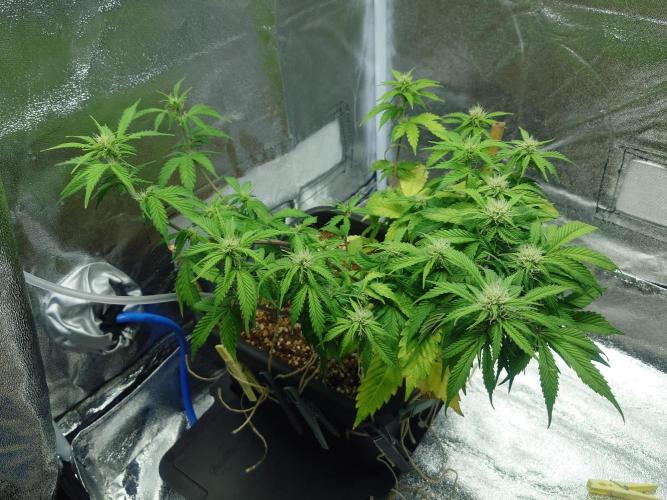
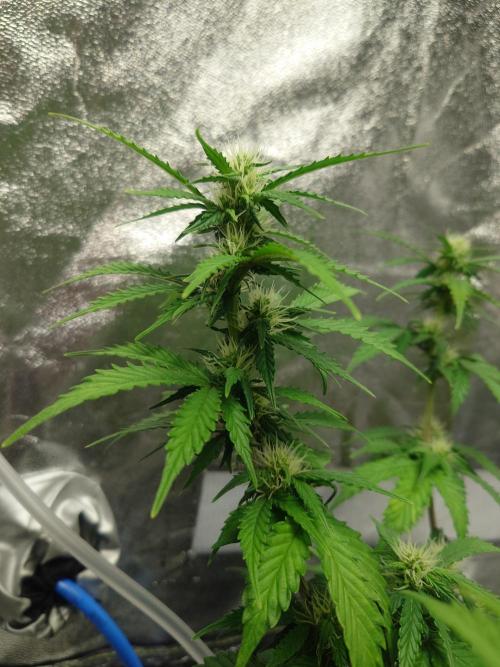
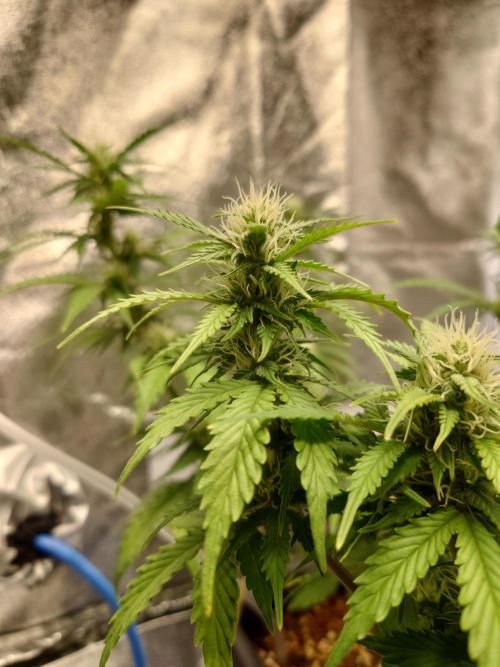
macejjr The plant has entered pre-flowering phase this week, started forming budlets on the stems. Still tying her down, trying to keep the canopy as flat as possible. Autopots aren't very good for LST, so I have to improvise and I'm tying her down using strings and clothespins - it's enough as the plant is small and stems aren't hard to bend.
I cleaned reservoir using H2O2 and slightly increased the nutrient amount. I hit now 1.2 ms/cm in the reservoir, I plan to slowly increase by 0.2 ms/cm every reservoir change (about 5 days) up to 1.8 ms/cm and adjust A+B ratio to 1:2. Keeping the humidity at about 50% using humidifier.
Plant is starting to smell, although it's still quite weak smell. Lower leaves started yellowing a bit, I have no idea why, but it's not very significant and fast yellowing as during the previous run. I think she looks quite fine, she's kinda small, but I wouldn't expect her to grow big in 8.5l autopot. Slightly increased light intensity to 80% with distance of about 35 cm from the top budlet.
3 likes
1 comment
Share
Used techniques
LST
Technique
6
Week 6. Flowering11d ago

30 cm
Height
18 hrs
Light Schedule
24 °C
Day Air Temp
6.0
pH
Weak
Smell
900 PPM
TDS
50 %
Air Humidity
24 °C
Solution Temp
24 °C
Substrate Temp
22 °C
Night Air Temp
8.5 l
Pot Size
35 cm
Lamp Distance
Nutrients 6
ATA Clean
0.1 mll
Silicone
1 mll
SHOGUN CalMag
1 mll
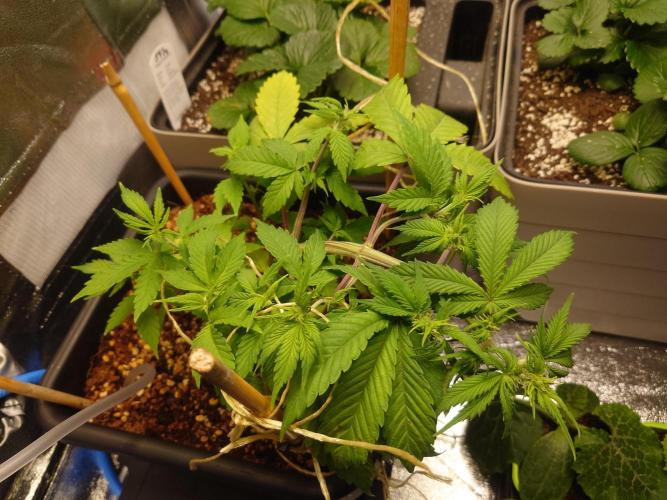
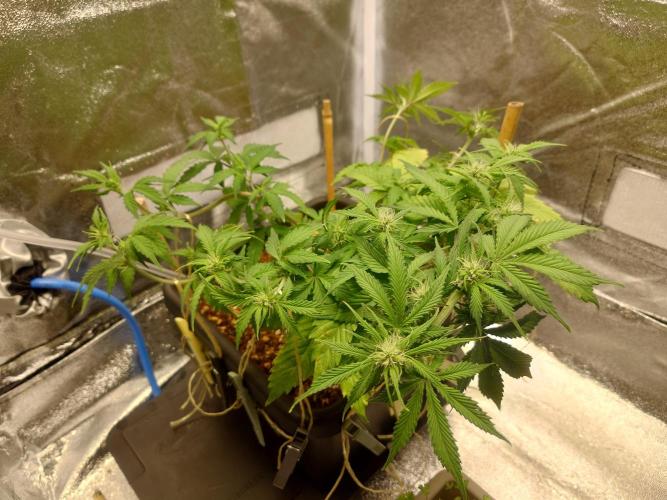
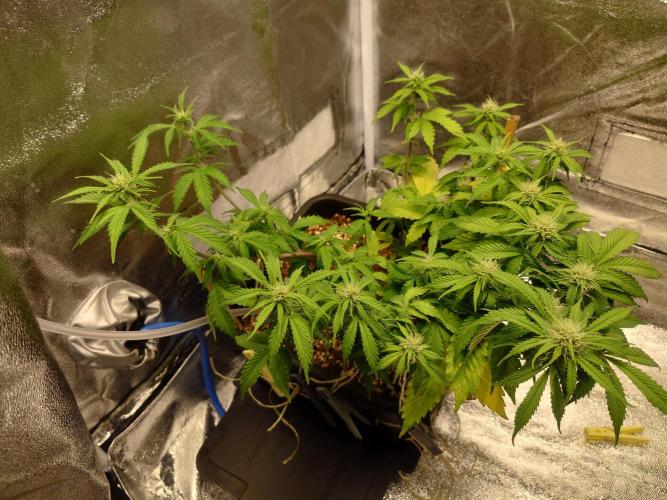
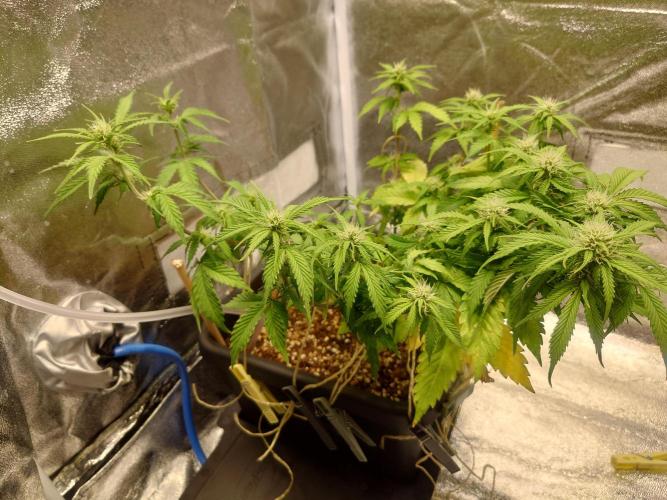
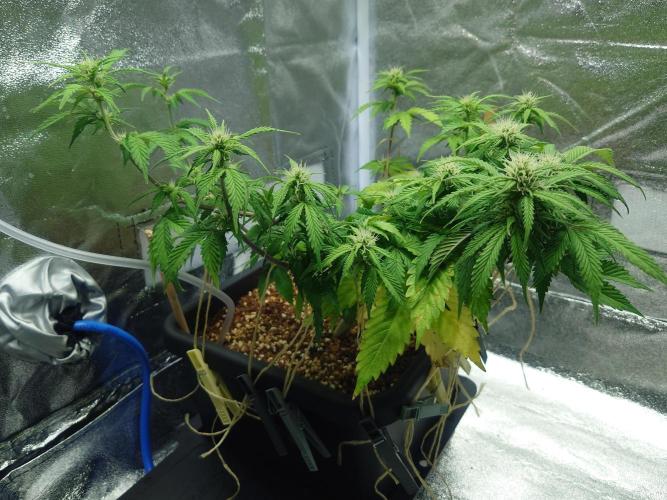
macejjr This week, not much has changed. Some of the lower leaves started turning yellow for some reason. I don't know why, looks the same as in my previous run. I supply CalMag, I put A + B in 1:1 ratio and still get yellow lower leaves. I keep changing water in reservoir every 5 days and stopped LST. Only adjusting light and increased nutrients to maximum - 1.8 ms/cm. I calibrated my pH meter as it was showing +0.2 than actual pH.
I had emergency this morning, I checked the reservoir and smelled sulphur - I measured pH and it drifted to 4.2. I checked pH in the tray and it was still about 5.6 so I closed the valve and rinsed reservoir and autopot valve with H2O2 as there was a bacterial activity. Luckily, I noticed it before it flooded into tray.
I use organics for my other plants, so probably some pipette wasn't cleaned correctly. This made me throw away my old pipettes and get a new ones and use them separately - one for organics, one for pH- and one for mineral based stuff.
2 likes
1 comment
Share
Used techniques
LST
Technique
7
Week 7. Flowering4d ago

32 cm
Height
18 hrs
Light Schedule
27 °C
Day Air Temp
6.0
pH
Normal
Smell
750 PPM
TDS
45 %
Air Humidity
23 °C
Solution Temp
23 °C
Substrate Temp
23 °C
Night Air Temp
8.5 l
Pot Size
35 cm
Lamp Distance
Nutrients 7

Oligo Spectrum
2 mll
ATA Clean
0.1 mll
Silicone
1 mll
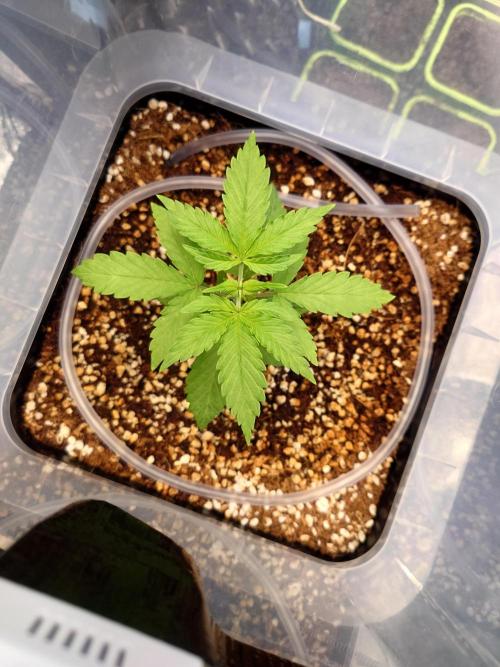
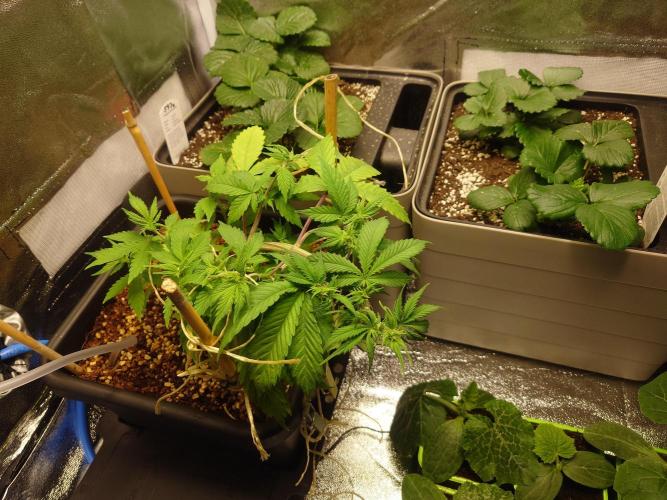
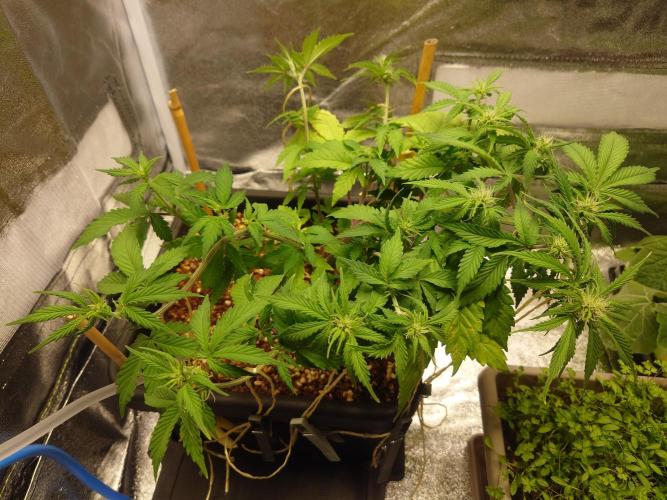
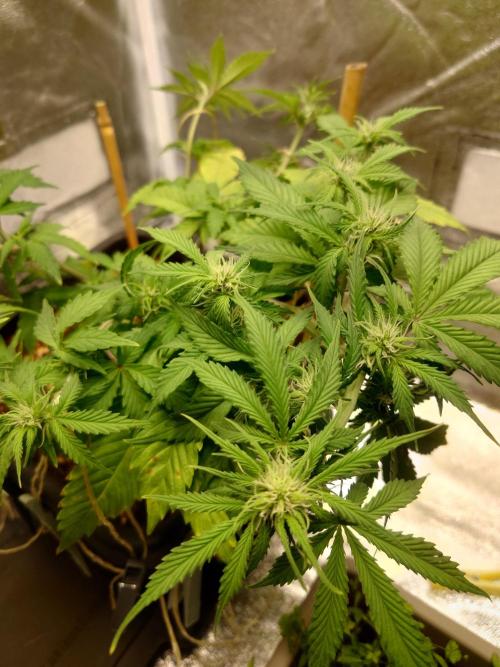
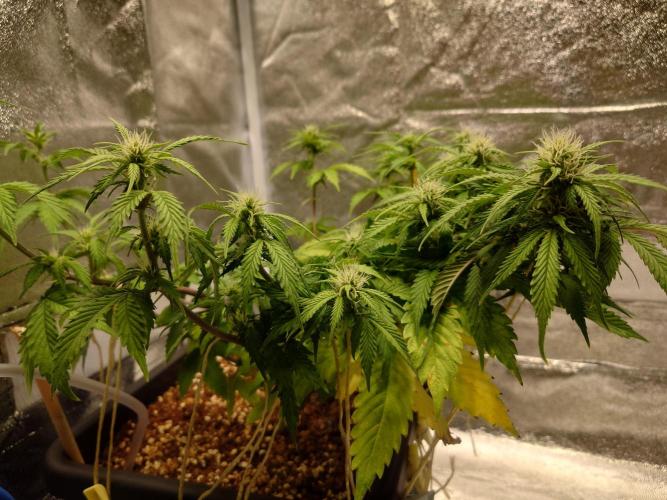
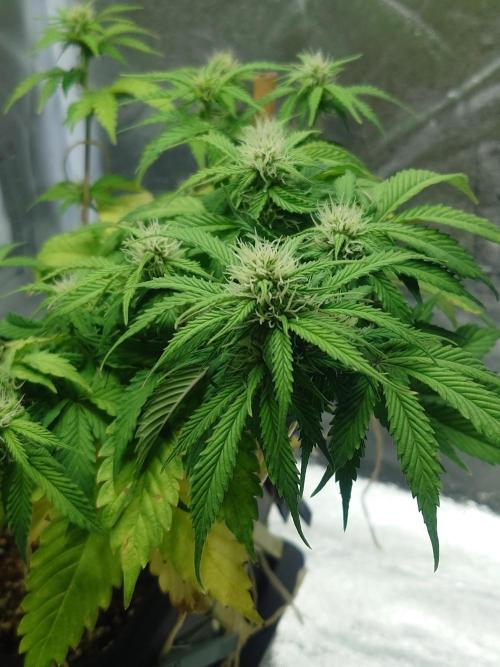
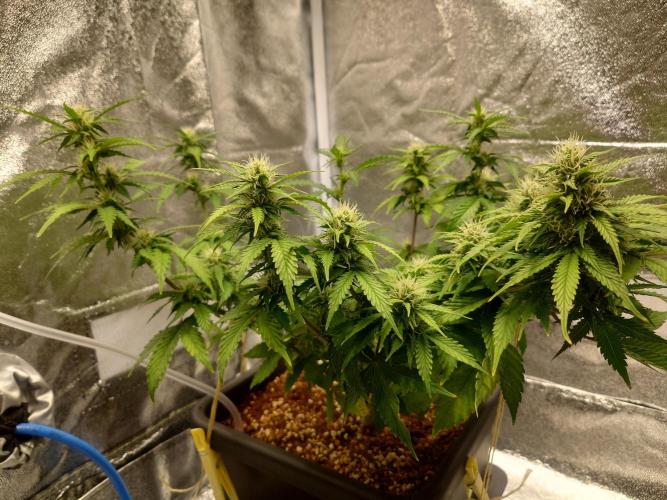
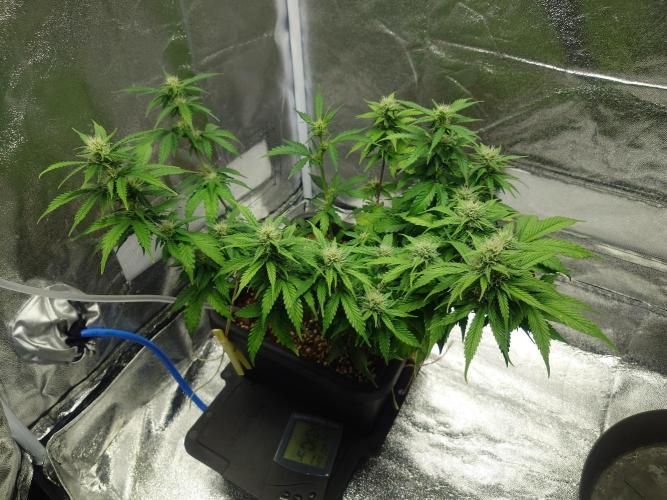
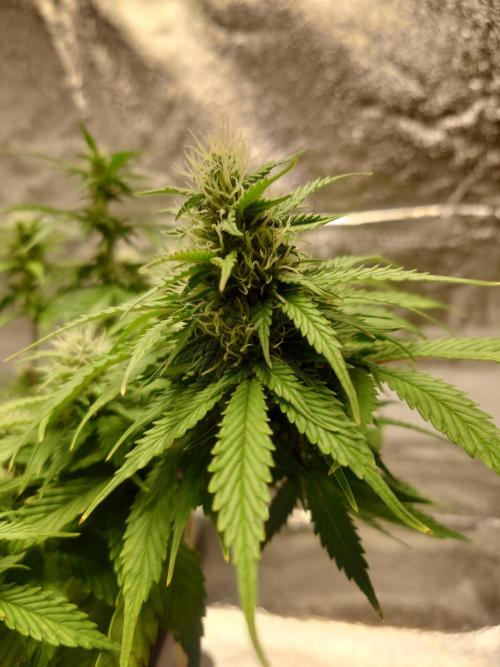
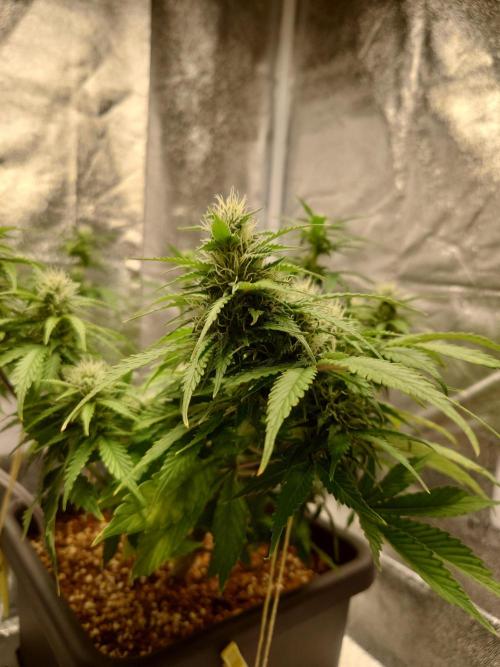
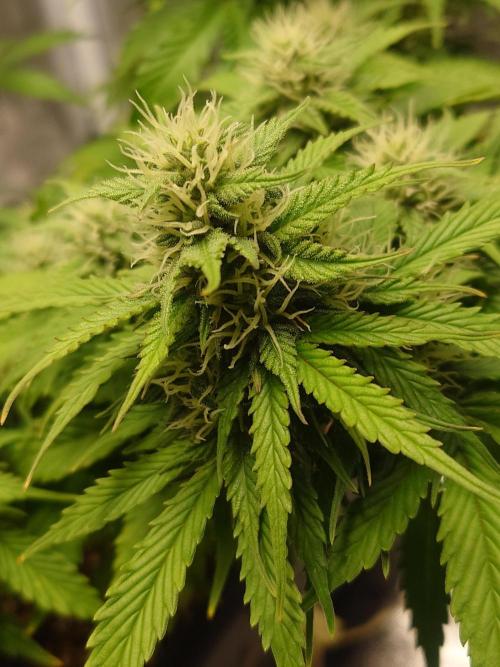
macejjr Plant looks happy, some of the older leaves wilted and fell off. The new sugar leaves are healthy green and buds are slowly fattening now. Plant has a nice diesel / citrus smell.
I bought some new stuff this week. There's a new wavemaker inside the reservoir, which is set on timer - 15 minutes mixing every 2 hours. I would say that the plant is way greener now - normal green not pale green. I reduced calmag to half dose as I believe that it's not so necessary to supply full dose at this point. Another new thing is T.A. Oligo Spectrum for micronutrients and I add it to every batch. By cutting down the calmag, I went down from 1.8 ms/cm to 1.5 ms/cm while adding the same amount of A+B nutrients.
I also put away a lot of LST ties that the plant had as they aren't necessary anymore, I kept only the main stem tie.
2 likes
1 comment
Share
Enjoying this diary? Follow for more updates!

Prefer the old Diary view?
Go back to the old Diary view